19/2/14 2台目のラズパイ(RaspberryPi 3B)でも成功しました!
その際に行った追加対策も記載します。
・Cythonインストール
・実行時のメモリ不足エラー対策
詳細は以下をご覧ください。
背景
先日、MacにYOLOを実装してリアルタイム画像認識を行った。
これをRaspberryPiに実装してpythonで編集できるようになると、
認識画像に応じてセンサ入出力など用途が広がりそうに感じたのでトライしてみた。
途中ややこしいことが多く、結構つまづいたので、
その時のエラーと対処法も含めて残しておきます。
開発環境
RaspberryPi 3B+
OSなどは以下
pi@raspberrypi:~ $ uname -a
Linux raspberrypi 4.14.79-v7+ #1159 SMP Sun Nov 4 17:50:20 GMT 2018 armv7l GNU/Linux
pi@raspberrypi:~ $ lsb_release -a
No LSB modules are available.
Distributor ID: Raspbian
Description: Raspbian GNU/Linux 9.6 (stretch)
Release: 9.6
Codename: stretch
環境構築
参考にしたサイト
・http://freewing.starfree.jp/raspberry_pi/raspberry_pi_darkflow_tensorflow_realtime_recognize_object/
・https://github.com/thtrieu/darkflow/issues/295
RaspberryPiのパッケージ情報を更新する
今回使用したRaspberryPiは新品にrasbianをインストールしただけのもの。
そこではじめに、下記を実行(これを忘れていてエラー地獄でした・・・)
$ sudo apt-get update
$ sudo apt-get upgrade
TensorFlowのインストール
まずはTensorFlowをインストール。
$ wget https://github.com/lhelontra/tensorflow-on-arm/releases/download/v1.10.0/tensorflow-1.10.0-cp35-none-linux_armv7l.whl
$ sudo pip3 install tensorflow-1.10.0-cp35-none-linux_armv7l.whl
opencvのインストール
続いてopencvのインストール。
$ sudo pip3 install opencv-python
darkflowのインストール
続いてdarkflowをインストール。
darkflowとは、Darknetというフレームワークを、tensorflowで使用できるようにしたものらしいです。
$ git clone https://github.com/thtrieu/darkflow.git
$ cd darkflow
$ python3 setup.py build_ext --inplace
たくさんwarningが出るがとりあえず無視。
下記エラーが出た時は、Cythonをインストール。
Traceback (most recent call last):
  File "setup.py", line 3, in <module>
    from Cython.Build import cythonize
ImportError: No module named 'Cython'
$ pip3 install Cython
その他、色々インストール。(もしかしたら不要かも)
$ sudo apt-get -y install libatlas-base-dev
$ sudo apt-get -y install libjasper-dev
$ sudo apt-get install libqtgui4
$ sudo apt-get -y install libqt4-test
学習の重みファイルと設定ファイル
ここでは、yolov2-tinyを扱えるようにする。
$ wget https://pjreddie.com/media/files/yolov2-tiny-voc.weights
$ mkdir bin
$ mv yolov2-tiny-voc.weights ./bin/

$ wget https://raw.githubusercontent.com/pjreddie/darknet/master/cfg/yolov2-tiny-voc.cfg
$ mv yolov2-tiny-voc.cfg ./cfg/
misc.pyの編集
これがわからずどハマりしました。
下記を参考に、.darkflow/darkflow/net/yolo/misc.pyを編集。
今回ダウンロードした'yolov2-tiny-voc'をvoc_modelsとcoco_modelsに追記。
・https://github.com/thtrieu/darkflow/blob/master/darkflow/net/yolo/misc.py#L13-L18
import pickle
import numpy as np
import cv2
import os

labels20 = ["aeroplane", "bicycle", "bird", "boat", "bottle",
    "bus", "car", "cat", "chair", "cow", "diningtable", "dog",
    "horse", "motorbike", "person", "pottedplant", "sheep", "sofa",
    "train", "tvmonitor"]

# 8, 14, 15, 19

voc_models = ['yolo-full', 'yolo-tiny', 'yolo-small',  # <- v1
              'yolov1', 'tiny-yolov1', # <- v1.1
              'tiny-yolo-voc', 'yolo-voc', 'yolov2-tiny-voc'] # <- v2

coco_models = ['tiny-coco', 'yolo-coco',  # <- v1.1
               'yolo', 'tiny-yolo', 'yolov2-tiny-voc'] # <- v2

coco_names = 'coco.names'
nine_names = '9k.names'

---以下は変更なし---
その後、再起動。
$ sudo reboot
動作確認
以下のスクリプトを、darkflow直下に格納して実行。
from darkflow.net.build import TFNet
import cv2

options = {"model": "cfg/yolov2-tiny-voc.cfg", "load": "bin/yolov2-tiny-voc.weights", "threshold": 0.1}

tfnet = TFNet(options)
$ python3 test.py
Parsing ./cfg/tiny-yolo.cfg
Parsing cfg/tiny-yolo.cfg
Loading bin/tiny-yolo.weights ...
Successfully identified 64701556 bytes
Finished in 0.03937816619873047s
Model has a coco model name, loading coco labels.

Building net ...
Source | Train? | Layer description                | Output size
-------+--------+----------------------------------+---------------
       |        | input                            | (?, 416, 416, 3)
 Load  |  Yep!  | conv 3x3p1_1  +bnorm  leaky      | (?, 416, 416, 16)
 Load  |  Yep!  | maxp 2x2p0_2                     | (?, 208, 208, 16)
 Load  |  Yep!  | conv 3x3p1_1  +bnorm  leaky      | (?, 208, 208, 32)
 Load  |  Yep!  | maxp 2x2p0_2                     | (?, 104, 104, 32)
 Load  |  Yep!  | conv 3x3p1_1  +bnorm  leaky      | (?, 104, 104, 64)
 Load  |  Yep!  | maxp 2x2p0_2                     | (?, 52, 52, 64)
 Load  |  Yep!  | conv 3x3p1_1  +bnorm  leaky      | (?, 52, 52, 128)
 Load  |  Yep!  | maxp 2x2p0_2                     | (?, 26, 26, 128)
 Load  |  Yep!  | conv 3x3p1_1  +bnorm  leaky      | (?, 26, 26, 256)
 Load  |  Yep!  | maxp 2x2p0_2                     | (?, 13, 13, 256)
 Load  |  Yep!  | conv 3x3p1_1  +bnorm  leaky      | (?, 13, 13, 512)
 Load  |  Yep!  | maxp 2x2p0_1                     | (?, 13, 13, 512)
 Load  |  Yep!  | conv 3x3p1_1  +bnorm  leaky      | (?, 13, 13, 1024)
 Load  |  Yep!  | conv 3x3p1_1  +bnorm  leaky      | (?, 13, 13, 1024)
 Load  |  Yep!  | conv 1x1p0_1    linear           | (?, 13, 13, 425)
-------+--------+----------------------------------+---------------
Running entirely on CPU
Finished in 35.74989700317383s
成功!!
もし
”typeerror unsupported operand type(s) for retry and int”
というエラーが出てしまったら、ラズパイのメモリ不足です。
下記サイトを参考にしてメモリ増やすと動くようになります。
http://freewing.starfree.jp/raspberry_pi/raspberry_pi_free_memory_disable_service/
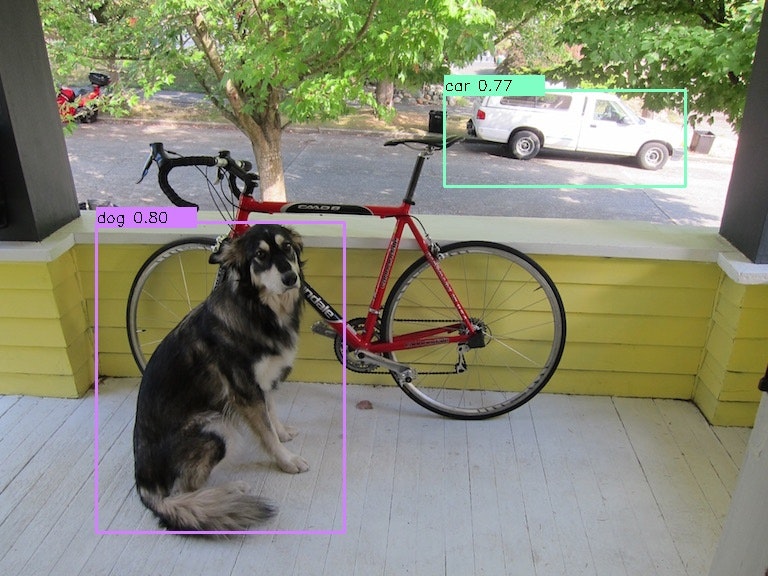
実際にどのように認識されているかを確認するために、下記スクリプトを実行して画像を作成。
from darkflow.net.build import TFNet
import cv2
import numpy as np

options = {"model": "cfg/yolov2-tiny-voc.cfg", "load": "bin/yolov2-tiny-voc.weights", "threshold": 0.1}

tfnet = TFNet(options)

class_names = ['aeroplane', 'bicycle', 'bird', 'boat', 'bottle',
              'bus', 'car', 'cat', 'chair', 'cow', 'diningtable',
              'dog', 'horse', 'motorbike', 'person', 'pottedplant',
              'sheep', 'sofa', 'train', 'tvmonitor']

imgcv = cv2.imread("./sample_img/sample_dog.jpg")
result = tfnet.return_predict(imgcv)
print(result)

num_classes = len(class_names)
class_colors = []
for i in range(0, num_classes):
    hue = 255*i/num_classes
    col = np.zeros((1,1,3)).astype("uint8")
    col[0][0][0] = hue
    col[0][0][1] = 128
    col[0][0][2] = 255
    cvcol = cv2.cvtColor(col, cv2.COLOR_HSV2BGR)
    col = (int(cvcol[0][0][0]), int(cvcol[0][0][1]), int(cvcol[0][0][2]))
    class_colors.append(col)

for item in result:
    tlx = item['topleft']['x']
    tly = item['topleft']['y']
    brx = item['bottomright']['x']
    bry = item['bottomright']['y']
    label = item['label']
    conf = item['confidence']

    if conf > 0.6:

        for i in class_names:
            if label == i:
                class_num = class_names.index(i)
                break

        #枠の作成
        cv2.rectangle(imgcv, (tlx, tly), (brx, bry), class_colors[class_num], 2)

        #ラベルの作成
        text = label + " " + ('%.2f' % conf)
        cv2.rectangle(imgcv, (tlx, tly - 15), (tlx + 100, tly + 5), class_colors[class_num], -1)
        cv2.putText(imgcv, text, (tlx, tly), cv2.FONT_HERSHEY_SIMPLEX, 0.5, (0,0,0), 1)

# 書き出し
cv2.imwrite("./sample_img/sample_dog2.jpg", imgcv)
できてる!!
RaspberryPi+カメラでリアルタイム認識をしてみる
ここまではインストールしたdarkflow内部に保管されているサンプル画像での検証。
ここからは、RapberryPiにRaspberryPi専用カメラを接続し、リアルタイム認識を行った結果。
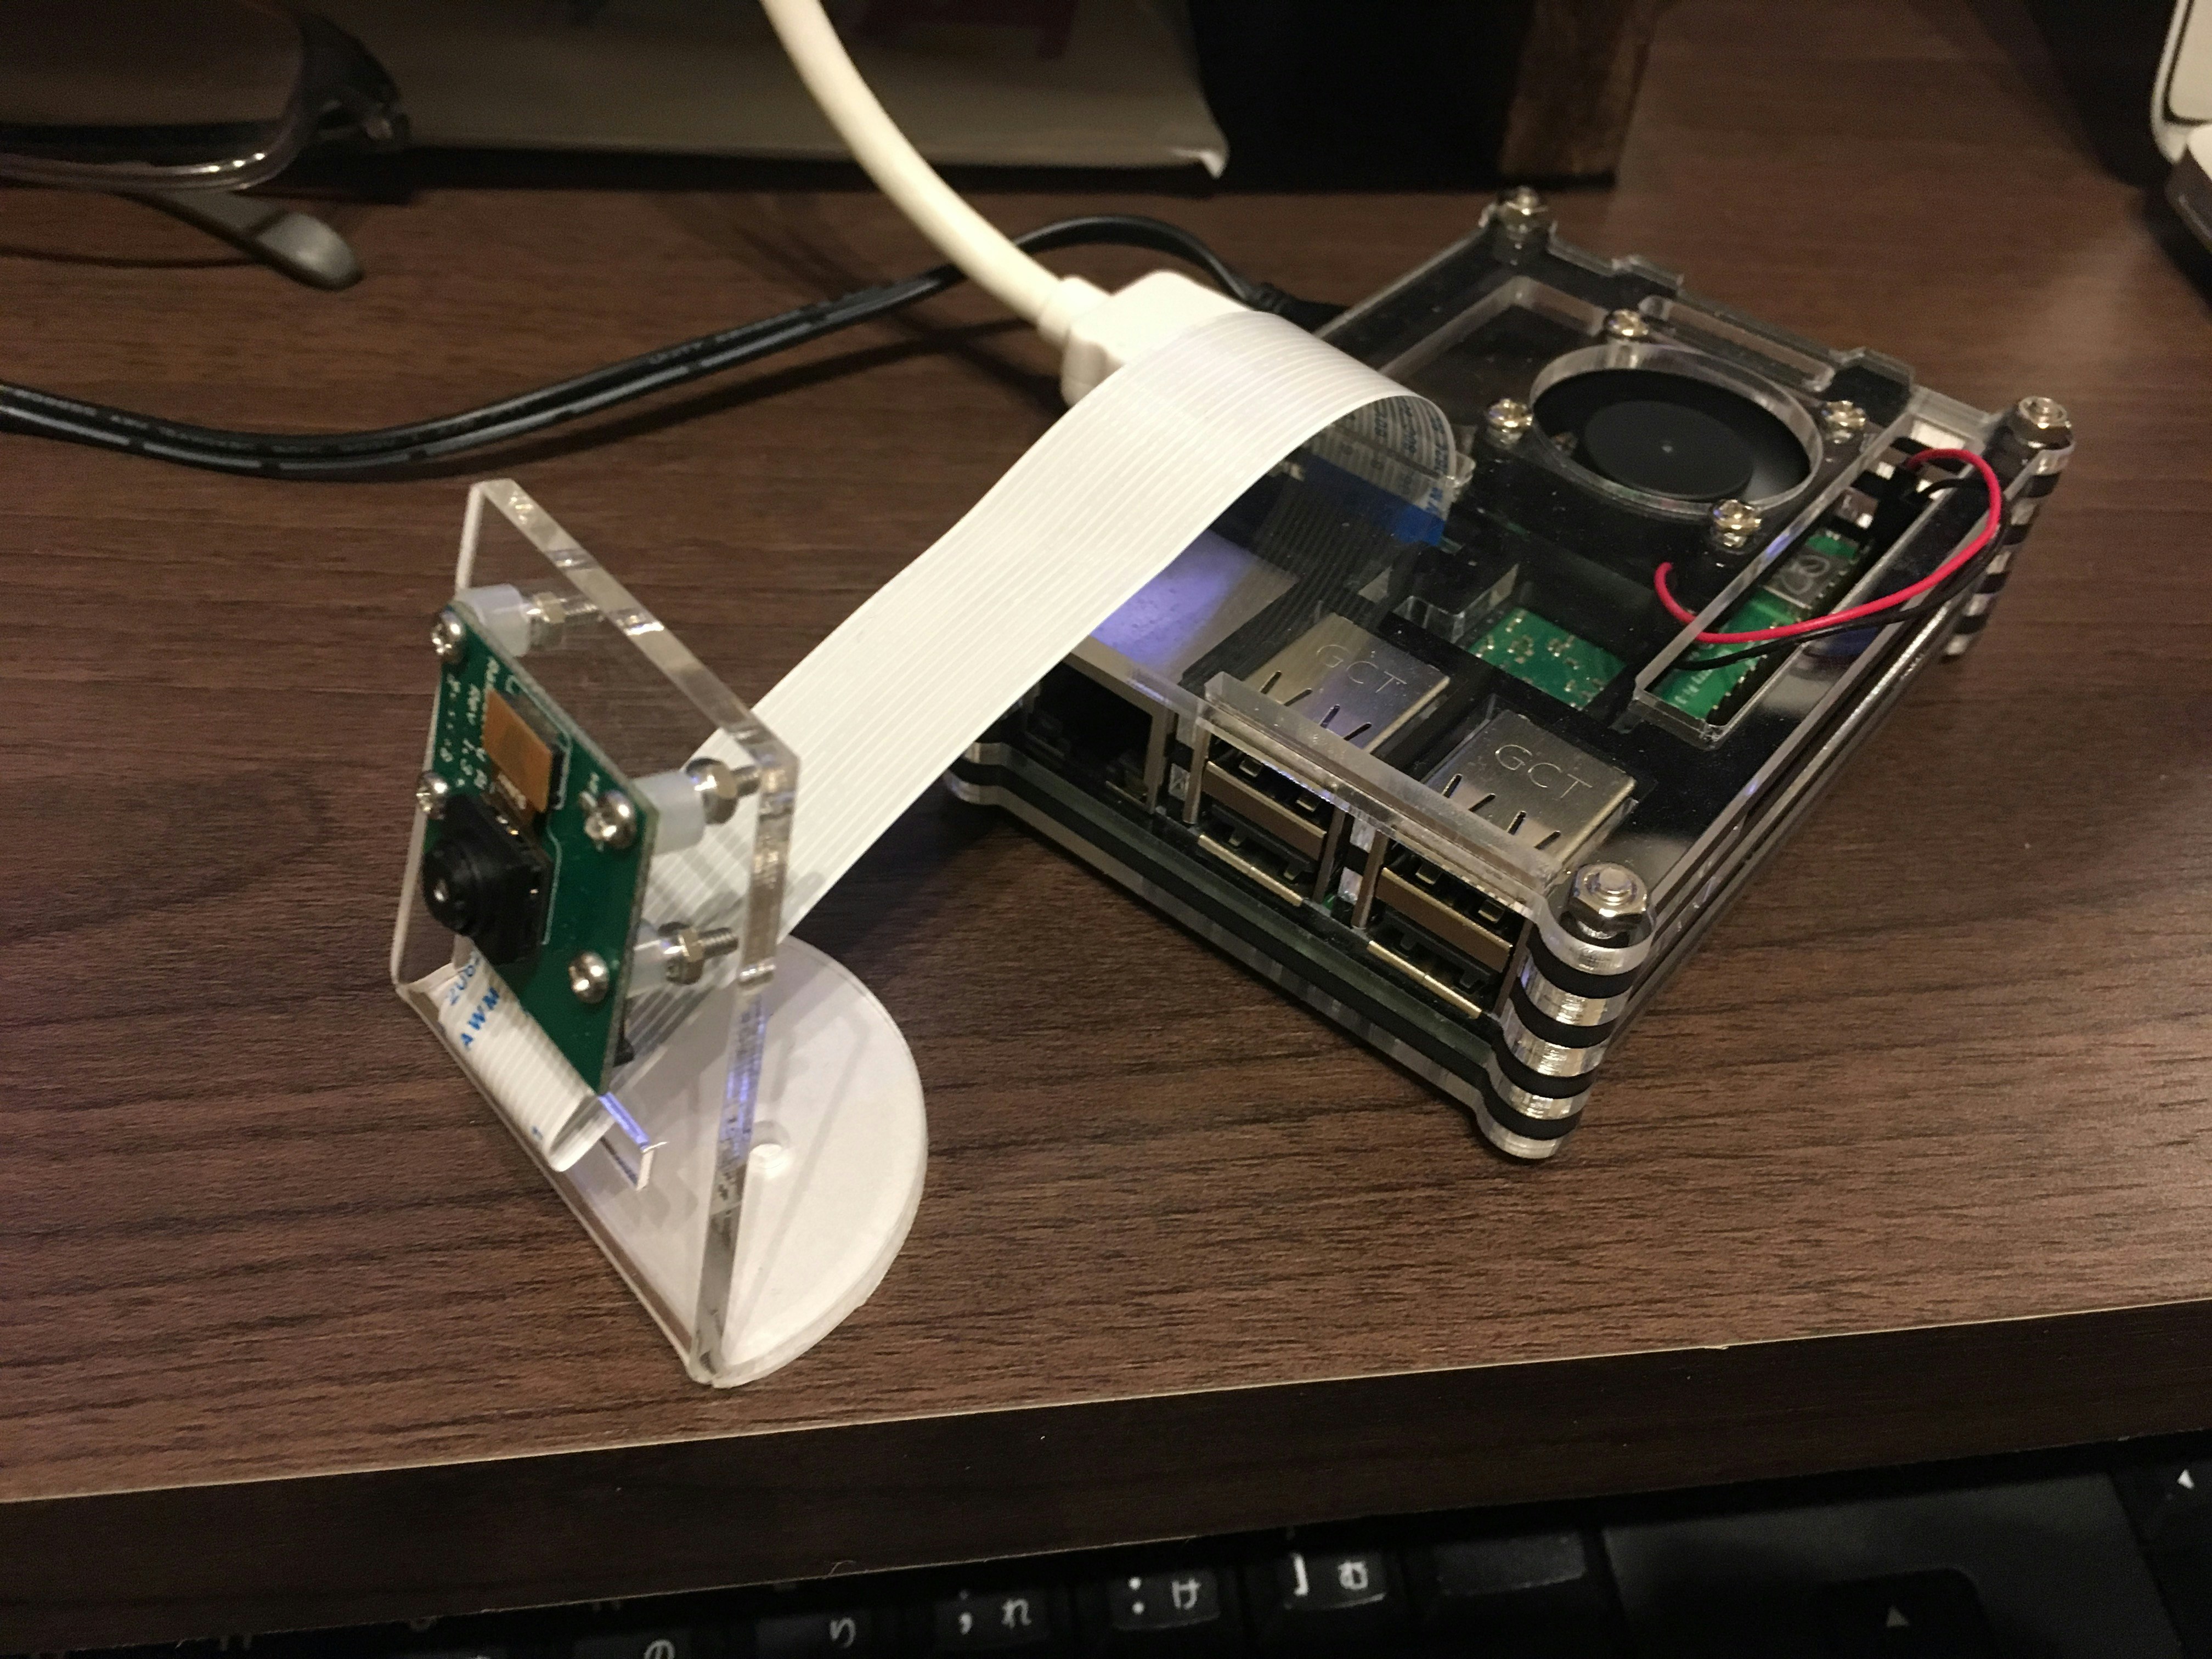
ハードウェアの環境は下記写真参照。
いろいろついていますが、RaspberryPi 3B+とカメラのみあればOK。
動かしたスクリプトは以下。
カメラでの撮影画像をopencvと同じ形式に変換。
これまでと同じく、以下のtest3.pyをdarkflowディレクトリ直下に保存して実行。
from darkflow.net.build import TFNet
import cv2
import numpy as np
import picamera
import io

options = {"model": "cfg/yolov2-tiny-voc.cfg", "load": "bin/yolov2-tiny-voc.weights", "threshold": 0.1}

tfnet = TFNet(options)

# カメラの起動
stream = io.BytesIO()
CAMERA_WIDTH = 1024
CAMERA_HEIGHT = 768
camera = picamera.PiCamera()
camera.resolution = (CAMERA_WIDTH, CAMERA_HEIGHT)

class_names = ['aeroplane', 'bicycle', 'bird', 'boat', 'bottle',
              'bus', 'car', 'cat', 'chair', 'cow', 'diningtable',
              'dog', 'horse', 'motorbike', 'person', 'pottedplant',
              'sheep', 'sofa', 'train', 'tvmonitor']

num_classes = len(class_names)
class_colors = []
for i in range(0, num_classes):
    hue = 255*i/num_classes
    col = np.zeros((1,1,3)).astype("uint8")
    col[0][0][0] = hue
    col[0][0][1] = 128
    col[0][0][2] = 255
    cvcol = cv2.cvtColor(col, cv2.COLOR_HSV2BGR)
    col = (int(cvcol[0][0][0]), int(cvcol[0][0][1]), int(cvcol[0][0][2]))
    class_colors.append(col)

def main():

    while(True):
        #カメラ撮影
        camera.capture(stream, format='jpeg')
        #numpy型に変換
        data = np.fromstring(stream.getvalue(), dtype=np.uint8)
        #opencv型に変換
        frame = cv2.imdecode(data, 1)

        # 動画ストリームからフレームを取得
        result = tfnet.return_predict(frame)

        for item in result:
            tlx = item['topleft']['x']
            tly = item['topleft']['y']
            brx = item['bottomright']['x']
            bry = item['bottomright']['y']
            label = item['label']
            conf = item['confidence']

            if conf > 0.6:

                for i in class_names:
                    if label == i:
                        class_num = class_names.index(i)
                        break

                #枠の作成
                cv2.rectangle(frame, (tlx, tly), (brx, bry), class_colors[class_num], 2)

                #ラベルの作成
                text = label + " " + ('%.2f' % conf)
                cv2.rectangle(frame, (tlx, tly - 15), (tlx + 100, tly + 5), class_colors[class_num], -1)
                cv2.putText(frame, text, (tlx, tly), cv2.FONT_HERSHEY_SIMPLEX, 0.5, (0,0,0), 1)

        # 表示
        cv2.imshow("Show FLAME Image", frame)
        #カメラの状態をリセット
        stream.seek(0)

        # escを押したら終了。
        k = cv2.waitKey(10);
        if k == ord('q'):  break;

    cv2.destroyAllWindows()

if __name__ == '__main__':
    main()
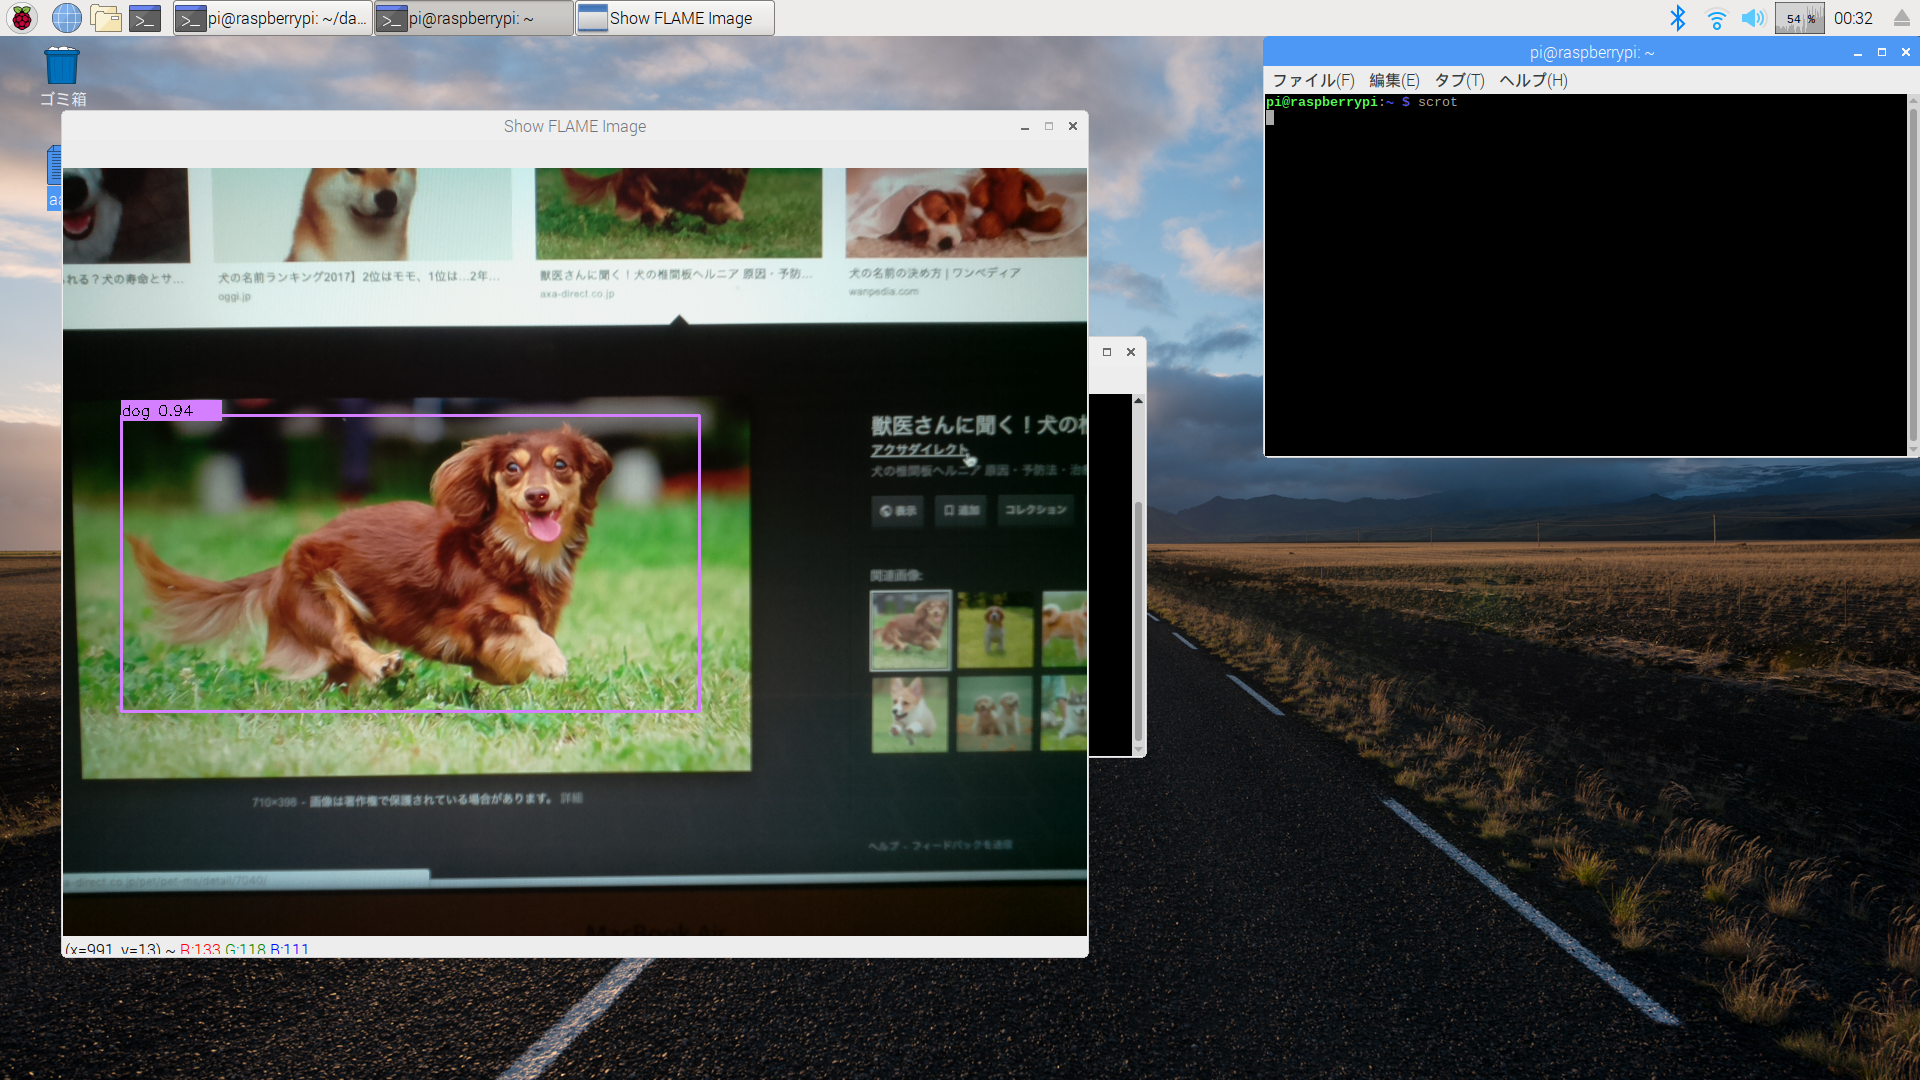
RaspberryPi上で撮影した画像をリアルタイムにtiny-YOLOv2で画像認識。
(若干タイムロスあり、速度はおそい。0.2fpsくらいかな。)
RaspberryPiでの画像認識検証
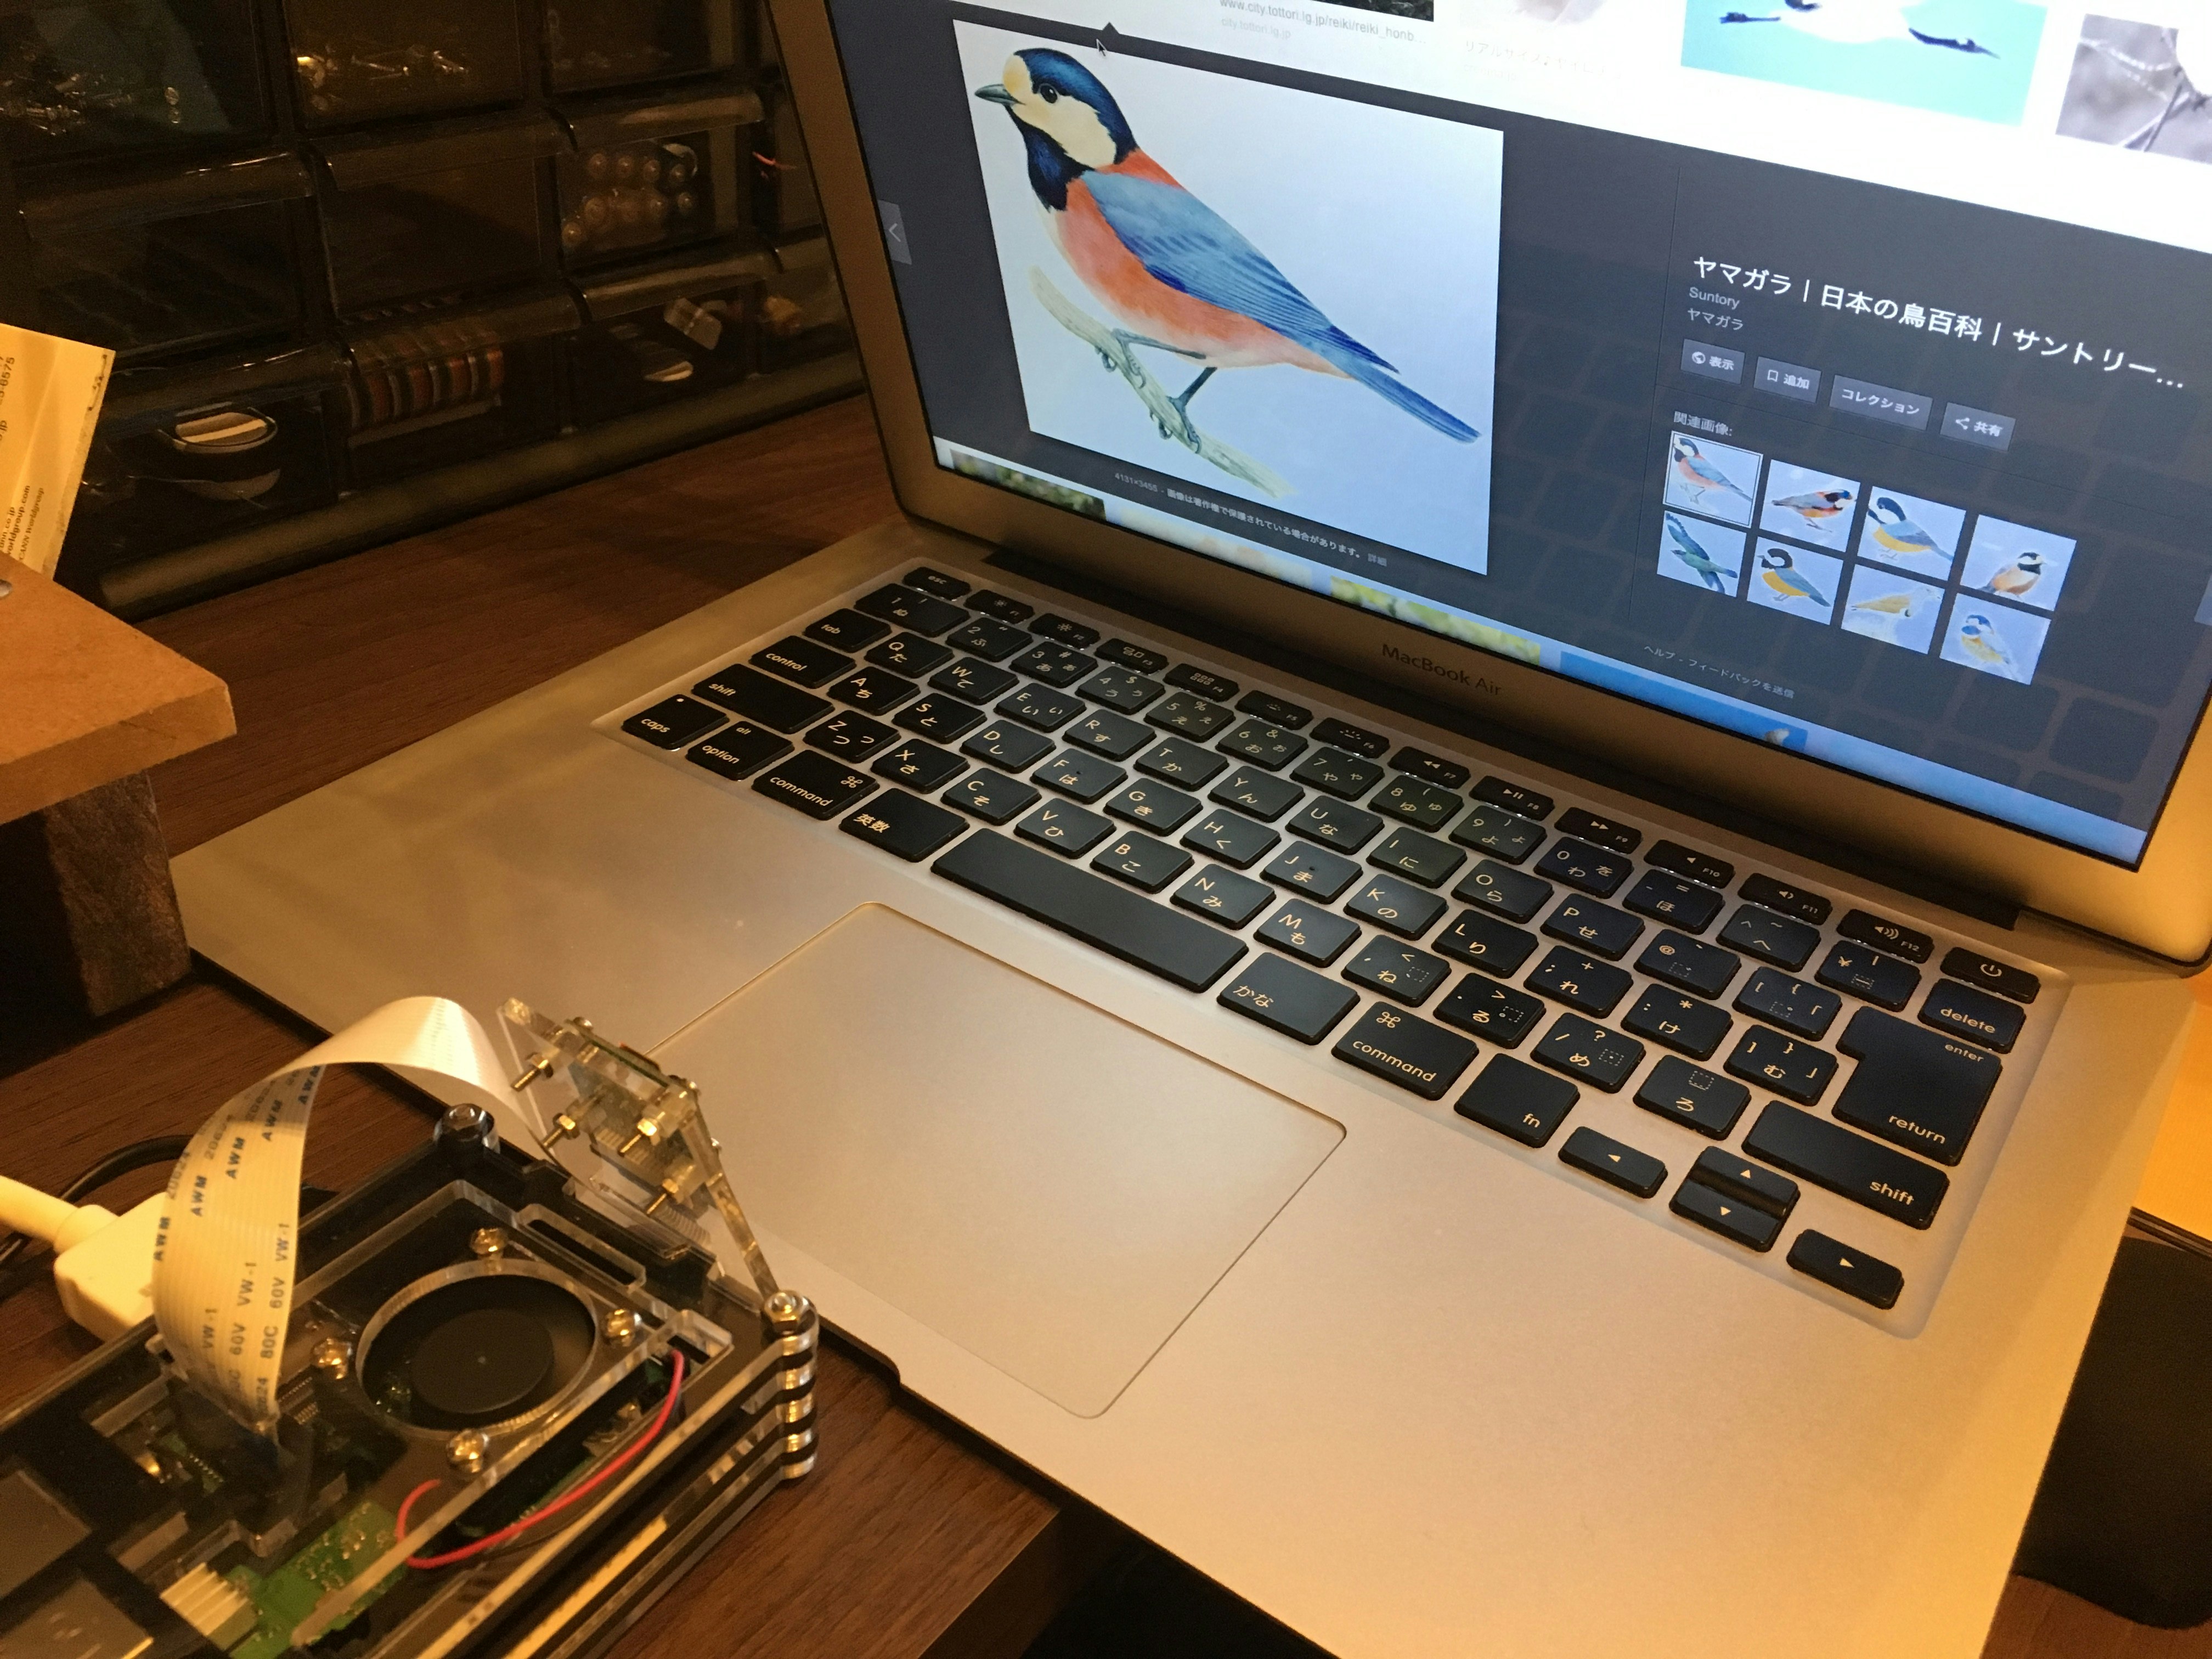
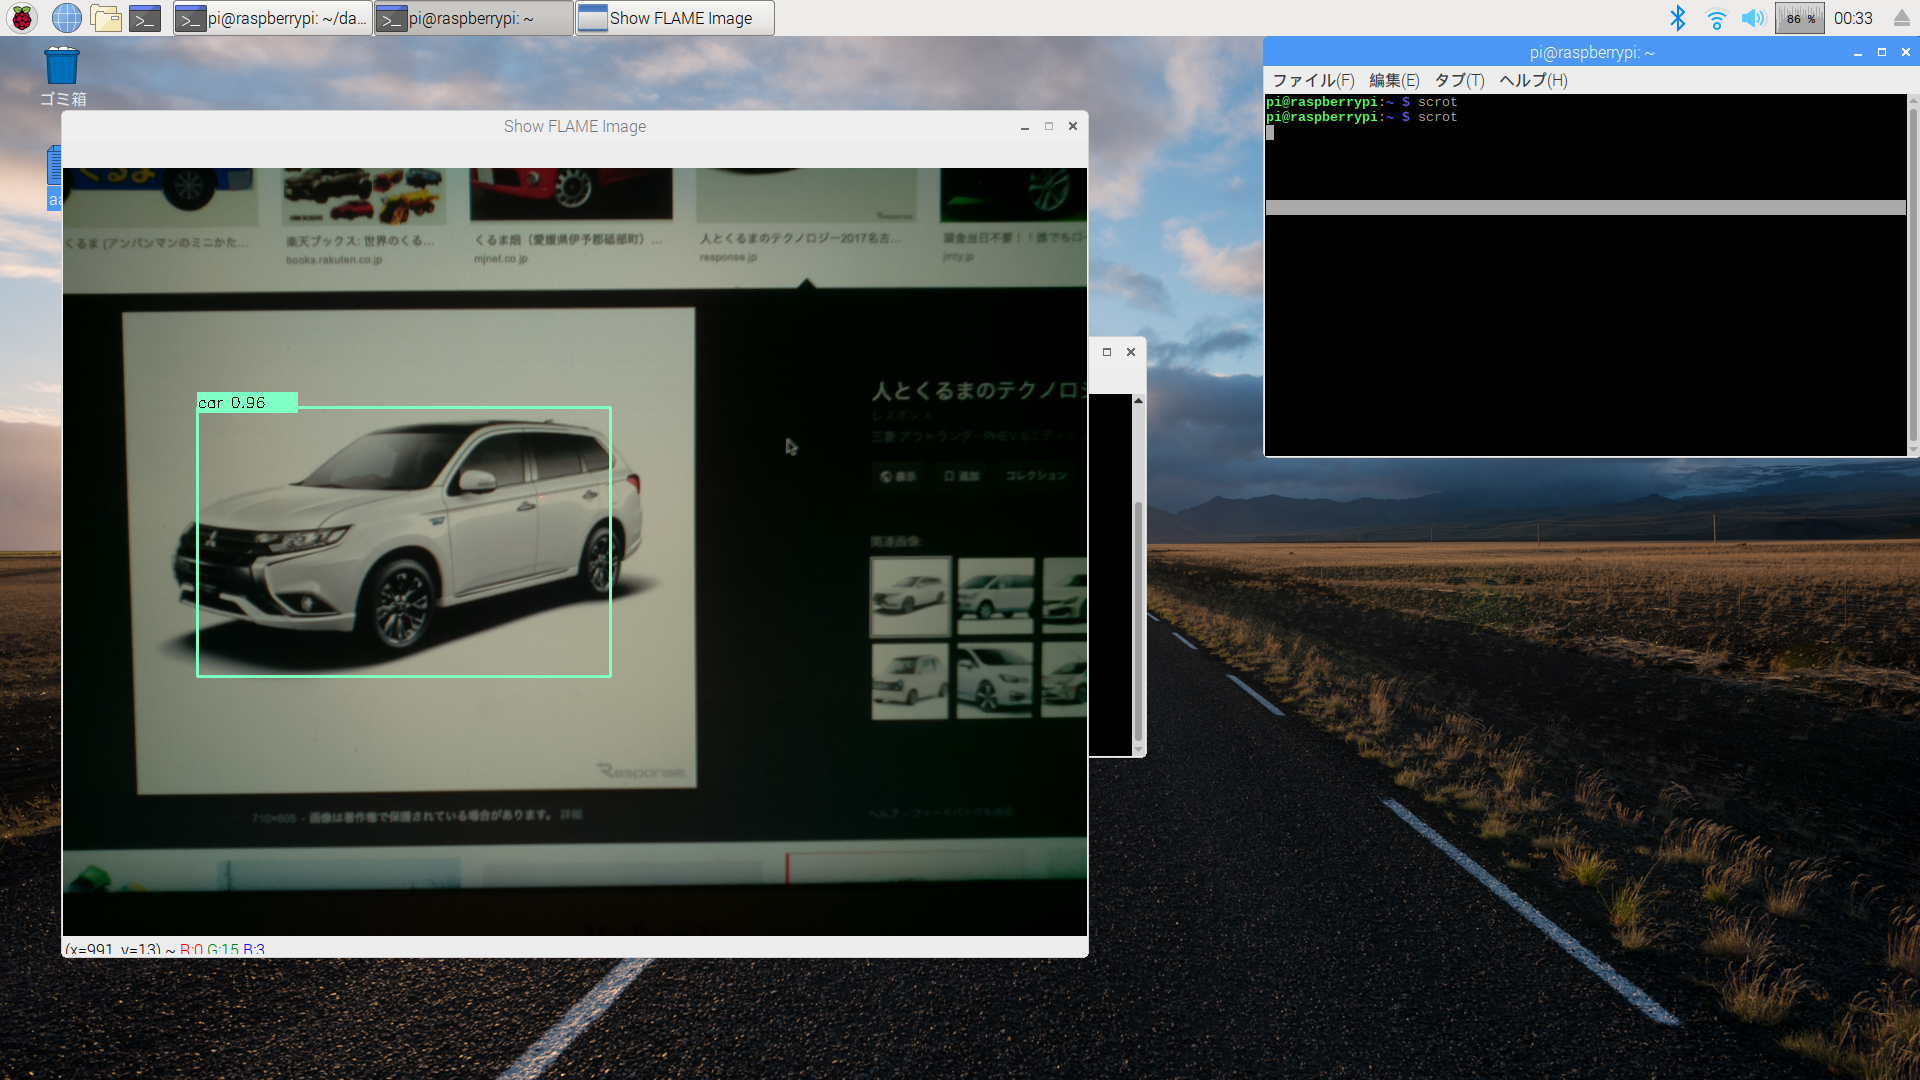
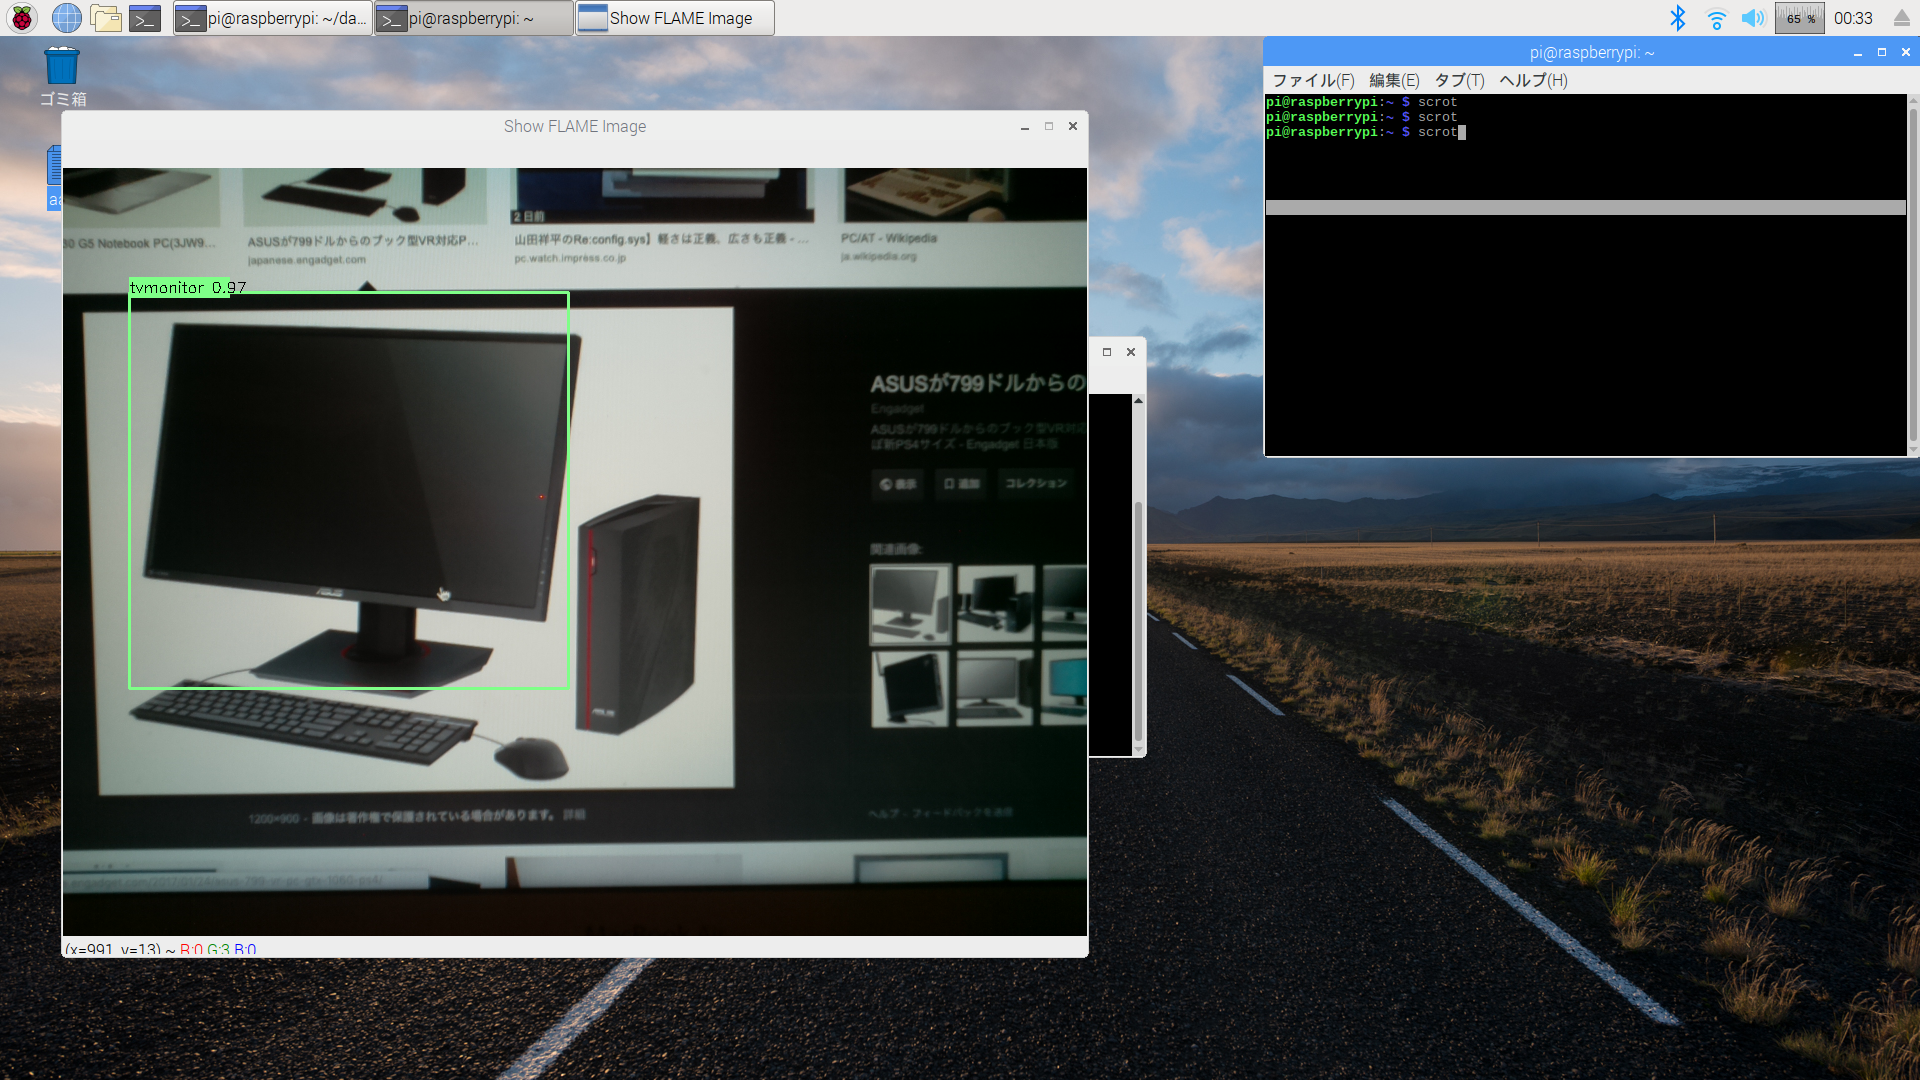
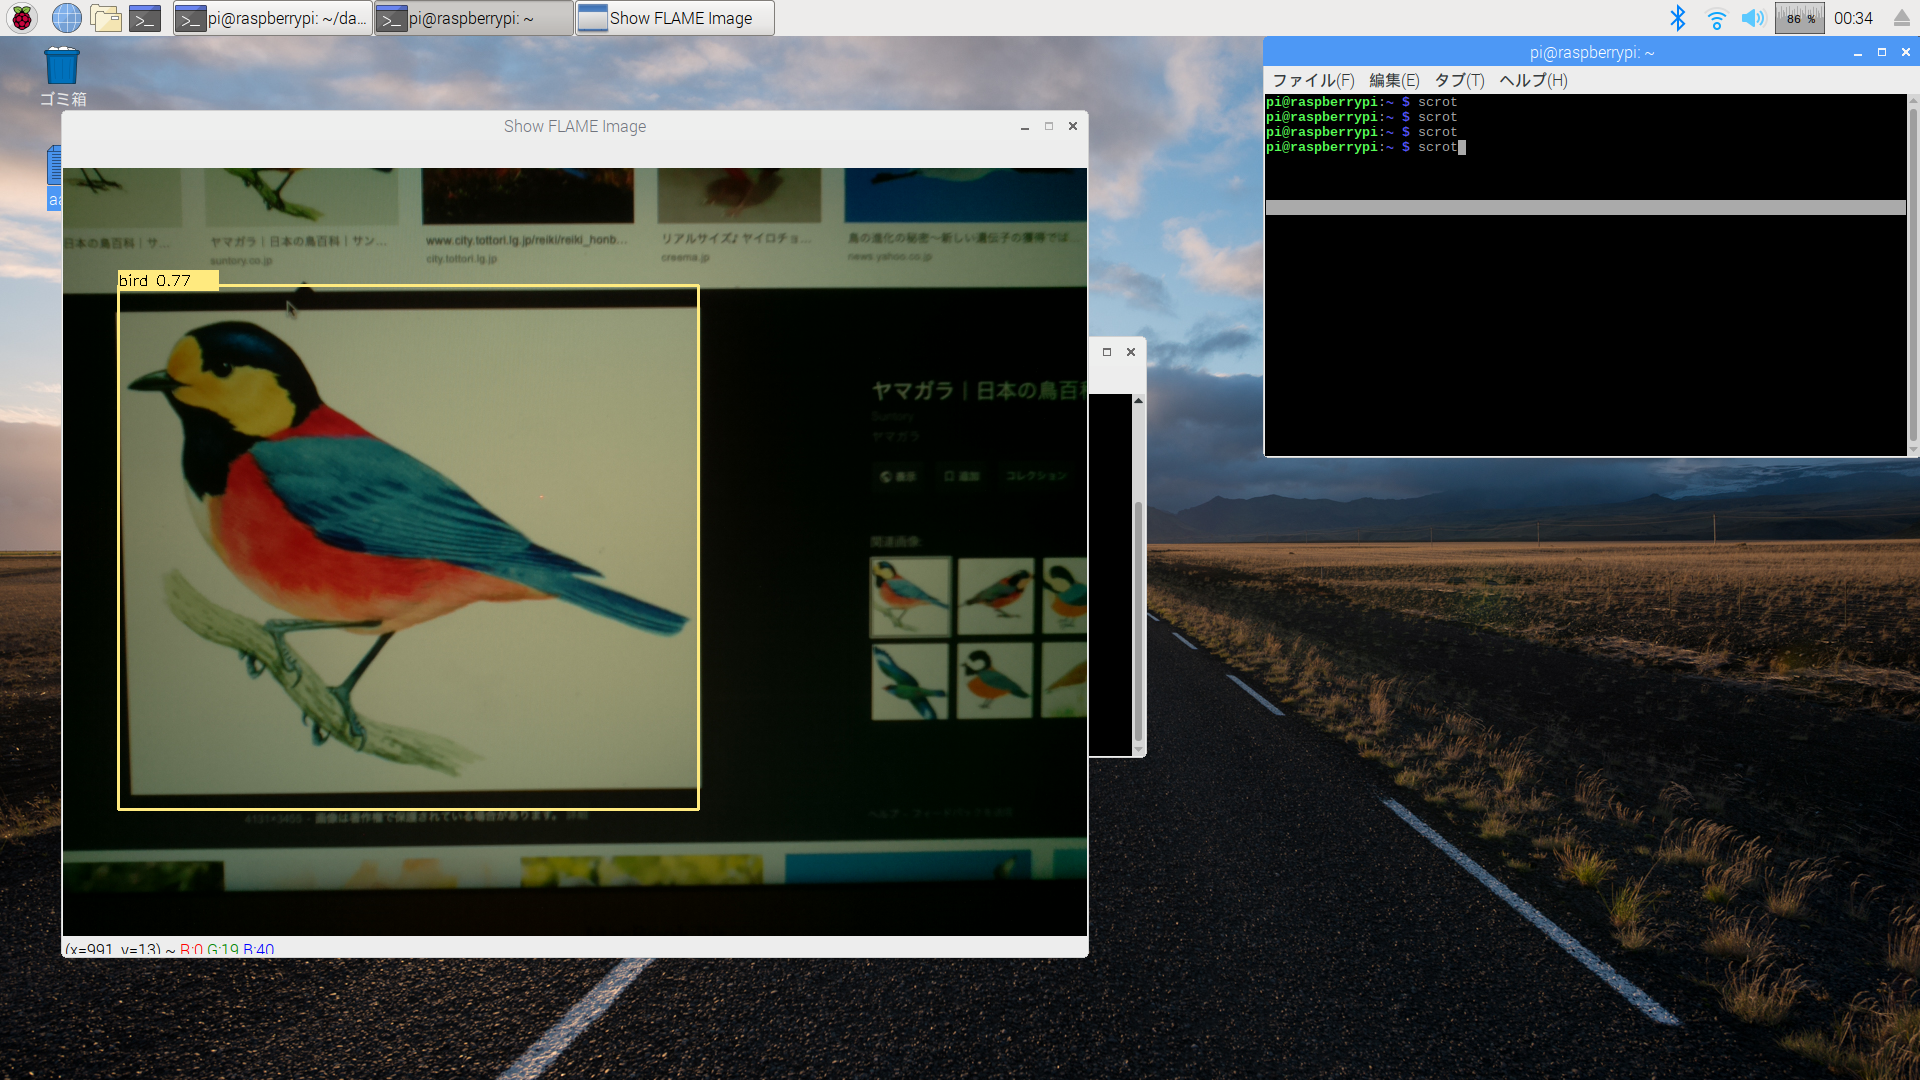
次いで、下記のようにPCで表示した画像をカメラで撮影して画像認識の検証を行ってみた。
以下はRaspberryPiのDesktop画面をキャプチャしたもの。
各画像に対して枠ができて、検出結果も合っている!
いい感じ!
ということで、RaspberryPiでも画像認識できるようになりました。
