はじめに
Android アプリケーション開発では Android SDK やサードパーティーなどから提供される様々な View を利用することができ、開発者はそれらを組み合わせて独自の UI を構築することができます。1
また、View や View のサブクラスを継承して独自の Custom View Component を作成することもできます。
ということで、独自の View をざっくり custom view2 と呼称することとし、ステップバイステップで試行錯誤していこうと思います。
概要
今回は、TextView を継承して custom view を作ってみようと思います。
要件
Unix Epoch を受け取り、タイムゾーンは Asia/Tokyo として、yyyy-MM-dd HH:mm:ss.SSS 文字列を表示する TextView を作成する。
ソース
◆ sample_activity.xml
下記のような表示をするためのレイアウトファイルです。

<?xml version="1.0" encoding="utf-8"?>
<androidx.constraintlayout.widget.ConstraintLayout
    xmlns:android="http://schemas.android.com/apk/res/android"
    xmlns:app="http://schemas.android.com/apk/res-auto"
    xmlns:tools="http://schemas.android.com/tools"
    android:layout_width="match_parent"
    android:layout_height="match_parent">
    <com.objectfanatics.chrono10.ex1.UnixEpochTextView
        android:id="@+id/unix_epoch_text_view"
        android:layout_width="wrap_content"
        android:layout_height="wrap_content"
        android:gravity="center"
        android:textSize="30sp"
        app:layout_constraintBottom_toTopOf="@id/show_current_time_button"
        app:layout_constraintEnd_toEndOf="parent"
        app:layout_constraintStart_toStartOf="parent"
        app:layout_constraintTop_toTopOf="parent"
        app:layout_constraintVertical_chainStyle="packed"
        tools:text="2020-01-01\n00:00:00.000" />
    <Button
        android:id="@+id/show_current_time_button"
        android:layout_width="wrap_content"
        android:layout_height="wrap_content"
        android:layout_marginTop="16dp"
        android:text="show current time"
        app:layout_constraintBottom_toBottomOf="parent"
        app:layout_constraintEnd_toEndOf="parent"
        app:layout_constraintStart_toStartOf="parent"
        app:layout_constraintTop_toBottomOf="@id/unix_epoch_text_view" />
</androidx.constraintlayout.widget.ConstraintLayout>
◆ UnixEpochTextView
Unix Epoch を受け取り、タイムゾーンは Asia/Tokyo として、yyyy-MM-dd HH:mm:ss.SSS 文字列を表示する TextView です。
package com.objectfanatics.chrono10.ex1

import android.content.Context
import android.util.AttributeSet
import androidx.appcompat.widget.AppCompatTextView
import java.text.SimpleDateFormat
import java.util.*

class UnixEpochTextView : AppCompatTextView {
    constructor(context: Context?) : super(context)
    constructor(context: Context?, attrs: AttributeSet?) : super(context, attrs)
    constructor(context: Context?, attrs: AttributeSet?, defStyleAttr: Int) : super(context, attrs, defStyleAttr)

    fun setUnixEpoch(unixEpoch: Long) {
        text = unixEpoch.unixEpochString
    }

    companion object {
        private val Long.unixEpochString: String
            get() = SimpleDateFormat("yyyy-MM-dd\nHH:mm:ss.SSS", Locale.US)
                .apply { timeZone = TimeZone.getTimeZone("Asia/Tokyo") }
                .format(Date(this))
    }
}
◆ Activity
package com.objectfanatics.chrono10.ex1

import android.os.Bundle
import android.widget.Button
import androidx.appcompat.app.AppCompatActivity
import com.objectfanatics.chrono10.R

class SampleActivity : AppCompatActivity() {
    override fun onCreate(savedInstanceState: Bundle?) {
        super.onCreate(savedInstanceState)
        setContentView(R.layout.sample_activity)

        val unixEpochTextView = findViewById<UnixEpochTextView>(R.id.unix_epoch_text_view)
        val showCurrentTimeButton = findViewById<Button>(R.id.show_current_time_button)
        showCurrentTimeButton.setOnClickListener { unixEpochTextView.setUnixEpoch(System.currentTimeMillis()) }
    }
}
実行
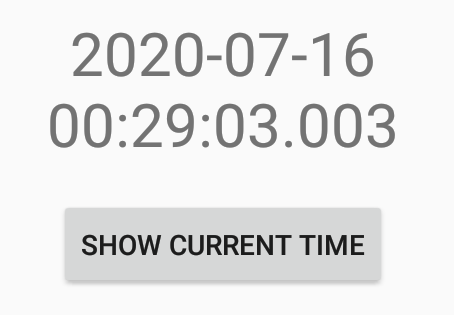
ボタンを押すたびに、下記のように現在時刻が表示されました。
考察
◆ 今回やったこと
Unix Epoch を受け取り、タイムゾーンは Asia/Tokyo として、yyyy-MM-dd HH:mm:ss.SSS 文字列を表示する TextView を作成しました。
◆ 気になる点
TextView であればレイアウトファイルにて android:text="10" のような指定ができるのに、このクラスに対しては app:unixEpoch="123" のような指定ができません。
◆ 次回の課題
次回は app:unixEpoch="123" のような指定ができるようにしてみようと思います。
Links
第1回: Custom View 探求記(TextView 継承編 その1)← いまココ!
第2回: Custom View 探求記(TextView 継承編 その2)
第3回: Custom View 探求記(TextView 継承編 その3)
第4回: Custom View 探求記(TextView 継承編 その4)
第5回: Custom View 探求記(DataBindingを使うべきか使わぬべきかそれが問題だ編 その1)
Tips
以下、本編と直接は関係のない tips です。
◆ @JvmOverloads を使わない
@JvmOverloads を用いたコードは、secondary constructor を用いて親コンストラクタに委譲するコードと等価ではありません。
◆ ロジックを static scope に配置する
今回のコードでは private val Long.unixEpochString: String という extension が companion object 内に記述されていますが、これには以下のようなメリットがあります:
- ロジックが instance scope のコードに影響を受けないことが保証される。
- ロジックが instance scope のコードに影響されないことが一目でわかるため、可読性も保守性も高い。
- 保守時に instance scope への依存が注入されてしまうというミスを防ぐことができる。
- ロジックの移動や共通化などが容易。
- ロジックの単体テストが容易。3
◆ TextView ではなく AppCompatTextView を継承する
AppCompatTextView のドキュメントに書かれている通りです。また、appcompat 系が存在するほぼ全ての View に、このルールが適用されています。
This will automatically be used when you use TextView in your layouts and the top-level activity / dialog is provided by appcompat. You should only need to manually use this class when writing custom views.
-
レイアウトファイルに View の組み合わせを記述し、実行時に inflate するなど。 ↩
-
Custom View, Custom View, UI Component, カスタムビュー, カスタムView, UIコンポーネントのように表記されることもあるが大枠は同じことが多い。っていうか、Martin Fowler の GUI Architectures にも書かれているような感じで、UI 関連のパターンを指す用語の理解は殆ど Chinese whispers の世界だよね。 ↩
-
publicにして@VisibleForTestingを指定すれば単体テストは容易。 ↩