はじめに
基本的な部分は、UnityによるHoloLens開発環境&エミュレータ設定についてを参考にさせていただいています。
しかし、Visual Studio 2017 で環境構築する際に詰まったところがあるので、それを踏まえて記事を書きました。
環境
- Visual Studio 2017 Community
- HoloLens Emulator (build 10.0.14393.0)
- Unity 5.61
公式のInstall the toolsを元に、2017年6月8日時点で最新の環境で構築しました。
これから行う環境構築は、Microsoft DeveloperのInstall the toolsにそって行なっています。
この記事よりバージョンが新しくなった場合は公式を参照して下さい。
Hyper-Vの有効化

コントロール パネル>プログラム>プログラムと機能
と進んで、winsowsの機能の有効化または無効化 をクリックします。
開かれたウィンドウのHyper-Vを有効化すればOKです。
環境構築

まずは、
https://developer.microsoft.com/en-us/windows/mixed-reality/install_the_tools#installation_checklist_for_hololens
にアクセスして下さい。
以下の作業は、このページから行うので、常に開いておいてください。
1.Visual Studio 2017 をインストール

Visual Studio 2017のリンクから、Visual Studio Communityのインストーラをダウンロードして下さい。
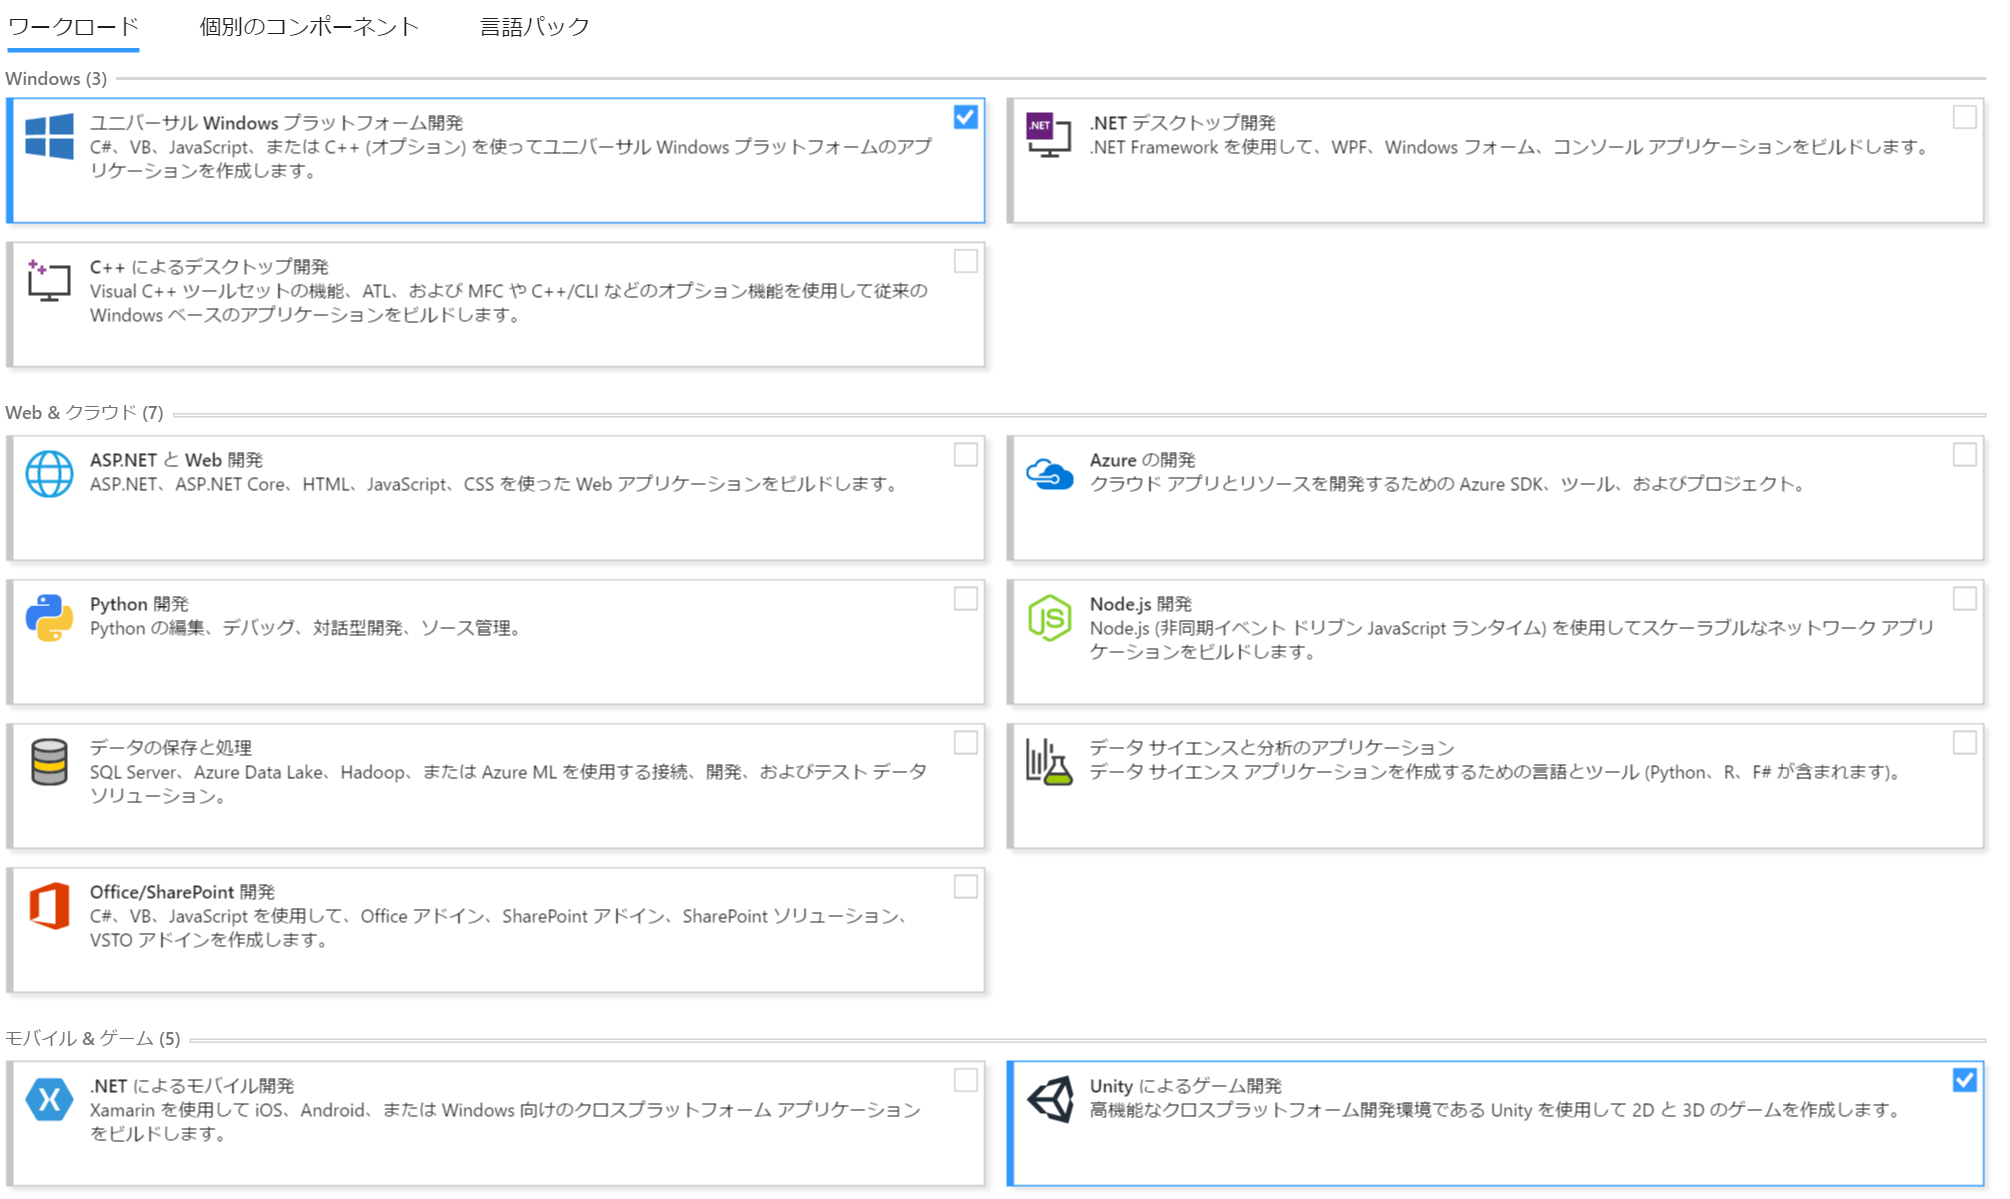
このような画面に進むので、ユニバーサルWindowsプラットフォーム開発とUnityによるゲーム開発にチェックを入れてインストールします。
### 2.HoloLens Emulator をインストールHoloLens Emulatorを押して、エミュレータのインストーラをダウンロードします。
インストーラに従って、インストールを始めます
ここで詰まります!
恐らく、エラーが出てインストールが止まってしまいます。
エラーが出ずにそのままインストール終わったのなら、別にOKです。
エラーが出たら、以下のことを行ってください。
2.5.HoloLens Emulator エラー解決
どうやら Visual Studio 2015 を入れてない人が Visual Studio 2017 を入れる際には、下記のことを実行しないとエラーが出てしまうっぽいです。
If you are using Visual Studio 2017 and do not have Visual Studio 2015 installed,
you must update the registry to work around a prerequisite check

    1.Add or locate this key: HKLM\SOFTWARE\ Microsoft\Analog
    2.Add a REG_SZ value in that key with name: “OverrideHoloLensSDKPrerequisites”, and value: “TRUE”
    3.If you are on an x64 version of Windows, also add or locate this key:
      HKLM\SOFTWARE\Wow6432Node\Microsoft\Analog
    4.Add a REG_SZ value in that key with name: “OverrideHoloLensSDKPrerequisites”, and value: “TRUE”
さて、具体的にやりかたを説明していきます。
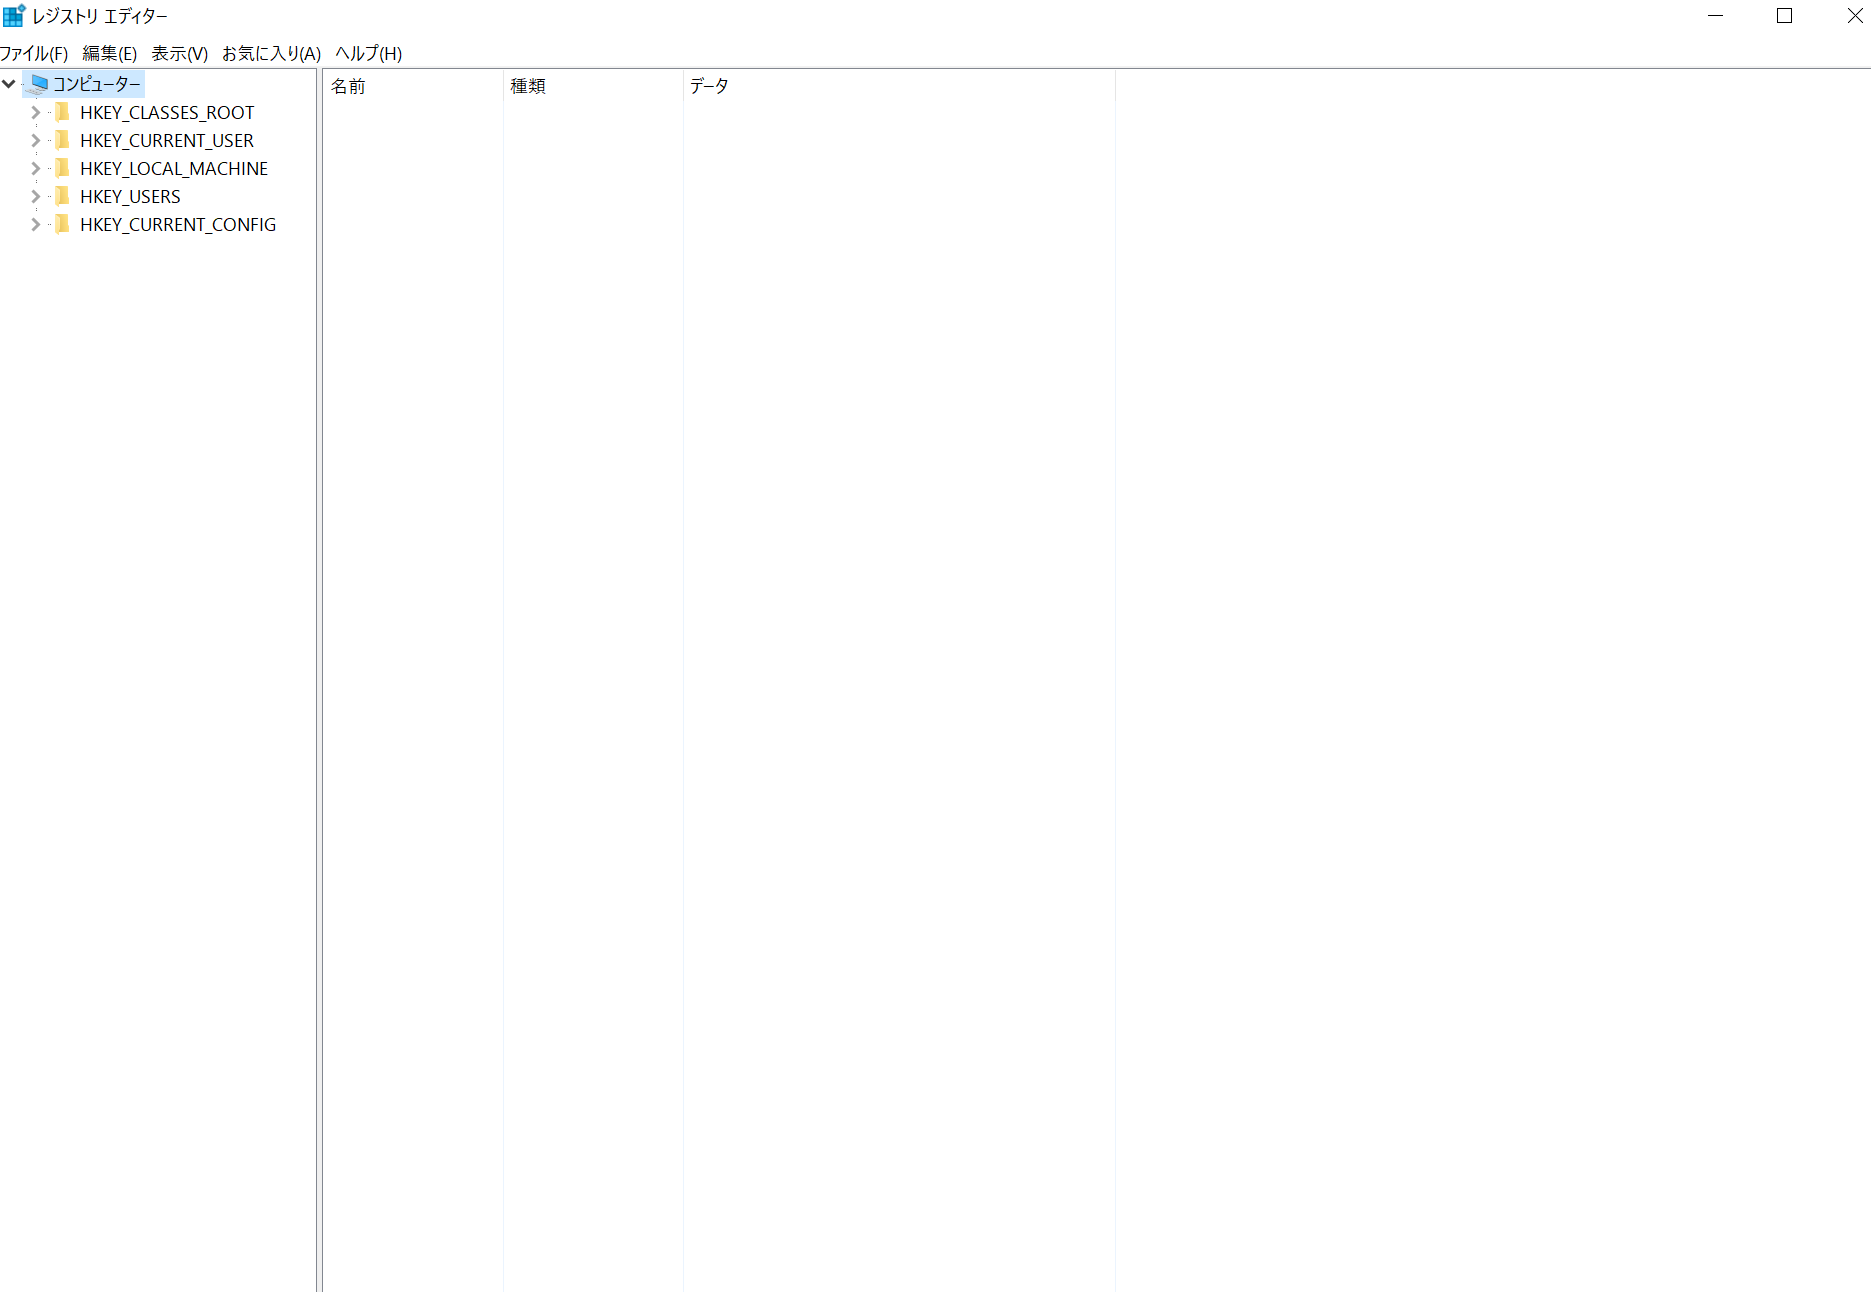
1.regedit起動!
まず、windowsの検索ボックスで、regeditと検索してregeditを実行します。
すると、レジストリエディタという画面が開くはずです。

2.Analog
次に、HKEY_LOCAL_MACHINE > SOFTWARE > Microsoft > Analogの中に
名前:OverrideHoloLensSDKPrerequisites
データ:TRUE
の文字列値を作成します。
もし、Analogがなければ作りましょう。
下の図のようになってれば、OKです。

同様に、
HKEY_LOCAL_MACHINE > SOFTWARE > WOW6432Node > Microsoft > Analog
でも同じことをしましょう。
3.再び、HoloLens Emulator インストーラを起動
最後にもう一度、HoloLens Emulatorのインストーラを起動してください。
これで上手くいくはずです。
3.Unity をインストール
最後に、Unity 5.6.1をダウンロードして、インストールしましょう。
これはインストーラに従えば、特に問題なくできると思います。
これにて、HoloLensの環境構築は終了です。
ビルド
ビルドのやり方については、UnityによるHoloLens開発環境&エミュレータ設定についてを参考にやってみてください。
Unityのsampleプログラムは、このサイトのこちらのfileになります。
注意すべき点としては、最後にVisual Studio 2017でビルドする時下のようになっていることを確認してください。
- エミュレータでビルドするとき

- HoloLensにビルドするとき

さいごに
HoloLensは記事も少なく、開発がとても大変です。
今回の環境構築だけでも、ものすごくつらかったです。
ですが、今後もHoloLens開発頑張りたいと思います。
