最終課題のチーム開発で担当した部分を自分の復習を兼ねて記録用に書きました。
商品の講入機能の実装
・クレジット登録(payjp)
削除・再登録できる
・Payjpのコンソールからその売り上げが確認できる
・クレジット登録していないと購入できない
・購入すると商品状態が切り替わる(売り切れる)
PAY.JP クレジットカード機能
payjpとは?
PAY.JPを使うと、シンプルなAPIで
Webサービスなどにクレジットカード決済機能を簡単に導入できる。
前提条件
hamlでの記載(gem 'haml-rails')
deviseが導入済みでログインができている
→Devise未導入や何もない状態からスタートする場合は、
『Devise導入の設定手順 ~haml使用/pay.jp導入の前準備~ (Rails)』を先に実施。
1.PAY.JPアカウントの作成
Payjpのサイトでアカウントを作成。
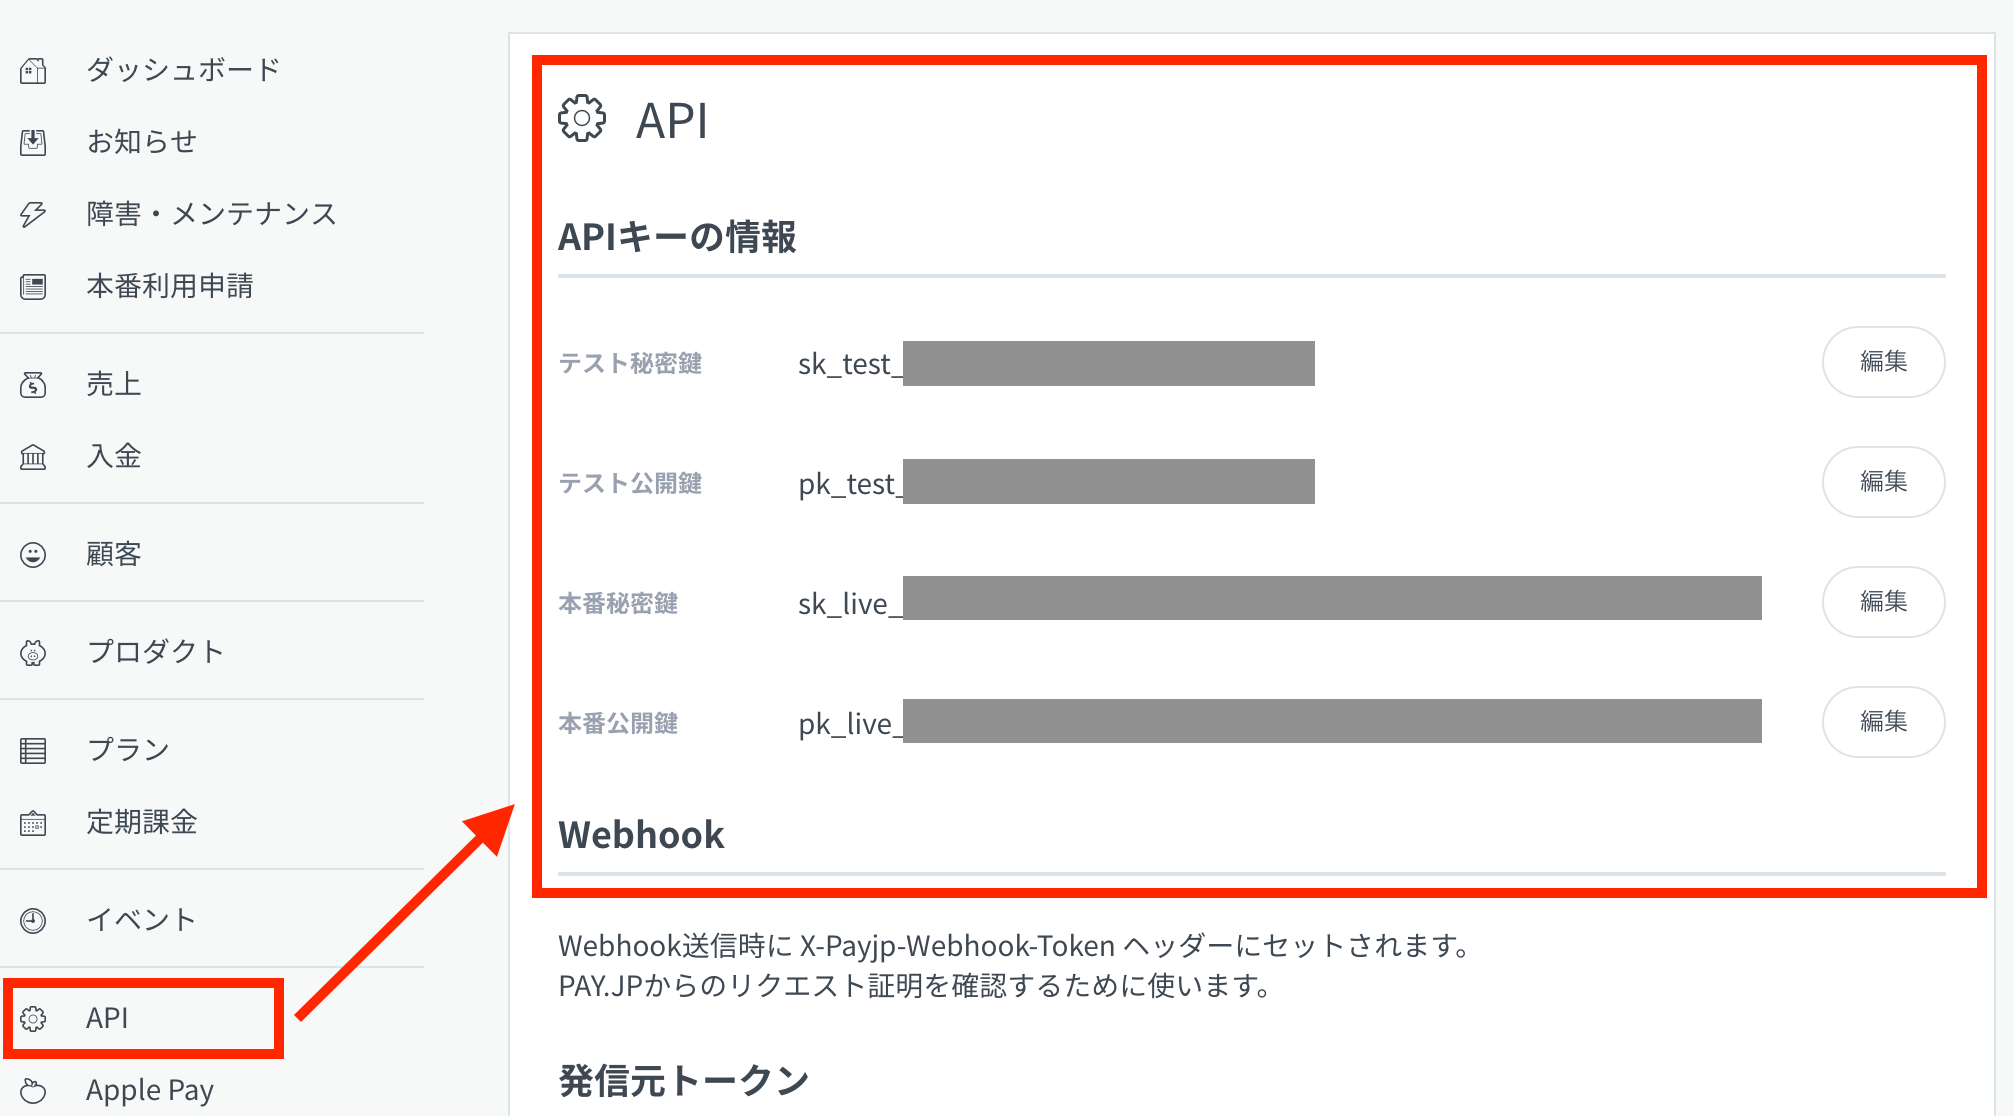
2.APIを確認しよう
ダッシュボードのAPIより確認ができます。
今回はテストモードでの実装なので、テスト秘密鍵とテスト公開鍵を使用。

3.payjpのgemを設置しよう
下記をgemfileに記載しbundle installを実施.
gem 'payjp'
4.payjp.jsを読み込めるようにしよう
%script{src: "https://js.pay.jp/", type: "text/javascript"}を下記の通り追記します。
%html
  %head
    %meta{:content => "text/html; charset=UTF-8", "http-equiv" => "Content-Type"}/
    %title payjptest
    %script{src: "https://js.pay.jp/", type: "text/javascript"}
    -# このscriptを記載
    = csrf_meta_tags
    = stylesheet_link_tag    'application', media: 'all', 'data-turbolinks-track': 'reload'
    = javascript_include_tag 'application', 'data-turbolinks-track': 'reload'
  %body
    = yield
5.テーブルを作成しよう
下記コマンドでpayjpのデータを保管するテーブルを作成します。
rails g model Card user_id:integer customer_id:string card_id:string
テーブルのカラムの紐づけは下記の通りです。
user_id ... Userテーブルのid
customer_id ... payjpの顧客id
card_id ... payjpのデフォルトカードid
※デフォルトカードidはトークンとは違う
class CreateCards < ActiveRecord::Migration[5.2]
  def change
    create_table :cards do |t|
      t.integer :user_id, null: false
      t.string :customer_id, null: false
      t.string :card_id, null: false

      t.timestamps
    end
  end
end
マイグレーションを実施
$ rails db:migrate
※カード情報そのものを保存することは禁止されている
payjpに保管されている情報を顧客idやカードidで呼び出すことで情報取得や支払いなどに対応
6.コントローラーを作成しよう
class CardsController < ApplicationController

  def new
    card = Card.where(user_id: current_user.id)
    redirect_to card_path(current_user.id) if card.exists?
  end


  def pay #payjpとCardのデータベース作成
    Payjp.api_key = Rails.application.credentials[:PAYJP_PRIVATE_KEY]
    #保管した顧客IDでpayjpから情報取得
    if params['payjp-token'].blank?
      redirect_to new_card_path
    else
      customer = Payjp::Customer.create(
        card: params['payjp-token'],
        metadata: {user_id: current_user.id}
      )
      @card = Card.new(user_id: current_user.id, customer_id: customer.id, card_id: customer.default_card)
      if @card.save
        redirect_to card_path(current_user.id)
      else
        redirect_to pay_cards_path
      end
    end
  end

  def destroy #PayjpとCardデータベースを削除
    card = Card.find_by(user_id: current_user.id)
    if card.blank?
    else
      Payjp.api_key = Rails.application.credentials[:PAYJP_PRIVATE_KEY]
      customer = Payjp::Customer.retrieve(card.customer_id)
      customer.delete
      card.delete
    end
      redirect_to new_card_path
  end

  def show #Cardのデータpayjpに送り情報を取り出す
    card = Card.find_by(user_id: current_user.id)
    if card.blank?
      redirect_to new_card_path
    else
      Payjp.api_key = Rails.application.credentials[:PAYJP_PRIVATE_KEY]
      customer = Payjp::Customer.retrieve(card.customer_id)
      @default_card_information = customer.cards.retrieve(card.card_id)
    end
  end
end
コントローラ内のRails.application.credentials[:PAYJP_PRIVATE_KEY]は環境変数でテスト秘密鍵を設定し読み込みます。
credential.ymlファイルにAPIキーを記載
PAYJP_PRIVATE_KEY = 'sk_test_000000000000000000000000'
PAYJP_KEY = 'pk_test_00000000000000000000000'
(自分が他にも参考にした記事、メモ)
※where:与えられた条件にマッチするレコードをすべて返す。
https://qiita.com/nakayuu07/items/3d5e2f8784b6f18186f2
※blank?:空のオブジェクト、またはnilのオブジェクトかどうかを判定するメソッド。
( empty? || nil? と同等)
空のオブジェクト、またはnilのオブジェクトの場合は true
値が存在する場合は false
※ActiveRecordで条件に一致するデータが存在するかどうかを調べたいときは、exists?を使う。
https://qiita.com/uw9623/items/851ac5f71e316834c0fa
※メタデータとは、本体であるデータに関する付帯情報が記載されたデータです。データのためのデータ
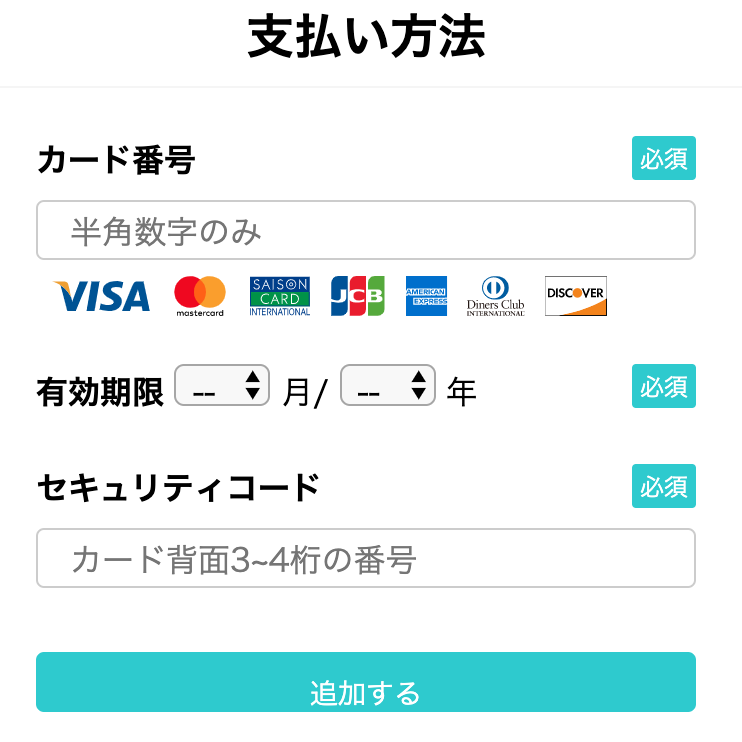
7.カードの登録画面を作成しよう
登録画面と確認兼削除画面の2つを作成
登録画面
            = form_tag(pay_cards_path, method: :post, id: 'charge-form',  name: "inputForm") do
              %label カード番号
              .require 必須
              = text_field_tag "number", "", class: "number", placeholder: "半角数字のみ" ,maxlength: "16", type: "text", id: "card_number"
              %ul.signup-card-list
                %li
                  = image_tag "https://www-mercari-jp.akamaized.net/assets/img/card/visa.svg?238737266",width:"49px",height:"20px"
                %li
                  = image_tag "https://www-mercari-jp.akamaized.net/assets/img/card/master-card.svg?238737266",width:"34px",height:"20px"
                %li
                  = image_tag "https://www-mercari-jp.akamaized.net/assets/img/card/saison-card.svg?238737266",width:"30px",height:"20px"
                %li
                  = image_tag "https://www-mercari-jp.akamaized.net/assets/img/card/jcb.svg?238737266",width:"32px",height:"20px"
                %li
                  = image_tag "https://www-mercari-jp.akamaized.net/assets/img/card/american_express.svg?238737266",width:"21px",height:"20px"
                %li
                  = image_tag "https://www-mercari-jp.akamaized.net/assets/img/card/dinersclub.svg?238737266",width:"32px",height:"20px"
                %li
                  = image_tag "https://www-mercari-jp.akamaized.net/assets/img/card/discover.svg?238737266",width:"32px",height:"20px"
              %br
              %label 有効期限
              .require 必須
              %select#exp_month{name: "exp_month", type: "text"}
                %option{value: ""} --
                %option{value: "1"}01
                %option{value: "2"}02
                %option{value: "3"}03
                %option{value: "4"}04
                %option{value: "5"}05
                %option{value: "6"}06
                %option{value: "7"}07
                %option{value: "8"}08
                %option{value: "9"}09
                %option{value: "10"}10
                %option{value: "11"}11
                %option{value: "12"}12
              %span 月/
              %select#exp_year{name: "exp_year", type: "text"}
                %option{value: ""} --
                %option{value: "2019"}19
                %option{value: "2020"}20
                %option{value: "2021"}21
                %option{value: "2022"}22
                %option{value: "2023"}23
                %option{value: "2024"}24
                %option{value: "2025"}25
                %option{value: "2026"}26
                %option{value: "2027"}27
                %option{value: "2028"}28
                %option{value: "2029"}29
              %span 年
              %br
              %br
              %label セキュリティコード
              .require 必須
              = text_field_tag "cvc", "", class: "cvc", placeholder: "カード背面3~4桁の番号", maxlength: "4", id: "cvc"
              %br
              #card_token
              %br
              = submit_tag "追加する", id: "token_submit"

※参考記事がこの書き方だったのでそのまま書きましたが
他の記事も載せておきます
【Rails】date_selectタグの使い方メモ
(自分が他にも参考にした記事、メモ)
※text_field_tagの使い方
text_field_tagヘルパーは、Viewファイルのform_withヘルパー内に記載することで、文字列入力用のテキストボックスを実現することができるViewヘルパー
text_field_tag(テキストボックス名, 初期文字列, {オプション1, オプション2,,,})
「テキストボックス名」は、テキストフィールドのidとnameに割り当てられ、フォームから値を取得するときのキー
「初期文字列」は、テキストフィールドのデフォルト値で、指定された文字列が入力された状態で表示される
オプションには、以下の4種類に加え、各種HTML属性をハッシュ形式で設定することが可能
:disable 無効化(trueにすると、入力できなくなる)
:size 表示可能文字数
:maxlength 入力可能文字数
:placeholder フィールド内にデフォルト表示される文字列。ただし、値として設定されているわけではなく、フォーカスが当たると削除される
※append()の基本的な使い方
append()メソッドは、指定した要素内の最後に引数のコンテンツを追加するメソッドです。
コンテンツにはテキストの他、HTML要素やJQueryオブジェクトが指定できる。
確認兼削除画面
  クレジットカード情報
          .form-content
            %br
            = "**** **** **** " + @default_card_information.last4
            %br
            - exp_month = @default_card_information.exp_month.to_s
            - exp_year = @default_card_information.exp_year.to_s.slice(2,3)
            = exp_month + " / " + exp_year
            = form_tag(card_path(current_user.id), method: :delete, id: 'charge-form',  name: "inputForm") do
              %input{ type: "hidden", name: "card_id", value: "" }
              %button.delete-btn 削除する
(自分が他にも参考にした記事、メモ)
※sliceでカード年数の2、3番目を取得
※type属性をhiddenにしたときの大きな特徴は、「送信したいデータがブラウザに表示されない」ブラウザ上では見えないことを利用して、ユーザーからの命令がどのような種類なのかをサーバーに送信するときに判断させるために、hiddenを使うこともある
8.Payjpにデータを送りトークンを取得しよう
jQueryを使用するので、railsに未設定の場合は設定をしてください。
設定方法はこちら←
document.addEventListener(
  "DOMContentLoaded", e => {//DOM読み込みが完了したら実行
    if (document.getElementById("token_submit") != null) { //token_submitというidがnullの場合、下記コードを実行しない
      Payjp.setPublicKey("pk_test_31f3ec18c086406c969b76cb"); //ここに公開鍵を直書き
      let btn = document.getElementById("token_submit"); //IDがtoken_submitの場合に取得
      btn.addEventListener("click", e => { //ボタンが押されたときに作動
        e.preventDefault(); //ボタンを一旦無効
        let card = {//カード情報生成
          number: document.getElementById("card_number").value,
          cvc: document.getElementById("cvc").value,
          exp_month: document.getElementById("exp_month").value,
          exp_year: document.getElementById("exp_year").value
        }; //入力されたデータを取得
        Payjp.createToken(card, (status, response) => {//トークン生成
          if (status === 200) { //成功した場合
            $("#card_number").removeAttr("name");
            $("#cvc").removeAttr("name");
            $("#exp_month").removeAttr("name");
            $("#exp_year").removeAttr("name"); //データを自サーバにpostしないように削除
            $("#card_token").append(
              $('<input type="hidden" name="payjp-token">').val(response.id)
            ); //取得したトークンを送信できる状態
            document.inputForm.submit();
            alert("登録が完了しました");
          } else {
            alert("カード情報が正しくありません。");
          }
        });
      });
    }
  },
  false
);
(自分が他にも参考にした記事、メモ)
※ボタンを押したタイミングで PAY.JP のサーバにクレジットカード情報を送信し、結果としてトークンなどの情報を受け取っている
※removeさせることでカード情報をparamsの値として含まれないようにしています
※HTTP レスポンスステータスコードは、特定の HTTP リクエストが正常に完了したどうかを示します。レスポンスは 5 つのクラスに分類されています。
- 情報レスポンス (100–199),
- 成功レスポンス (200–299),
- リダイレクト (300–399),
- クライアントエラー (400–499),
- サーバエラー (500–599)
-成功レスポンス200-
リクエストが成功したことを示します。成功が意味することは、 HTTP メソッドにより異なります。
- GET: リソースが読み込まれ、メッセージ本文で転送された。
- HEAD: メッセージ本文にエンティティヘッダーある。
- PUT または POST: 操作の結果を表すリソースがメッセージ本文で送信される。
- TRACE: メッセージ本文に、サーバーが受け取ったリクエストメッセージが含まれている。
9.ルートを作成しよう
resources :cards, only: [:new, :show, :destroy] do
    collection do
      post 'pay', to: 'cards#pay'
    end
  end
(自分が他にも参考にした記事、メモ)
リソースベースのルーティングでは「index」「show」「new」「edit」「create」「update」「destroy」の7つのアクションへのルーティング自動で設定されます。これに別のアクションを呼び出すためのルーティングを追加する為collectionを記述します。
10.カードを登録してみよう
http://localhost:3000/cards/new にアクセスして登録できるか確認。
その時、テストカードで登録するようにしてください。
それ以外を打ち込んだ場合はトークンが発行できずはねられてしまいます。
購入編←
参考