結論
yamlファイルを渡すだけですぐにmockサーバが作成できる。
prism mock ./hoge.yaml
2020/08/26 追記
API定義をyamlで書くのもいいですが、https://stoplight.io だとボタンぽちぽちでapiが作成でき、自動でyamlを出力してくれます。おすすめです。mockサーバもついているようです。
概要
SwaggerやOpenAPIなどから、モックデータを呼び出し動作確認する場合にyamlファイルだけ有ればすぐにモックサーバを起動できるPrismというサービスがあります。この記事では実際にモックサーバを起動するところまで説明します。
Prism
PrismとはOpenAPI v2(Swagger)とOpenAPI v3のAPIモックパッケージです。
インストール
npm install -g @stoplight/prism-cli

# OR

yarn global add @stoplight/prism-cli
モックサーバ起動
prism mock hoge.yaml
これでモックサーバを起動してくれます。
動かしてみる
では、実際にmockサーバを作ってみましょう。
ちなみに、『VSCodeで効率的にswaggerを書く。』にも記載されている通り、VSCodeでも楽にSwaggerを書けます。
Swagger Editorとほぼ動作は同じなのでどちらでも構いません。
Previewへのリアルタイム反映はどちらも機能として実装されています。
Swagger Editorという名前ですがOpenAPI v3も書けます。一応JSONからYAMLへのコンバート機能もあります。
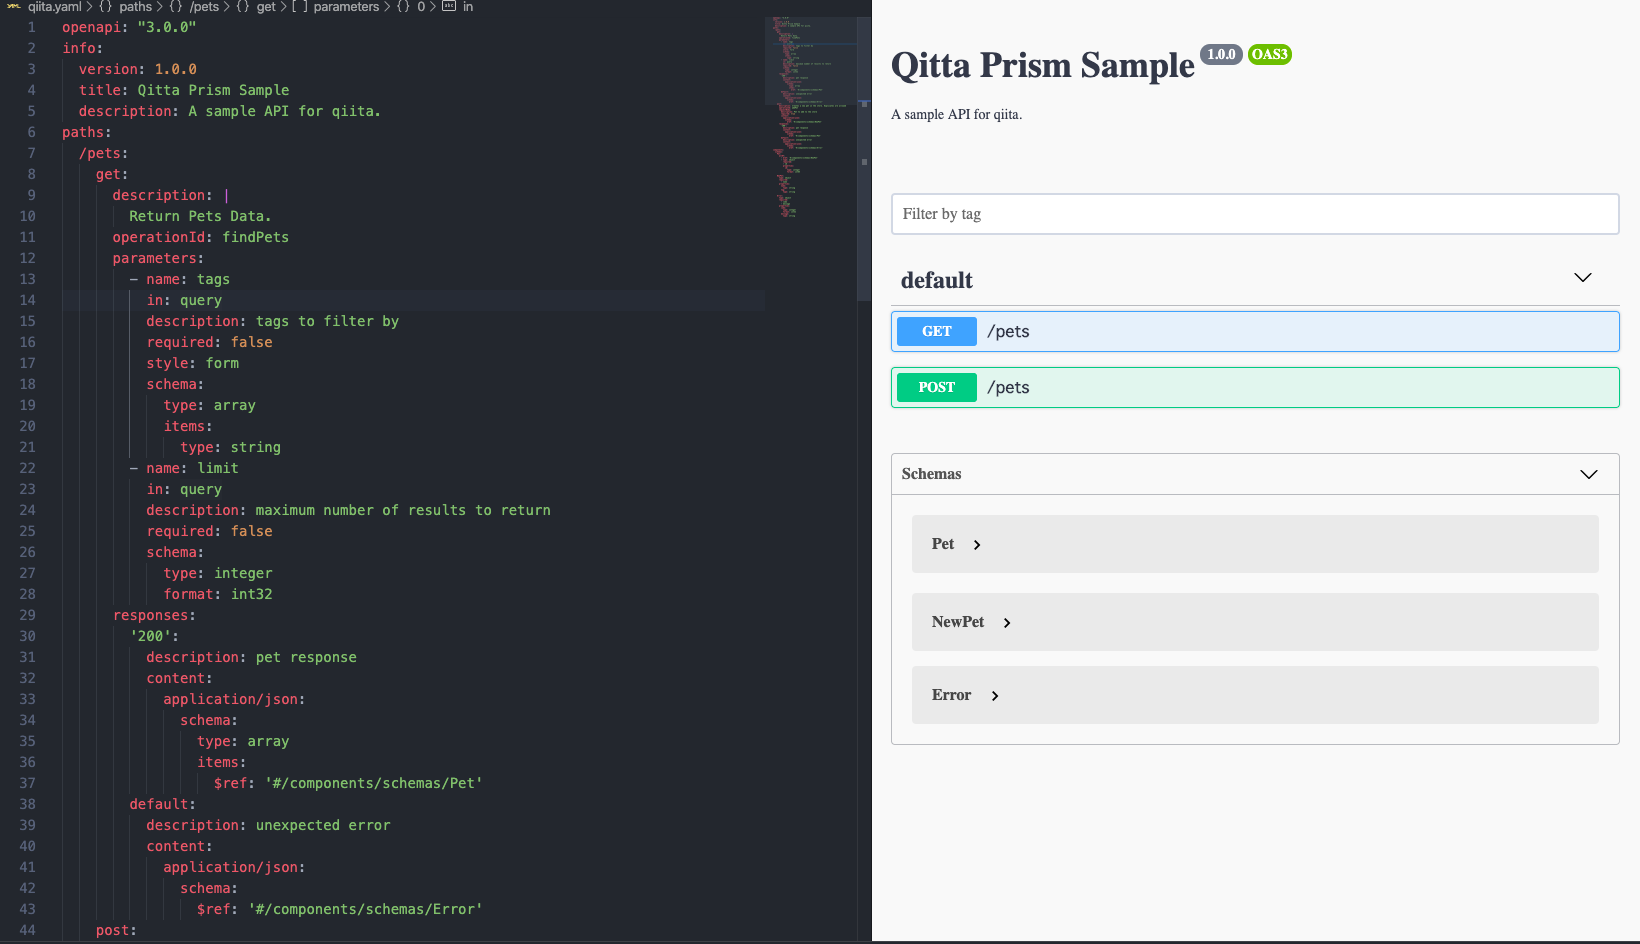
yamlファイル
API仕様が決まり、以下のようなyamlファイルが作成されたとします。
このファイルの元になったファイルは公式のサンプルにあります。
openapi: "3.0.0"
info:
  version: 1.0.0
  title: Qitta Prism Sample
  description: A sample API for qiita.
paths:
  /pets:
    get:
      description: |
        Return Pets Data.
      operationId: findPets
      parameters:
        - name: tags
          in: query
          description: tags to filter by
          required: false
          style: form
          schema:
            type: array
            items:
              type: string
        - name: limit
          in: query
          description: maximum number of results to return
          required: false
          schema:
            type: integer
            format: int32
      responses:
        '200':
          description: pet response
          content:
            application/json:
              schema:
                type: array
                items:
                  $ref: '#/components/schemas/Pet'
        default:
          description: unexpected error
          content:
            application/json:
              schema:
                $ref: '#/components/schemas/Error'
    post:
      description: Creates a new pet in the store. Duplicates are allowed
      operationId: addPet
      requestBody:
        description: Pet to add to the store
        required: true
        content:
          application/json:
            schema:
              $ref: '#/components/schemas/NewPet'
      responses:
        '200':
          description: pet response
          content:
            application/json:
              schema:
                $ref: '#/components/schemas/Pet'
        default:
          description: unexpected error
          content:
            application/json:
              schema:
                $ref: '#/components/schemas/Error'
components:
  schemas:
    Pet:
      allOf:
        - $ref: '#/components/schemas/NewPet'
        - type: object
          required:
          - id
          properties:
            id:
              type: integer
              format: int64

    NewPet:
      type: object
      required:
        - name
      properties:
        name:
          type: string
        tag:
          type: string

    Error:
      type: object
      required:
        - code
        - message
      properties:
        code:
          type: integer
          format: int32
        message:
          type: string
これを『VSCodeで効率的にswaggerを書く。』と同様にVSCodeで開くと下のような画面になります。青色のGETのボタンを押すと詳細がみれたり、実際に実行することができます。
モックサーバ起動
すでにPrismをインストールしているとして、
prism mock ./qiita.yaml
を実行してみましょう。
すると、下記のようにサーバが起動します。

レスポンスを確認してみる
試しにcurlコマンドでレスポンスを確認してみると、以下のようにモックデータが取得できます。
❯ curl "http://127.0.0.1:4010/pets"
[{"name":"string","tag":"string","id":-9223372036854776000}]
まとめ
- Prismを使用すると、楽にモックサーバを作成することができます。
- yamlファイルの詳しい記述に関しては、作って理解する OpenAPI 3.0 / connexion がわかりやすいです。