概要
Python歴2週間の初学者ですが、ゼミの研究のためにGoogleの検索結果を取得したいと思い、こちらの記事「Custom Search APIを使ってGoogle検索結果を取得する」を参考にチャレンジしました。
参考記事と重複しますが、どのような手順で作ったか公開したいと思います。
環境
Windows10
python3.7
Anaconda Navigator
目標物
ゼミの研究テーマ「訪日外客数の増減に影響を与える決定要因は何か」の先行研究を取得
→取得した記事のタイトルやURLを一覧にしたファイルを作成
手順
- APIキーを取得する
- Custom Search APIの有効化
- Custom Search Engineの取得
- ライブラリのインストール
- APIでGoogle検索結果の取得&jsonファイルで保存
- 5で取得したファイルを整形処理&tvs形式で保存
1. APIキーを取得する
Google Cloud Platformのナビゲーションメニューを開き、「APIとサービス」→「認証情報」をクリック。

取得したAPIキーは後で使うのでコピーしてどこかにペーストしておく。
2. Custom Search APIの有効化
Google Cloud Platform のナビゲーションメニューを開き、「APIとサービス」→「ライブラリ」をクリック。

ページの一番下「その他」から「Custom Search API」を選択し、詳細ページを開く。
「有効化する」をクリック。

3. Custom Search Engineの取得
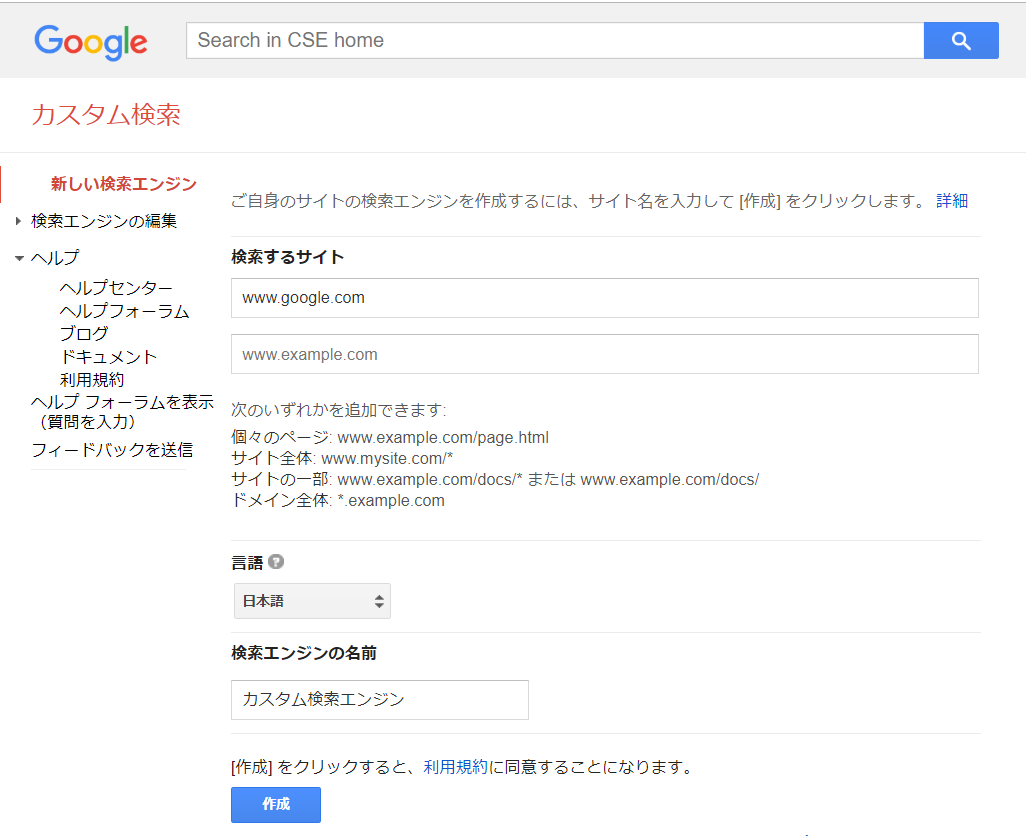
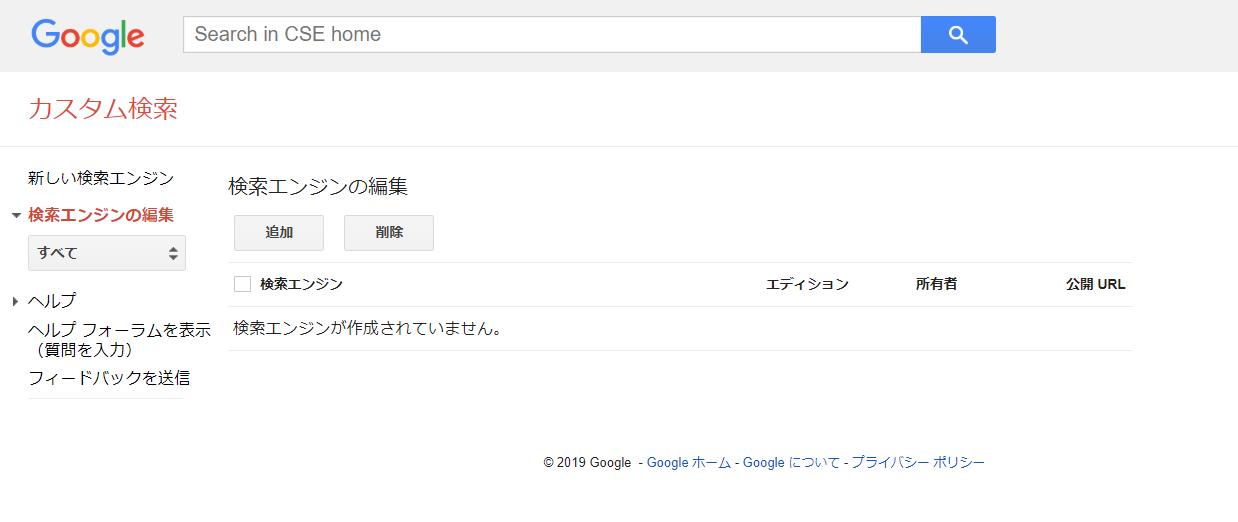
①Custom Search Engineのページにとんで「追加」をクリック。
②
・「検索するサイト」下に何かしらのサイトのURLを入れる(何でもよい)
・言語は「日本語」に設定
・検索エンジンの名前を入力
・「作成」をクリック

③「検索エンジンの編集」下のオプションから先ほど作った検索エンジンの名前を選択して編集する

このページですること
・「検索エンジンID」をコピーしてどこかにペーストして取っておく
・「言語」は日本語を選択
・「検索するサイト」に表示されているサイトを削除
・「ウェブ全体を検索」をオン
・「更新」をクリック
4. ライブラリのインストール
「Google API Client Library for Python」を参考に「Google API Python Client」をインストールします。
virtualenvで仮想環境を作ってからライブラリをインストールしています。
5. APIで取得&jsonファイルで保存
原因

参考記事:WindowsでPython3使用時のUnicodeEncodeError(cp932,Shift-JISエンコード)の原因と回避方法
回避方法
Open関数の引数でencodingをutf-8に指定する。
with open(os.path.join(save_response_dir, 'response_' + today + '.json'), mode='w', encoding='utf-8') as response_file:
        response_file.write(jsonstr)
6. 今度こそAPIで取得&jsonファイルで保存
少しいじって、最終的にコードは以下のようになりました。
import os
import datetime
import json

from time import sleep
from googleapiclient.discovery import build

GOOGLE_API_KEY = "xxxxxxxxxxxxxxxxxxxxxxxxxxxxxxxxxxxxxxx"
CUSTOM_SEARCH_ENGINE_ID = "xxxxxxxxxxxxxxxxxxxxxxxxxxxxxxxxx"

DATA_DIR = 'data'


def makeDir(path):
    if not os.path.isdir(path):
        os.mkdir(path)


def getSearchResponse(keyword):
    today = datetime.datetime.today().strftime("%Y%m%d")
    timestamp = datetime.datetime.today().strftime("%Y/%m/%d %H:%M:%S")

    makeDir(DATA_DIR)

    service = build("customsearch", "v1", developerKey=GOOGLE_API_KEY)

    page_limit = 10
    start_index = 1
    response = []
    for n_page in range(0, page_limit):
        try:
            sleep(1)
            response.append(service.cse().list(
                q=keyword,
                cx=CUSTOM_SEARCH_ENGINE_ID,
                lr='lang_ja',
                num=10,
                start=start_index
            ).execute())
            start_index = response[n_page].get("queries").get("nextPage")[
                0].get("startIndex")
        except Exception as e:
            print(e)
            break

    # レスポンスをjson形式で保存
    save_response_dir = os.path.join(DATA_DIR, 'response')
    makeDir(save_response_dir)
    out = {'snapshot_ymd': today, 'snapshot_timestamp': timestamp, 'response': []}
    out['response'] = response
    jsonstr = json.dumps(out, ensure_ascii=False)
    with open(os.path.join(save_response_dir, 'response_' + today + '.json'), mode='w', encoding='utf-8') as response_file:
        response_file.write(jsonstr)


if __name__ == '__main__':

    target_keyword = '訪日外国人 要因研究'

    getSearchResponse(target_keyword)
今度こそ実行すると「data」フォルダ下に「response」フォルダが出来上がり、更にその下にjsonファイルができました!

7. 6で取得したファイルを整形処理&tvs形式で保存
コードは以下の通りです。
import os
import datetime
import json
import pandas as pd

DATA_DIR = 'data'


def makeDir(path):
    if not os.path.isdir(path):
        os.mkdir(path)


def makeSearchResults():
    today = datetime.datetime.today().strftime("%Y%m%d")

    response_filename = os.path.join(
        DATA_DIR, 'response', 'response_' + today + '.json')
    response_file = open(response_filename, 'r', encoding='utf-8')
    response_json = response_file.read()
    response_tmp = json.loads(response_json)
    ymd = response_tmp['snapshot_ymd']
    response = response_tmp['response']
    results = []
    cnt = 0
    for one_res in range(len(response)):
        if 'items' in response[one_res] and len(response[one_res]['items']) > 0:
            for i in range(len(response[one_res]['items'])):
                cnt += 1
                display_link = response[one_res]['items'][i]['displayLink']
                title = response[one_res]['items'][i]['title']
                link = response[one_res]['items'][i]['link']
                snippet = response[one_res]['items'][i]['snippet'].replace(
                    '\n', '')
                results.append({'ymd': ymd, 'no': cnt, 'display_link': display_link,
                                'title': title, 'link': link, 'snippet': snippet})
    save_results_dir = os.path.join(DATA_DIR, 'results')
    makeDir(save_results_dir)
    df_results = pd.DataFrame(results)
    df_results.to_csv(os.path.join(save_results_dir, 'results_' + ymd + '.tsv'), sep='\t',
                      index=False, columns=['ymd', 'no', 'display_link', 'title', 'link', 'snippet'])


if __name__ == '__main__':

    makeSearchResults()
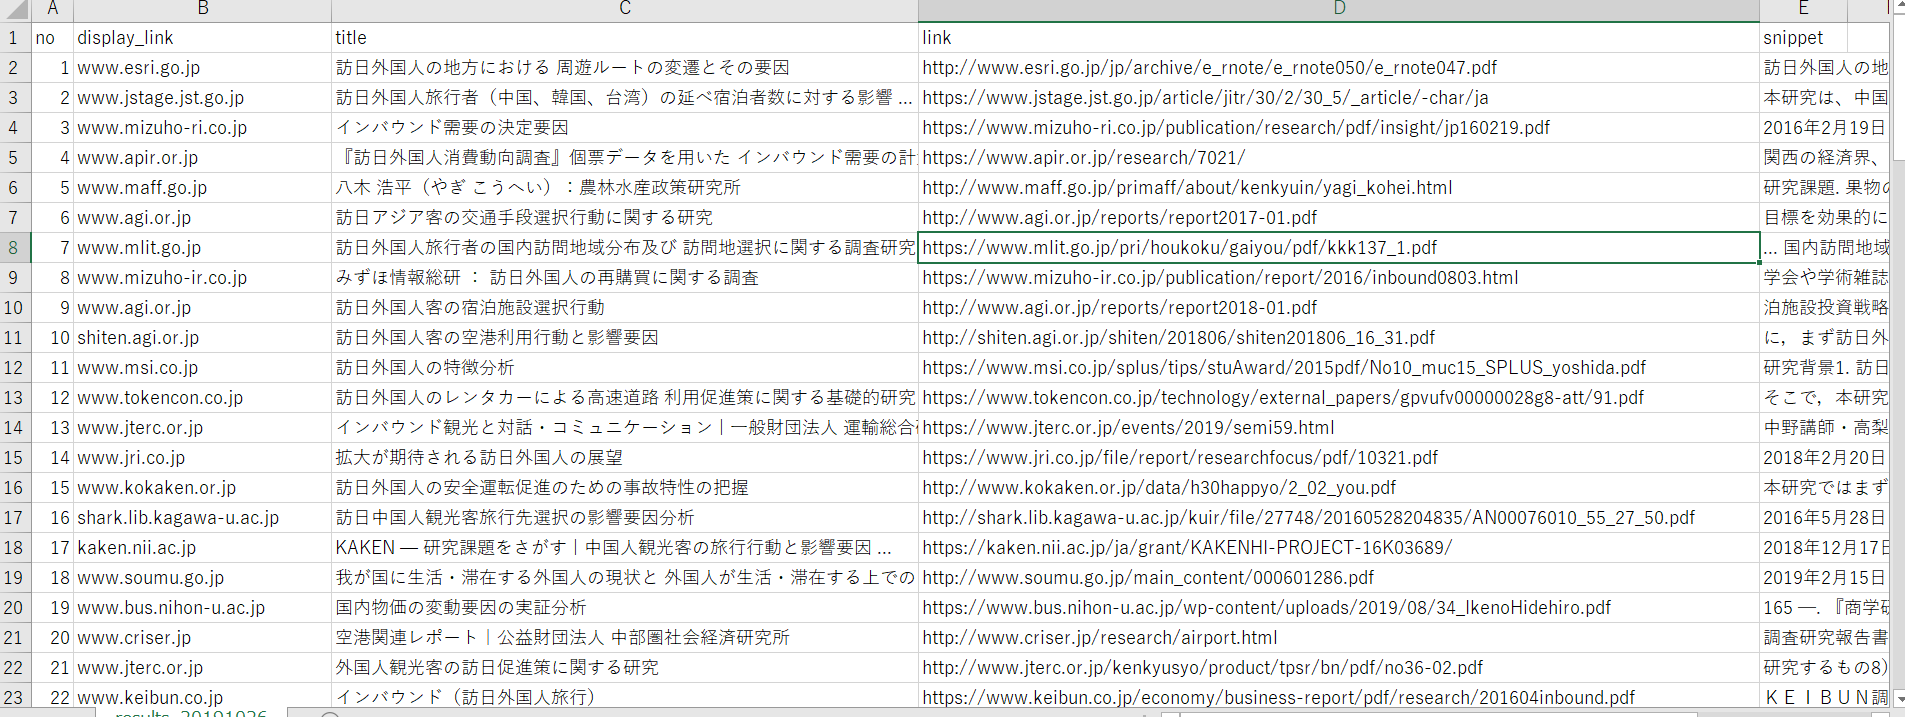
実行すると日付、番号、サイトのURL、タイトル、記事のURL、詳細の順に整理されました!

感想
今回参考にさせていただいた記事(Custom Search APIを使ってGoogle検索結果を取得する)が素晴らしく分かりやすかったために、初学者でも簡単に実装できました!
コードの意味もしっかり理解しないといけませんが、取り敢えず日常に役立てられるプログラムが作れて嬉しいです![]()
ただ、無料枠だとCustom Search APIには色々制約があるようなので(Google Custom Search JSON API)今後また使うときには気を付けないとですね。


