後編その2: ThingWorx でIoT アプリを開発します
前編はこちら
中編はこちら
後編その1はこちら
引き続きThingWorx にアップされたデータを可視化するIoT アプリを作成します。
手順
- LED 操作パネル作成
- 時系列データを表示
- 完成:マッシュアップを実行
1. LED操作パネル作成
ウィジット追加
-
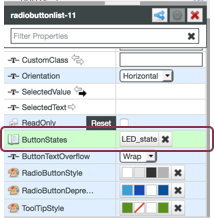
Radio Button ウィジットを配置します

-
ButtonStates を”LED_state”に設定します
サービス追加
-
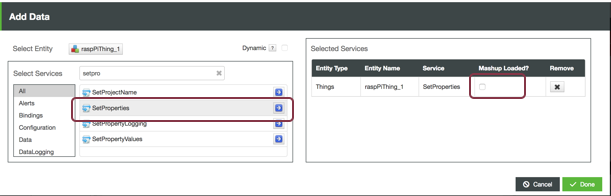
Things_raspPiThing_1 の右側の”+” をクリック

-
SetProperties を選択し"→" をクリック
-
Mashup Loaded?にチェックが入っていないことを確認して“Done”をクリック
サービスとウィジットの紐付け
-
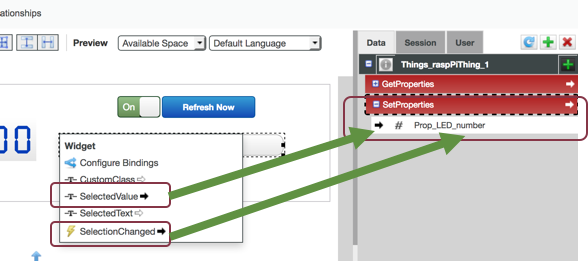
Radio Button ウィジットの左上にカーソルをあててSelectedValueをドラッグしたまま
SetPropertiesのProp_LED_number でドロップ -
同じくウィジットからSelectionChangedをドラッグしたままSetProperties でドロップ
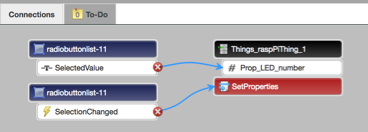
-
SetProperties をクリックすると右図のようになります
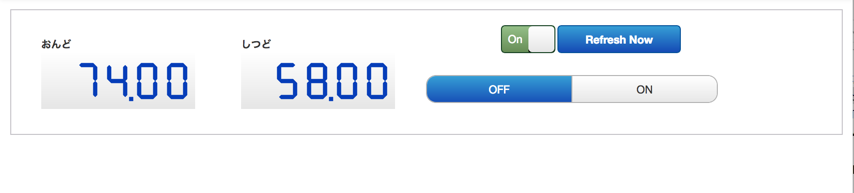
マッシュアップ画面の実行
- “Save” をクリック
- “View Mashup”で画面を実行
- ボタンの操作でLEDが点灯・消灯することを確認しましょう
2. 時系列データを表示
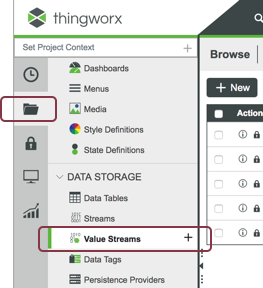
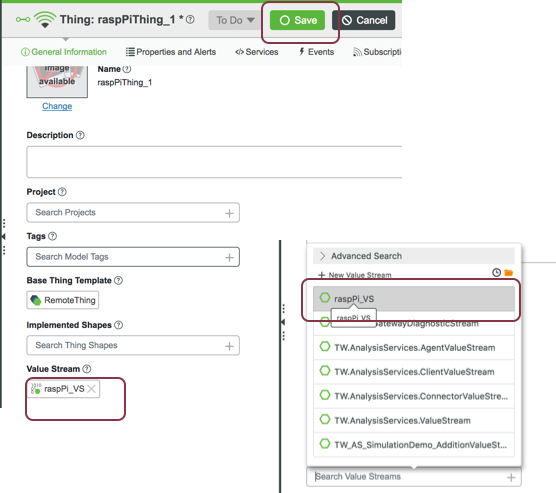
時系列データ保存のためValue Stream を作成
-
フォルダアイコンをクリック
DATA STORAGE のValue Streams 右にある”+” をクリック
-
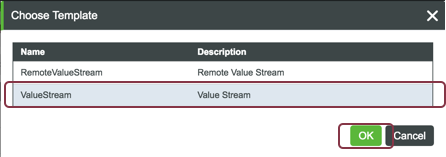
ValueStream を選択してOK をクリック
-
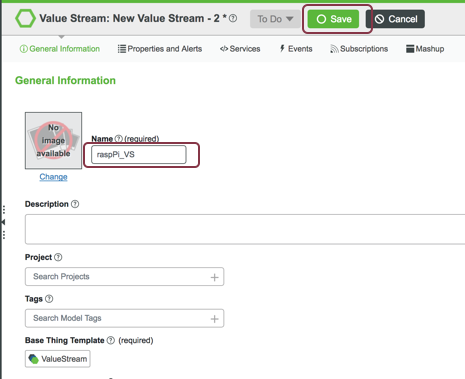
名前に”raspPi_VS” を設定
-
“Save” をクリック
Value Stream にThing のデータを保存する設定
-
Resent リストからraspPiThing_1 を選択
-
“General Information”の画面を開く
-
Value Stream の項目にraspPi_VS を設定
-
”Save”をクリック
-
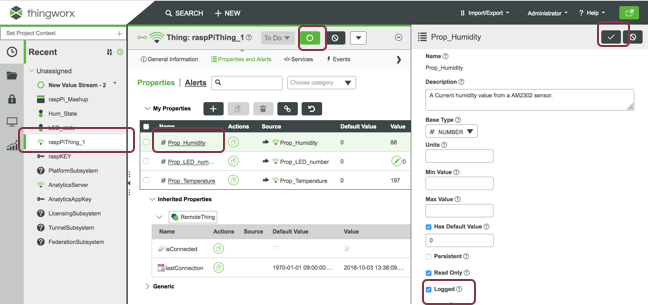
“Properties and Alerts” に切り替え
-
Prop_Humidity を選択
-
右側の”Logged”をチェック
-
画面右端のチェックマークをクリック(隣はキャンセル)
-
同様にProp_Temperature もLogged をチェックし保存
-
“Save”をクリック
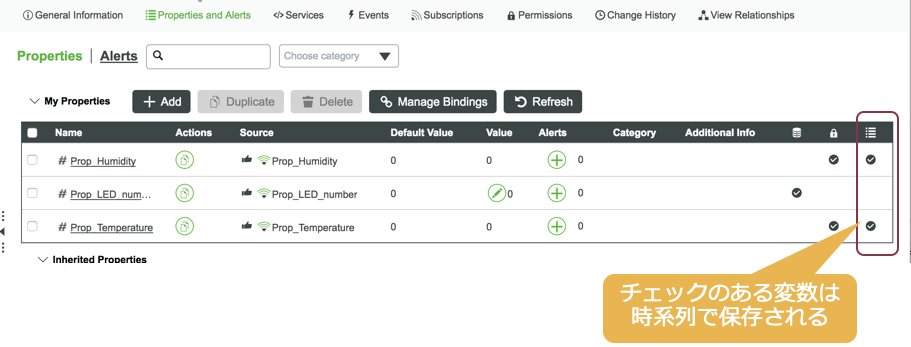
- 設定作業が正しければ、以下の表示になります
マッシュアップ画面への時系列データの表示追加
- raspPi_Mashup を選択し編集画面を開く
- Time Series Chart ウィジットを下段に配置

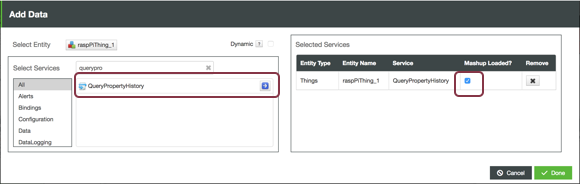
3. Things_raspPiThing_1 の右側の"+" をクリック
4. QueryPropertyHistory の"→" をクリック
5. Mashup Loaded? にチェックをいれて“Done” をクリック
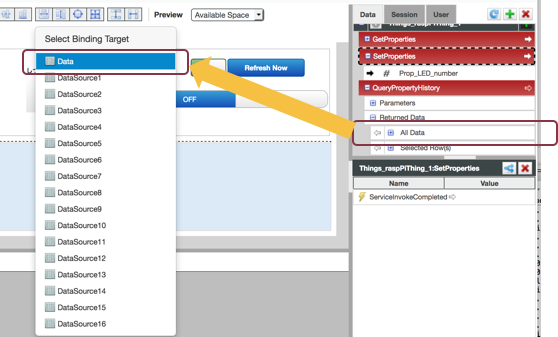
- QueryPropertyHistory のReturned Date 下の“All Data” アイテムをドラッグしたまま
Time Series Chart ウィジットでドロップ - バインド先は”Data” を選択
ウィジットの設定
-
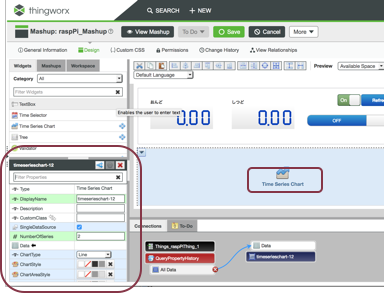
配置したTime Series Chart ウィジットを選択
-
左下のPropertyリストにて以下の項目を設定
NumberOfSeries: 2
XAxisField: timestamp
DataField1: Prop_Temperature
DataField2: Prop_Humidity
-
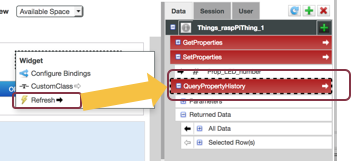
Auto Refresh ウィジットのRefresh イベントを
QueryPropertyHistory にドラッグ&ドロップで紐付ける
-
“Save”をクリック
3. 完成です
お疲れ様でした。マッシュアップを実行しましょう。
