2
1

Delete article

Deleted articles cannot be recovered.

Draft of this article would be also deleted.

Are you sure you want to delete this article?

More than 1 year has passed since last update.

RaspberryPiで構築したWebアプリ(Flask)を外部公開する

Last updated at Posted at 2023-05-18

本記事の背景

Flaskは以前の記事で簡単に構築することは可能だが、外出先からアクセスできなかった。
Flaskの構築
本記事は、Flaskで構築したサイトを外部に公開することを試みる
※本記事はルータを変更するため、設定を間違えるとネットワークが一時的に使えなくなる可能性があるため、
念のため、復旧する手順をご確認の上、行ってください。

外部公開

ローカルサイトを外部公開する方法はいろいろあるが、今回は最も簡単な方法でやってみる
NAT転送を設定する(外部のアクセスを内部アクセスへ転送する設定)
まずは、家庭内LANは以下のような構成と想定
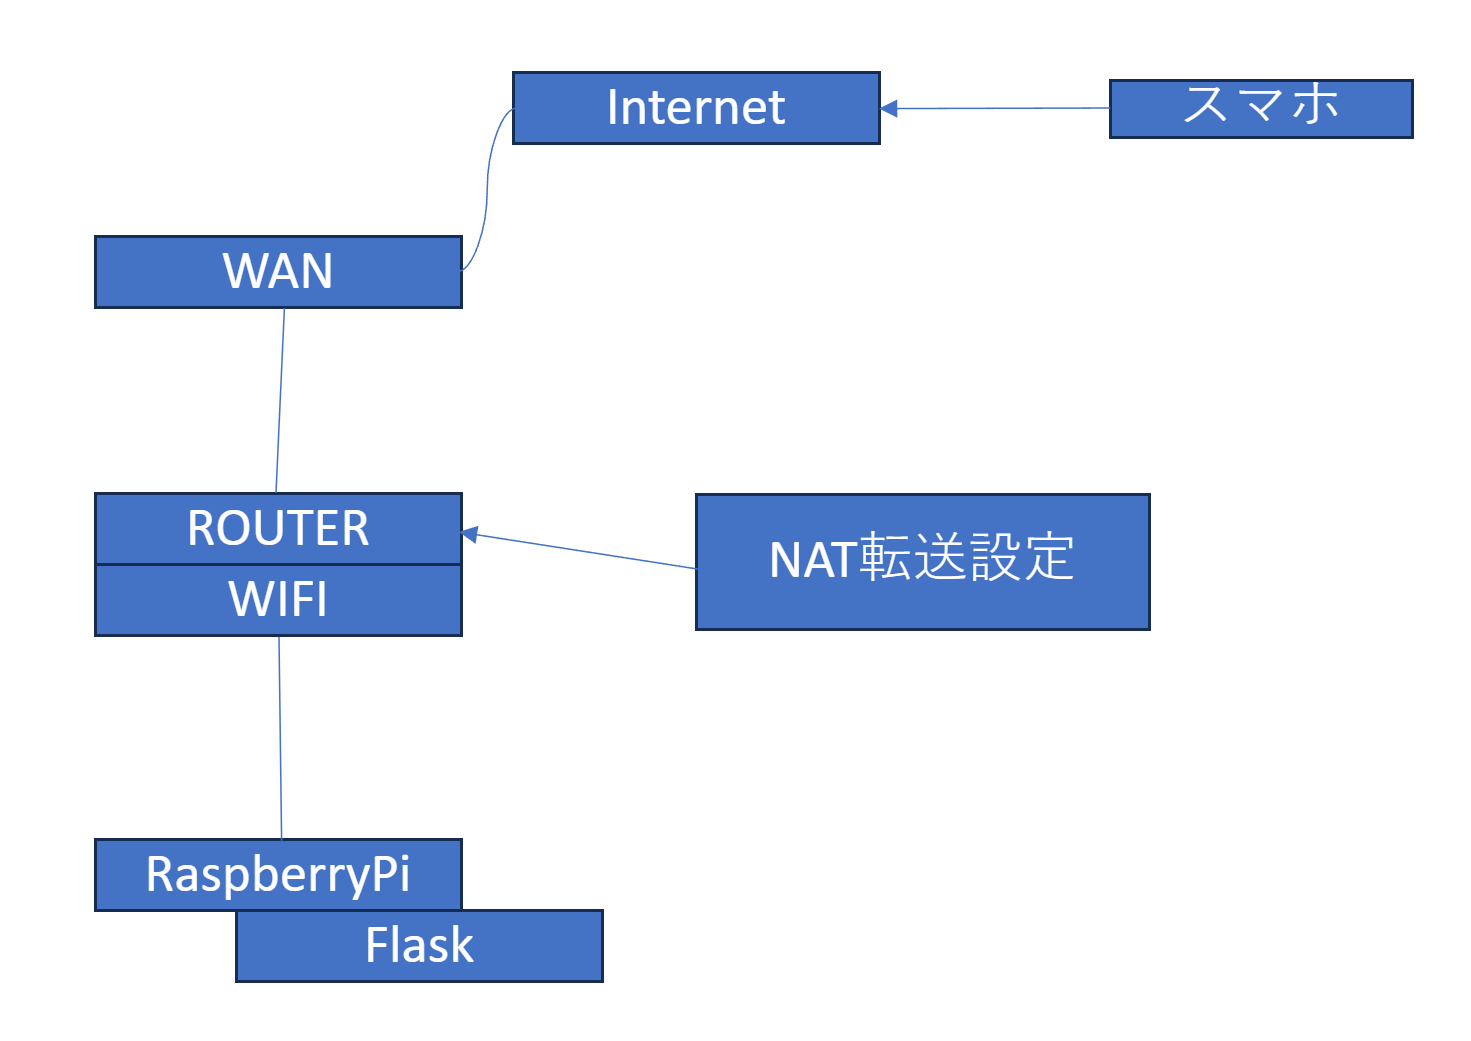
image.png
ルーターの種類によって若干呼び名が異なる
本設定はTP-Link

NAT設定

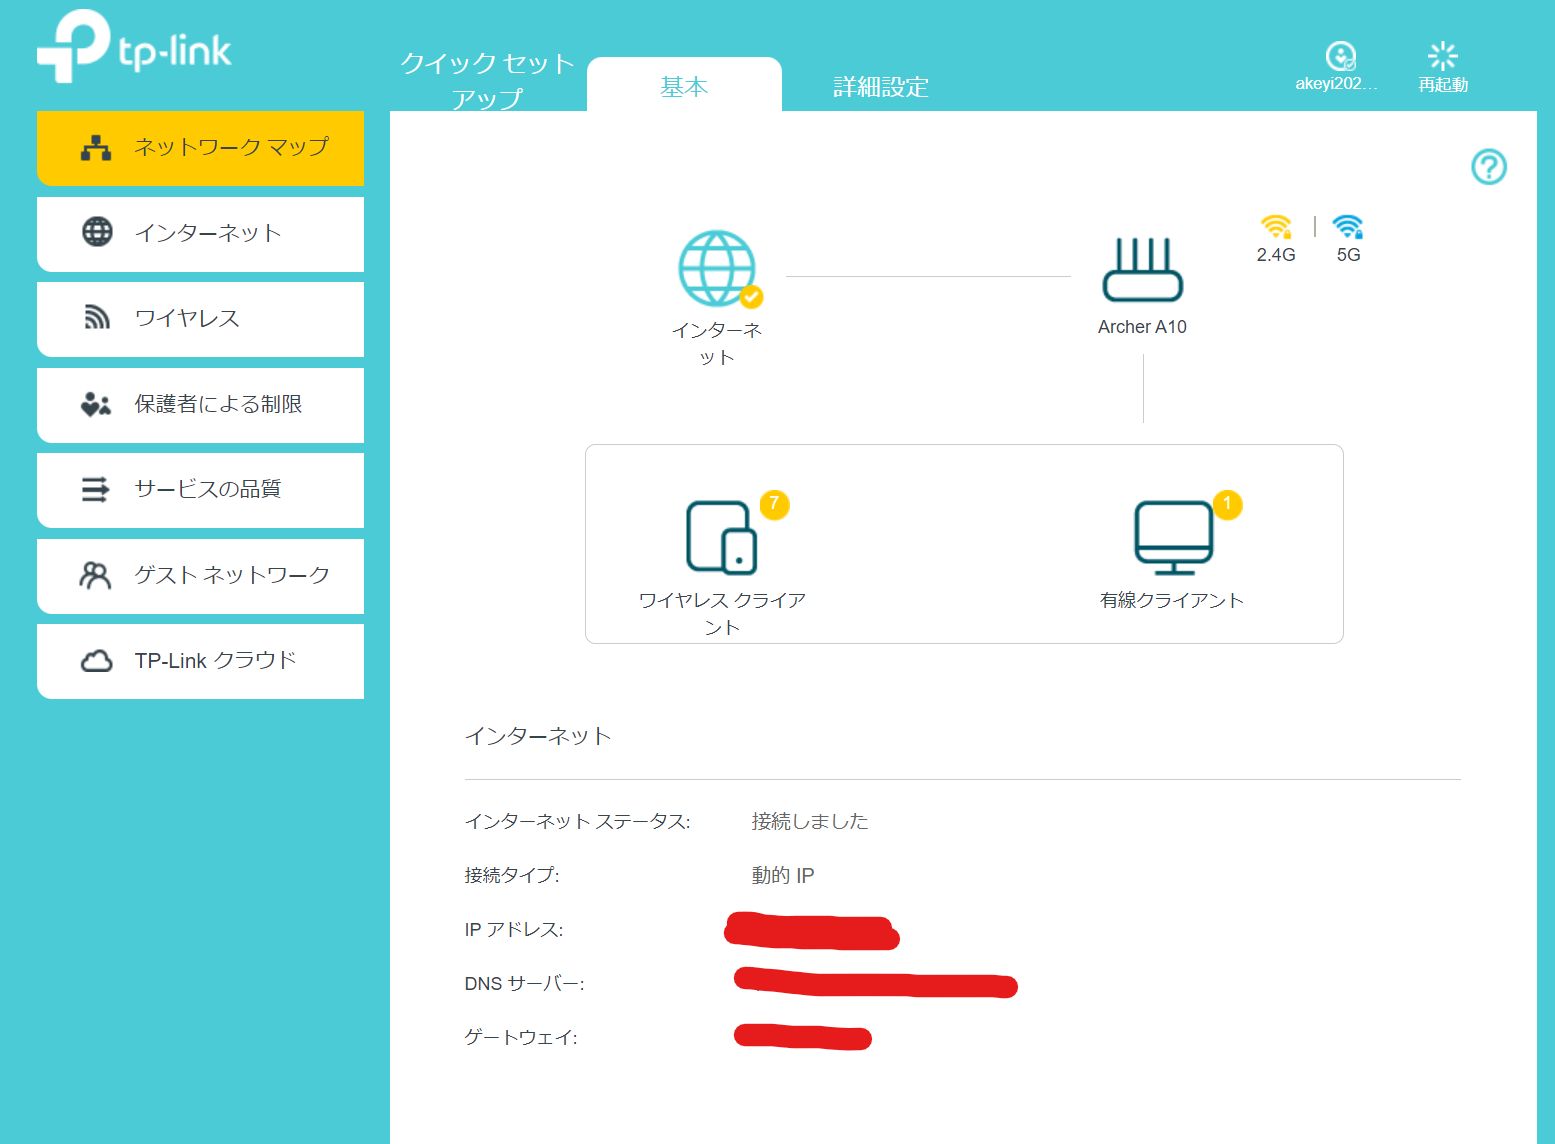
まずは、ルータにアクセスする(192.168.0.1)
image.png

1.IPアドレスをメモする(xxx.xxx.xxx.xxx)
2.仮想サーバーをクリックし、追加ボタンを押す
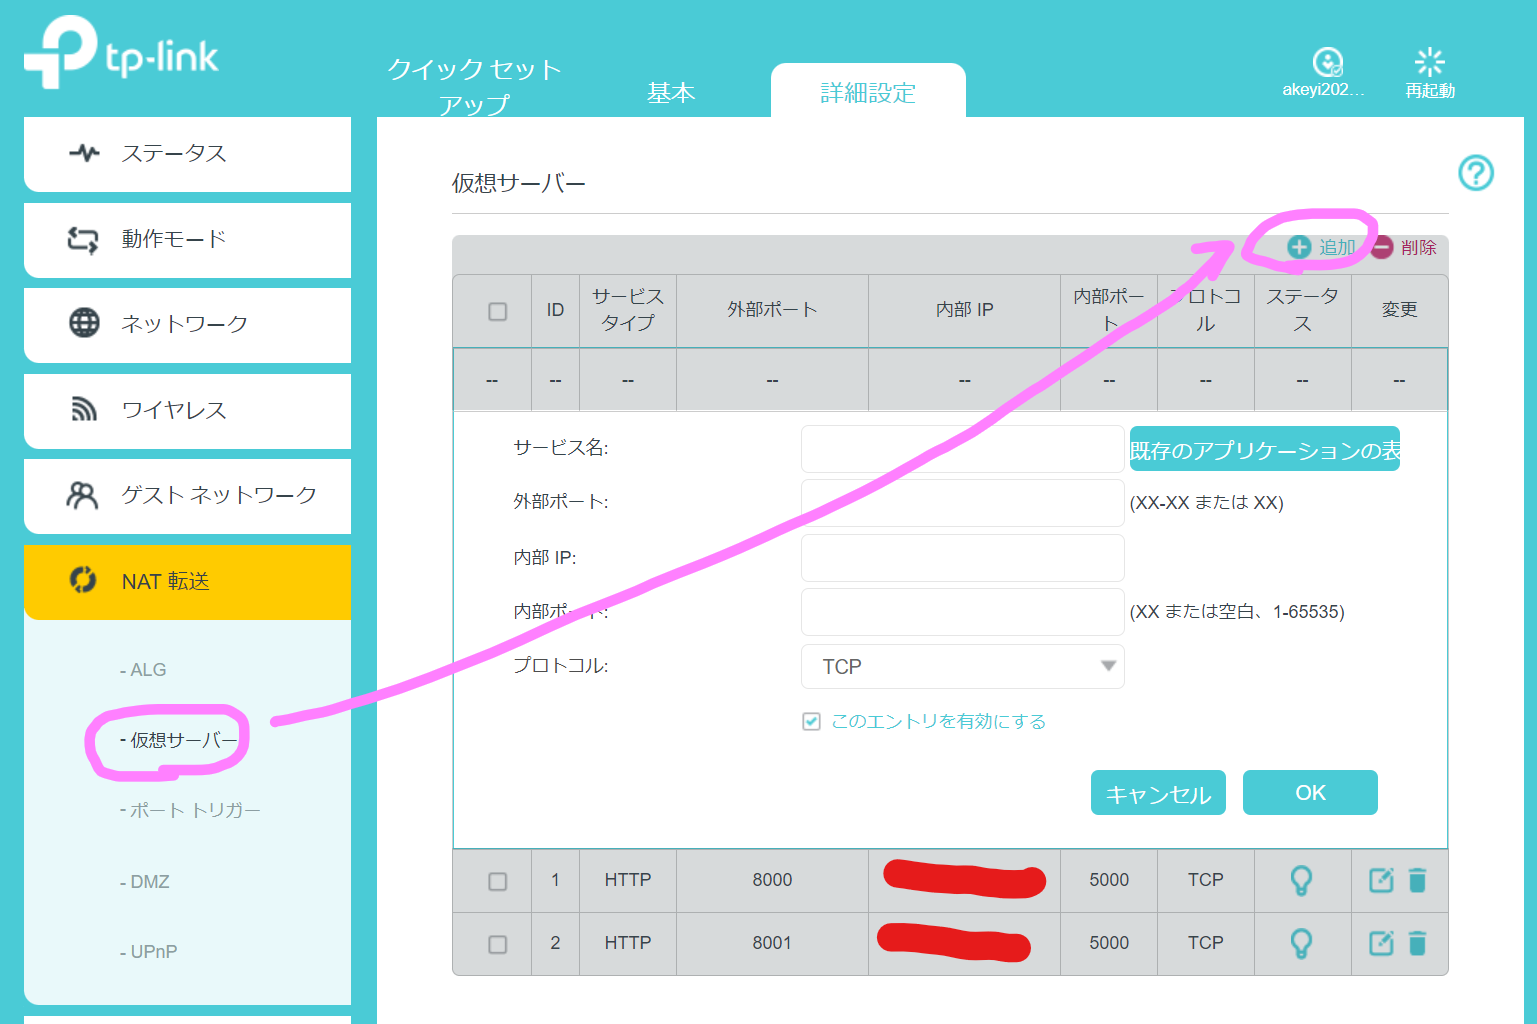
image.png
3.以下の項目を入れる
サービス名:HTTP
外部ポート:8080など
内部IP:RaspberryPiのIPアドレスを入力する
内部ポート:5000
プロトコル:TCP
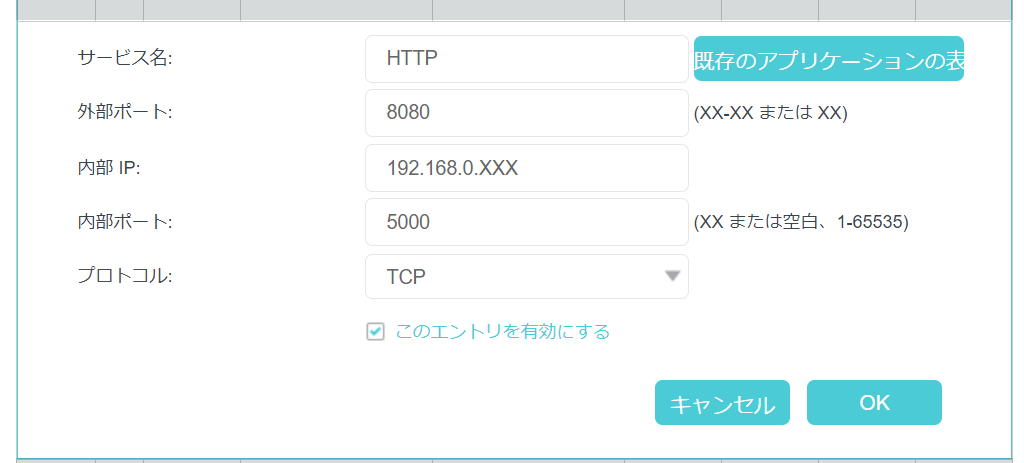
image.png
4.OKボタンを押す

Flask起動

5.RaspberryPiにログインし、Flaskアプリを起動する
image.png

サイト確認

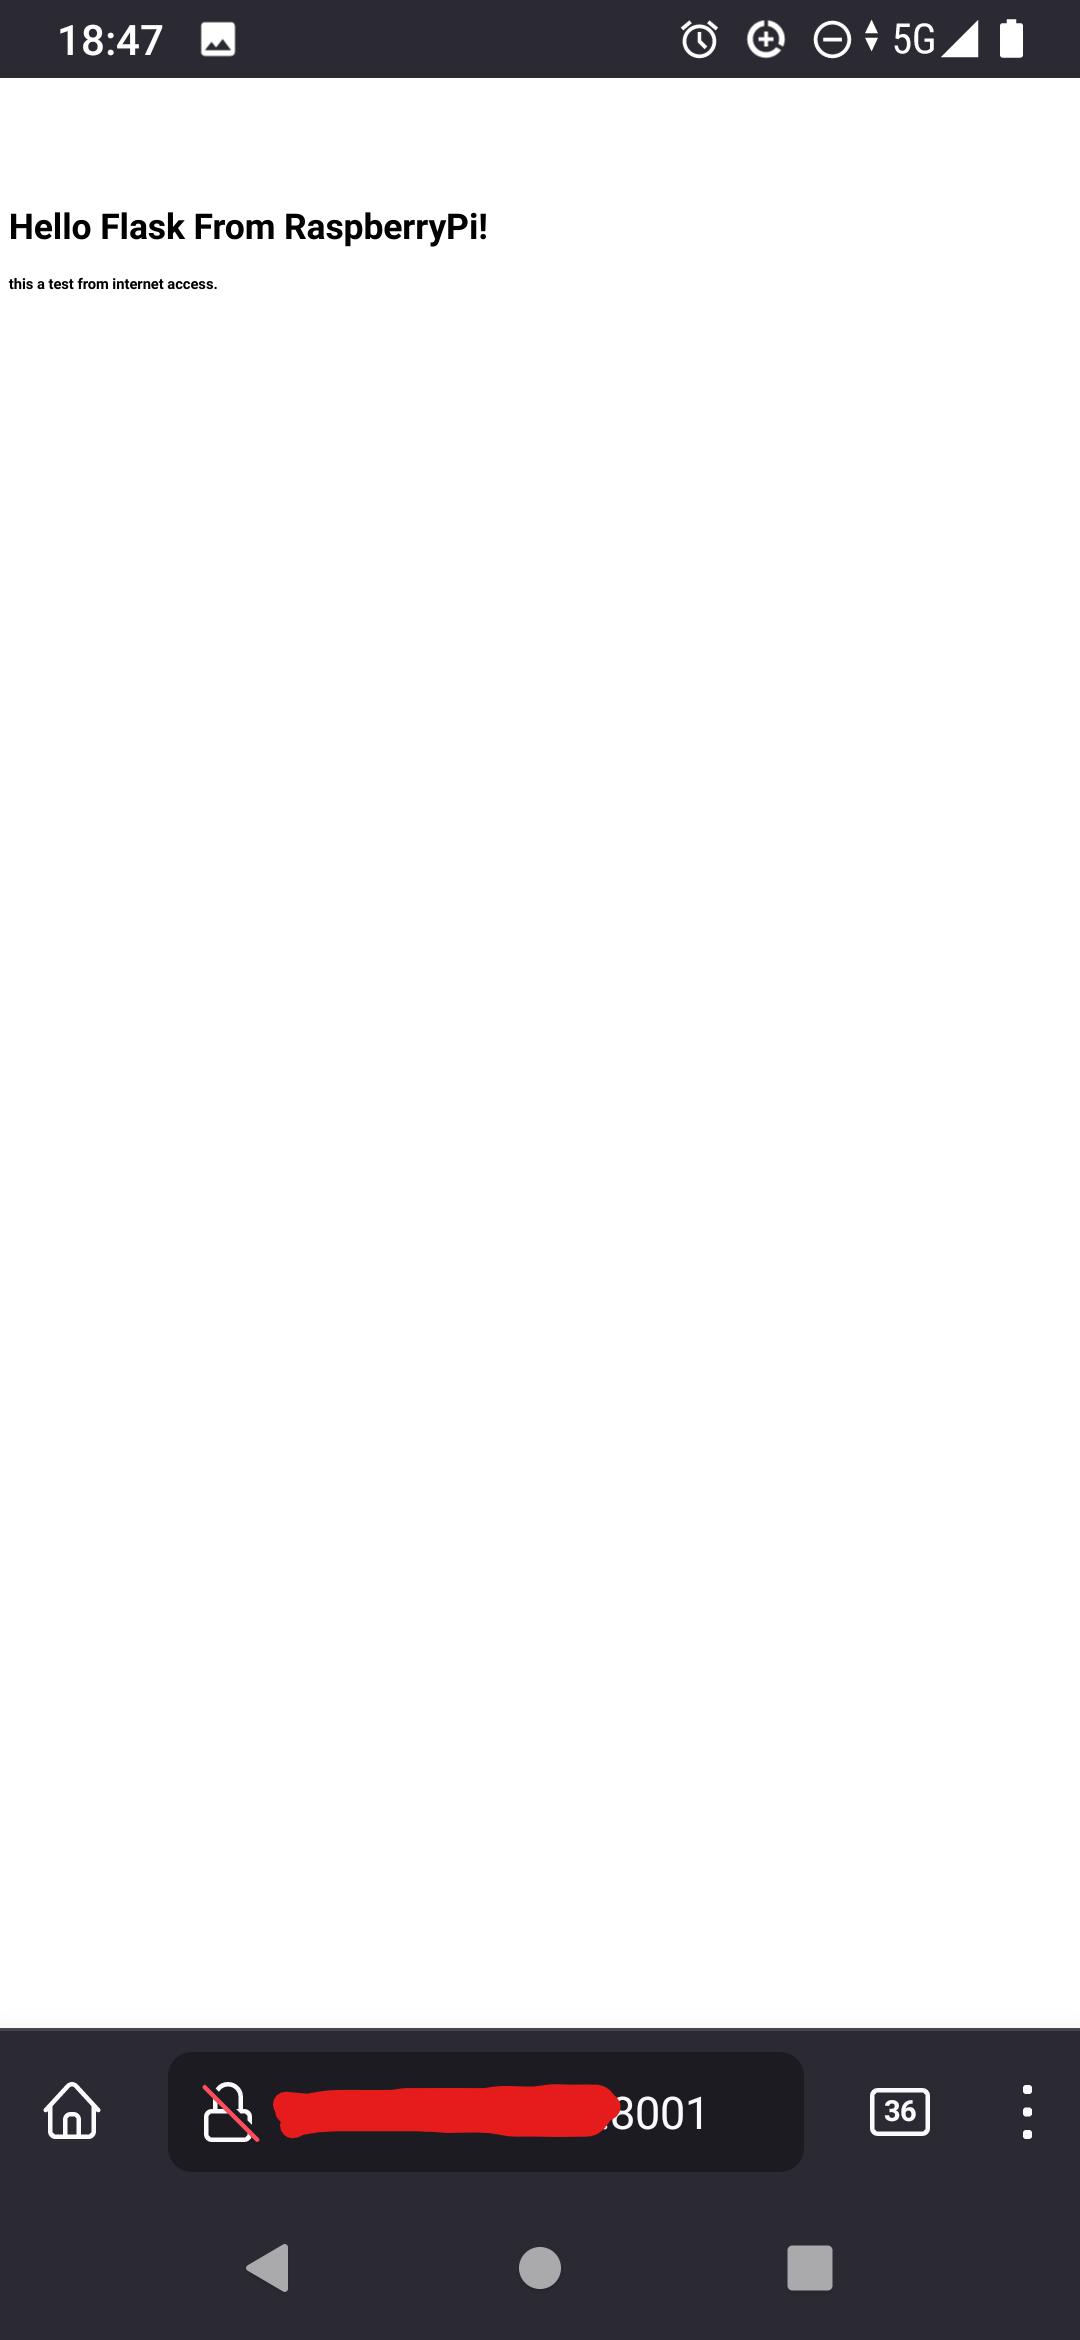
6.スマホにWIFIを切断し、外部アクセスしてみる、以下の画面が表示されたら、アクセスが成功
image.png

2
1
0

Register as a new user and use Qiita more conveniently

  1. You get articles that match your needs
  2. You can efficiently read back useful information
  3. You can use dark theme
What you can do with signing up
2
1

Delete article

Deleted articles cannot be recovered.

Draft of this article would be also deleted.

Are you sure you want to delete this article?