福岡から世界中の"むずかしい"を簡単にする株式会社diffeasyCTOの西@_takeshi_24です。
この記事はアドベントカレンダー「diffeasyCTO西の24(にし)日連続投稿チャレンジ Advent Calendar 2019」の2日目の記事です。
この記事は「Nuxt.jsとFirebaseとCloudFunctionsでWebアプリ開発」シリーズとして、連載していきます。
Nuxt.jsとFirebaseなどを使ってWebアプリケーション開発にチャレンジしたい方、是非Qiitaアカウントかtwitterをフォローしていただき、ツッコミやいいね!お願いします!
Nuxt.js
一昨年のアドベントカレンダーで書いたこちらの記事「Nuxt.js使ってみた」や去年のこちらの記事「Nuxt v2とFirebase(CloudFirestore)でPWA対応Webアプリ開発」がありがたいことに今でもたくさん見られていてます。
非常に嬉しいのですが、ちょっと情報も古くなってきて、VuexFireなども最近メンテナンスされていないようので、改めてNuxt.jsのインストールとFirebaseを使った基本的な開発について説明します。
Nuxt.jsをインストール
Nuxt.jsについてや、インストール手順など、公式サイトにかなり詳細なドキュメントがあります。
「create-nuxt-app」スターターテンプレートを使ってインストールします。
前回の記事ではパッケージ管理ソフトとしてnpmを使っていましたが、今回はnpmよりインストールが速いと言われているYarnを利用します。
node.jsやyarnのインストールはすでに完了している状態で説明をしていきますので、インストールがまだの方は、まずはそちらの手順もWeb上にありますので、そちらを参考にしてください。
1.nuxt-appでNuxt.jsのアプリを作成します。今回はnuxt-sampleという名前で作成します。
※後の手順でFirebaseをインストールするため、sampleディレクトリを作成し、sampleディレクトリの中で実行してください。
yarn create nuxt-app nuxt-sample
2.必要なパッケージソフトがインストールされます。
3.完了したらプロジェクト名を聞かれます。先ほど入力した「sample」がデフォルトで表示されているので、そのままエンターして進みます。
create-nuxt-app v2.12.0
✨  Generating Nuxt.js project in nuxt-sample
? Project name (nuxt-sample)
4.プロジェクトの説明、開発者名など入力していきます。
? Project name nuxt-sample
? Project description Nuxt sample project.
? Author name takeshi
5.利用するパッケージ管理ソフトを選択します。今回はYarnを利用します。
? Choose the package manager Yarn
6.利用するUIフレームワークを選択します。
? Choose UI framework
  None
  Ant Design Vue
  Bootstrap Vue
  Buefy
  Bulma
  Element
  Framevuerk
  iView
  Tachyons
  Tailwind CSS
❯ Vuetify.js
UIフレームワークは必須ではありませんが、必要に応じて利用してください。
今回は「Vuetify」を選択します。
7.利用するサーバーフレームワークを選択します。
? Choose custom server framework
❯ None (Recommended)
  AdonisJs
  Express
  Fastify
  Feathers
  hapi
  Koa
  Micro
今回サーバーサイドはCloudFunctionsやFirebaseを利用するので、サーバーフレームワークは利用しません。
8.必要なモジュールを選択します。スペースで複数選択可能です。
? Choose Nuxt.js modules (Press <space> to select, <a> to toggle all, <i> to inv
ert selection)
❯◯ Axios
 ◯ Progressive Web App (PWA) Support
 ◯ DotEnv
今回はPWAアプリとして作成するので、Progressive Web App (PWA) Supportを選択します。
環境変数の管理にDotEnvを使っても良いのですが、開発時と本番運用時に環境変数を変えたいので、今回はcross-envというパッケージを使います。
こちらの手順は次回の記事で説明します。
9.コードフォーマッターを選択します。
? Choose linting tools
❯◉ ESLint
 ◯ Prettier
 ◯ Lint staged files
 ◯ StyleLint
必要に応じて選択してください。ここでは、ESLintとPrettierを選択します。
10.テストフレームワークを選択します。
? Choose test framework
  None
❯ Jest
  AVA
Nuxt.jsではJestが利用されることが多いです。
11.SSR(サーバーサイドレンダリング)かSPA(Single Page App)を選択します。
? Choose rendering mode
  Universal (SSR)
❯ Single Page App
今回はSPAを選択します。
SSR、SPAなどについては、また後日改めて記事にしたいと思います。
12.今回私はVSCodeを利用して開発しているので、ES6で開発していることをVSCodeに認識させるためjsconfig.jsonを選択します。
? Choose development tools
❯◉ jsconfig.json (Recommended for VS Code)
13.ここまで選択すると、Yarnでパッケージがインストールされます。
🎉 Successfully created project sample
14.作成されたプロジェクトに移動し、プロジェクトを起動します。
$ cd nuxt-sample
$ yarn run dev

   ╭──────────────────────────────────────────╮
   │                                          │
   │   Nuxt.js v2.10.2                        │
   │   Running in development mode (spa)      │
   │                                          │
   │   Listening on: http://localhost:3000/   │
   │                                          │
   ╰──────────────────────────────────────────╯
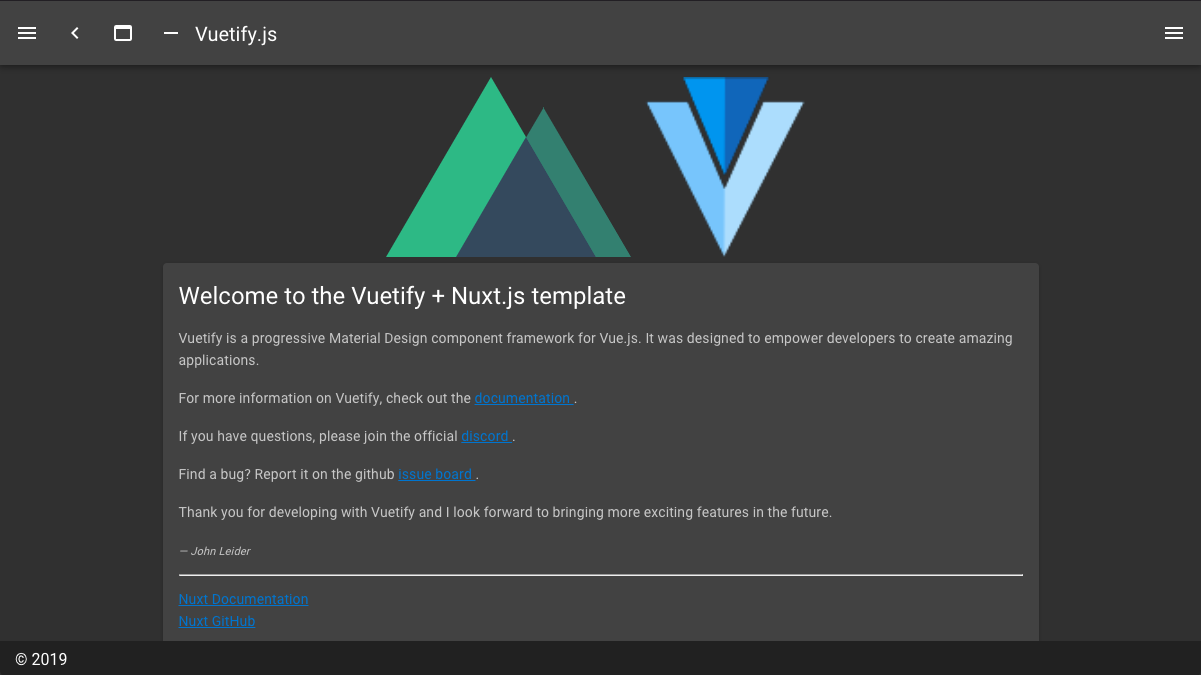
15.http://localhost:3000 にアクセスすると、Nuxt.jsの画面が表示されます。
16.次のFirebaseHostingの準備のため、SPAをジェネレートします。
yarn generate
17.distディレクトリにジェネレートしたNuxt.jsのアプリケーションが出力されます。
Firebase
Fireabseとは何か、については以前の記事「Nuxt v2とFirebase(CloudFirestore)でPWA対応Webアプリ開発」で紹介していますので、そちらをご覧ください。
Firebaseの準備
以降のコマンドは、先ほどのnuxt-sampleの1つ上のsampleディレクトリで実行します。
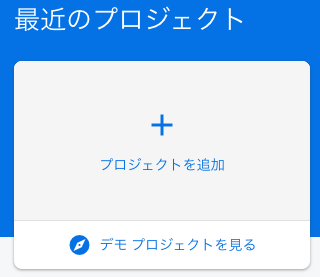
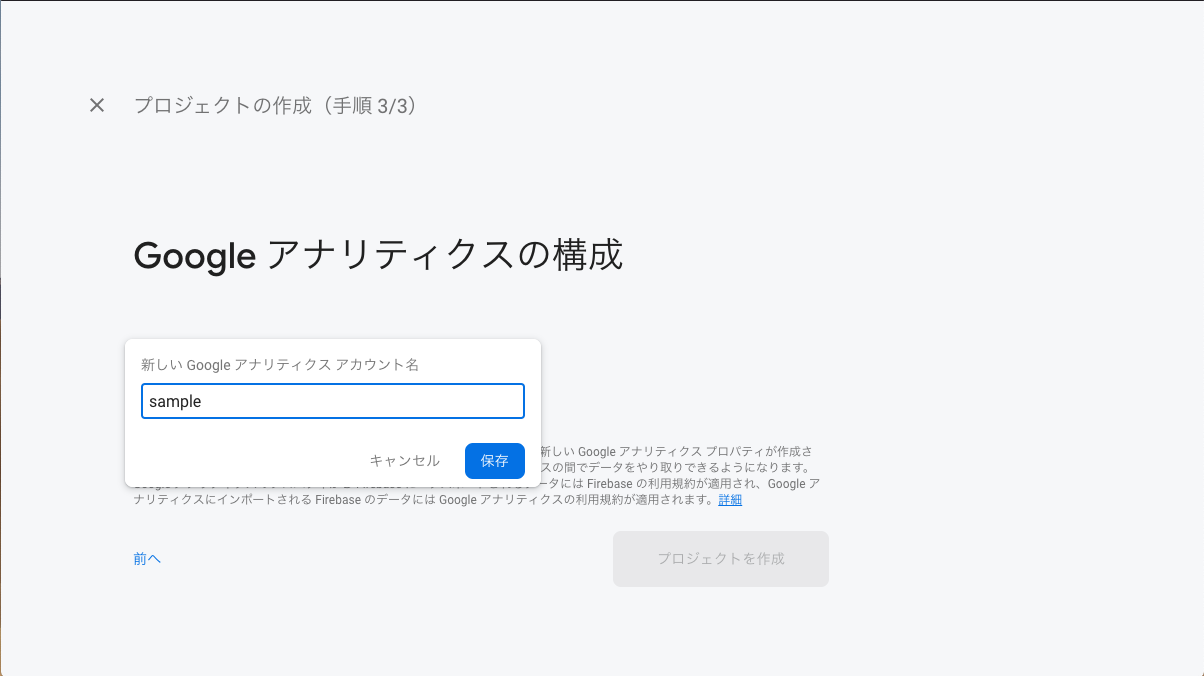
1.Firebaseコンソールから新規プロジェクトを作成します。
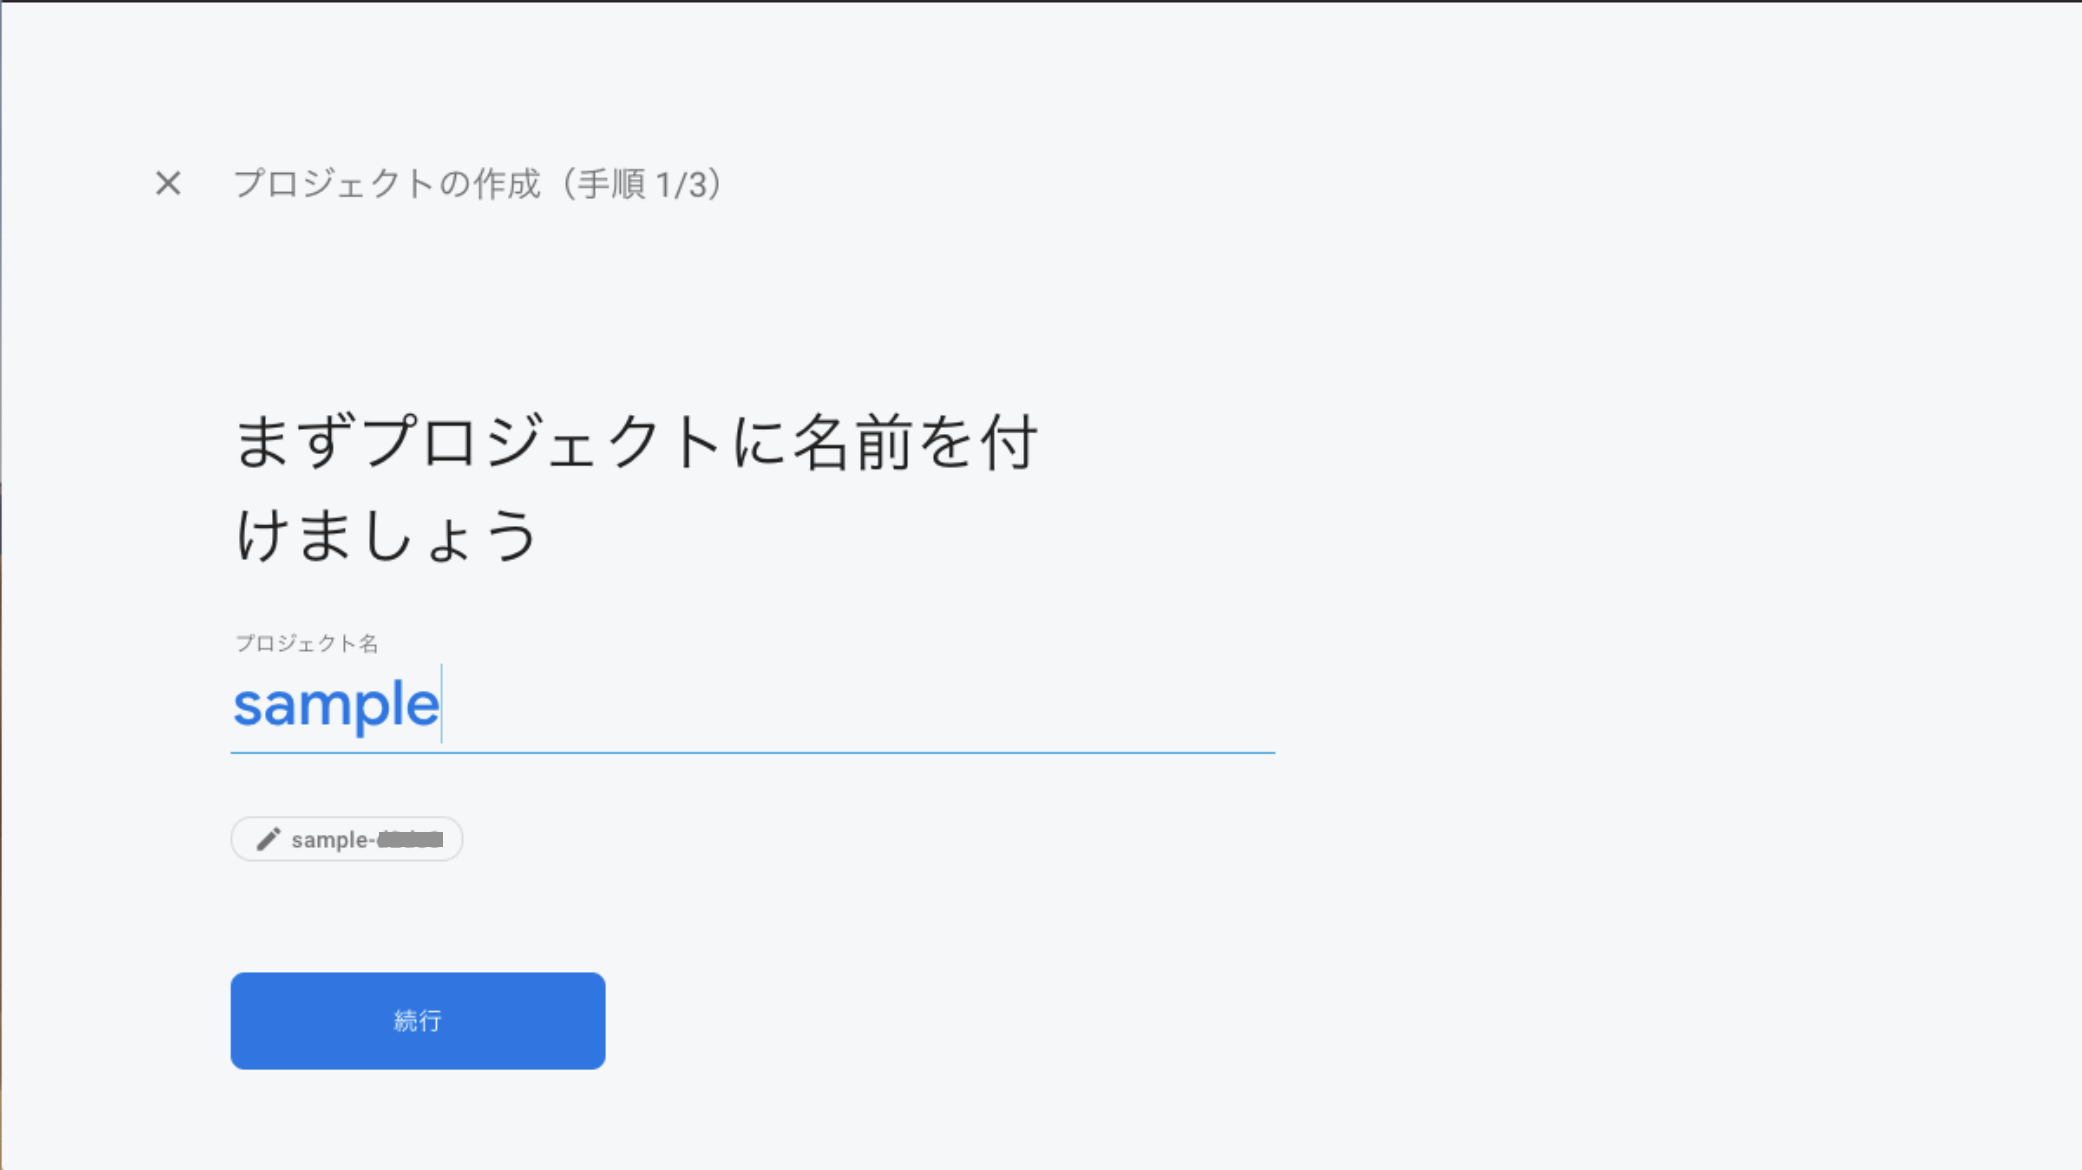
2.プロジェクト名を入力します。今回はFirebaseプロジェクトもsampleという名前で作成します。名前を入力すると、プロジェクトのIDが発行されます。
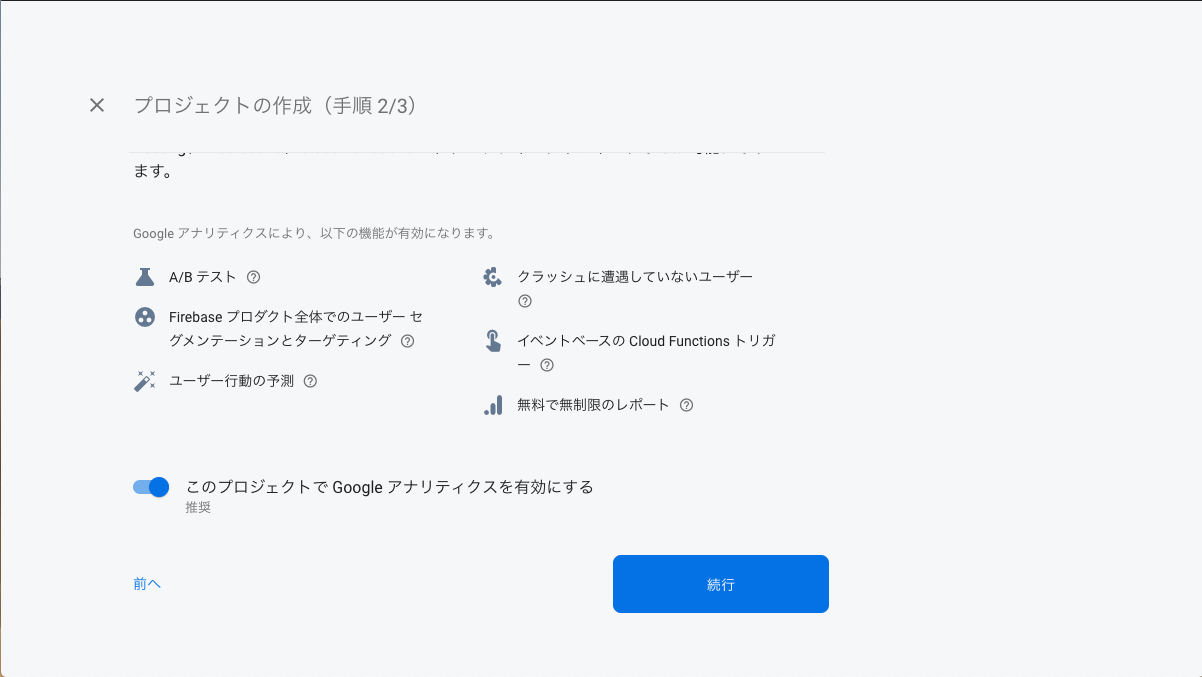
3.必要に応じてAnalyticsの設定をして、プロジェクト作成が完了します。
4.FirebaseコンソールのProjectOverview→全般でGoogle Cloud Platform(GCP)リソースロケーションを選択します。
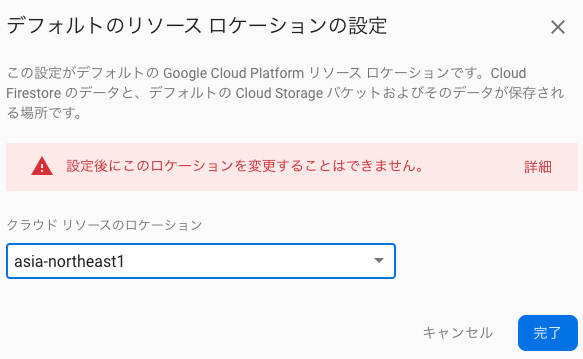
日本であれば、東京(asia-northeast1)または大阪(asia-northeast2)のリージョンを選ぶと良いでしょう。
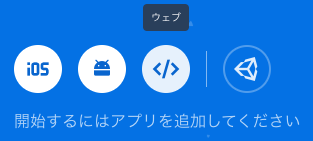
5.FirebaseWebアプリを作成します。FirebaseHostingも利用するので、FirebaseHostingのチェックもします。
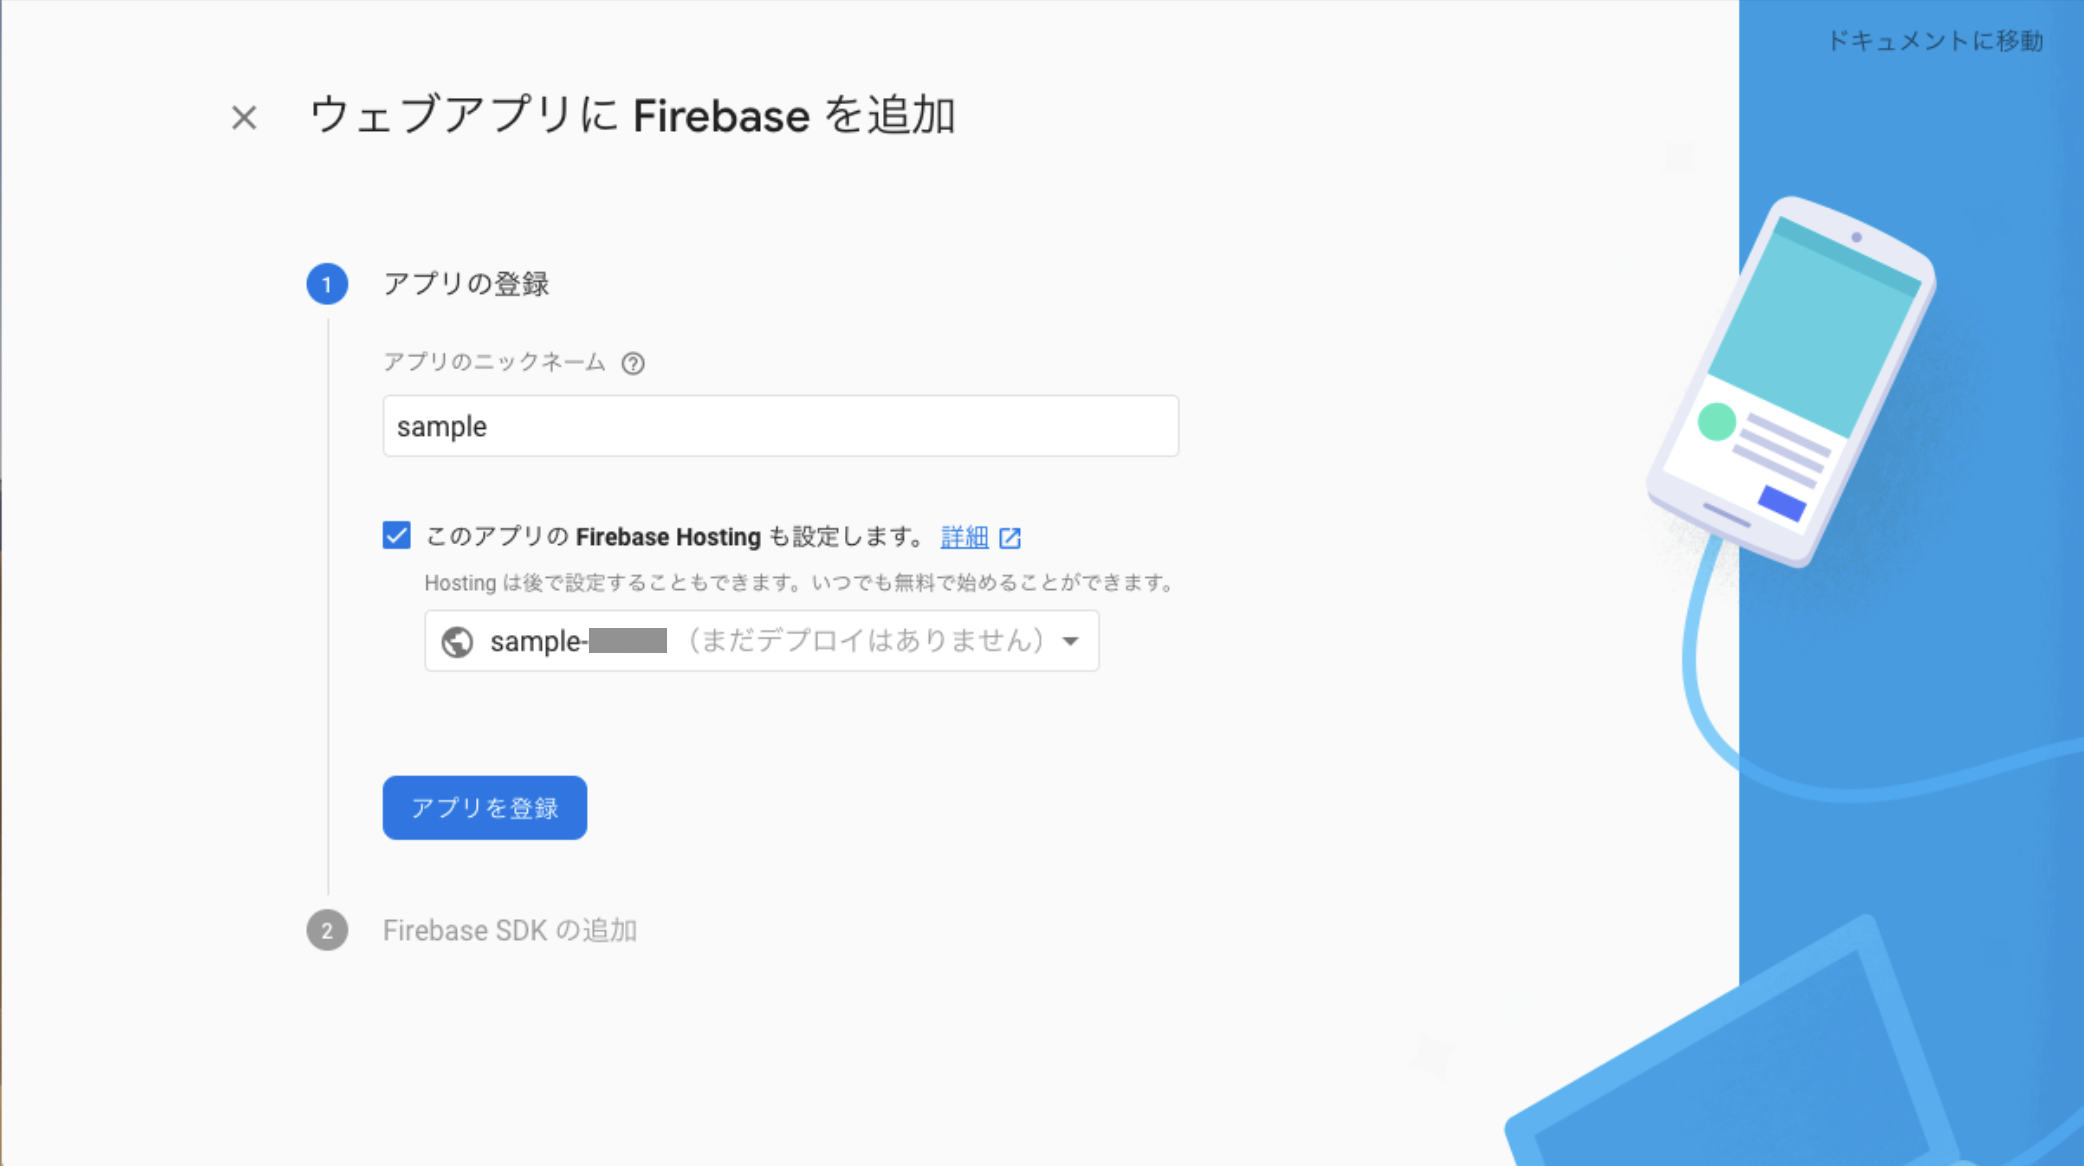
6.次のステップでFirebaseSDKのコードが表示されますが、今回はNuxt.jsと連携するので、利用しません。
7.次のステップでFirebaseToolsのインストール手順が表示されますが、ここではパッケージ管理にYarnを利用していますので、以下のコマンドでインストールします。
$ yarn global add firebase-tools
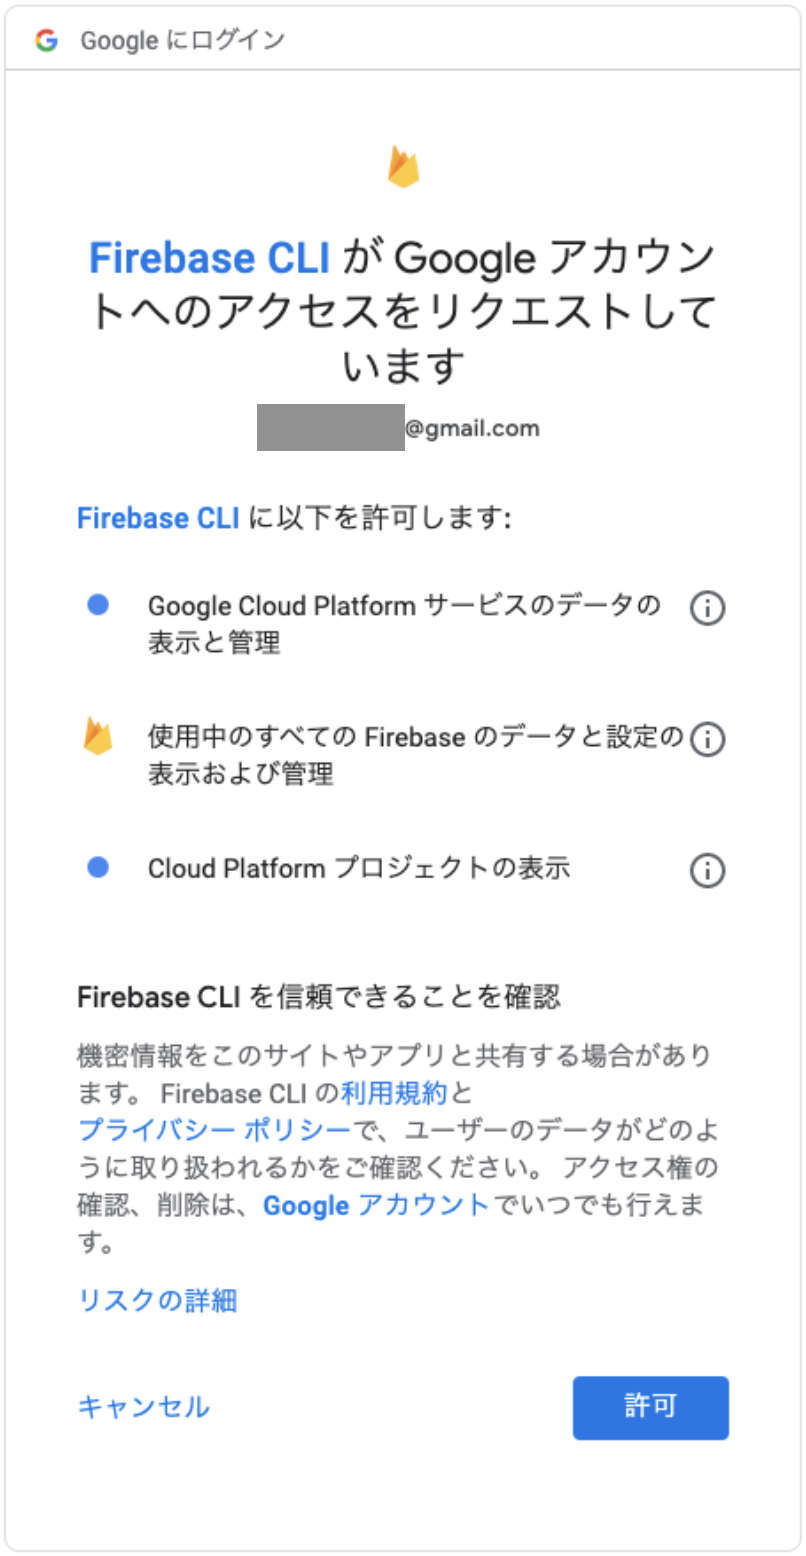
8.FirebaseToolsでログインします。
$ firebase login
9.アクセス権限のページが表示されますので、内容を確認して「許可」します。
10.Firebaseアプリケーションを初期化します。
$ firebase init
利用するサービスを選択します。
? Which Firebase CLI features do you want to set up for this folder? Press Space to select features, then Enter to confirm your choices.
 ◉ Database: Deploy Firebase Realtime Database Rules
 ◉ Firestore: Deploy rules and create indexes for Firestore
 ◉ Functions: Configure and deploy Cloud Functions
 ◉ Hosting: Configure and deploy Firebase Hosting sites
 ◉ Storage: Deploy Cloud Storage security rules
❯◉  Emulators: Set up local emulators for Firebase features
10.プロジェクトを選択します。先ほど作成したsampleプロジェクトを選択してください。
First, let's associate this project directory with a Firebase project.
You can create multiple project aliases by running firebase use --add,
but for now we'll just set up a default project.

? Please select an option: Use an existing project
? Select a default Firebase project for this directory: sample-xxxxx (sample)
11.Database、Firestore、Functionsの設定を聞かれますので、そのままエンターで進んでいきます。CloudFunctionsはJavaScriptを利用します。
=== Database Setup

Firebase Realtime Database Rules allow you to define how your data should be
structured and when your data can be read from and written to.

? What file should be used for Database Rules? database.rules.json
✔  Database Rules for sample-xxxxx have been downloaded to database.rules.json.
Future modifications to database.rules.json will update Database Rules when you run
firebase deploy.

=== Firestore Setup

Firestore Security Rules allow you to define how and when to allow
requests. You can keep these rules in your project directory
and publish them with firebase deploy.

? What file should be used for Firestore Rules? firestore.rules

Firestore indexes allow you to perform complex queries while
maintaining performance that scales with the size of the result
set. You can keep index definitions in your project directory
and publish them with firebase deploy.

? What file should be used for Firestore indexes? firestore.indexes.json

=== Functions Setup

A functions directory will be created in your project with a Node.js
package pre-configured. Functions can be deployed with firebase deploy.

? What language would you like to use to write Cloud Functions? JavaScript
12.ESLintを利用するか聞かれるので、利用する場合は、Yesを選択します。
パッケージのインストールはyarnを利用しますので、npmインストールはNoで進みます。
? Do you want to use ESLint to catch probable bugs and enforce style? Yes
✔  Wrote functions/package.json
✔  Wrote functions/.eslintrc.json
✔  Wrote functions/index.js
✔  Wrote functions/.gitignore
? Do you want to install dependencies with npm now? (Y/n) n
13.Hostingにデプロイするディレクトリを指定します。Nuxt.jsでジェネレートしたdistディレクトリを指定します。
? What do you want to use as your public directory? nuxt-sample/dist
14.SPAなので、index.htmlを見に行くようにします。index.htmlは上書きしないので、Noです。
? Configure as a single-page app (rewrite all urls to /index.html)? Yes
? File nuxt-sample/dist/index.html already exists. Overwrite? No
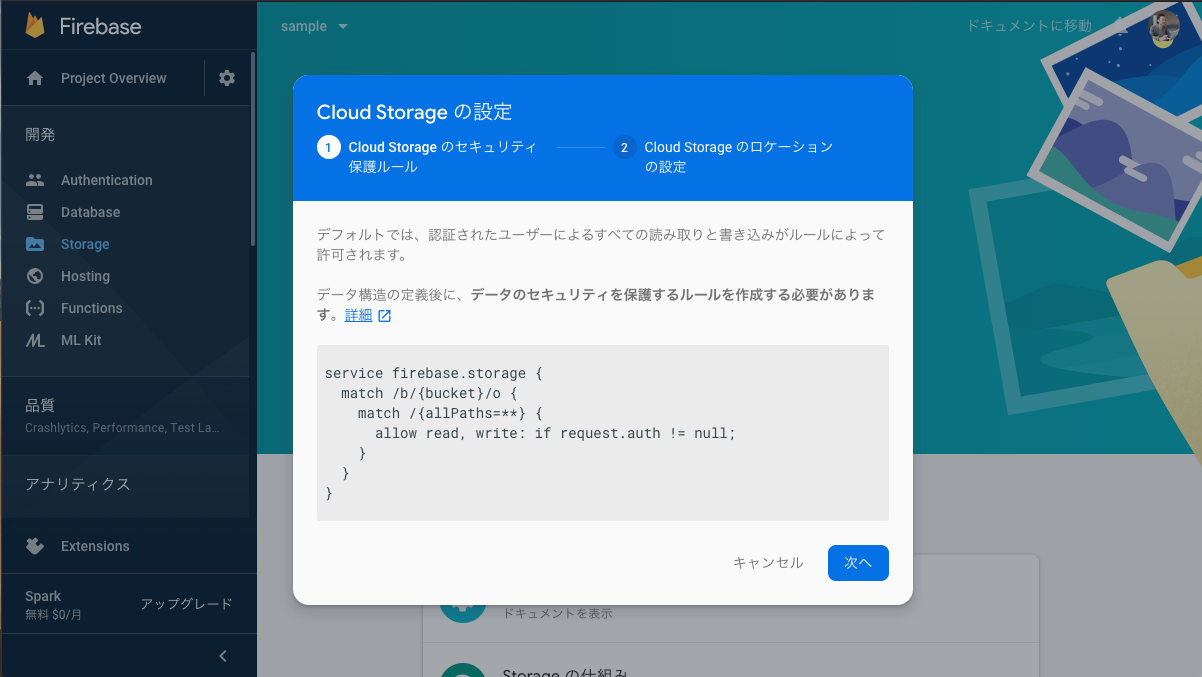
15.StorageRulesについてはそのままエンターで進みます。
? What file should be used for Storage Rules? storage.rules
16.エミュレータを設定します。Pubsub以外のサービスを選択します。
=== Emulators Setup
? Which Firebase emulators do you want to set up? Press Space to select emulators, then Enter to confirm your choices.
 ◉ Functions
 ◉ Firestore
 ◉ Database
❯◉ Hosting
 ◯ Pubsub
17.エミュレーターのポートは特に問題なければデフォルトのまま次に進みます。
? Which port do you want to use for the functions emulator? 5001
? Which port do you want to use for the firestore emulator? 8080
? Which port do you want to use for the database emulator? 9000
? Which port do you want to use for the hosting emulator? 5000
? Would you like to download the emulators now? Yes

18.作成されたfunctionsディレクトリに移動して、Yarnでパッケージをインストールします。

```terminal
$ cd functions
$ yarn install
19.Firebaseコンソールで、Database(Firestore, RealtimeDatabase)、Storageのページを開き、初期化します。

20.firebaseにデプロイします。(firebase.jsonファイルのディレクトリで実行)
$ firebase deploy
  functions: Finished running predeploy script.
i  database: checking rules syntax...
✔  database: rules syntax for database sample-xxxxx is valid
i  firebase.storage: checking storage.rules for compilation errors...
✔  firebase.storage: rules file storage.rules compiled successfully
i  firestore: reading indexes from firestore.indexes.json...
i  cloud.firestore: checking firestore.rules for compilation errors...
✔  cloud.firestore: rules file firestore.rules compiled successfully
i  functions: ensuring necessary APIs are enabled...
✔  functions: all necessary APIs are enabled
i  storage: uploading rules storage.rules...
✔  firestore: deployed indexes in firestore.indexes.json successfully
i  firestore: uploading rules firestore.rules...
i  functions: preparing functions directory for uploading...
i  hosting[sample-xxxxx]: beginning deploy...
i  hosting[sample-xxxxx]: found 25 files in nuxt-sample/dist
✔  hosting[sample-xxxxx]: file upload complete
i  database: releasing rules...
✔  database: rules for database sample-xxxxx released successfully
✔  storage: released rules storage.rules to firebase.storage
✔  firestore: released rules firestore.rules to cloud.firestore
i  hosting[sample-xxxxx]: finalizing version...
✔  hosting[sample-xxxxx]: version finalized
i  hosting[sample-xxxxx]: releasing new version...
✔  hosting[sample-xxxxx]: release complete

✔  Deploy complete!
21.最後にHostingのURLが表示されるので、ページを開いて、先ほどと同じNuxt.jsのページが表示されたら完了です。
まとめ
長くなりましたが、以上でNuxt.jsとFirebaseのWebアプリ開発の準備完了です。
この記事は「Nuxt.jsとFirebaseとCloudFunctionsでWebアプリ開発」シリーズとして、連載していきます。
続きはアドベントカレンダー「diffeasyCTO西の24(にし)日連続投稿チャレンジ Advent Calendar 2019」に掲載していきます。
今後は、以下のような記事を公開していく予定です。
- Nuxt.jsとFirebaseAuthentication/FirebaseUIで認証
- Nuxt.jsとFirebase RealtimeDatabase CloudFirestore でBaas開発入門
- Nuxt.jsとCloudFunctionsでサーバーレスアプリ開発入門編
- CloudFunctionsからCloudSQLに接続
- FirebaseRealtimeDatabaseとCloudFirestoreにおけるトランザクション処理
- Nuxt.jsアプリにFirebase Cloud Messagingでプッシュ通知
- FirebaseのRealtimeDatabase/FirestoreをトリガーにFunctions実行
Nuxt.jsとFirebaseなどを使ってWebアプリケーション開発にチャレンジしたい方、是非Qiitaアカウントかtwitterをフォローしていただき、ツッコミやいいね!お願いします!
#advent_24のハッシュタグでフィードバックいただけると嬉しいです!