これ is 何?
これは、BigQuery Advent Calendar 2021の8日目の記事です。
最近までデータ基盤構築の業務に携わり、データウェアハウスとしてBigQueryを活用しましたので、その基本的な使い方を紹介します。
目次
- これ is 何?
- そもそもデータ基盤って?
- BigQueryの活用
- BigQueryの基本操作
- Cloud Functionsを使ったGCSからのバルクロード
- データポータルとの連携
- 最後に
そもそもデータ基盤って?
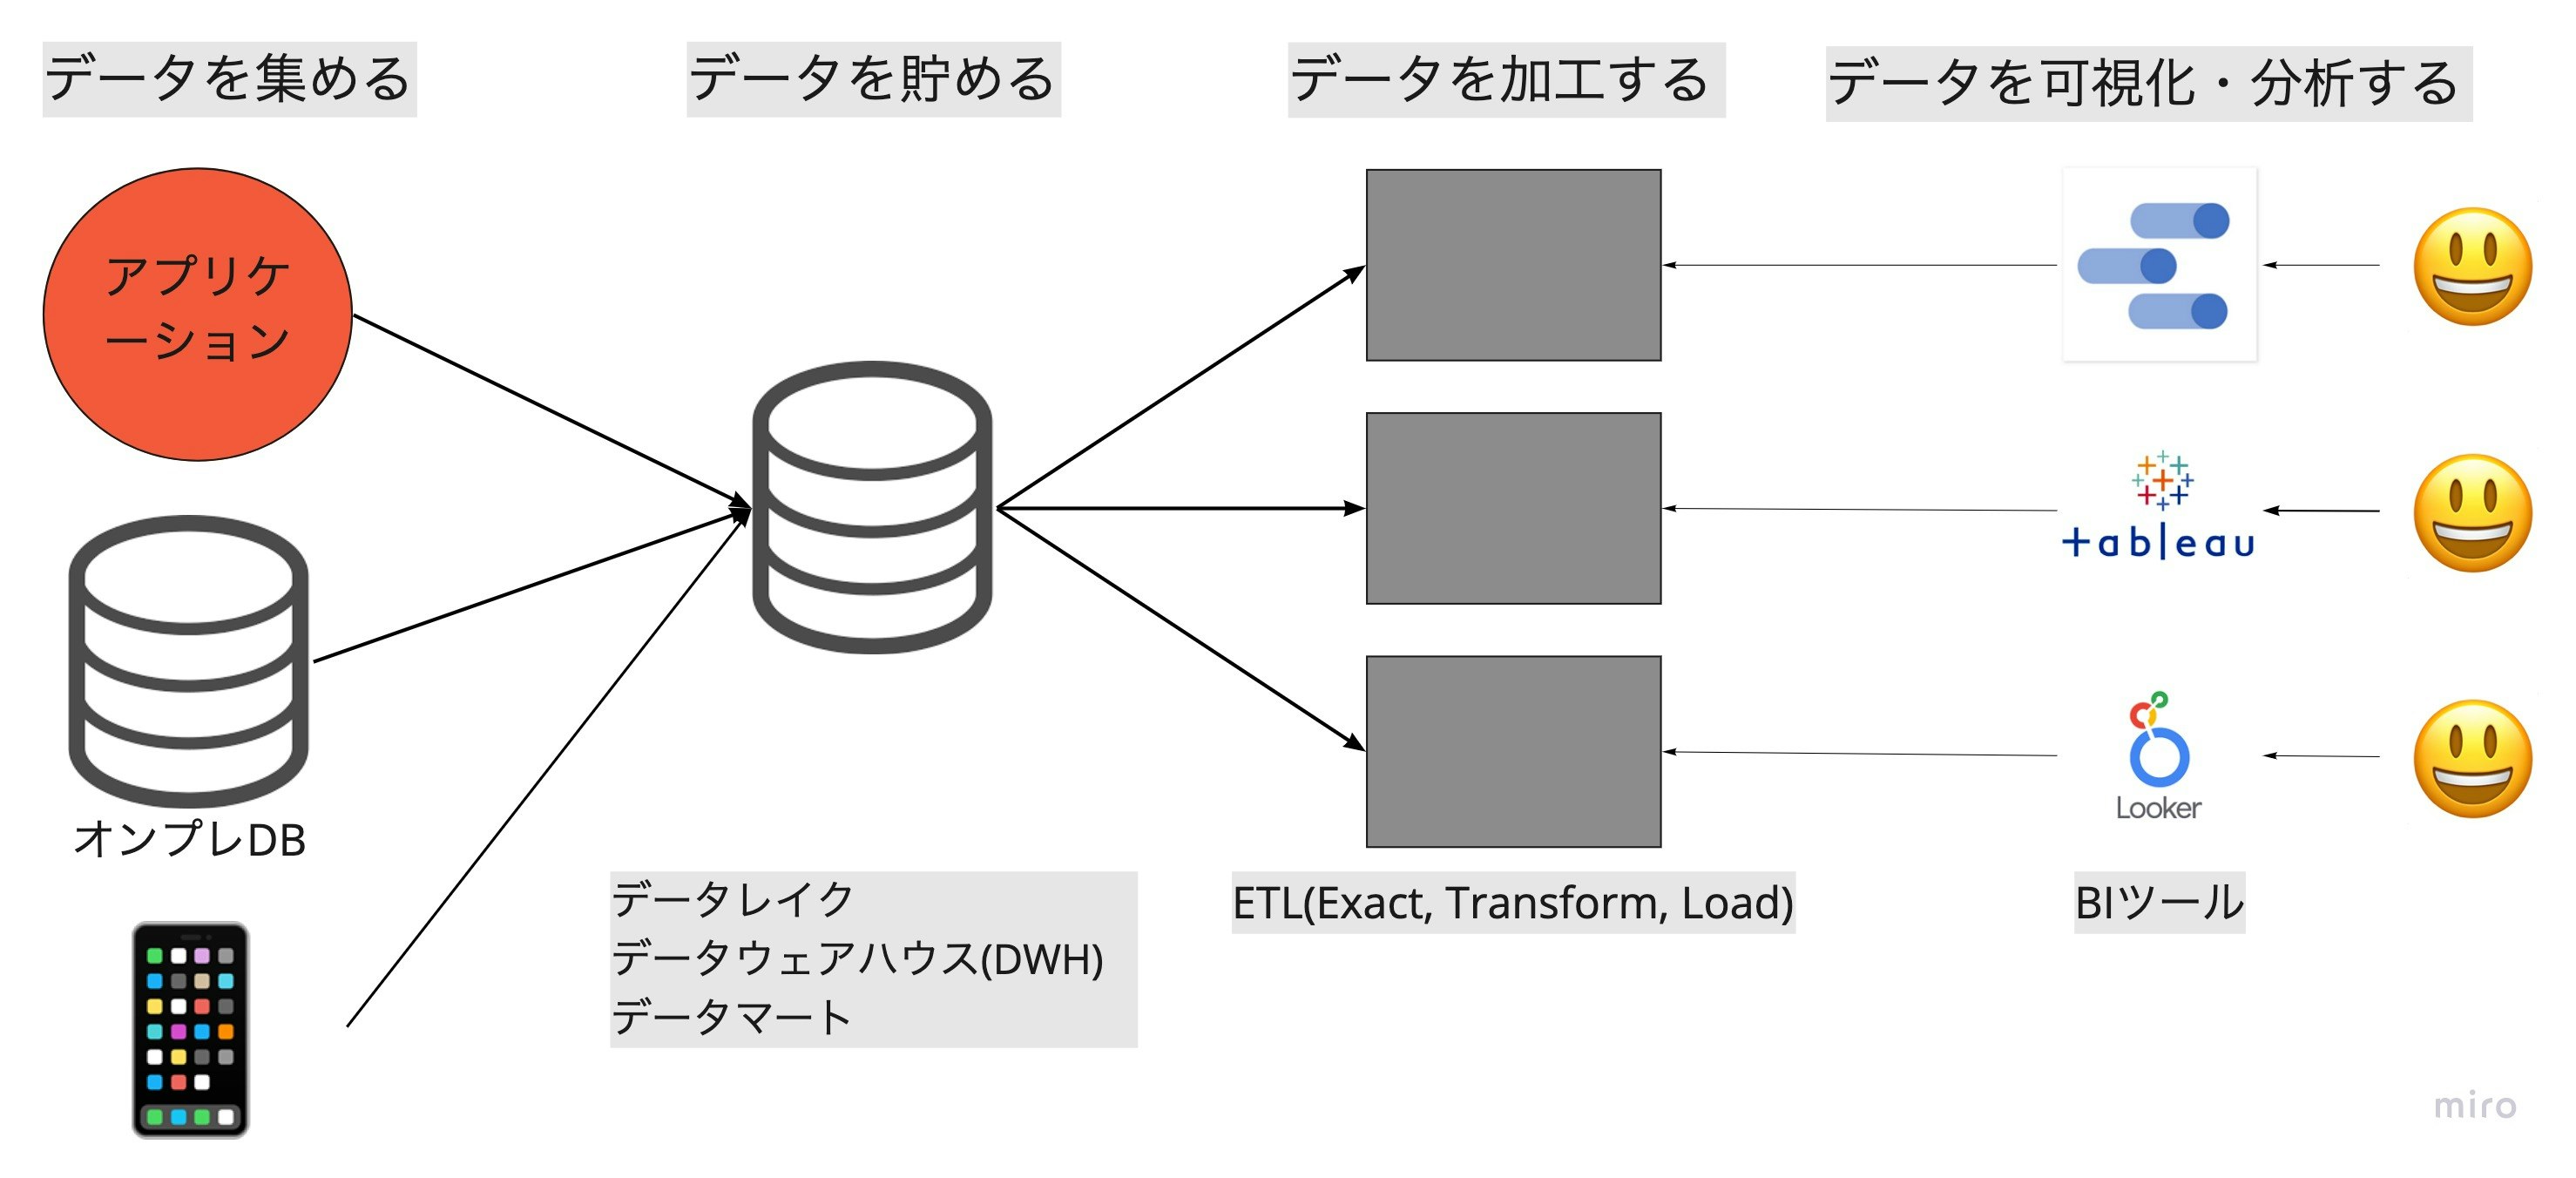
データを蓄積、加工、可視化・分析を一貫して出来るようにするための基盤のことであり、営業やマーケター、機械学習エンジニアなどの分析者がデータを利活用できるようにするために使われる。
データ基盤は下図のように、「データを集める」、「データを貯める」、「データを加工する」、「データを可視化・分析する」の4つの構成要素から成る。ここでは、BigQueryをデータを貯めるためのデータウェアハウスとして使っている。
BigQueryの活用
BigQueryの基本操作
BigQueryでの基本操作として下記の3つが挙げられます
- 他のサービスからデータをロード
- BigQuery内でSQLコマンドをうつ
- 他のサービスにデータをエクスポートする
SQLコマンドの解説については公式ドキュメントに譲って、ロードとエクスポートを見ていきます。
https://cloud.google.com/bigquery/docs/reference/standard-sql/lexical
Cloud Functionsを使ったGCSからのバルクロード
BigQueryにデータを入れる方法として、GCPのConsole画面から手動でデータを入れるものと、APIや言語別に用意されたライブラリを使って自動で行うものがありますが、データ基盤のワークフローはすべて自動で行われることが条件ですので後者の方法を見ていきます。
下記は、Cloud Functionsを使ってGCSにあるcsvファイルをBigQueryにロードするコードの一例です。
<?php
require 'vendor/autoload.php';

use Psr\Http\Message\ServerRequestInterface;
use Psr\Http\Message\ResponseInterface;
use GuzzleHttp\Psr7\Response;
use Google\Cloud\Storage\StorageClient;
use Google\Cloud\BigQuery\BigQueryClient;
use Google\Cloud\Core\ExponentialBackoff;

function loadData(ServerRequestInterface $request)
{
    // プロジェクトID および、データセットIDをセット
    $projectId  = 'my-project-id';
    $datasetId  = 'my-dataset-id';
    $bigQuery = new BigQueryClient([
        'projectId' => $projectId,
    ]);
    $dataset = $bigQuery->dataset($datasetId);
    // テーブル名をセット
    $table = $dataset->table('my-table');

    // create the import job
    $gcsUri = 'gs://{target-bucket-name}/{target-object-name}';
    // 1行目がheaderのcsvファイルの場合はskipLeadingRows(1)でheaderを読み込ませないようにする
    $loadConfig = $table->loadFromStorage($gcsUri)->skipLeadingRows(1);
    $job = $table->runJob($loadConfig);
    // poll the job until it is complete
    $backoff = new ExponentialBackoff(10);
    $backoff->execute(function () use ($job) {
        $job->reload();
        if (!$job->isComplete()) {
            return json_encode([
                'success' => false,
                'code' => 500,
                'message' => 'Job has not yet completed',
            ]);
        }
    });
    // check if the job has errors
    if (isset($job->info()['status']['errorResult'])) {
        $error = $job->info()['status']['errorResult']['message'];
        return json_encode([
            'success' => false,
            'code' => 500,
            'message' => 'Error running job: ' . $error,
        ]);
    }

    return json_encode([
        'success' => true,
        'code' => 200,
        'message' => 'Successfully loaded from GCS to BigQuery.',
    ]);
}
{
    "require": {
        "google/cloud": "^0.99.0",
        "guzzlehttp/guzzle": "^5.3|^6.0"
    }
}
簡単なコードでロードができちゃいます!素晴らしいですね!
データポータルとの連携
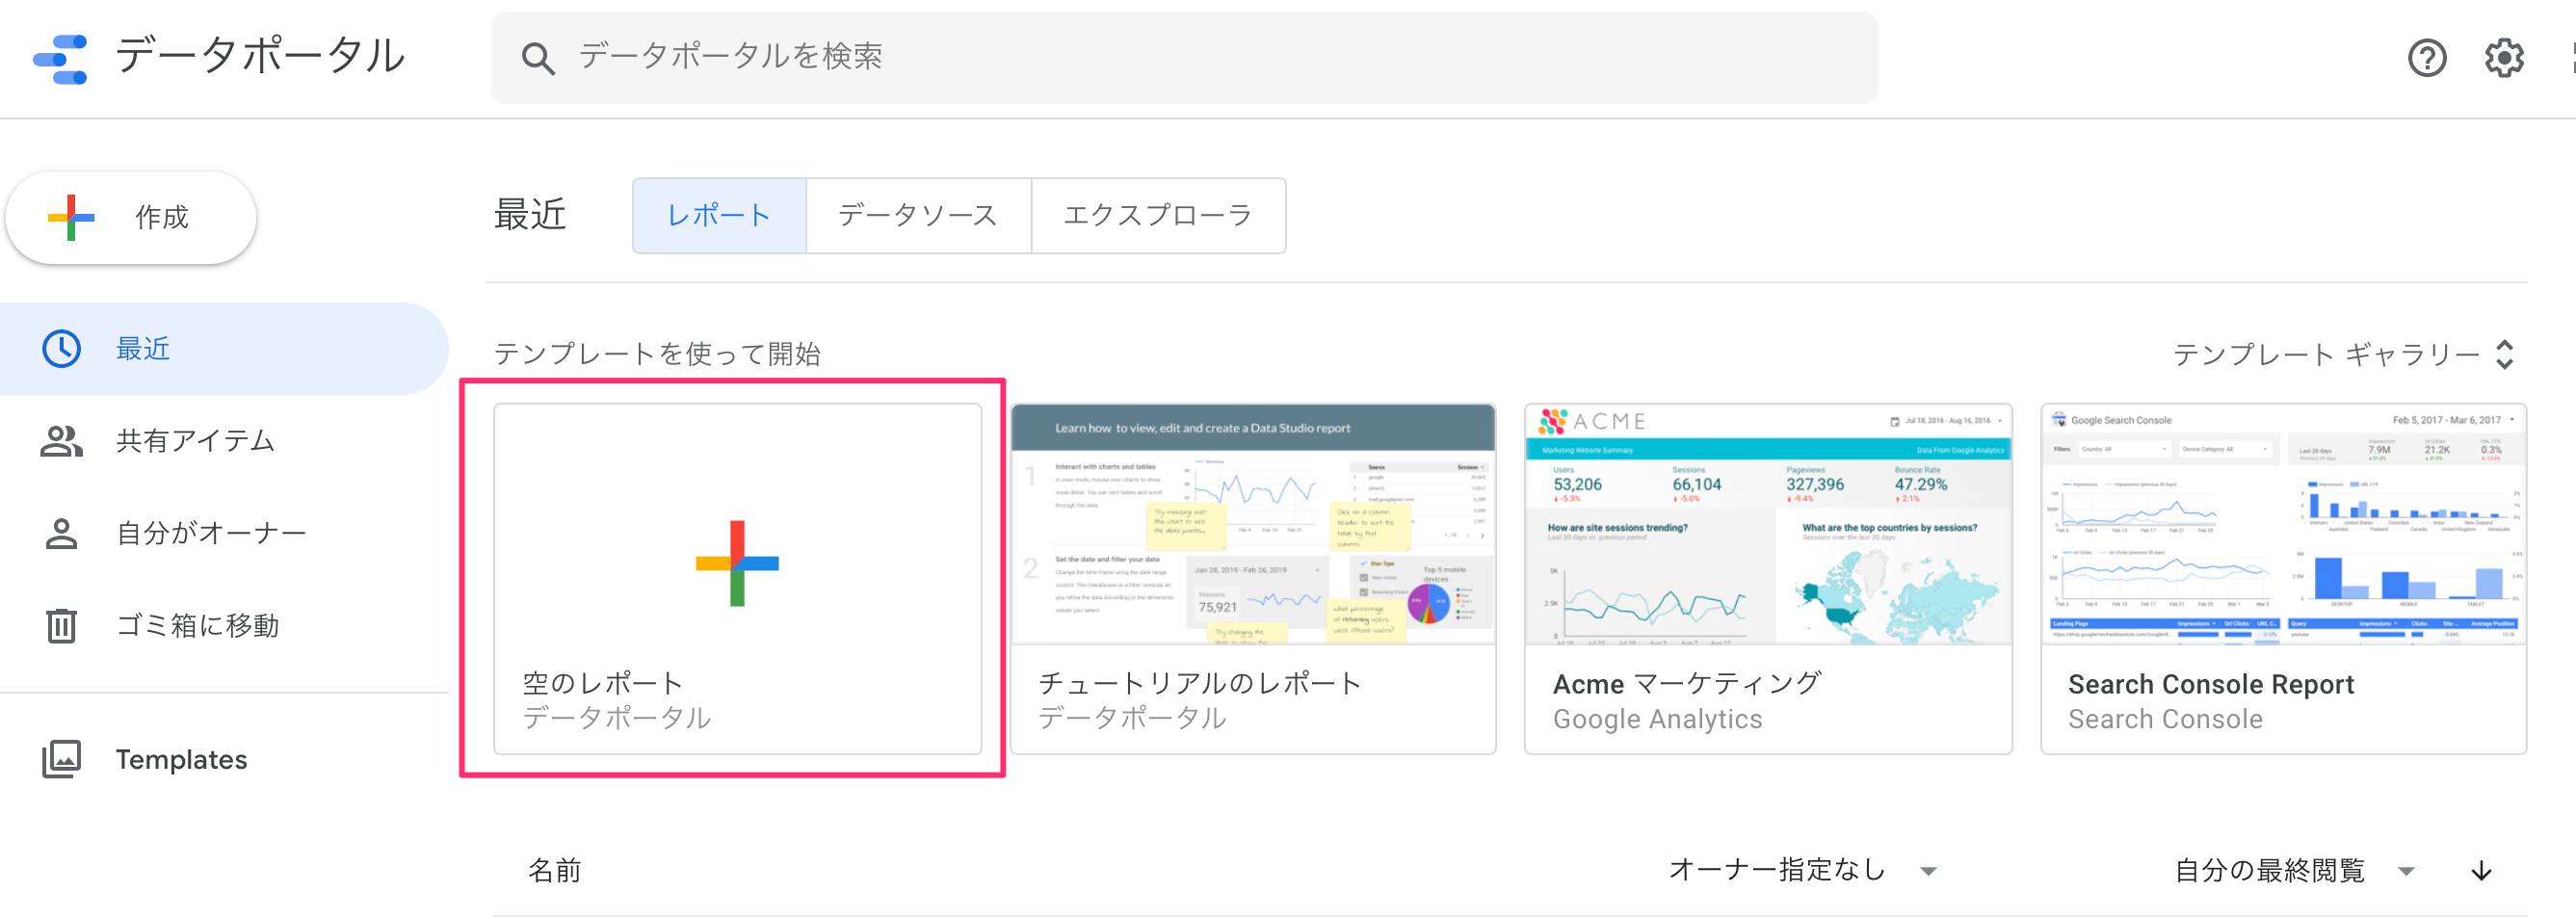
まずデータポータルを開いて、適当に空のレポートを開きます。

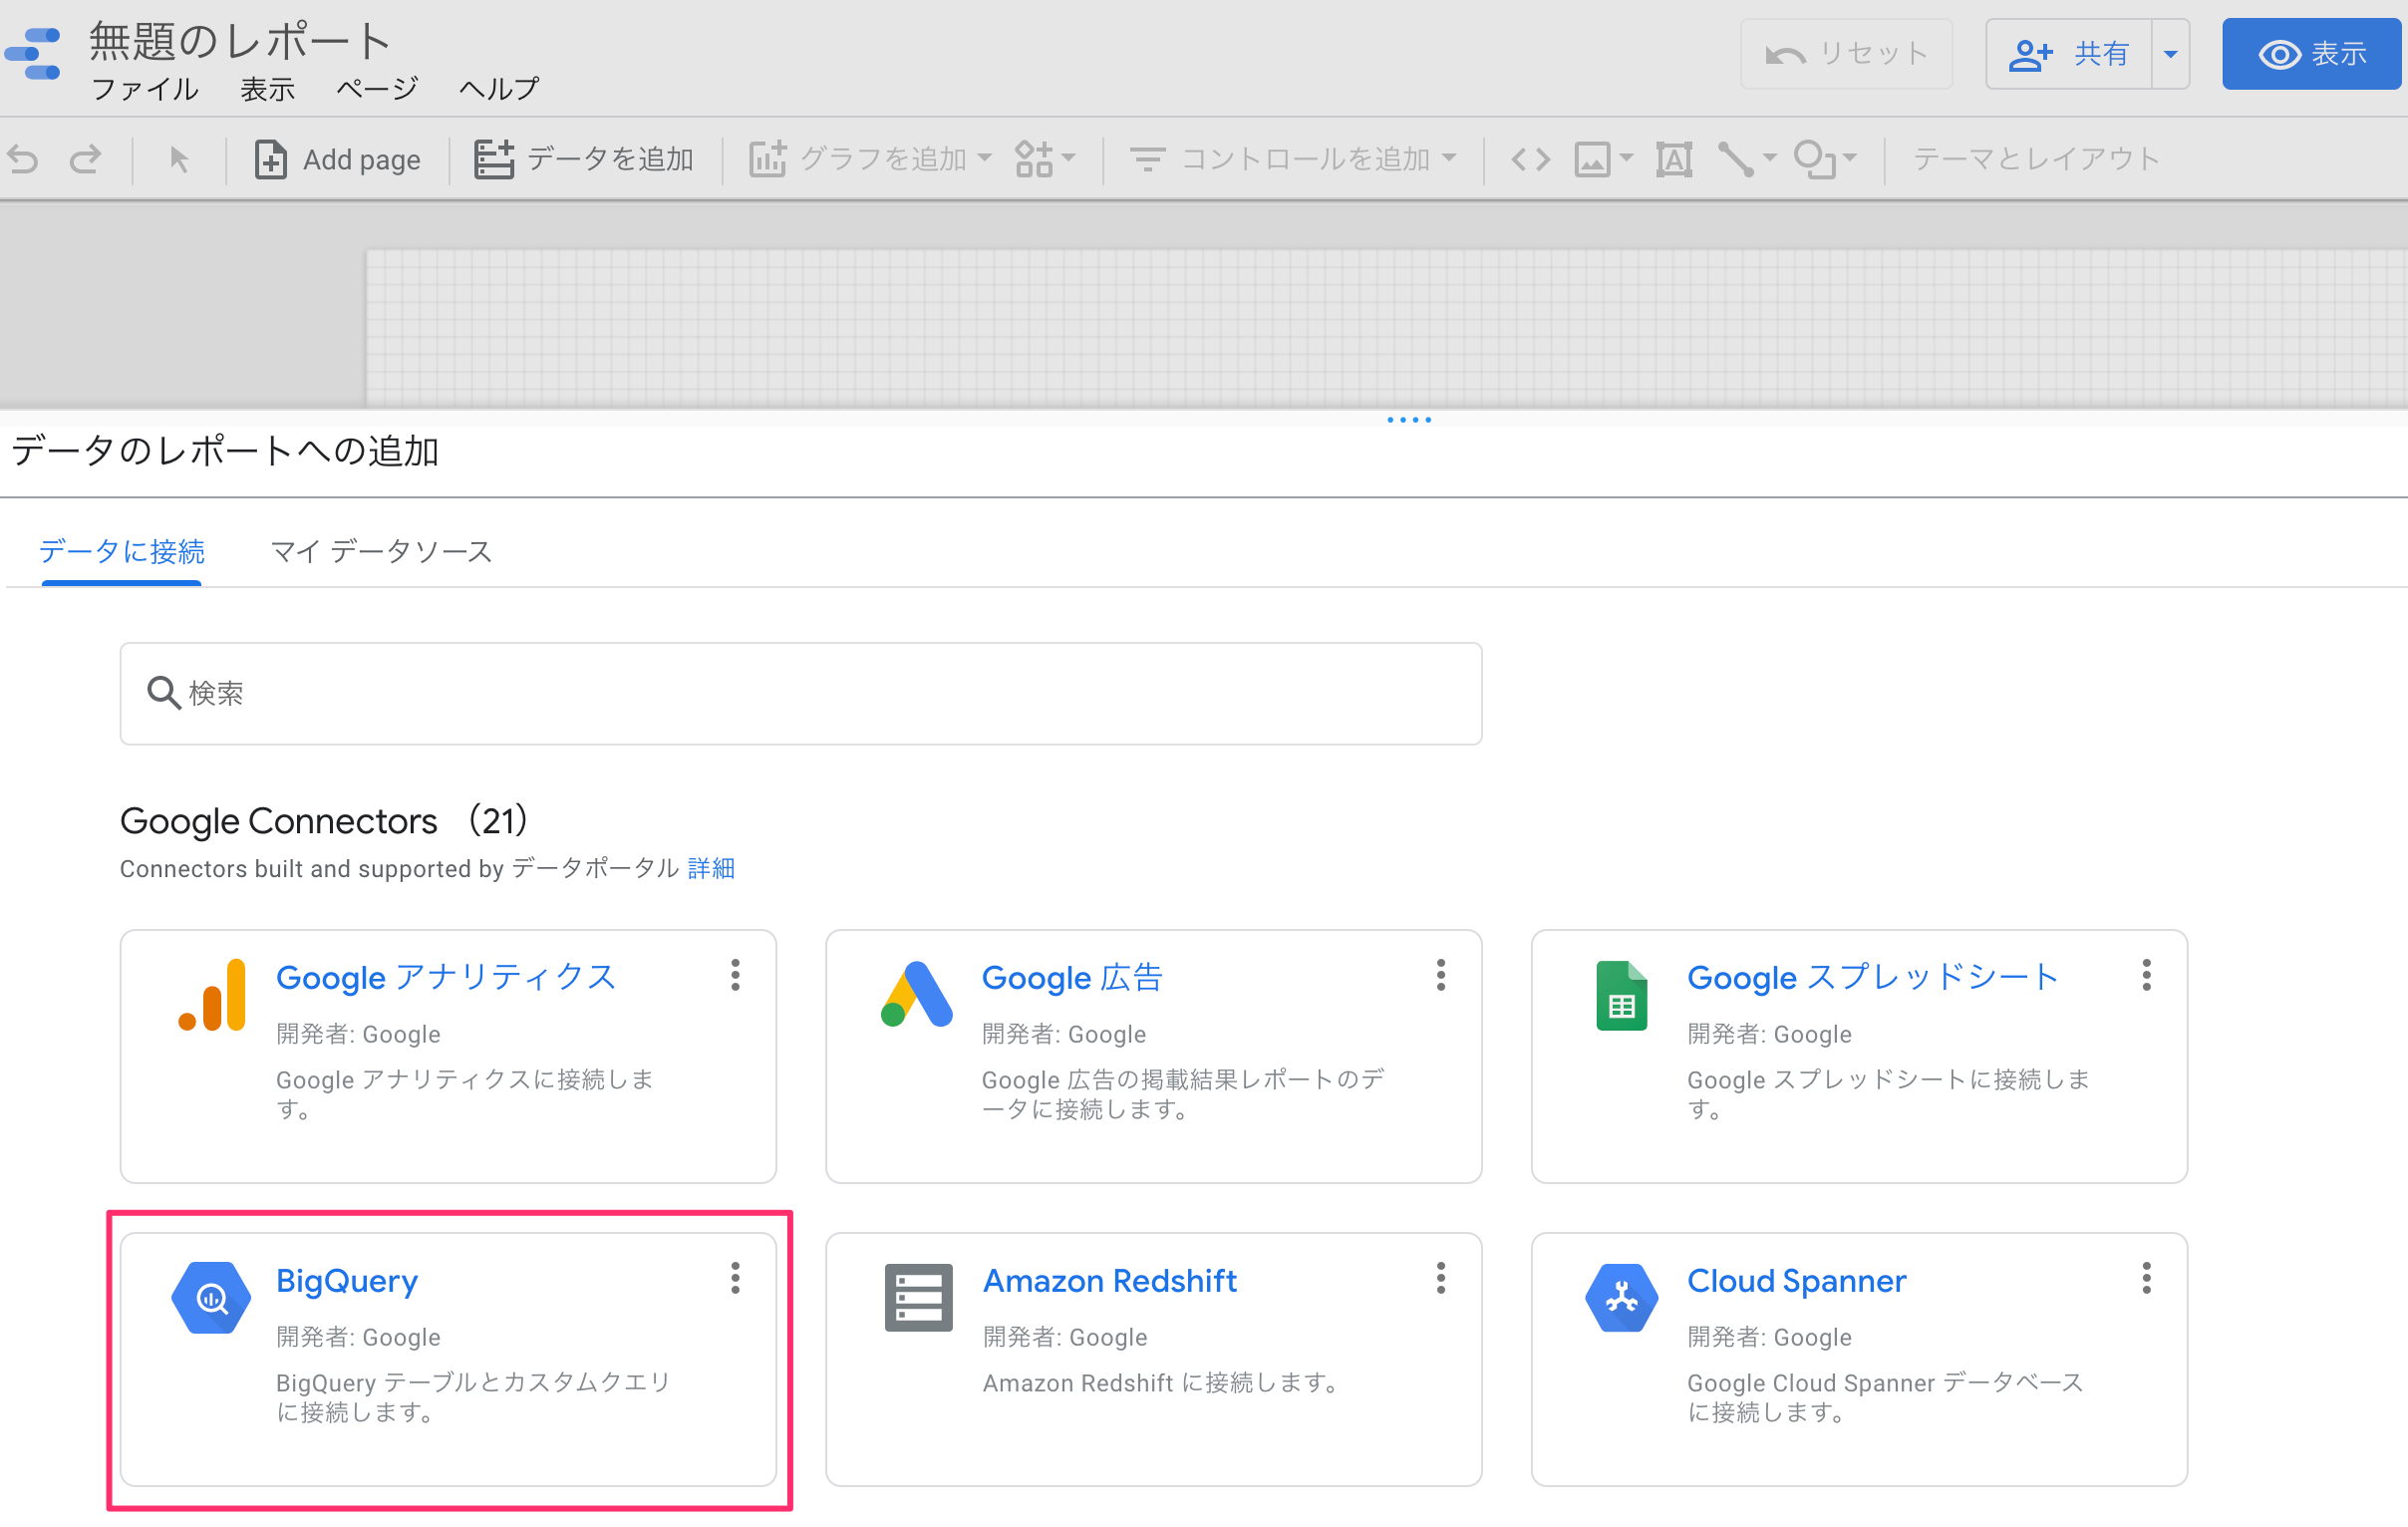
開いたら、すぐにデータのレポートへの追加画面が出ますので、BigQueryを選択。
あとから上部のタブの「データを追加」からも選択できます。

下図のようなウィンドウが出ますので、連携させたいテーブルをプロジェクト、データセット、テーブル名の順に選択して、追加を押します。

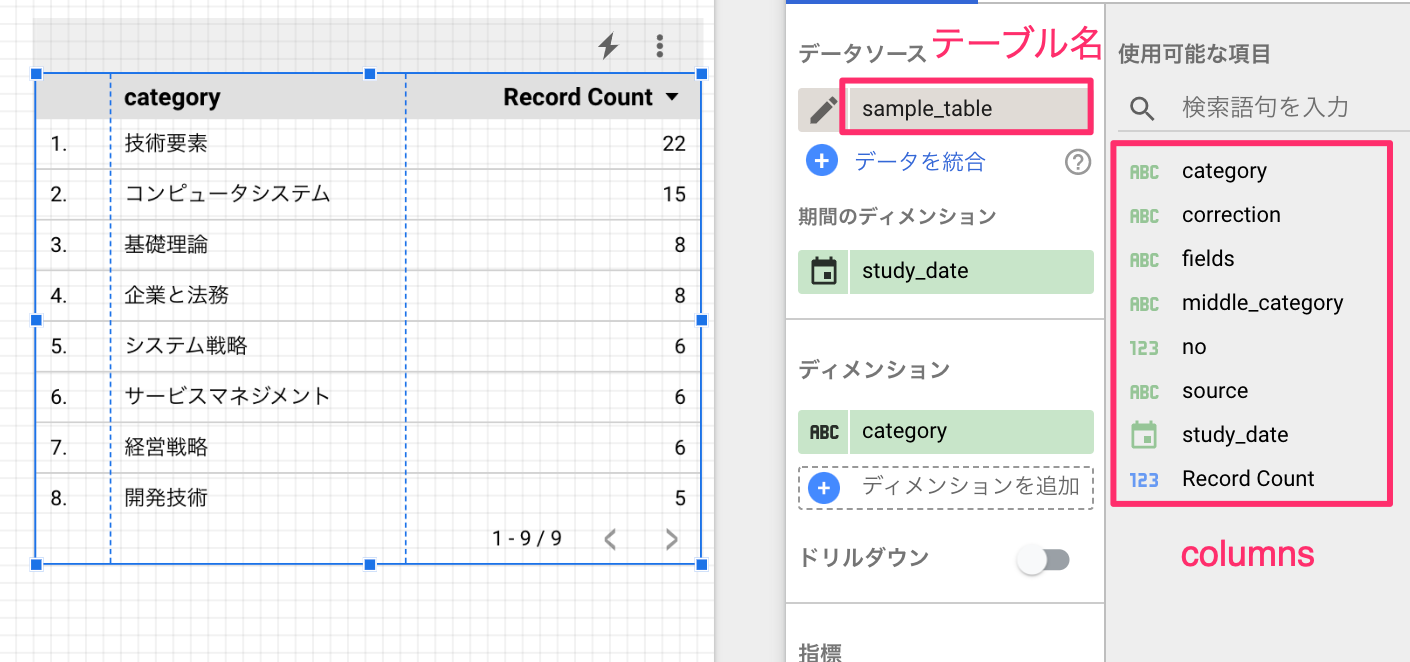
下記のように表示されればOKです。

以上!これでデータポータルとの連携は完了です。
最後に
BigQueryを使うととてもかかるのではないかと始めは不安でしたが、手厚い無料枠もあり月額の費用はほとんどかかりませんでした。BigQuery最高です!![]()
