UIScrollViewとAutoLayoutが相性が悪いという声を聞きますが、
別にそこまで悪いとは思わないので、簡単な考え方をまとめてみます。
今回は、テストケースとして、
UIScrollView(可変)
- 320x320のUIView(固定)
- 320x320のUIView(固定)
という単純なケースを考えてみます。
この場合、まずstoryboard(or xib)で、次のように設定します。

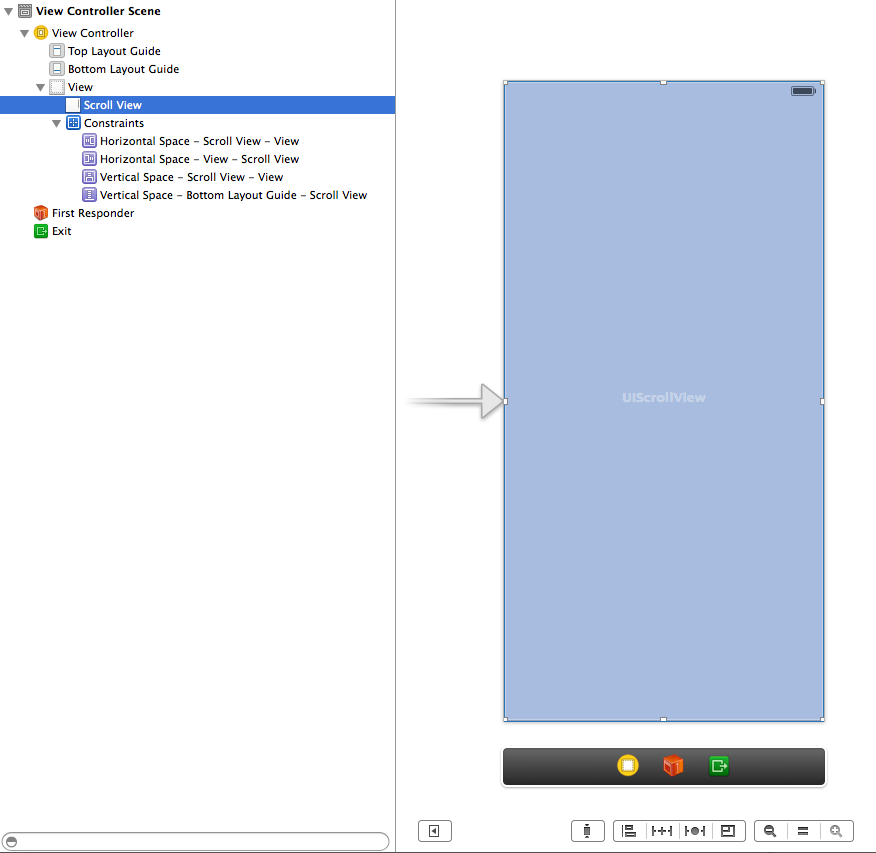
画面いっぱいにUIScrollViewを配置し、Constraintsを設定します。
Constraintsは、上下左右マージン0です。
VisualFormat的には、"V:|-0-[view]-0-|", "H:|-0-[view]-0-|"となります。
次に内側のビューを2つ配置します。
作業のしやすさ的に、
ViewControllerのサイズをFreeformにして、サイズを変更しておくと良いでしょう。

その後、ルートのviewのサイズを320x640にしてピッタリ収まるようにします。

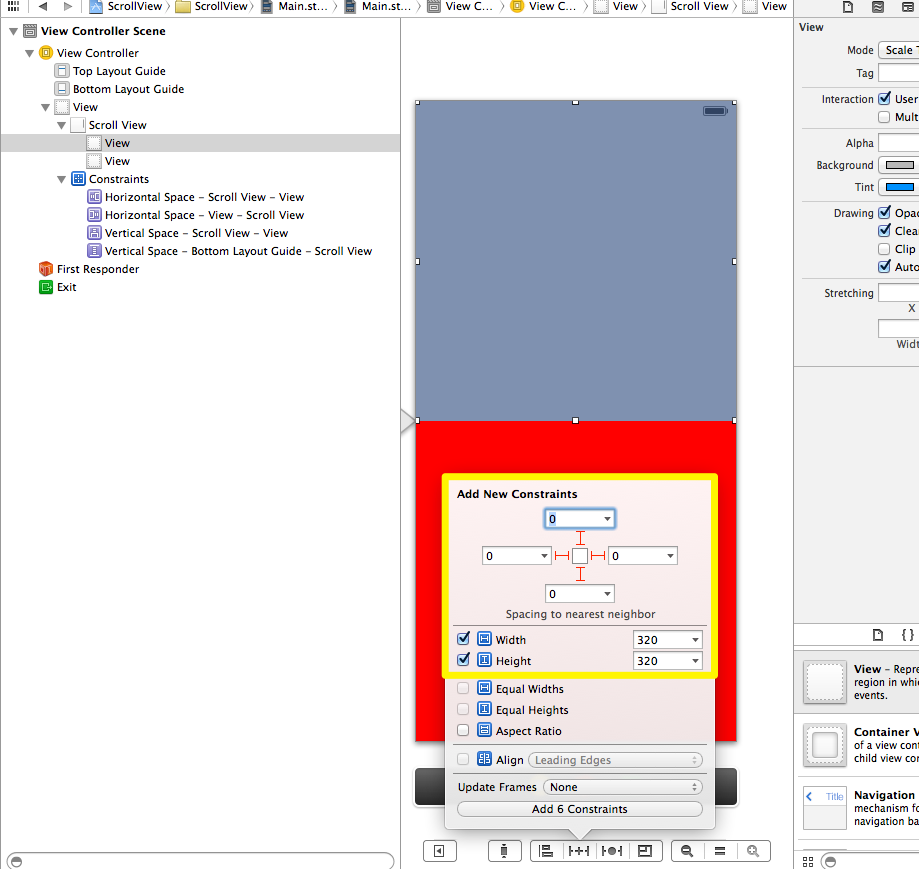
次に内側の2つのビューそれぞれに以下のようなConstraintsを設定します。

これはVisualFormat的には
"H:|-0-[_view1(320)]-0-|"
"H:|-0-[_view2(320)]-0-|"
"V:|-0-[_view1(320)]-0-[_view2(320)]-0-|"
となります。
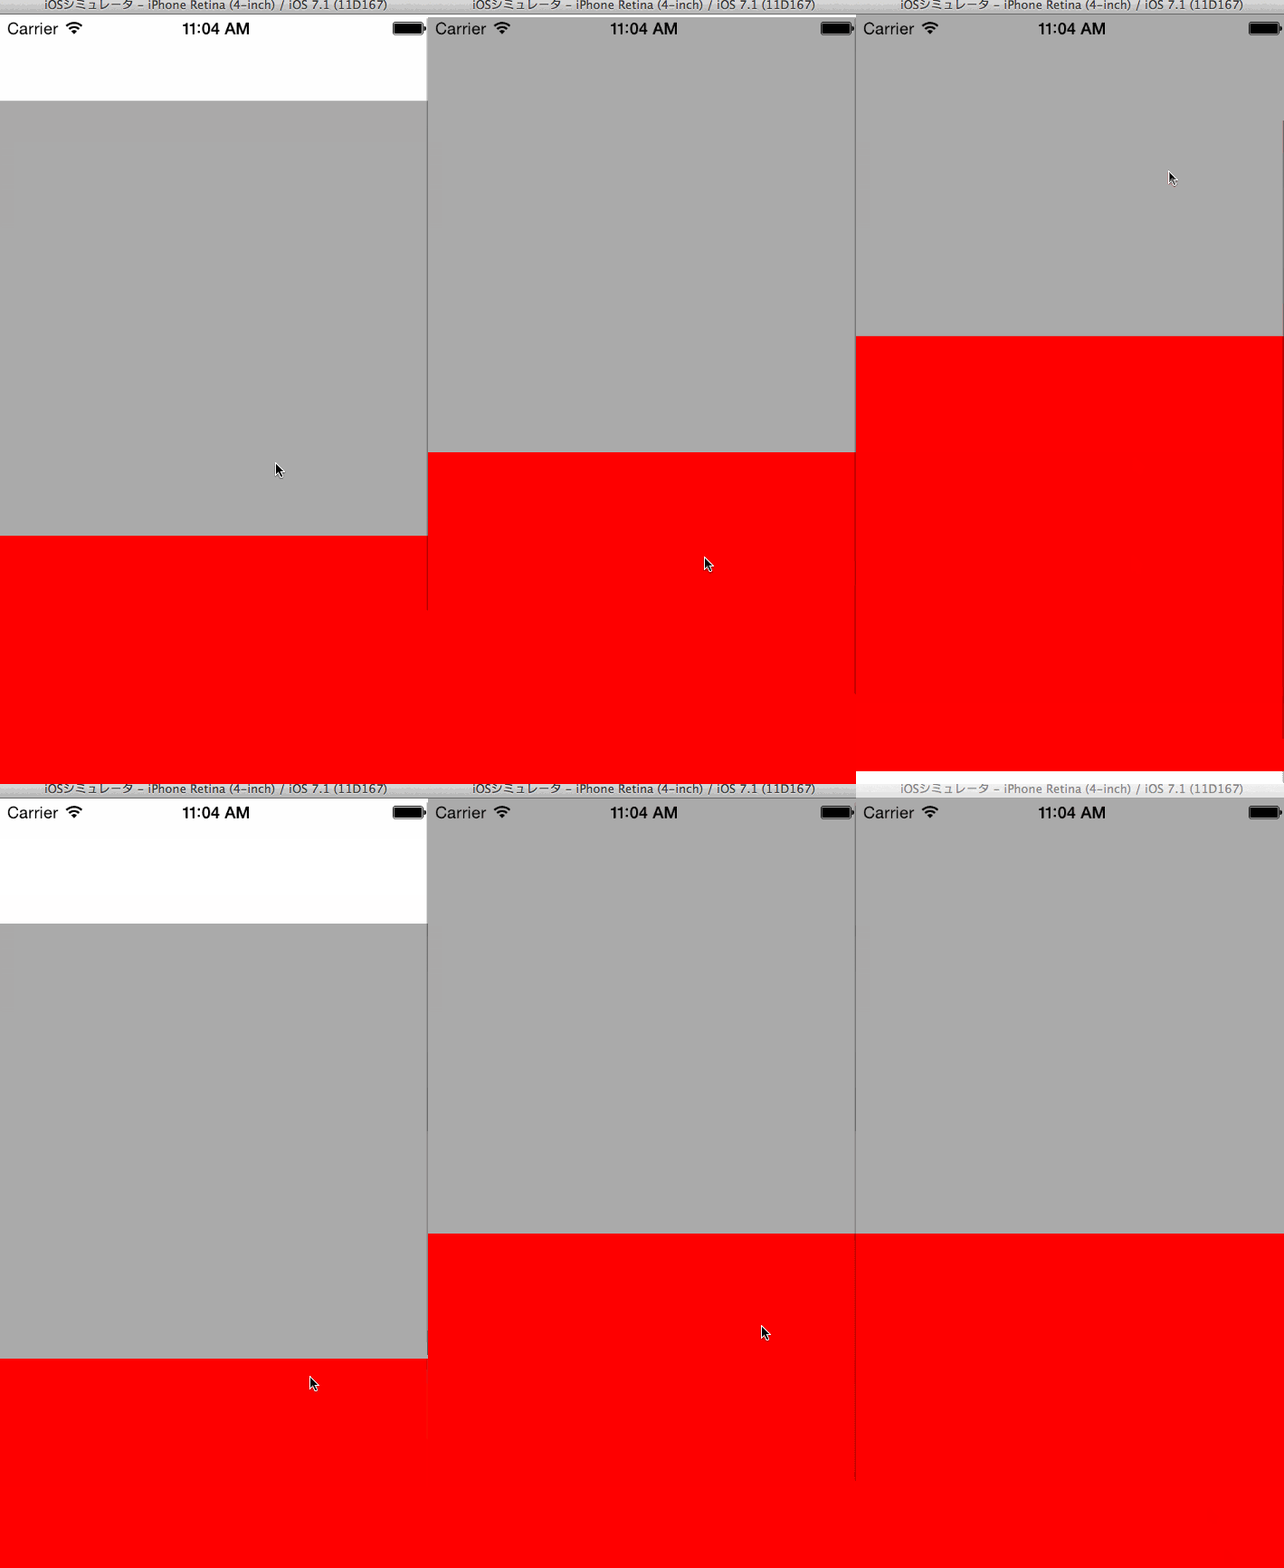
さてい、これで実行させてみると、setContentSize:の指定が無いにも関わらず、
かつコードも一行も書かずに、
見事次のようなスクロールが実現できます。
何が起きているかというと、UIScrollViewは、
「下の階層ビューがConstraintsによって一意に定まる場合、それがcontentSizeになる」
ただこれだけです。
設定手順は多少有りますが、理解してしまえば、なんてことはなく、
UIScrollViewとからめても、AutoLayoutは非常に強力な配置方法と言えます。
是非みなさん試してみてはいかがでしょうか?
