下調べ
使ったLCDディスプレイ
コントローラは、ST7789
GPIOは、
| PIN | Raspberry Pi GPIO | Description |
|---|---|---|
| KEY1 | P21 | ボタン 1 |
| KEY2 | P20 | ボタン 2 |
| KEY3 | P16 | ボタン 3 |
| Joystick Up | P6 | ジョイスティック 上 |
| Joystick down | P19 | ジョイスティック 下 |
| Joystick Left | P5 | ジョイスティック 左 |
| Joystick Right | P26 | ジョイスティック 右 |
| Joystick Press | P13 | ジョイスティック 押下 |
| CLK | P11/SCLK | SPI クロック入力 |
| DIN | P10/MOS | SPI データ入力 |
| CS | P8/CE0 | チップ選択 |
| DC | P25 | データ/コマンド |
| RST | P27 | リセット |
| BL | P24 | バックライト |
参考にしたページ
/boot/firmware/config.txt
config.txtにの値を設定します。
設定値は上記のGPIOの値を使っています。
$ sudo vi /boot/firmware/config.txt
dtoverlay=mipi-dbi-spi,spi0-0,speed=70000000
dtparam=width=240,height=240
dtparam=reset-gpio=27,dc-gpio=25
dtparam=backlight-gpio=24
ファームウェアのビルド
$ git clone https://github.com/notro/panel-mipi-dbi.git
Cloning into 'panel-mipi-dbi'...
remote: Enumerating objects: 11, done.
remote: Counting objects: 100% (11/11), done.
remote: Compressing objects: 100% (8/8), done.
remote: Total 11 (delta 1), reused 7 (delta 1), pack-reused 0 (from 0)
Receiving objects: 100% (11/11), done.
Resolving deltas: 100% (1/1), done.
$ cd panel-mipi-dbi
コントローラの設定ファイルを作ります。
ここの値を参考にしています。
https://github.com/notro/panel-mipi-dbi/wiki/Displays#adafruit-st7789-minipitft-lcd-and-tft-bonnet
$ vi st7789.txt
とりあえず中身はgithubのままにしています。
# Adafruit ST7789 MiniPiTFT LCD and TFT Bonnet
# width=240,height=240

command 0x01  # _SWRESET and Delay 150ms
delay 150

command 0x11  # _SLPOUT and Delay 10ms
delay 10

command 0x3A 0x55  # _COLMOD and Delay 10ms
delay 10

command 0x36 0x08  # _MADCTL Botton->Top Refresh
command 0x21  # _INVON Hack and Delay 10ms
delay 10

command 0x13  # _NORON and Delay 10ms
delay 10

# Command 36h sets the read order from frame memory to the display panel
# Remember to swap width/height on 0/180 rotations
#command 0x36 0x00 # rotation 0
command 0x36 0xA0 # rotation 90
#command 0x36 0xC0 # rotation 180
#command 0x36 0x60 # rotation 270

command 0x29  # _DISPON and Delay 500ms
delay 250
delay 250
ファイルを作ったらファームウェアをビルドします。
$ ./mipi-dbi-cmd panel.bin st7789.txt
できたpanel.binを/lib/firmwareにコピーします。
$ sudo cp panel.bin /lib/firmware/
コピーしたら再起動します。
$ sudo reboot
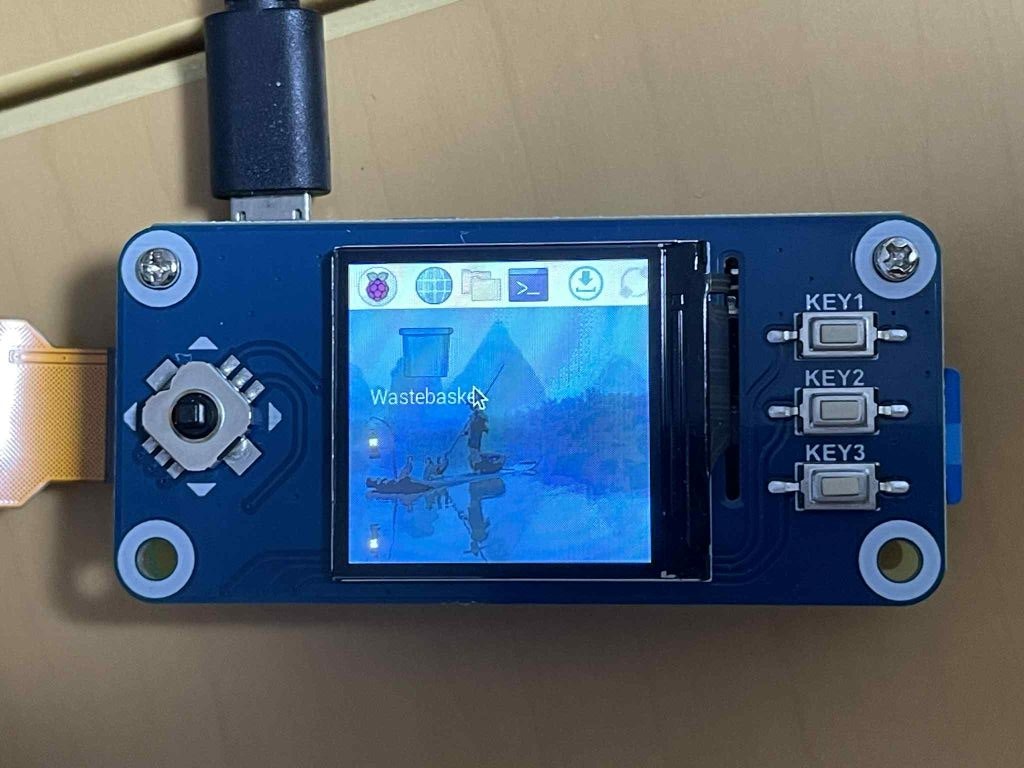
画面に表示されたけど、ひっくり返っているし、2/3くらいしか表示されていない...。
st7789.txtの回転角が90度になっていたのを270度に変更します。
以下のようになります。
(省略)
# Command 36h sets the read order from frame memory to the display panel
# Remember to swap width/height on 0/180 rotations
#command 0x36 0x00 # rotation 0
#command 0x36 0xA0 # rotation 90
#command 0x36 0xC0 # rotation 180
command 0x36 0x60 # rotation 270
(省略)
修正したら、同じようにビルドしてpanel.binを/lib/firmwareにコピーして再起動します。
$ ./mipi-dbi-cmd panel.bin st7789.txt
$ sudo cp panel.bin /lib/firmware/
$ sudo reboot
起動メッセージが以下のようになっています。
$ dmesg | grep panel-mipi-dbi-spi
[    8.825714] panel-mipi-dbi-spi spi0.0: supply power not found, using dummy regulator
[    8.825902] panel-mipi-dbi-spi spi0.0: supply io not found, using dummy regulator
[    9.842438] panel-mipi-dbi-spi spi0.0: [drm] fb0: panel-mipi-dbid frame buffer device
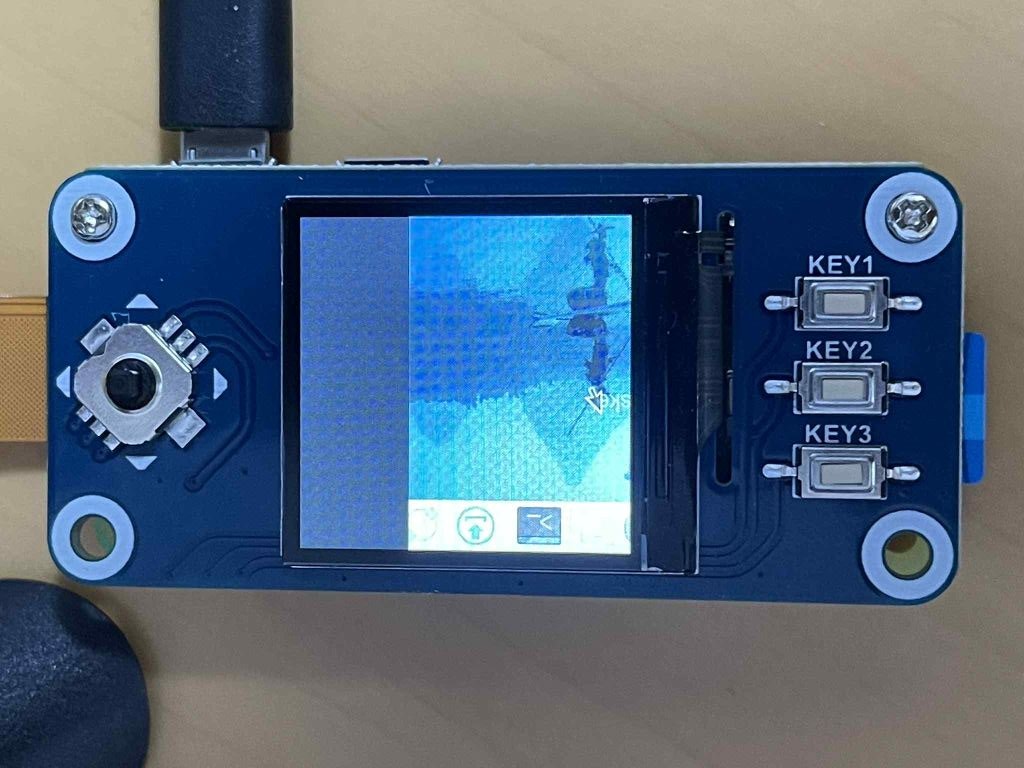
画面が正常に表示されました。