iOS8からUIPrinterPickerControllerというクラスが追加され、AirPrintの方法がさらにやりやすくなりました。
今回はUIPrinterPickerControllerを使って、AirPrintでiPhoneから印刷する方法をまとめてみたいと思います。
実行環境
- Xcode7.3
- Swift2.2
- iOS8以上
Printer Simulator.appのダウンロード
開発にあたり、AirPrint対応のプリンターがなければいけないかとおもいきや、Appleからプリンターのシュミレーターアプリが提供されています。
Printer Simulator.appです
これを使えば、実際にプリンターがなくても、AirPrintを使った機能の開発が進められます。
Printer Simulator.appはHardware IO Toolsとして提供されています。
https://developer.apple.com/downloads/?name=for%20Xcode
へアクセスをして Hardware IO Tools for Xcode 7.3を選択し、Hardware_IO_Tools_for_Xcode_7.3.dmgをダウンロードします。
このdmgファイルの中に、Printer Simulator.appが入っています。
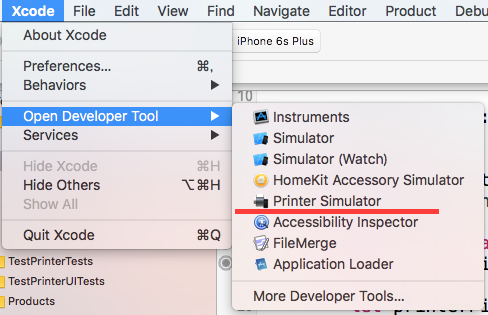
せっかくなので、Xcodeのメニュー Xcode > open Developer Tool でPrinter Simulator.appを選択できるようにしましょう。
/Applications/Xcode.app/Contents/Applications
へアクセスしてHardware_IO_Tools_for_Xcode_7.3.dmgの中にあるPrinter Simulator.appのコピーを置きます。
するとXcodeのメニュー Xcode > open Developer Tool でPrinter Simulator.appが選択可能になります。
UIPrinterPickerControllerを使ったAirPrint実装方法
さて、コードの話に移りましょう。
予めPrinter Simulator.appをダブルクリックで起動しておきます。
プロジェクトを新規で作成し、適当にボタンを配置して、@IBAction func startPrint(sender: UIButton)を作成します。
//ViewController.swift
    @IBAction func startPrint(sender: UIButton) {
        self.showPrinterPicker()
    }


    func showPrinterPicker() {
        // UIPrinterPickerControllerのインスタンス化
        let printerPicker = UIPrinterPickerController(initiallySelectedPrinter: nil)

        // UIPrinterPickerControllerをモーダル表示する
        printerPicker.presentAnimated(true, completionHandler:
            {
            [unowned self] printerPickerController, userDidSelect, error in
            if (error != nil) {
                // エラー
                print("Error : \(error)")
            } else {
                // 選択したUIPrinterを取得する
                if let printer: UIPrinter = printerPickerController.selectedPrinter {
                    print("Printer's URL : \(printer.URL)")
                    self.printToPrinter(printer)
                } else {
                    print("Printer is not selected")
                }
            }
            }
        )
    }

        func printToPrinter(printer: UIPrinter) {
        // 印刷してみる
        let printIntaractionController = UIPrintInteractionController.sharedPrintController()
        let info = UIPrintInfo(dictionary: nil)
        info.jobName = "Sample Print"
        info.orientation = .Portrait
        printIntaractionController.printInfo = info
        //印刷する内容
        printIntaractionController.printingItem = UIImage(named: "sample.jpg")
        printIntaractionController.printToPrinter(printer, completionHandler: {
            controller, completed, error in
        })
    }
解説
まずUIPrinterPickerControllerをインスタンス化します。
+ printerPickerControllerWithInitiallySelectedPrinter:メソッドを実行します。引数のinitiallySelectedPrinterは予めプリンターを選択する場合は指定します。とくに指定がなければnilにします。nilにすることで印刷できるプリンターを全てピッカーで表示させることができます。
次に- presentAnimated:completionHandler:を実行して、印刷可能なプリンターのリストを表示するピッカーを表示します。第一引数がアニメーションをするかどうか、第二引数がピッカーが非表示になった場合に行う処理を指定できます。今回はprintToPrinter(_:)メソッドを実行して印刷を実行しています。
実行
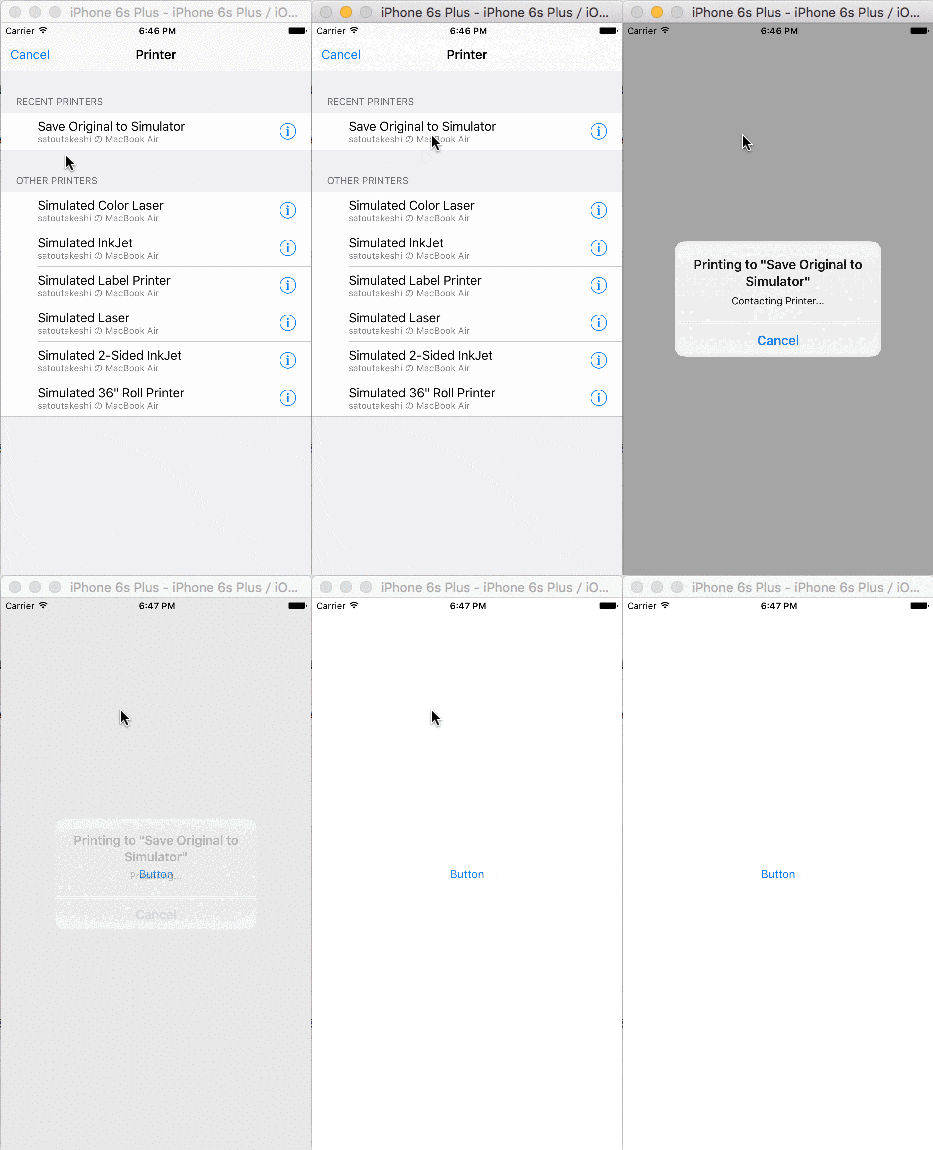
これを実行すると使用可能なプリンターリストがピッカーで表示されます。
セルをタップしてプリンターを選択すると、印刷されます。
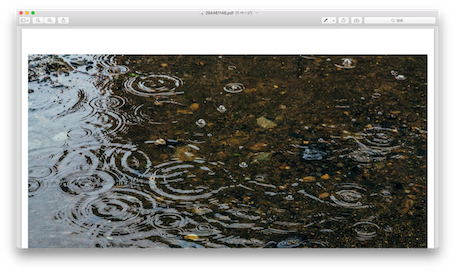
Printer Simulator.appを起動していれば、印刷結果がPDFで表示されます。
ピッカーを表示せずに印刷する方法
いつもピッカーを表示してプリンターを表示するのが煩わしい場合があります。
プリンター選択のピッカーを表示しなくてもプリントすることができます。
ただし、予めプリンターのippsURLを取得しておく必要があります。
//ViewController.swift
    func showPrinterPicker() {
        // UIPrinterPickerControllerのインスタンス化
        let printerPicker = UIPrinterPickerController(initiallySelectedPrinter: UIPrinter(URL: NSURL(string: "ipps://xxxxxxx")!)) //->プリンターのippsURLを指定!

        printerPicker.delegate = self

        // UIPrinterPickerControllerをモーダル表示する
        printerPicker.presentAnimated(false, completionHandler://->animationをfalseに指定して画面表示
            {
            [unowned self] printerPickerController, userDidSelect, error in
            if (error != nil) {
                // エラー
                print("Error : \(error)")
            } else {
                // 選択したUIPrinterを取得する
                if let printer: UIPrinter = printerPickerController.selectedPrinter {
                    print("Printer'displayname : \(printer.displayName)")
                    print("Printer's URL : \(printer.URL)")//->ここでプリンターのURLが取得できる
                    self.printToPrinter(printer)
                } else {
                    print("Printer is not selected")
                }
            }
            }
        )

        printerPicker.dismissAnimated(false)//->すぐさまanimationをfalseで閉じる
    }
let printerPicker = UIPrinterPickerController(initiallySelectedPrinter: UIPrinter(URL: NSURL(string: "ipps://xxxxxxxxx")!))
でUIPrinterPickerControllerインスタンス生成時にinitiallySelectedPrinterにUIPrinterのURLを指定すれば、そのプリンターを選択した状態でインスタンスを生成することができます。
あとは、- presentAnimated:completionHandler:でアニメーションをfalseにして表示して、
すぐにprinterPicker.dismissAnimated(false)でUIPrinterPickerControllerインスタンスを非表示にします。
これで指定プリンターにピッカー非表示でプリントができます。
参考
- http://qiita.com/keita1987/items/861476156fe12b9b0a83
- https://developer.apple.com/library/ios/documentation/UIKit/Reference/UIPrinterPickerController_class/index.html#//apple_ref/occ/instp/UIPrinterPickerController/delegate
- https://developer.apple.com/library/ios/documentation/UIKit/Reference/UIPrinter_class/index.html#//apple_ref/occ/clm/UIPrinter/printerWithURL:
- https://developer.apple.com/library/ios/documentation/UIKit/Reference/UIPrinterPickerControllerDelegate_protocol/index.html#//apple_ref/occ/intfm/UIPrinterPickerControllerDelegate/printerPickerControllerParentViewController:
- http://dev.classmethod.jp/references/ios8-uiprinterpickercontroller/
- http://qiita.com/keita1987/items/ad31184465666dbb26ba


