この記事について
今いる部署で新たなネットワークを組んだ際に死活監視の仕組みも自分が作る可能性が高く、予習を兼ねて自宅ラズパイNWにZabbix監視ボードを作りました。
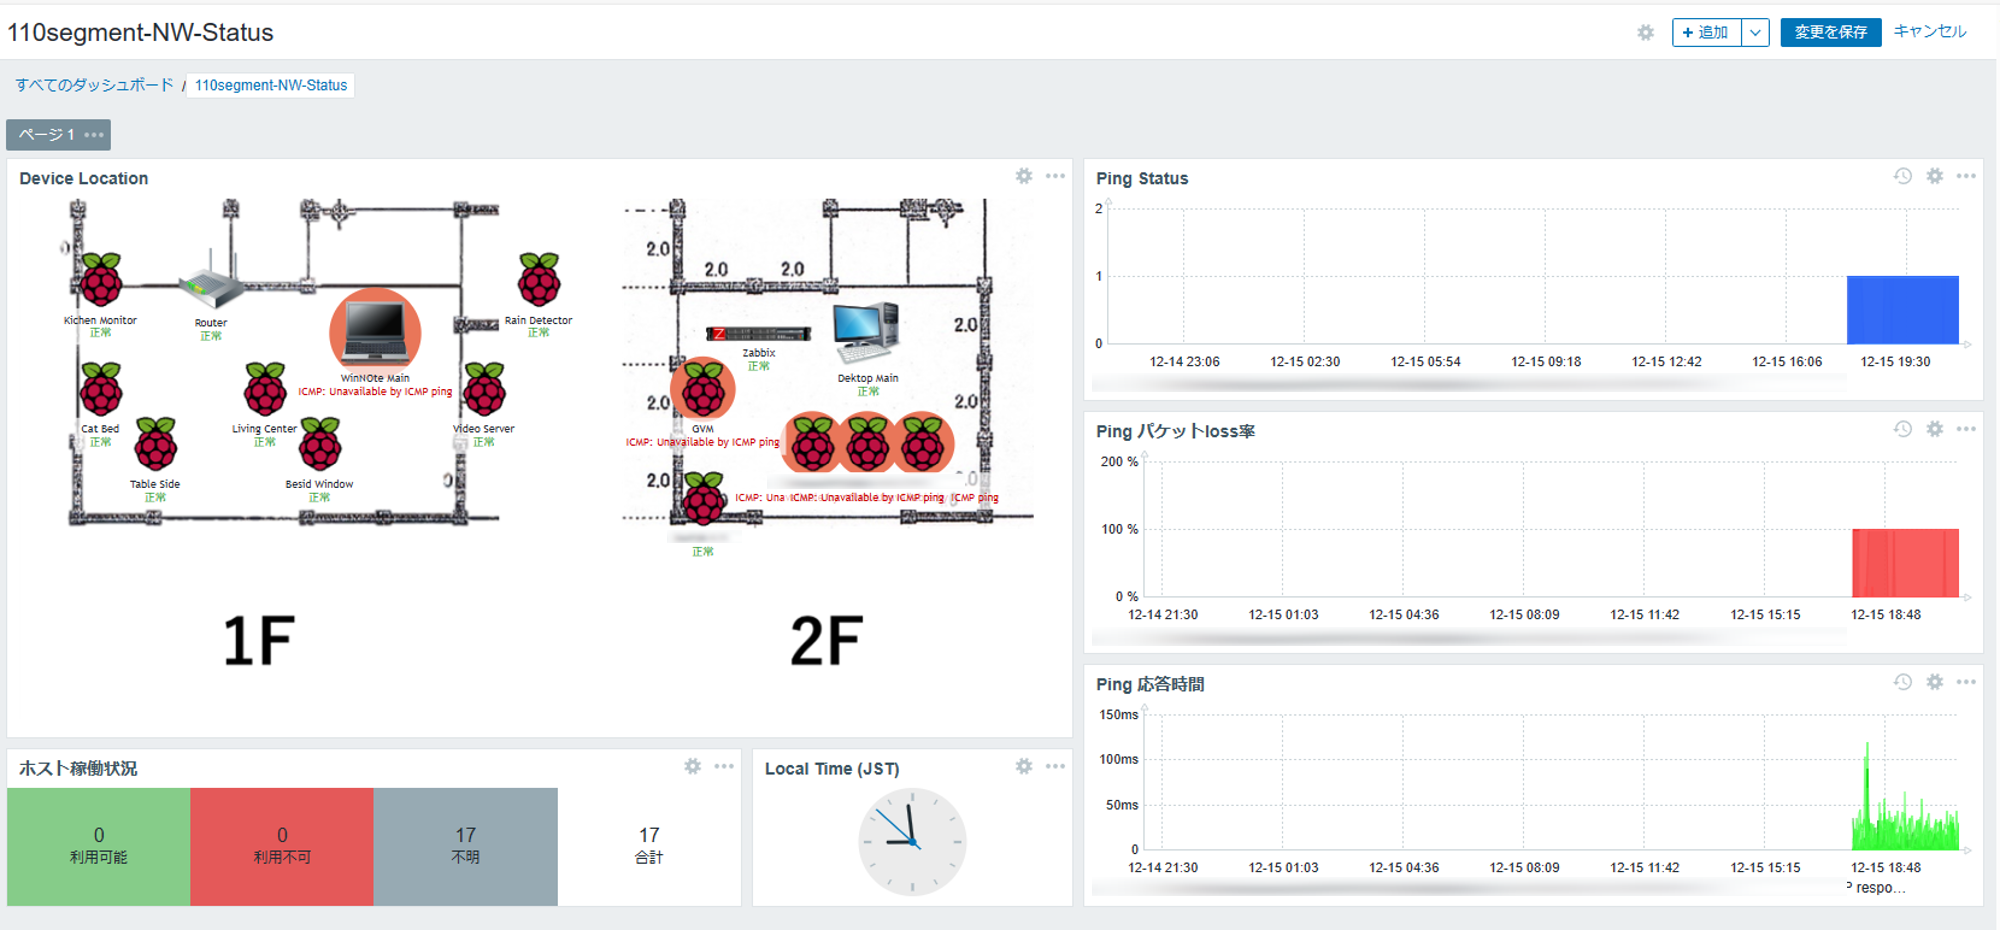
とりあえず図のようなダッシュボード構築を目指して本稿ではサーバー構築手順を説明します。
環境
RaspberryPi
Raspberry Pi: Raspberry Pi 4 Model B Rev 1.2
OS: Raspberry Pi OS Lite 64-bit (Debian GNU/Linux 12 (bookworm))
Zabbixサーバー構成
Download and install Zabbixで以下の構成を選択しました。

インストール
NetworkManager設定
過去に作った備忘録を使ってeth0は動的、wlan0は静的な接続を作りました。
タイプしずらいので起動時に自動作成された接続は消します。
sudo nmcli c delete Wired\ connection\ 1
アップデート/基本パッケージ
sudo apt update
sudo apt -y upgrade

#cron使う場合に備えてpostfixもインストール
sudo apt install -y python3-dev python3-pip ptables iptables-persistent git postfix
linux Firewallも設定します。手順は過去記事を参照とします。
ロケール
en_GB.UTF-8で初期設定されるのでen_GB.UTF-8を残し、usとjpをraspi-configで追加します。
en_GB.UTF-8を削除するとZabbix(Psql)の初期設定が出来なくなりますので注意です。
sudo raspi-config
5 Localisation Options -> L1 Locale
en_GB.UTF-8
en_US.UTF-8
ja_JP.UTF-8 as default
sudo raspi-config nonint do_change_timezone Asia/Tokyo
sudo raspi-config nonint do_wifi_country JP
PostgreSQL
Zabbixインストールの前にDBをインストールします。
手順説明は過去記事を参照とします
バージョン指定しない場合はlatestがインストールされます。
Zabbix/依存関係
Zabbixサポートのガイダンスに沿ってインストールします。
wget https://repo.zabbix.com/zabbix/6.0/raspbian/pool/main/z/zabbix-release/zabbix-release_6.0-5+debian12_all.deb
sudo dpkg -i zabbix-release_6.0-5+debian12_all.deb
sudo apt update
sudo apt install -y zabbix-server-pgsql zabbix-frontend-php php8.2-pgsql zabbix-nginx-conf zabbix-sql-scripts zabbix-agent
sudo -u postgres createuser --pwprompt zabbix
sudo -u postgres createdb -O zabbix zabbix
zcat /usr/share/zabbix-sql-scripts/postgresql/server.sql.gz | sudo -u zabbix psql zabbix
Zabbix serverにPostgreSQLのパスワードを設定します。
sudo sed -i "s/# DBPassword=/DBPassword=yourpassword/g" /etc/zabbix/zabbix_server.conf
nginxにlisten portとhostnameを設定します。
sudo sed -i "s/#        listen          8080;/        listen          8080;/g" /etc/zabbix/nginx.conf
sudo sed -i "s/#        server_name     example.com;/        server_name     zabbixpi;/g" /etc/zabbix/nginx.conf
Zabbix serverの自動起動を有効化し一旦再起動します。
sudo systemctl restart zabbix-server zabbix-agent nginx php8.2-fpm
sudo systemctl enable zabbix-server zabbix-agent nginx php8.2-fpm

sudo reboot
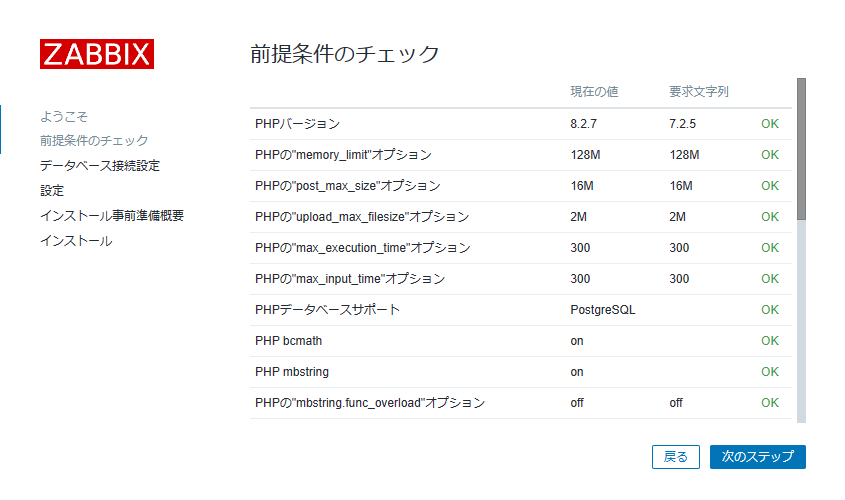
起動後初期設定
ラズパイのipでZabbix Serverを呼び出します。
デフォルトロケールをja_JP.UTF-8にした場合は日本語で起動します。
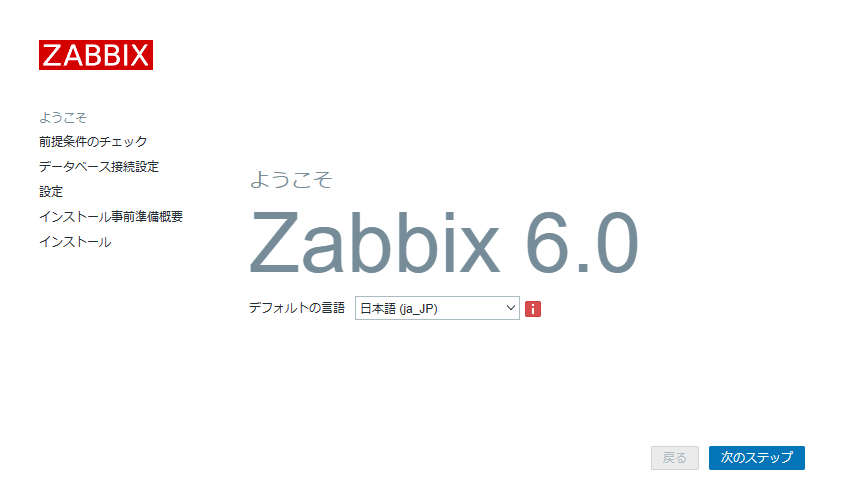
確認して次に進みます。
Psqlに設定したパスワードを保存します。
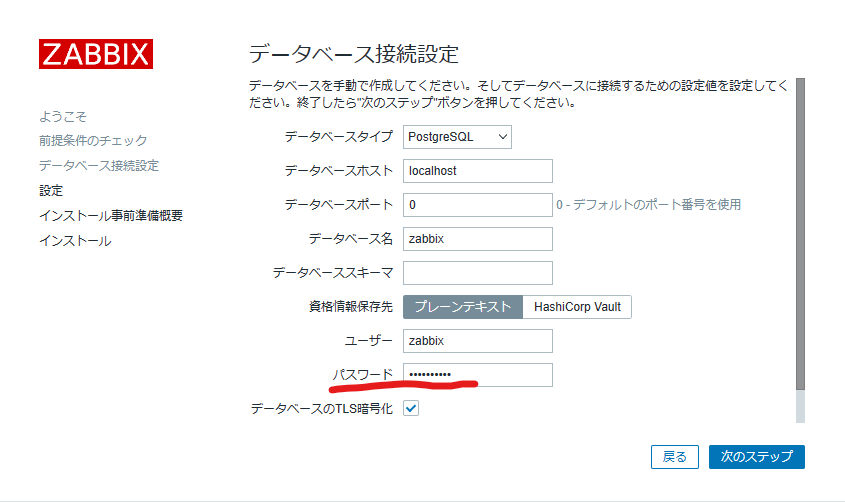
サーバー名は任意です。
hostnameに合わせました。

確認して進みます。
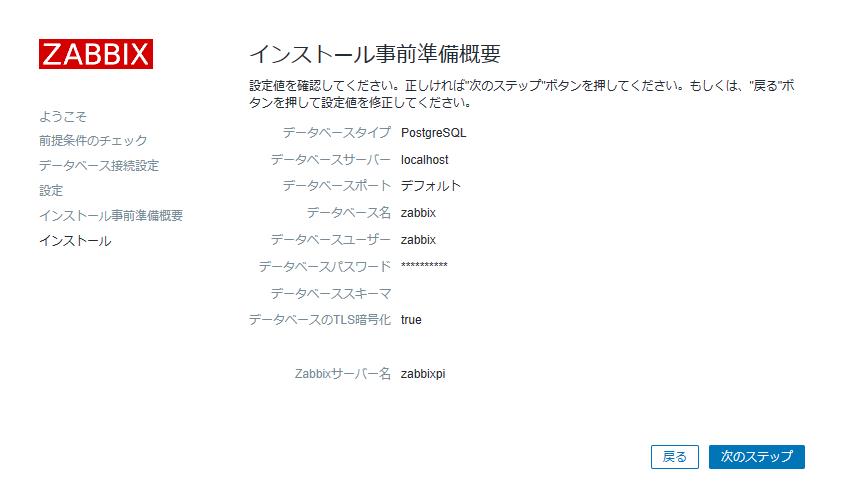
設定完了です。

ログイン
初期設定
ユーザー名:Admin
パスワード:zabbix

defaultのdashboardが表示されたら各種の操作が可能な状態です。

次回
「ラズパイでPing監視(2)ダッシュボード構築」でダッシュボード構築手順を説明します。