

はじめに
この記事は、Godot 4.xで脱出ゲームを作る連載の第6回です。
- 第1回:環境構築とプロジェクト作成
- 第2回:Claude Code + godot-mcpのセットアップ
- 第3回:Claude CodeとMCPでスプラッシュ画面を実装する
- 第4回:Claude CodeとMCPでタイトル画面を実装してシーンを遷移する
- 第5回:背景の特定領域をタップしてフェード遷移する
- 第6回:再利用可能なモーダルポップアップを作る(今回)
前回(第5回)では郵便受けをタップして post.tscn へフェード遷移する仕組みを実装しました。今回は post.tscn でポップアップを表示する仕組みを作ります。脱出ゲームでは「オブジェクトをタップ→ポップアップで詳細表示」が頻出パターンなので、どのシーンからでも使い回せるコンポーネントとして設計します。
この記事で作るもの
- タップでポップアップを表示・非表示する仕組み
- ポップアップ表示中は背景をタップ不可にするブロッカー
- フェードイン/アウトの演出
- 閉じるボタン(
btn_back.png)の追加 -
scenes/components/popup.tscnとして再利用可能なライブラリ化
前提条件
- Claude Code + godot-mcpのセットアップ完了(第2回参照)
-
scenes/post.tscnとscripts/post.gdが作成済み(第5回参照) - 以下の画像素材が
assets/images/に配置済み
| ファイル | 用途 |
|---|---|
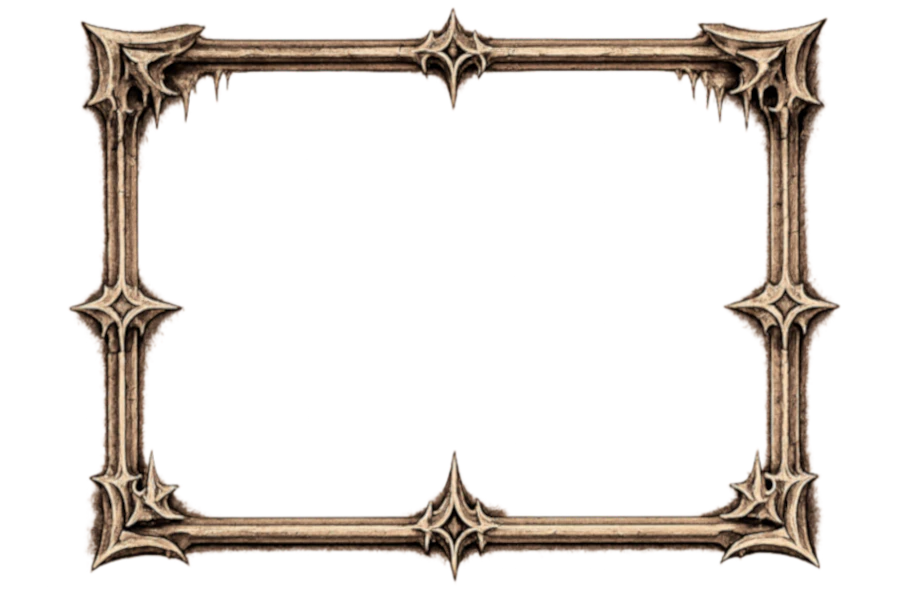
frame_popup.png |
ポップアップのフレーム枠(900×600px) |
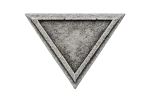
btn_back.png |
閉じるボタン |
frame_popup.png
btn_back.png
設計方針
今回はポップアップを scenes/components/popup.tscn として独立したシーンに切り出し、open() / close() メソッドで操作できるコンポーネントとして設計します。呼び出し側のシーンは $Popup.open() と一行書くだけで使えるので、後続のシーンでも簡単に再利用できます。
Claude Codeへの指示は一度に完成形を伝えるのではなく、段階的に追加指示を出しながら調整しています。その試行錯誤の過程もそのまま記録しています。
ファイル構成
scenes/
  components/
    popup.tscn          ← 今回作成(再利用可能なポップアップ)
  post.tscn             ← ポップアップを呼び出す側
scripts/
  components/
    popup.gd            ← 今回作成
  post.gd               ← 呼び出し側(追記)
assets/images/
  frame_popup.png       ← ポップアップのフレーム画像
  btn_back.png          ← 閉じるボタン画像
1. ポップアップの基本実装
1-1. Claude Codeへの指示
プロンプト:
post.tscnで郵便受けの領域をタップしたら、frame_popup.pngを表示するポップアップを作成してください。ポップアップよりz軸の下はタップ不可能にしてください。ポップアップは共有で利用するのでライブラリ化しておいてください。
1-2. 生成されたノード構成
Claude Codeは scenes/components/ ディレクトリを作成し、以下の構成でポップアップを実装しました。
Popup (Control)          ← ルート。スクリプトをアタッチ
├── Blocker (ColorRect)  ← 全画面の半透明黒。下層へのタップをブロック
└── Frame (TextureRect)  ← frame_popup.png を表示
Blocker が全画面を覆うことで、ポップアップ表示中は背景への入力をブロックします。
1-3. 生成されたシーン(popup.tscn)
[gd_scene format=3]

[ext_resource type="Texture2D" path="res://assets/images/frame_popup.png" id="1_frame"]
[ext_resource type="Script" path="res://scripts/components/popup.gd" id="2_popup"]

[node name="Popup" type="Control"]
layout_mode = 3
anchors_preset = 15
anchor_right = 1.0
anchor_bottom = 1.0
grow_horizontal = 2
grow_vertical = 2
script = ExtResource("2_popup")

[node name="Blocker" type="ColorRect" parent="."]
layout_mode = 1
anchors_preset = 15
anchor_right = 1.0
anchor_bottom = 1.0
grow_horizontal = 2
grow_vertical = 2
color = Color(0, 0, 0, 0.6)
mouse_filter = 0

[node name="Frame" type="TextureRect" parent="."]
layout_mode = 1
anchors_preset = 15
anchor_right = 1.0
anchor_bottom = 1.0
grow_horizontal = 2
grow_vertical = 2
texture = ExtResource("1_frame")
expand_mode = 0
stretch_mode = 6
mouse_filter = 2
1-4. 生成されたスクリプト(popup.gd)
extends Control

signal closed

func _ready() -> void:
    $Blocker.gui_input.connect(_on_blocker_input)
    hide()

func open() -> void:
    show()
    modulate.a = 0.0
    var tween := create_tween()
    tween.tween_property(self, "modulate:a", 1.0, 0.2)

func close() -> void:
    var tween := create_tween()
    tween.tween_property(self, "modulate:a", 0.0, 0.2)
    tween.tween_callback(func(): hide(); closed.emit())

func _on_blocker_input(event: InputEvent) -> void:
    if event is InputEventMouseButton and event.pressed and event.button_index == MOUSE_BUTTON_LEFT:
        close()
1-5. ポイント解説
mouse_filter = 0(MOUSE_FILTER_STOP)でタップをブロック
ColorRect(Blocker)の mouse_filter を 0(STOP)にすることで、Blockerより下のノードへ入力イベントが届かなくなります。ポップアップ表示中は背景の郵便受けエリアなどをタップしても反応しなくなります。
mouse_filter = 2(MOUSE_FILTER_IGNORE)でフレームはタップを素通し
Frame(TextureRect)は見た目だけで入力を受け取る必要がないため 2(IGNORE)を設定します。これでフレーム部分をタップしても Blocker のイベントとして処理されます。
open() / close() メソッドによるシンプルなAPI
呼び出し側は $Popup.open() と $Popup.close() を呼ぶだけで操作できます。フェードイン/アウトもポップアップ内部に閉じているため、呼び出し側のコードがすっきりします。
closed シグナルで「閉じた後の処理」を外から受け取れる
close() 完了後に closed シグナルを emit しているため、「ポップアップが閉じたあとに何かしたい」場合は呼び出し側でシグナルを購読できます。
1-6. 呼び出し側(post.tscn / post.gd)への追記
popup.tscn を post.tscn に追加します。ノードツリーの末尾に配置することで、描画が最前面になります。
[ext_resource type="PackedScene" path="res://scenes/components/popup.tscn" id="3_popup"]

[node name="MailboxArea" type="Control" parent="."]
layout_mode = 0
offset_left = 735.0
offset_top = 220.0
offset_right = 1135.0
offset_bottom = 620.0
mouse_default_cursor_shape = 2

[node name="Popup" parent="." instance=ExtResource("3_popup")]
post.gd への追記は gui_input シグナルで $Popup.open() を呼ぶだけです。
func _ready() -> void:
    modulate.a = 0.0
    var tween := create_tween()
    tween.tween_property(self, "modulate:a", 1.0, fade_in_duration)
    $MailboxArea.gui_input.connect(_on_mailbox_area_gui_input)

func _on_mailbox_area_gui_input(event: InputEvent) -> void:
    if event is InputEventMouseButton and event.pressed and event.button_index == MOUSE_BUTTON_LEFT:
        $Popup.open()
2. フレーム画像を原寸表示に変更
想定よりスケールを大きくされたので、原寸サイズに変更してもらいました。
2-1. Claude Codeへの追加指示
プロンプト:
frame_popup.pngは実際サイズのままで。
2-2. 生成された差分
stretch_mode を 6(Keep Aspect Covered)から 3(Keep Centered)に変更します。
- stretch_mode = 6
+ stretch_mode = 3
2-3. ポイント解説
| stretch_mode | 値 | 動作 |
|---|---|---|
| Keep Aspect Covered | 6 | アスペクト比を保ちながら全体を覆うよう拡大 |
| Keep Centered | 3 | 原寸のまま中央表示(今回採用) |
frame_popup.png は900×600pxのサイズで設計されているため、拡大せず原寸のまま中央に表示するのが意図した見た目になります。
3. 表示位置をY軸上方向に移動
ポップアップの下に閉じるボタンを配置するため上に少し移動させました。
3-1. Claude Codeへの追加指示
プロンプト:
Y軸上に100px移動してください
3-2. 生成された差分
Frameの offset_top / offset_bottom にそれぞれ -100 を追加します。
  [node name="Frame" type="TextureRect" parent="."]
  layout_mode = 1
  anchors_preset = 15
  anchor_right = 1.0
  anchor_bottom = 1.0
+ offset_top = -100.0
+ offset_bottom = -100.0
3-3. ポイント解説
offset_top と offset_bottom を同じ値だけずらすと、矩形の縦幅を変えずに上下位置だけを移動できます。今回は両方に -100 を設定することでフレームが100px上に移動します。
4. ポップアップをタップしても閉じないように変更
組んでもらった処理ですと、どこをタップしても閉じる挙動になっていたので、戻るボタンの設置計画があるためタップでは閉じないようにしてもらいました。
4-1. Claude Codeへの追加指示
プロンプト:
ポップアップをタップしても閉じないように
4-2. 生成された差分
Blocker の gui_input への接続と、_on_blocker_input メソッドを削除します。
  func _ready() -> void:
-     $Blocker.gui_input.connect(_on_blocker_input)
      hide()

- func _on_blocker_input(event: InputEvent) -> void:
-     if event is InputEventMouseButton and event.pressed and event.button_index == MOUSE_BUTTON_LEFT:
-         close()
4-3. ポイント解説
Blocker は MOUSE_FILTER_STOP を維持しているため、背後へのタップブロックは引き続き有効です。変更後は close() を外部から明示的に呼び出す設計になります(次のステップで追加する閉じるボタンから呼び出します)。
5. 閉じるボタンを追加
5-1. Claude Codeへの追加指示
プロンプト:
frame_popup.pngのすぐ下に、btn_back.pngを表示して、タップでポップアップを閉じる
5-2. 生成されたノード構成の変更
Frame と BtnBack を VBoxContainer でまとめ、Frame の直下にボタンが並ぶ構造にします。
Popup (Control)
├── Blocker (ColorRect)
└── Content (VBoxContainer)      ← 追加:FrameとBtnBackをまとめる
    ├── Frame (TextureRect)
    └── BtnBack (TextureButton)  ← 追加
5-3. 生成された差分
+ [ext_resource type="Texture2D" path="res://assets/images/btn_back.png" id="3_btn_back"]

- [node name="Frame" type="TextureRect" parent="."]
- layout_mode = 1
- ...

+ [node name="Content" type="VBoxContainer" parent="."]
+ layout_mode = 1
+ anchors_preset = 15
+ anchor_right = 1.0
+ anchor_bottom = 1.0
+ offset_top = -100.0
+ offset_bottom = -100.0
+ grow_horizontal = 2
+ grow_vertical = 2
+ alignment = 1
+ mouse_filter = 2
+
+ [node name="Frame" type="TextureRect" parent="Content"]
+ layout_mode = 2
+ size_flags_horizontal = 4
+ texture = ExtResource("1_frame")
+ expand_mode = 0
+ stretch_mode = 3
+ mouse_filter = 2
+
+ [node name="BtnBack" type="TextureButton" parent="Content"]
+ layout_mode = 2
+ size_flags_horizontal = 4
+ texture_normal = ExtResource("3_btn_back")
popup.gd への追記は1行だけです。
  func _ready() -> void:
+     $Content/BtnBack.pressed.connect(close)
      hide()
5-4. ポイント解説
VBoxContainer + alignment = 1 で縦方向中央揃え
VBoxContainer の alignment = 1(CENTER)を設定することで、Frame と BtnBack が縦方向に中央揃えでまとまります。
size_flags_horizontal = 4(SHRINK_CENTER)で水平方向も中央揃え
各子ノードに設定することで、コンテナ内で水平方向にも中央配置されます。自然サイズ(画像サイズ)を維持したまま中央に揃えられるのがポイントです。
Content の mouse_filter = 2(IGNORE)でコンテナはタップを素通し
VBoxContainer 自体はタップイベントを消費させず、子ノードにそのまま通します。
6. コンテンツ位置をさらに調整
ポップアップと閉じるボタンが画面の上方向に配置されてしまったので、位置調整をしてもらいました。
6-1. Claude Codeへの追加指示
プロンプト:
frame_popup.pngとbtn_back.pngを50px下に
6-2. 生成された差分
Content VBoxContainer の offset_top / offset_bottom を調整します。
- offset_top = -100.0
- offset_bottom = -100.0
+ offset_top = -50.0
+ offset_bottom = -50.0
offset_top と offset_bottom を同じ値で変更することで、矩形の縦幅を変えずに50px下に移動します。
7. 最終的なコード
段階的な調整を経て完成した最終版のコードです。
scenes/components/popup.tscn
[gd_scene format=3]

[ext_resource type="Texture2D" path="res://assets/images/frame_popup.png" id="1_frame"]
[ext_resource type="Script" path="res://scripts/components/popup.gd" id="2_popup"]
[ext_resource type="Texture2D" path="res://assets/images/btn_back.png" id="3_btn_back"]

[node name="Popup" type="Control"]
layout_mode = 3
anchors_preset = 15
anchor_right = 1.0
anchor_bottom = 1.0
grow_horizontal = 2
grow_vertical = 2
script = ExtResource("2_popup")

[node name="Blocker" type="ColorRect" parent="."]
layout_mode = 1
anchors_preset = 15
anchor_right = 1.0
anchor_bottom = 1.0
grow_horizontal = 2
grow_vertical = 2
color = Color(0, 0, 0, 0.6)
mouse_filter = 0

[node name="Content" type="VBoxContainer" parent="."]
layout_mode = 1
anchors_preset = 15
anchor_right = 1.0
anchor_bottom = 1.0
offset_top = -50.0
offset_bottom = -50.0
grow_horizontal = 2
grow_vertical = 2
alignment = 1
mouse_filter = 2

[node name="Frame" type="TextureRect" parent="Content"]
layout_mode = 2
size_flags_horizontal = 4
texture = ExtResource("1_frame")
expand_mode = 0
stretch_mode = 3
mouse_filter = 2

[node name="BtnBack" type="TextureButton" parent="Content"]
layout_mode = 2
size_flags_horizontal = 4
texture_normal = ExtResource("3_btn_back")
scripts/components/popup.gd
extends Control

signal closed

func _ready() -> void:
    $Content/BtnBack.pressed.connect(close)
    hide()

func open() -> void:
    show()
    modulate.a = 0.0
    var tween := create_tween()
    tween.tween_property(self, "modulate:a", 1.0, 0.2)

func close() -> void:
    var tween := create_tween()
    tween.tween_property(self, "modulate:a", 0.0, 0.2)
    tween.tween_callback(func(): hide(); closed.emit())
動作確認
F5 でゲームを実行し、以下の流れで動作すれば成功です。
-
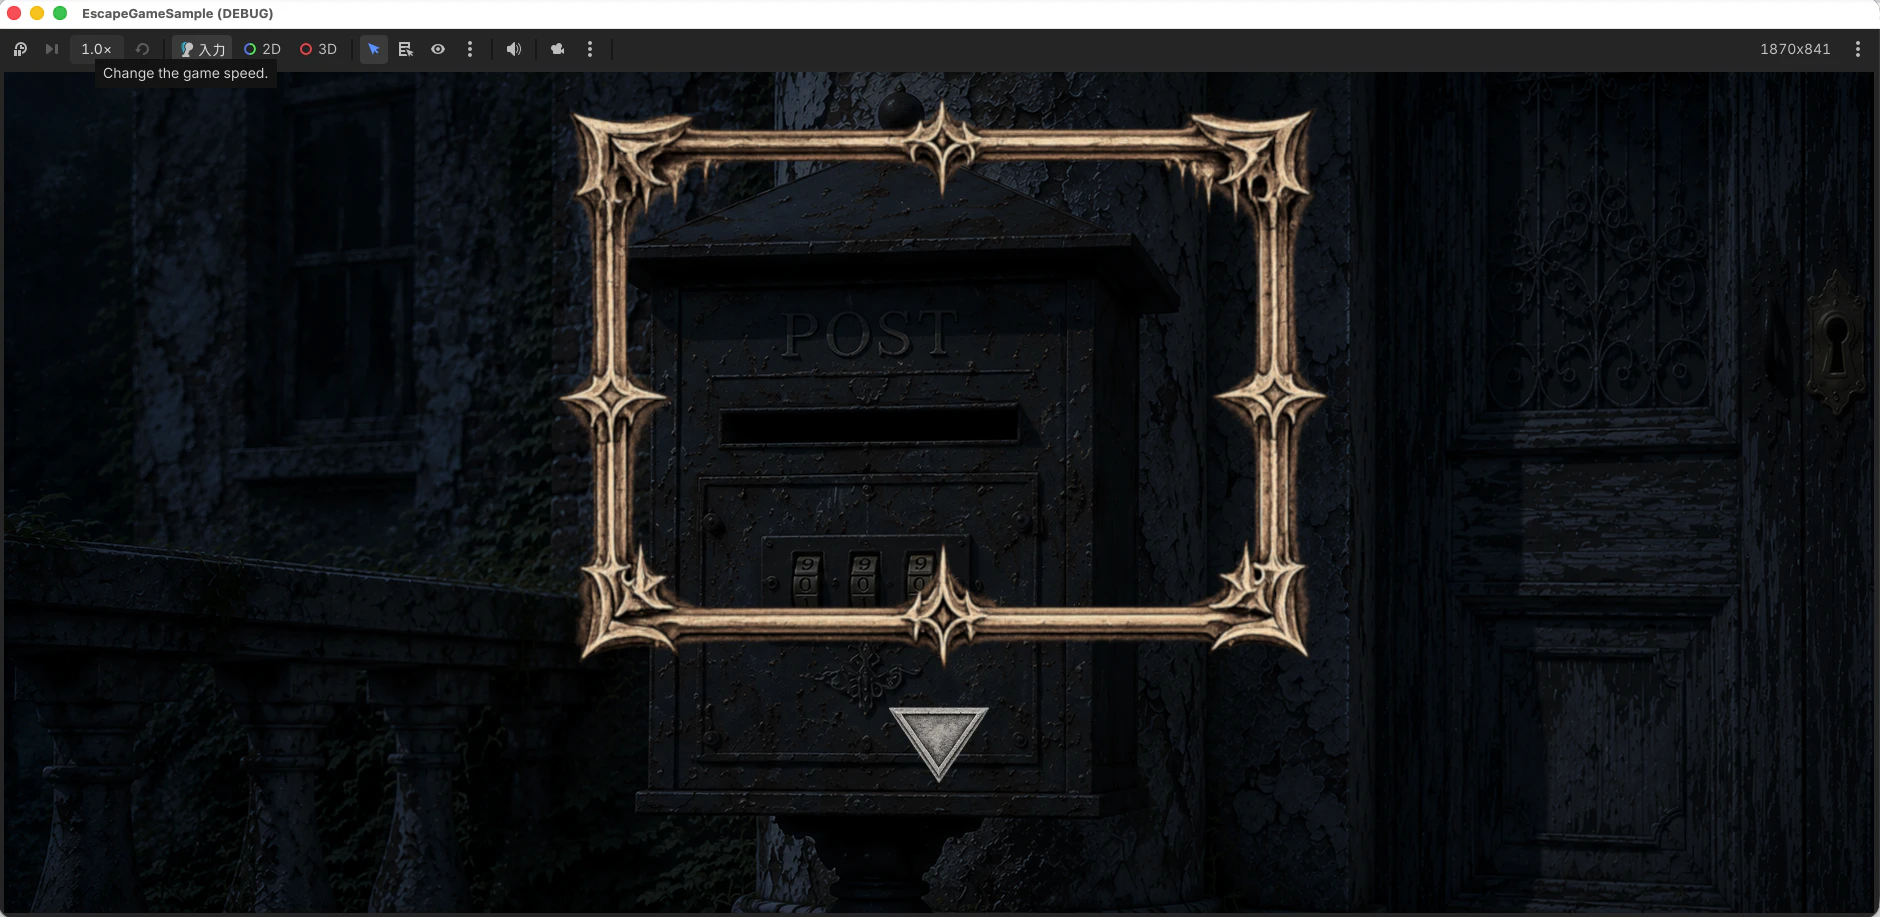
post.tscnに遷移した状態で郵便受けをタップする - 半透明の黒背景とともにポップアップがフェードインして表示される
- ポップアップ表示中、背景をタップしても反応しない
- 「戻る」ボタン(
btn_back.png)をタップするとポップアップがフェードアウトして閉じる
成果物
郵便受けに近接して
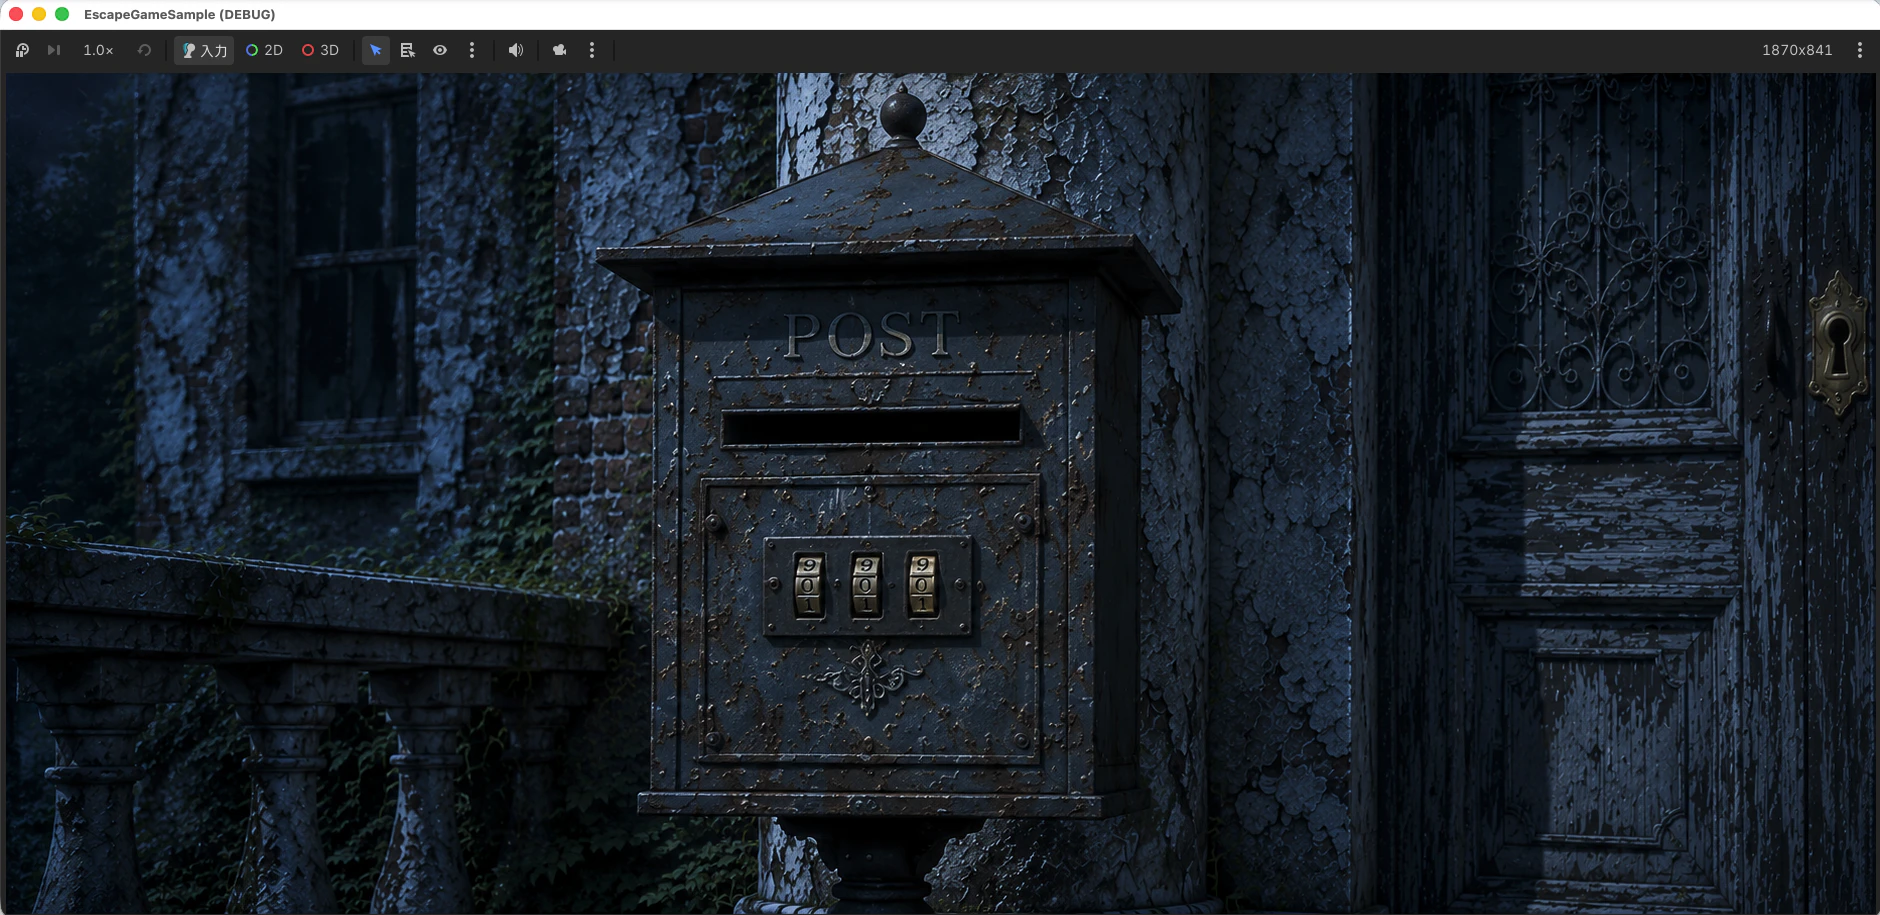
郵便受けをタップでポップアップを表示
このポップアップにダイヤル錠開錠のギミックを仕込む予定です
まとめ
今回はClaude Code + godot-mcpを使って以下を実装しました。
| やったこと | ポイント |
|---|---|
| 背後をタップ不可にする | 全画面 ColorRect に MOUSE_FILTER_STOP(mouse_filter = 0) |
| 画像を原寸表示 |
expand_mode = 0 + stretch_mode = 3(Keep Centered) |
| 位置の上下調整 |
offset_top / offset_bottom を同値でずらす |
| Frame と Button を縦並び中央配置 |
VBoxContainer + alignment = 1 + size_flags_horizontal = 4
|
| フェードイン/アウト |
create_tween() で modulate.a をアニメーション |
| 再利用可能なコンポーネント |
open() / close() メソッドで操作するライブラリ設計 |
今回のポップアップは「フレームとボタンだけ」のシンプルな構成ですが、次回はこのフレームの内部にダイヤル錠のスプライトアトラスを組み込んで謎解きギミックを実装します。