初めに
MQTTの勉強とLTE使ってM2Mっぽいものを見せてくれよというリクエストから、Spresense のM2MをLTE経由でMQTTのpub/subを使ってやってみようと作ってみました。このコードではM2Mって感じじゃないのですがベースのプログラムとして使えるかな~と思って言います。
具体的には、例えば、東京側にあるSpresenseの Keypadで、1~4の数字を入力すると、それに合わせて大阪にあるSpresenseのLED0~3が点灯するというものです。
※東京、大阪はイメージです。
Keypadも使うので、今回は、ArduinoIDEを使って実現しようとしました。
実は、これだと動きがもっさりしています。これを解消する記事は、別途書こうと思っていますが、それほど反応速度がいらないようなものには、非常に簡単にできるのでまずはここまでということで。
用意したもの
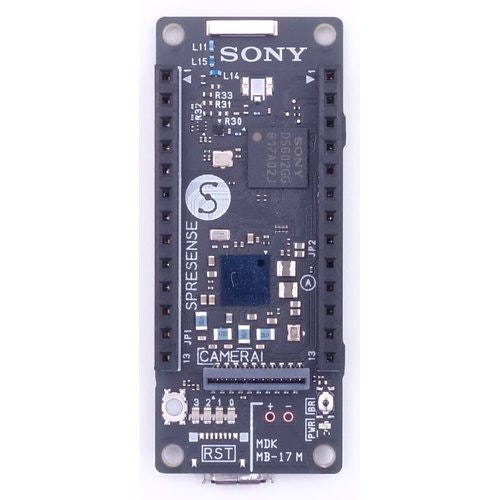
SPRESENSEメインボード[CXD5602PWBMAIN1]
https://www.switch-science.com/catalog/3900/
SPRESENSE LTE拡張ボード [CXD5602PWBLM1J]
https://www.switch-science.com/catalog/5999/

IIJmioプリペイドパック
https://s.iijmio.jp/prepaid/
と、Mainボード、LTE、SIMをすべて2セットづつ。
それに、Qwiicのコネクタとキーパッド。
SPRESENSE用Qwiic接続基板
https://www.switch-science.com/catalog/6318/

Qwiic - キーパッド(12ボタン)
https://www.switch-science.com/catalog/5535/

そうです。使いまわしです。苦笑い…。
ブログ(元ネタ)
この記事は、以下のブログに過去に投稿したもののまとめです。
LTEボードとMQTTを使ってM2Mを体感する その1
http://spresense.livedoor.blog/archives/28134913.html
LTEボードとMQTTを使ってM2Mを体感する その2
http://spresense.livedoor.blog/archives/28174660.html
サンプルプログラム
Spresense ArduinoIDE の LTE のサンプルの中に、MQTT で通信するサンプルがあります。
これを見ることで、LTE を使った MQTT通信 のサンプルが作れます。
LTEを使う共通部分
LTEを使う上での共通定義部分は以下になります。
# include <LTE.h>
# include <ArduinoMqttClient.h>

// APN name
# define APP_LTE_APN "iijmio.jp" // replace your APN

/* APN authentication settings
 * Ignore these parameters when setting LTE_NET_AUTHTYPE_NONE.
 */
# define APP_LTE_USER_NAME "mio@iij"     // replace with your username
# define APP_LTE_PASSWORD  "iij" // replace with your password

// APN IP type
# define APP_LTE_IP_TYPE (LTE_NET_IPTYPE_V4V6) // IP : IPv4v6

// APN authentication type
# define APP_LTE_AUTH_TYPE (LTE_NET_AUTHTYPE_CHAP) // Authentication : CHAP

/* RAT to use
 * Refer to the cellular carriers information
 * to find out which RAT your SIM supports.
 * The RAT set on the modem can be checked with LTEModemVerification::getRAT().
 */

# define APP_LTE_RAT (LTE_NET_RAT_CATM) // RAT : LTE-M (LTE Cat-M1)

LTE lteAccess;
LTEClient client;
当然ですが、IIJ MIO 用のサンプルです。
異なる SIM を使う人は変更してください。
また、サンプルコードにある doAttach() は、そのまま使えるので使います。
void doAttach()
{
  while (true) {

    /* Power on the modem and Enable the radio function. */

    if (lteAccess.begin() != LTE_SEARCHING) {
      Serial.println("Could not transition to LTE_SEARCHING.");
      Serial.println("Please check the status of the LTE board.");
      for (;;) {
        sleep(1);
      }
    }

    /* The connection process to the APN will start.
     * If the synchronous parameter is false,
     * the return value will be returned when the connection process is started.
     */
    if (lteAccess.attach(APP_LTE_RAT,
                         APP_LTE_APN,
                         APP_LTE_USER_NAME,
                         APP_LTE_PASSWORD,
                         APP_LTE_AUTH_TYPE,
                         APP_LTE_IP_TYPE,
                         false) == LTE_CONNECTING) {
      Serial.println("Attempting to connect to network.");
      break;
    }

    /* If the following logs occur frequently, one of the following might be a cause:
     * - APN settings are incorrect
     * - SIM is not inserted correctly
     * - If you have specified LTE_NET_RAT_NBIOT for APP_LTE_RAT,
     *   your LTE board may not support it.
     */
    Serial.println("An error has occurred. Shutdown and retry the network attach preparation process after 1 second.");
    lteAccess.shutdown();
    sleep(1);
  }
}
MQTT通信を使う共通部分
MQTTで通信する上での共通定義部分は以下になります。
今回は、コードの単純化と応答速度を鑑みて、特に認証もセキュア通信もしませんでした。
// MQTT broker
# define BROKER_NAME "test.mosquitto.org"
# define BROKER_PORT 1883

// MQTT topic
# define MQTT_TOPIC "spresense/mqtt"

MqttClient mqttClient(client);

char broker[] = BROKER_NAME;
int port = BROKER_PORT;
char topic[]  = MQTT_TOPIC;
で、ここにMQTTの クライアントID が必要です。
これは、punlisher/subscriberごとに代わるので、publisher側は、
// MQTT ID
# define MQTT_ID "spresense_pub"
と定義し、subscriber側は、
// MQTT ID
# define MQTT_ID "spresense_sub"
と定義します。
また、今回は Broker には、mosquitoの公開サーバ を使いました。
mosquitoはこちら。
今回は、この辺の説明は飛ばします。
これで、LTE経由でのMQTT通信の準備ができました。
Publisher側のコード
Publisher側は、Keypadをつかうので、includeとインスタンス定義に以下を追加します。
# include <Wire.h>
# include "SparkFun_Qwiic_Keypad_Arduino_Library.h"

KEYPAD keypad1; //Create instance of this object
setup() は以下になります。
void setup()
{
  // Open serial communications and wait for port to open
  Serial.begin(115200);
  while (!Serial) {
      ; // wait for serial port to connect. Needed for native USB port only
  }

  Serial.println("Starting .");

  if (keypad1.begin() == false)  {
    Serial.println("Keypad does not appear to be connected. Please check wiring. Freezing...");
    while (1);
  }
  Serial.println(keypad1.getVersion());

  /* Connect LTE network */
  doAttach();

  // Wait for the modem to connect to the LTE network.
  Serial.println("Waiting for successful attach.");
  LTEModemStatus modemStatus = lteAccess.getStatus();

  while(LTE_READY != modemStatus) {
    if (LTE_ERROR == modemStatus) {

      Serial.println("An error has occurred. Shutdown and retry the network attach process after 1 second.");
      lteAccess.shutdown();
      sleep(1);
      doAttach();
    }
    sleep(1);
    modemStatus = lteAccess.getStatus();
  }

  Serial.println("attach succeeded.");

  Serial.print("Attempting to connect to the MQTT broker: ");
  Serial.println(broker);

  mqttClient.setId(MQTT_ID);

  while (!mqttClient.connect(broker, port)) {
    Serial.print("MQTT connection failed! Error code = ");
    Serial.println(mqttClient.connectError());
    sleep(1);
  }

  Serial.println("You're connected to the MQTT broker!");

  ledOn(LED0);
  ledOn(LED1);
  ledOn(LED2);
  ledOn(LED3);
}
データを送りユーティリティー関数として、sendData を用意します。
void sendData(String testString)
{
    mqttClient.beginMessage(topic);
    mqttClient.print(testString);
    mqttClient.endMessage();
}
これで、MQTT の publish ができるようになったので、loop() の中で、keypad の1から4の入力を検出して、それに合わせた 数字 を MQTT で送るようにします。
void loop()
{
  keypad1.updateFIFO();  // necessary for keypad to pull button from stack to readable register
  char button = keypad1.getButton();

  if (button > 0) {
     switch (button) {
        case '1':
          sendData(String(1));
          break;
        case '2':
          sendData(String(2));
          break;
        case '3':
          sendData(String(3));
          break;
        case '4':
          sendData(String(4));
          break;

        default:
          break;
      }
    }
}
これで、keypad の入力の数字に合わせて数字を送ることができました。
Subscriber側のコード
Publisher側は、受け取った文字に合わせてLEDをつけるだけなので、特に追加のincludeとインスタンス定義はありません。
setup() は以下になります。
void setup()
{ // Open serial communications and wait for port to open
  Serial.begin(115200);
  while (!Serial) {
      ; // wait for serial port to connect. Needed for native USB port only
  }

  Serial.println("Starting .");

  /* Connect LTE network */
  doAttach();

  // Wait for the modem to connect to the LTE network.
  Serial.println("Waiting for successful attach.");
  LTEModemStatus modemStatus = lteAccess.getStatus();

  while(LTE_READY != modemStatus) {
    if (LTE_ERROR == modemStatus) {

      Serial.println("An error has occurred. Shutdown and retry the network attach process after 1 second.");
      lteAccess.shutdown();
      sleep(1);
      doAttach();
    }

  Serial.println("attach succeeded.");

  Serial.print("Attempting to connect to the MQTT broker: ");
  Serial.println(broker);

  mqttClient.setId(MQTT_ID);

  while (!mqttClient.connect(broker, port)) {
    Serial.print("MQTT connection failed! Error code = ");
    Serial.println(mqttClient.connectError());
    sleep(1);
  }

  mqttClient.subscribe(topic);

  Serial.println("You're connected to the MQTT broker!");
}
これで、MQTT の subscribe ができるようになったので、loop() の中で、受け取った文字に合わせて LED を点灯するようにします。
void loop()
{
  int messageSize = mqttClient.parseMessage();
  if (messageSize) {
    while (mqttClient.available()) {
     switch (mqttClient.read()) {
        case '1':
          ledOn(LED0);
          ledOff(LED1);
          ledOff(LED2);
          ledOff(LED3);
          break;
        case '2':
          ledOff(LED0);
          ledOn(LED1);
          ledOff(LED2);
          ledOff(LED3);
          break;
        case '3':
          ledOff(LED0);
          ledOff(LED1);
          ledOn(LED2);
          ledOff(LED3);
          break;
        case '4':
          ledOff(LED0);
          ledOff(LED1);
          ledOff(LED2);
          ledOn(LED3);
          break;

        default:
          break;
      }
    }
    Serial.println();
  }
}
これで リモート にある Spresense の キーパッド 入力に合わせて LEDを点灯させることができました。
動作結果
動かすとこんな感じになります。
#Spresense #LTE で、#MQTT 使って、#M2M してみた。#KeyPad で押した数字の #LED が点いた!
— 「SPRESENSEに興味あり」 (@spresense) November 26, 2021
これで、東京から大阪のSpresenseが操作できるね。https://t.co/g9hQalUcD6 pic.twitter.com/3lgouwfItQ
冒頭にも書いたとおり、かなり動きがもっさりしますが、これは、Arduino の MQTTライブラリでsubscribe することが原因のようです。SDKで動かせば早くなります。
機会 があればこちらも書きま~す。