IQ Botでは、使用するOCRエンジンをインスタンスごとに切り替えることが可能です。
OCRエンジンの切替方法はバージョンによって異なります。
この記事では、それぞれのバージョンにあわせたエンジンの切替方法を説明します。
A2019およびV11.3.5以降の場合
画面から切替が可能です。
詳細は以下のリンクで説明しています。
【リンク】「はじめての IQ Bot:IQ Botを作ってみよう!」より、OCRエンジンの選択
V11.3.4以前の場合
V11.3.4以前の場合、OCRの切替のためにIQ Botサーバ―上の設定ファイルを修正する必要があります。
1) Settingsファイルの修正
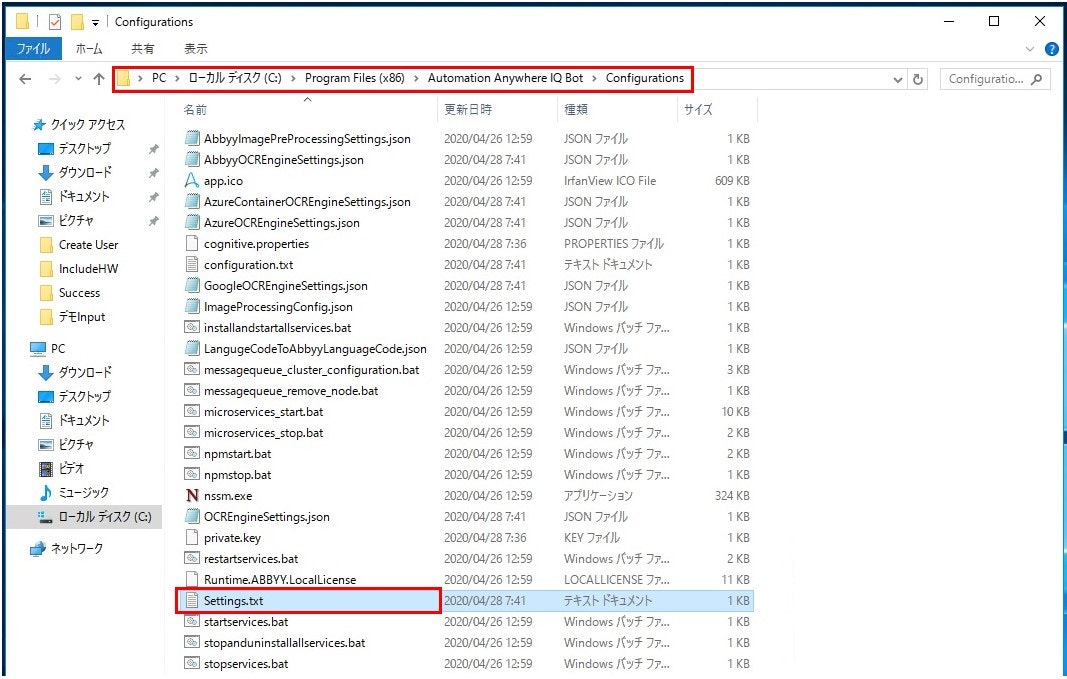
C:\Program Files (x86)\Automation Anywhere IQ Bot \Configurations配下の「Settings.txt」をメモ帳等で開きます。

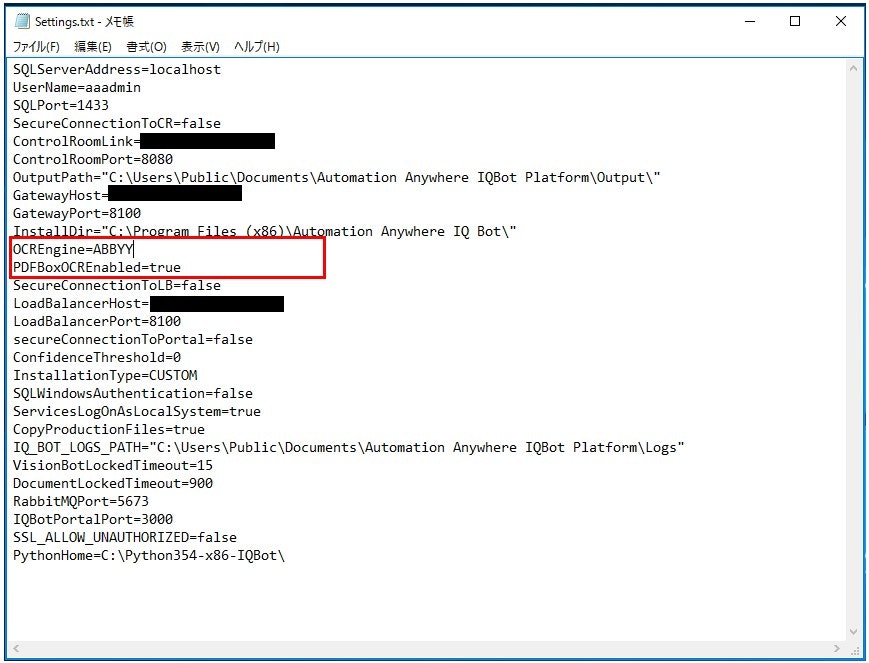
下記の赤枠のパラメーターを、下表の要領で変更して保存します。

| OCR | パラメータ設定内容 |
|---|---|
| Tessaract4 | OCREngine=Tessaract4 PDFBoxOCREnabled=true |
| ABBYY | OCREngine=ABBYY PDFBoxOCREnabled=true |
| Microsoft Computer Vision | OCREngine=MicrosoftAzureAPI PDFBoxOCREnabled=true |
| Google Vision | OCREngine=GoogleVisionAPI PDFBoxOCREnabled=false |
どのOCRを選ぶべきかを判断するコツはこちら参照。
2) 変更の反映
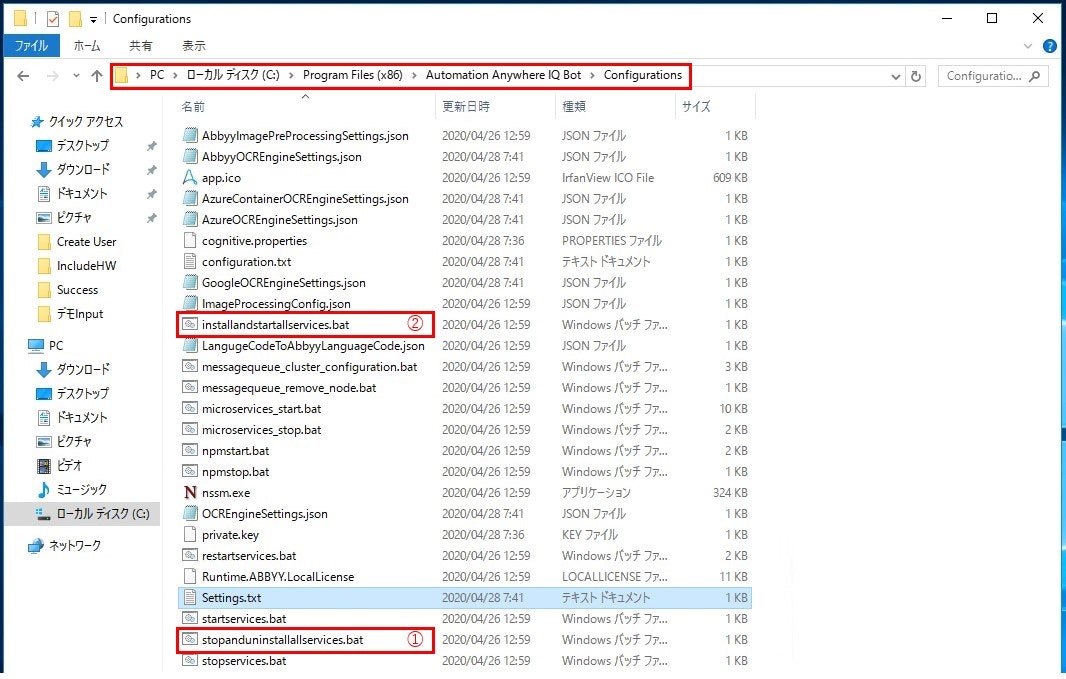
上記のセッティングファイルの変更を反映するために、C:\Program Files (x86)\Automation Anywhere IQ Bot \Configurations配下の①stopanduninstallallservices.bat → ②installandstartallservices.batを順に実行します。
(右クリック→管理者として実行)
以上で、OCRの変更が反映されます。
