

はじめに
今回は、OpenshiftOperatorにInstanaを導入する手順をやってみました!
InstanaのUIでの説明に沿ってコマンドだけでインストールが終了します。
全体手順
前提作業: Openshiftにinstana-agentプロジェクトとサービスアカウントを作成
1: オペレーターを手動でインストールします。
2: クラスター名を入力し、オプションでクラスターを含めるエージェントゾーンを入力します。
3: カスタムリソースYAMLファイルを構成します。
4: 以下のコマンドを実行・選択して構成でInstanaエージェントをデプロイします。
5: インストール確認(Instana UI)
全体像

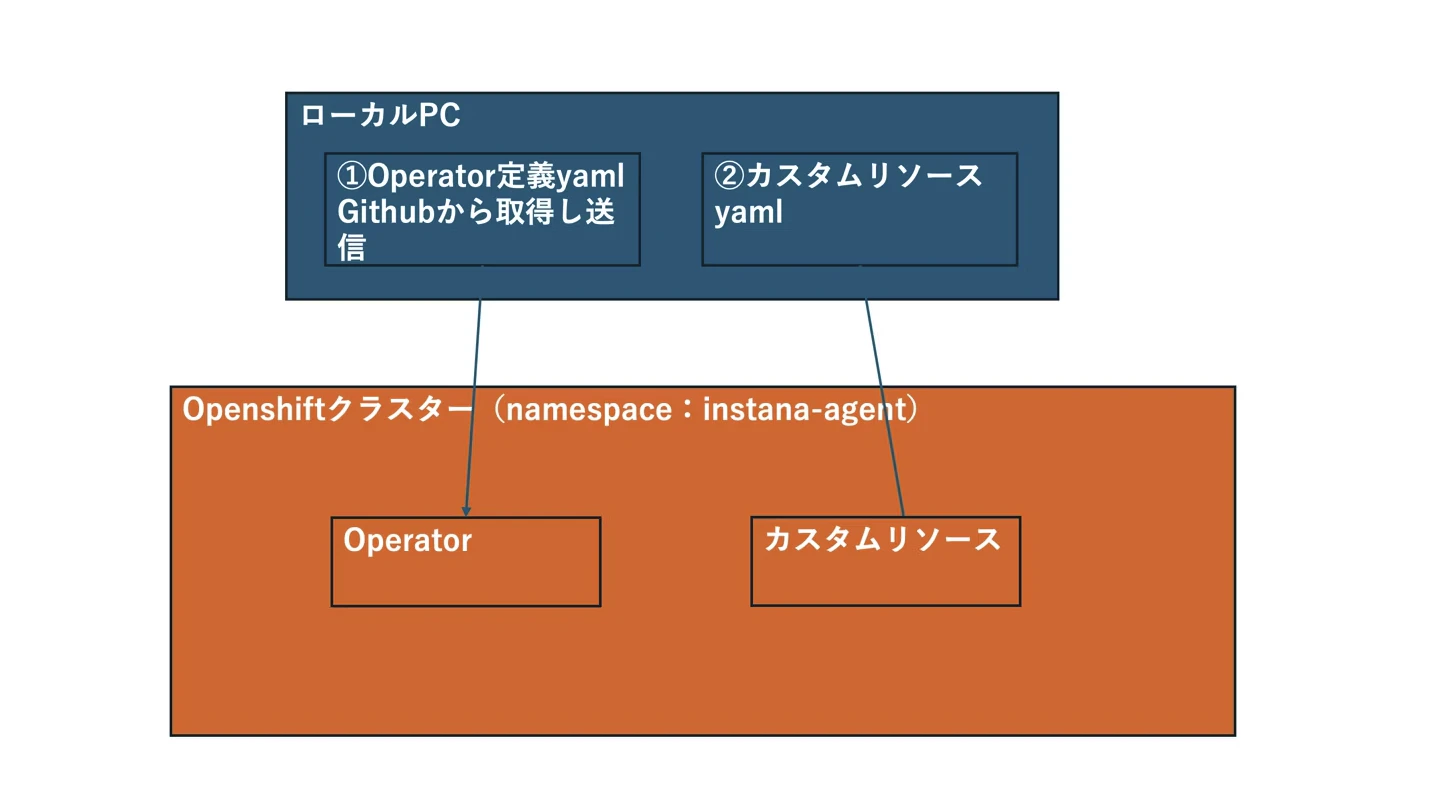
ローカルでoc / kubectlを実行すると、instana-agentプロジェクト内でOperatorとCustomResource(CR)が作成されます。
OperatorはCRをWatchしていて、変化があるとKubernetes APIに変更を呼びかけてpodが再配置されます。
参考
https://www.ibm.com/docs/en/instana-observability/1.0.311?topic=openshift-checking-agent-prerequisites-red-hat#setting-up-project-and-service-accounts__title__1
Instanaエージェントインストール手順
作業全体イメージ
ローカルでyamlを作って、OpenshiftクラスターにInstanaエージェントをデプロイします。
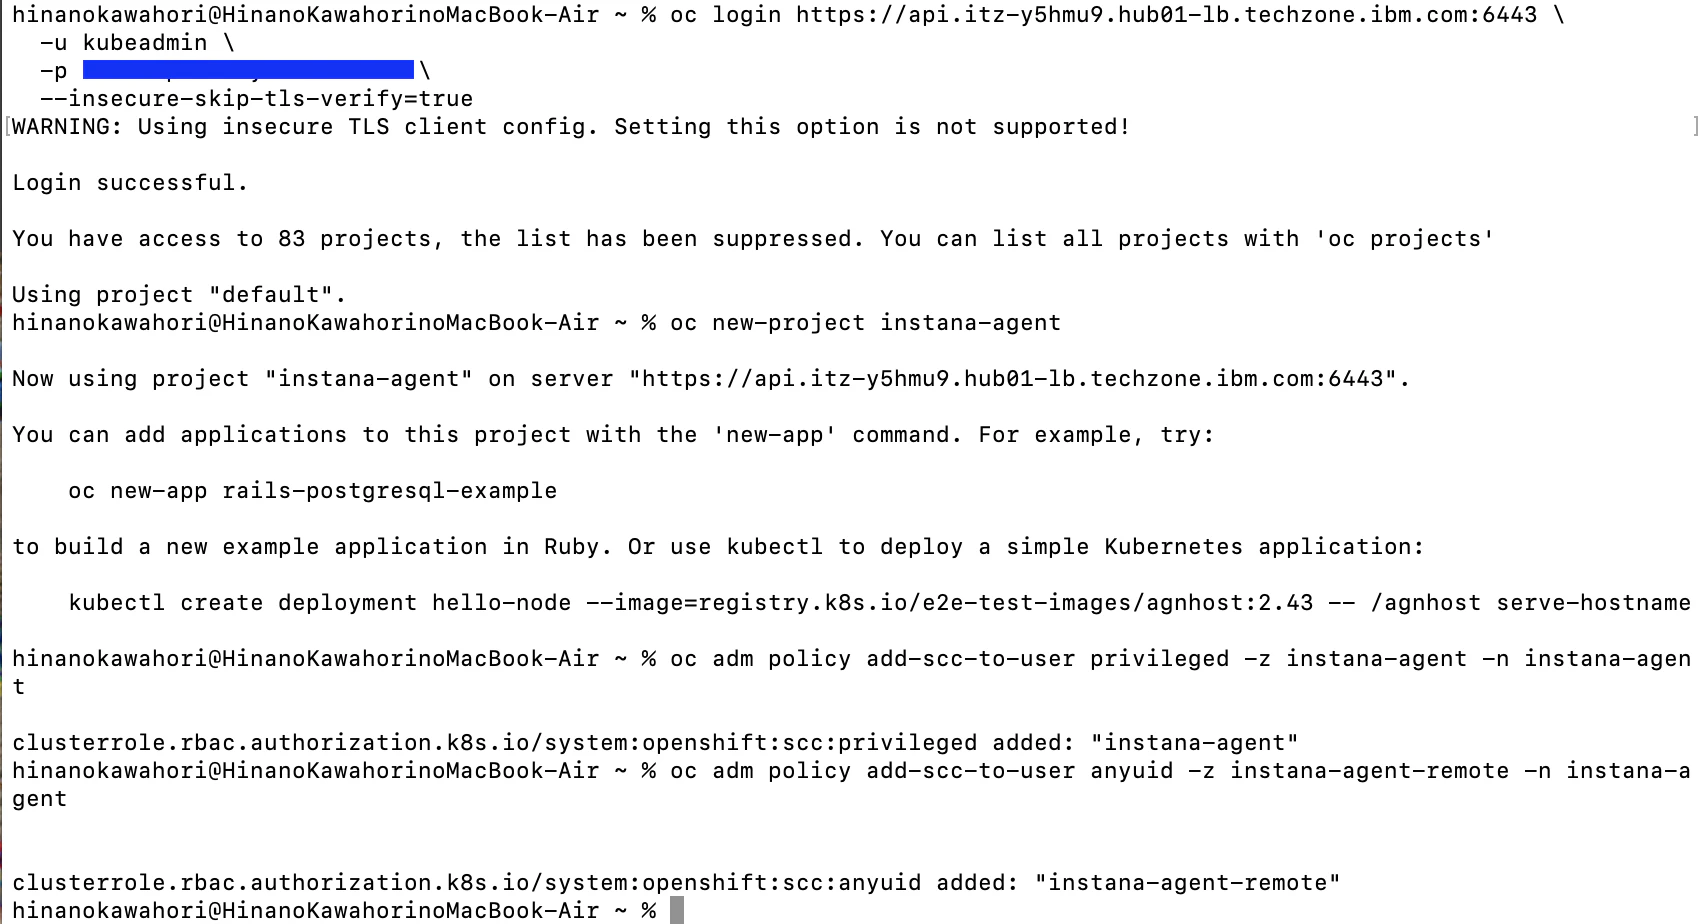
前提作業
Openshiftにinstanaエージェントをインストールする環境となる、instana-agentプロジェクトとサービスアカウントを作成します。
oc login https://api.itz-om63i2.hub01-lb.techzone.ibm.com:6443 \
  -u kubeadmin \
  -p 'Ph8ps-UjhhN-jg5Xm-UAC8n'
# usernameとpasswordを指定してログイン。
oc new-project instana-agent
oc adm policy add-scc-to-user privileged -z instana-agent -n instana-agent
oc adm policy add-scc-to-user anyuid -z instana-agent-remote -n instana-agent
ステップ1:オペレーターを手動でインストール
Projectがinstana-agentになっていることを確認し、Instana UIのコピペコマンドを実行します。
すると、色々createdとなります。
kubectl apply -f https://github.com/instana/instana-agent-operator/releases/latest/download/instana-agent-operator.yaml

ステップ2:クラスタ名を入力
任意のクラスタ名とゾーン名を入力します。
今回は、下記コマンドからクラスター名は環境名にしました。

oc whoami --show-server

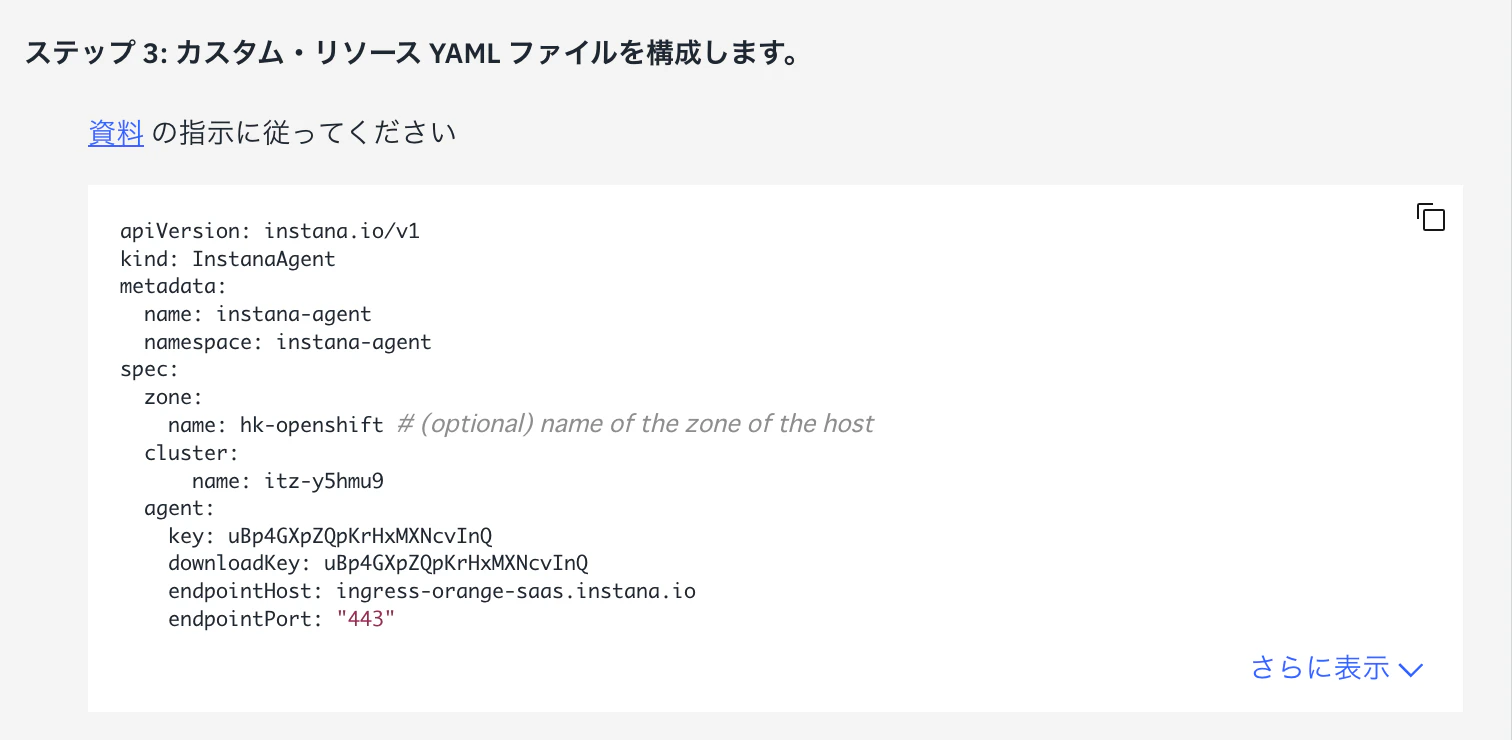
ステップ3:カスタム・リソース YAML ファイルを構成
どの位置からでもOKなので、InstanaUIで作られたコードをコピーして、instana-agent.customresource.yamlという名前のファイルを作ります。
ステップ4: Instana エージェントをデプロイ
ステップ3で作成したyamlをopenshift内のkubernetesに送ります。
kubectl apply -f instana-agent.customresource.yaml
無事インフラストラクチャでホストが確認できました!
