iOS開発初心者ですが、練習の為にと思いカレンダーを作りました。
ただ、かなり初心者なので、余り参考にならないかもしれませんが、
カレンダー作りは使用頻度の高いプログラムだと思いますので参考になればと思います。
このアプリを作るにあたって参考にさせていただいたページです。
Swift 3 の日時操作チートシート
【Swift】Calendarアプリを作る
【Swift】コレクションビューにセクションを追加する方法。
注意事項
- Swift3を使ってコードを書きました。CalenderオブジェクトはiOS10以上が対象となっています。
- XConde8.1 Swift3で動作確認を行っています
プロジェクトの準備
ベースとなるプロジェクトを作ります。
新規プロジェクトから SingleViewApplicationを選びProduct Nameを「Calendar」としました。
Main.storyboadに部品を配置します。
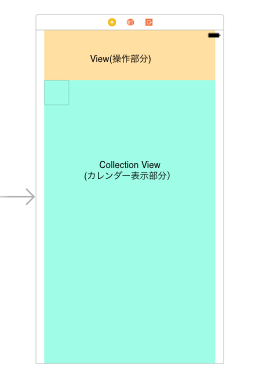
viewとCollectionViewをストーリボードに配置します。
Viewは日付を操作、表示する部品を後で入れます。コレクションビューはカレンダー部分の表示をします。分かりやすくバックグラウンドに色をつけました。

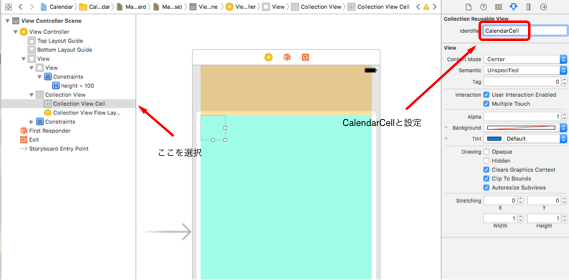
ColectionViewCellは固有値のIDがないと警告が出ます。
Collection View Cellのidentilfierプロパティに「CalendarCell」と設定。

Runで動く事を確認です。
ソースを管理
私は初心者なのでドツボに迷い込んでばかりです。
ソース管理はすごく重要なので、無事動いたらソースをコミットする事にしています。
区切りがいいのでブランチも作っておきます。
メニューの[Source Control]から[Commit...]を選択。簡単な説明を付け加えて[Commit]します。
次にメニューの[Source Control]の[プロジェクト名ーブランチ(今ならCarendarーmaster)]を選択し、[New Branche]を選択、
分かりやすい名前をつけて保存します。
困ったらブランチを戻れば何とかなります。(これ重要!!)
曜日表示部分を作る
カレンダーは曜日と日付部分の2段構成にしようと思います。
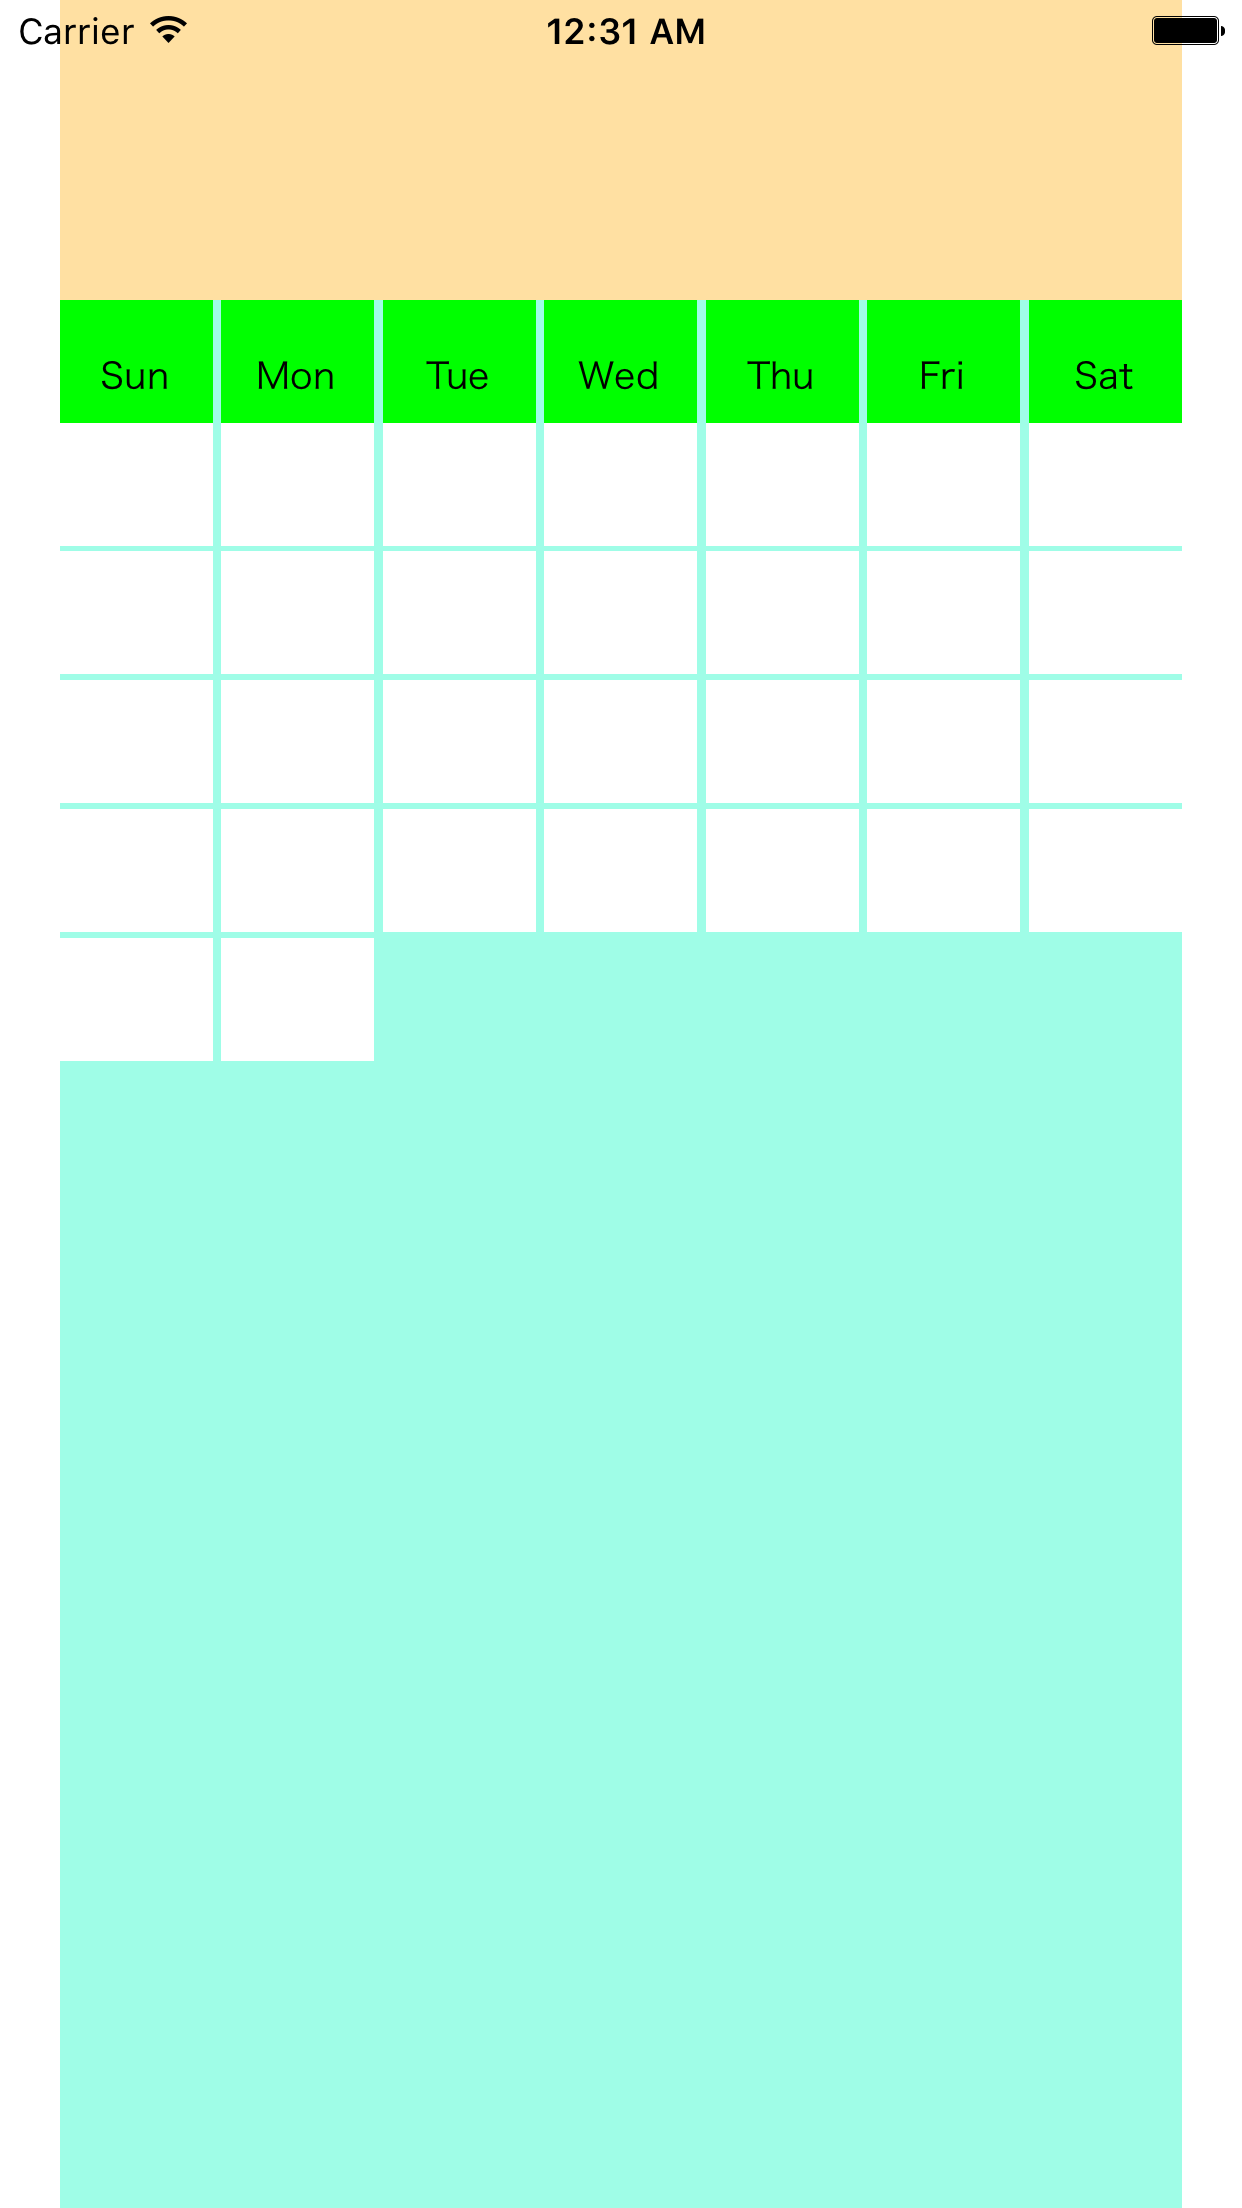
CollectionViewCellのセクションを2つにし、まずは曜日を表示させます。ついでに必要なファイルも作っておきます。
手順としては、
1.必要なファイルを作成
2.CollectionViewに必要な設定項目を追記
です。
必要なファイルを作成
(1)DateManager.swift(サブクラス:NSObject):カレンダーの内部処理を担当
(2)CalendarCell.swift(サブクラス:UICollectionViewCell):セルに追加するプロパティを記述します
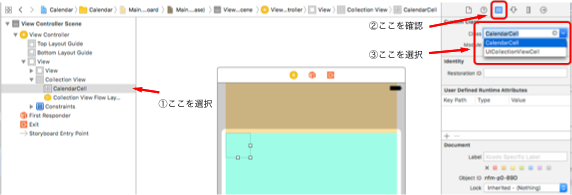
CollectionViewCellをクリックしてCustomClassのクラス名を「CalendarCell」に設定
上記のCollection View Cellのidentilfierとは別物です。名前分かりづらくてすみません。
CollectionViewのコードを記述
いよいよコードの記述に入ります。
ViewControllerにCollectionViewを Outlet接続し、データソースを記述します。
設定項目は、セルの数、セルの間隔
セルをクリックした時に得られる値をPrintしときます。
カレンダーの日付データはまだ実装していないのでデータ数は仮の数字で30を入れてます。
実装したコード
import UIKit

class ViewController: UIViewController ,UICollectionViewDataSource,UICollectionViewDelegate,UICollectionViewDelegateFlowLayout{ //← 追記

    let weekArray = ["Sun", "Mon", "Tue", "Wed", "Thu", "Fri", "Sat"]
    let numOfDays = 7       //1週間の日数
    let cellMargin : CGFloat = 2.0  //セルのマージン。セルのアイテムのマージンも別にあって紛らわしい。アイテムのマージンはゼロに設定し直してる

    //OUTLET
    @IBOutlet weak var calenderCollectionView: UICollectionView!

    override func viewDidLoad() {
        super.viewDidLoad()

        calenderCollectionView.delegate = self
        calenderCollectionView.dataSource = self
    }

    override func didReceiveMemoryWarning() {
        super.didReceiveMemoryWarning()
        // Dispose of any resources that can be recreated.
    }


    //コレクションビューのセクション数 今回は2つに分ける
    func numberOfSections(in collectionView: UICollectionView) -> Int {
        return 2
    }

    //データの個数(DataSourceを設定した場合に必要な項目)
    func collectionView(_ collectionView: UICollectionView, numberOfItemsInSection section: Int) -> Int {
        if(section == 0){   //section:0は曜日を表示
            return numOfDays
        }else{
            return 30        //section:1は日付を表示  今の時点では適当な数字30日くらいなので30を入れる
        }
    }

    //データを返すメソッド(DataSourceを設定した場合に必要な項目)
    //動作確認の為セルの背景を変える。曜日については表示する
    func collectionView(_ collectionView: UICollectionView, cellForItemAt indexPath: IndexPath) -> UICollectionViewCell {

        //コレクションビューから識別子「CalendarCell」のセルを取得する
        let cell = collectionView.dequeueReusableCell(withReuseIdentifier: "CalendarCell", for: indexPath) as! CalendarCell
        if(indexPath.section == 0){             //曜日表示
            cell.backgroundColor = UIColor.green
            cell.textLabel.text = weekArray[indexPath.row]

        }else{                                  //日付表示
            cell.backgroundColor = UIColor.white
            cell.textLabel.text = ""
        }
        return cell
    }

    //セルをクリックしたら呼ばれる
    func collectionView(_ collectionView: UICollectionView, didSelectItemAt indexPath: IndexPath) {
        print("Num:\(indexPath.row) Section:\(indexPath.section)")
    }

    /*

     セルのレイアウト設定

     */
    //セルサイズの指定(UICollectionViewDelegateFlowLayoutで必須) 横幅いっぱいにセルが広がるようにしたい
    func collectionView(_ collectionView: UICollectionView, layout collectionViewLayout: UICollectionViewLayout, sizeForItemAt indexPath: IndexPath) -> CGSize {
        let numberOfMargin:CGFloat = 8.0
        let widths:CGFloat = (collectionView.frame.size.width - cellMargin * numberOfMargin)/CGFloat(numOfDays)
        let heights:CGFloat = widths * 0.8

        return CGSize(width:widths,height:heights)
    }

    //セルのアイテムのマージンを設定
    func collectionView(_ collectionView: UICollectionView, layout collectionViewLayout: UICollectionViewLayout, insetForSectionAt section: Int) -> UIEdgeInsets {
        return UIEdgeInsetsMake(0.0 , 0.0 , 0.0 , 0.0 )  //マージン(top , left , bottom , right)
    }

    //セルの水平方向のマージンを設定
    func collectionView(_ collectionView: UICollectionView, layout collectionViewLayout: UICollectionViewLayout, minimumInteritemSpacingForSectionAt section: Int) -> CGFloat {
        return cellMargin
    }
    //セルの垂直方向のマージンを設定
    func collectionView(_ collectionView: UICollectionView, layout collectionViewLayout: UICollectionViewLayout, minimumLineSpacingForSectionAt section: Int) -> CGFloat {
        return cellMargin
    }
}
import UIKit

class CalendarCell: UICollectionViewCell {
    var textLabel : UILabel!

    required init?(coder aDecoder: NSCoder) {
        super.init(coder:aDecoder)!

        //UILabelを生成
        textLabel = UILabel(frame: CGRect(x:0, y:0, width:self.frame.width,  height: self.frame.height))
        textLabel.font = UIFont(name: "HiraKakuProN-W3", size: 12)
        textLabel.textAlignment = NSTextAlignment.center

        // Cellに追加
        self.addSubview(textLabel!)
    }

    override init(frame: CGRect) {
        super.init(frame: frame)

    }
}
import UIKit

class DateManager: NSObject {

}
Runして確認。

