はじめに
DreamHanksのMOONです。
今回はKotlin言語を使用してAndroidプログラミングの手順について説明していきます。
本来AndroidはJava言語を使って開発されていましたが、
最近はKotlinを使って開発することが多くなってきているので、今回はKotlinを使用していきます。
開発ツールをインストール
Androidを開発するためのAndroid Studioをインストールしていきます。
https://developer.android.com/studio?hl=jp
上記の公式サイトのリンクから、アンドロイドスタジオのインストールができます。
Android Studioプロジェクト作成
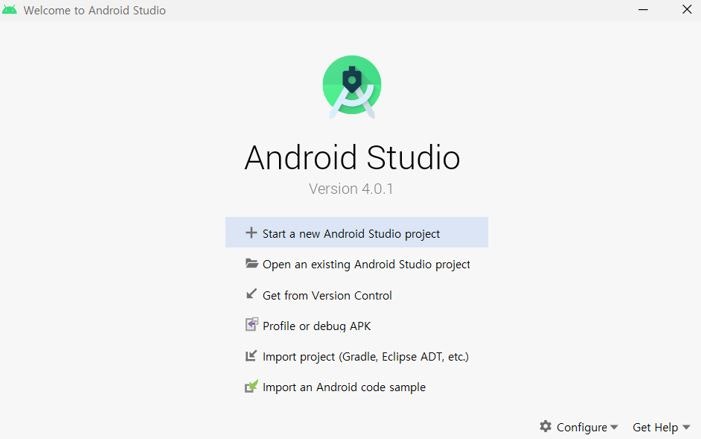
インストール後、最初にアンドロイドスタジオを実行すると以下の画面が表示されます。
一番上の「Start a new Android Studio project」を押してプロジェクトを作成します。
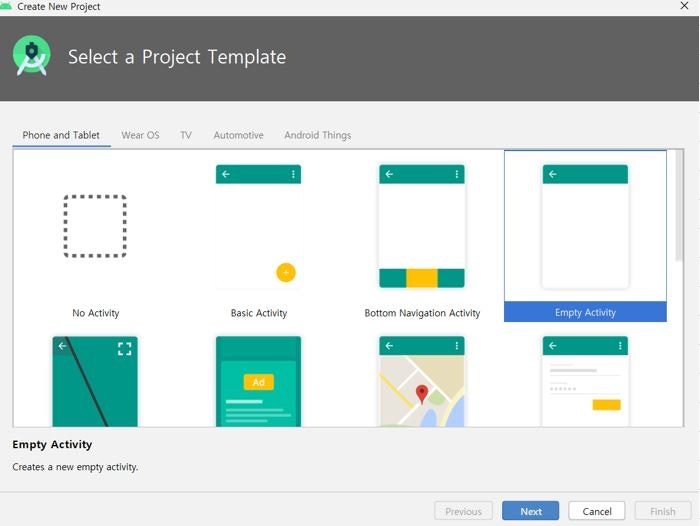
プロジェクトテンプレートの中からempty Activityを選択します。
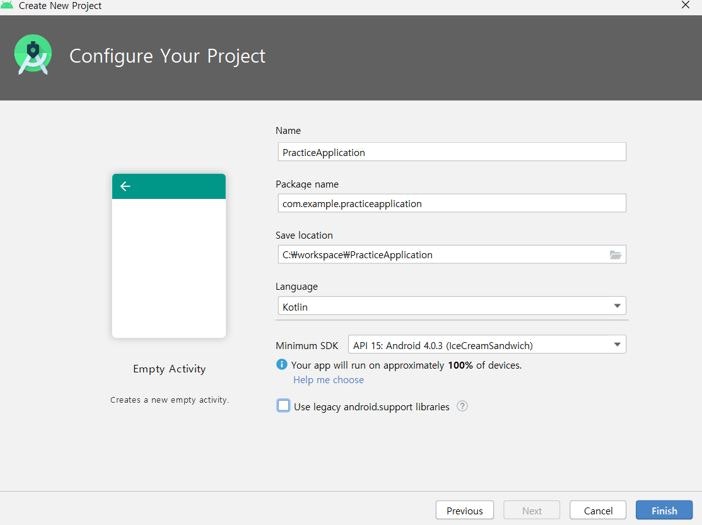
「Name」には希望のプロジェクト名を作成。
「Package name」には自動的にプロジェクト名の前のルートパスが生成されますが、
変更したいときには修正します。
「Save location」も自動的に生成されます。
「Language」には今回はKotlinを使用しますのでKotlinを選択します。
「Minimum SDK」は最小のバージョンを選択します。15バージョンを選択した場合、
上記画面下のMinimum SDKにあるメッセージのように
ほとんどのデバイスで動作可能です。
上記の作業が終了しfinishボタンをクリックすれば、完了です。
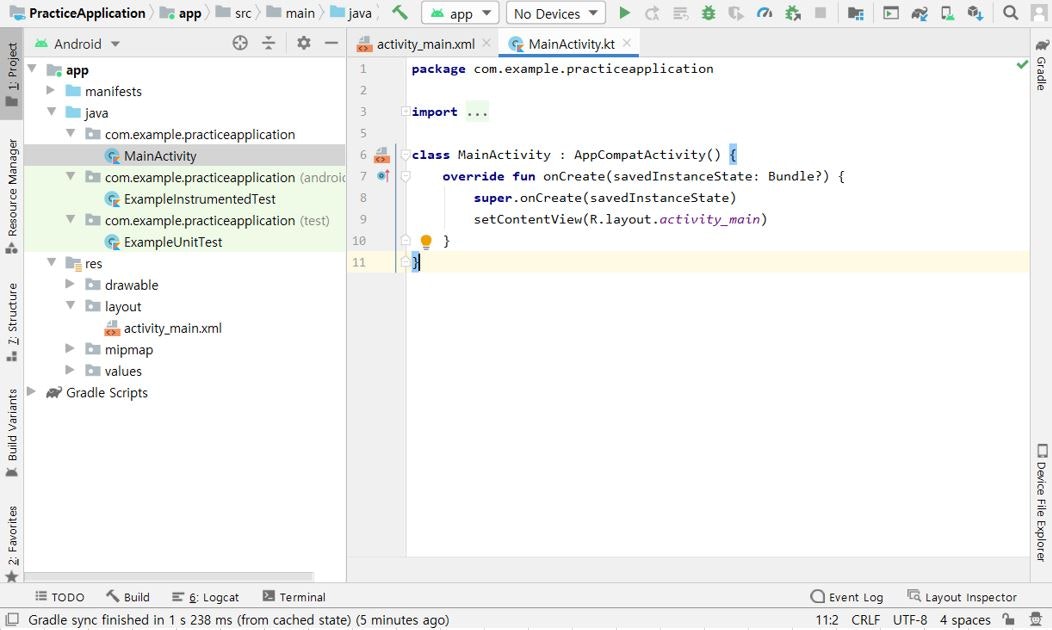
プロジェクトの基本要素確認
package com.example.practiceapplication

import androidx.appcompat.app.AppCompatActivity
import android.os.Bundle

class MainActivity : AppCompatActivity() {
    override fun onCreate(savedInstanceState: Bundle?) {
        super.onCreate(savedInstanceState)
        setContentView(R.layout.activity_main)
    }
}
Android Activityは、画面に表示されるUIを構成するための一番基本となる要素です。
Androidアプリは画面にUIを表示するため、最小1つのActivityを持つ必要があり、
アプリ実行時に指定されたActivityを実行してユーザーにUIを表示させます。
<?xml version="1.0" encoding="utf-8"?>
<androidx.constraintlayout.widget.ConstraintLayout xmlns:android="http://schemas.android.com/apk/res/android"
    xmlns:app="http://schemas.android.com/apk/res-auto"
    xmlns:tools="http://schemas.android.com/tools"
    android:layout_width="match_parent"
    android:layout_height="match_parent"
    tools:context=".MainActivity">

    <TextView
        android:layout_width="wrap_content"
        android:layout_height="wrap_content"
        android:text="Hello World!"
        app:layout_constraintBottom_toBottomOf="parent"
        app:layout_constraintLeft_toLeftOf="parent"
        app:layout_constraintRight_toRightOf="parent"
        app:layout_constraintTop_toTopOf="parent" />

</androidx.constraintlayout.widget.ConstraintLayout>
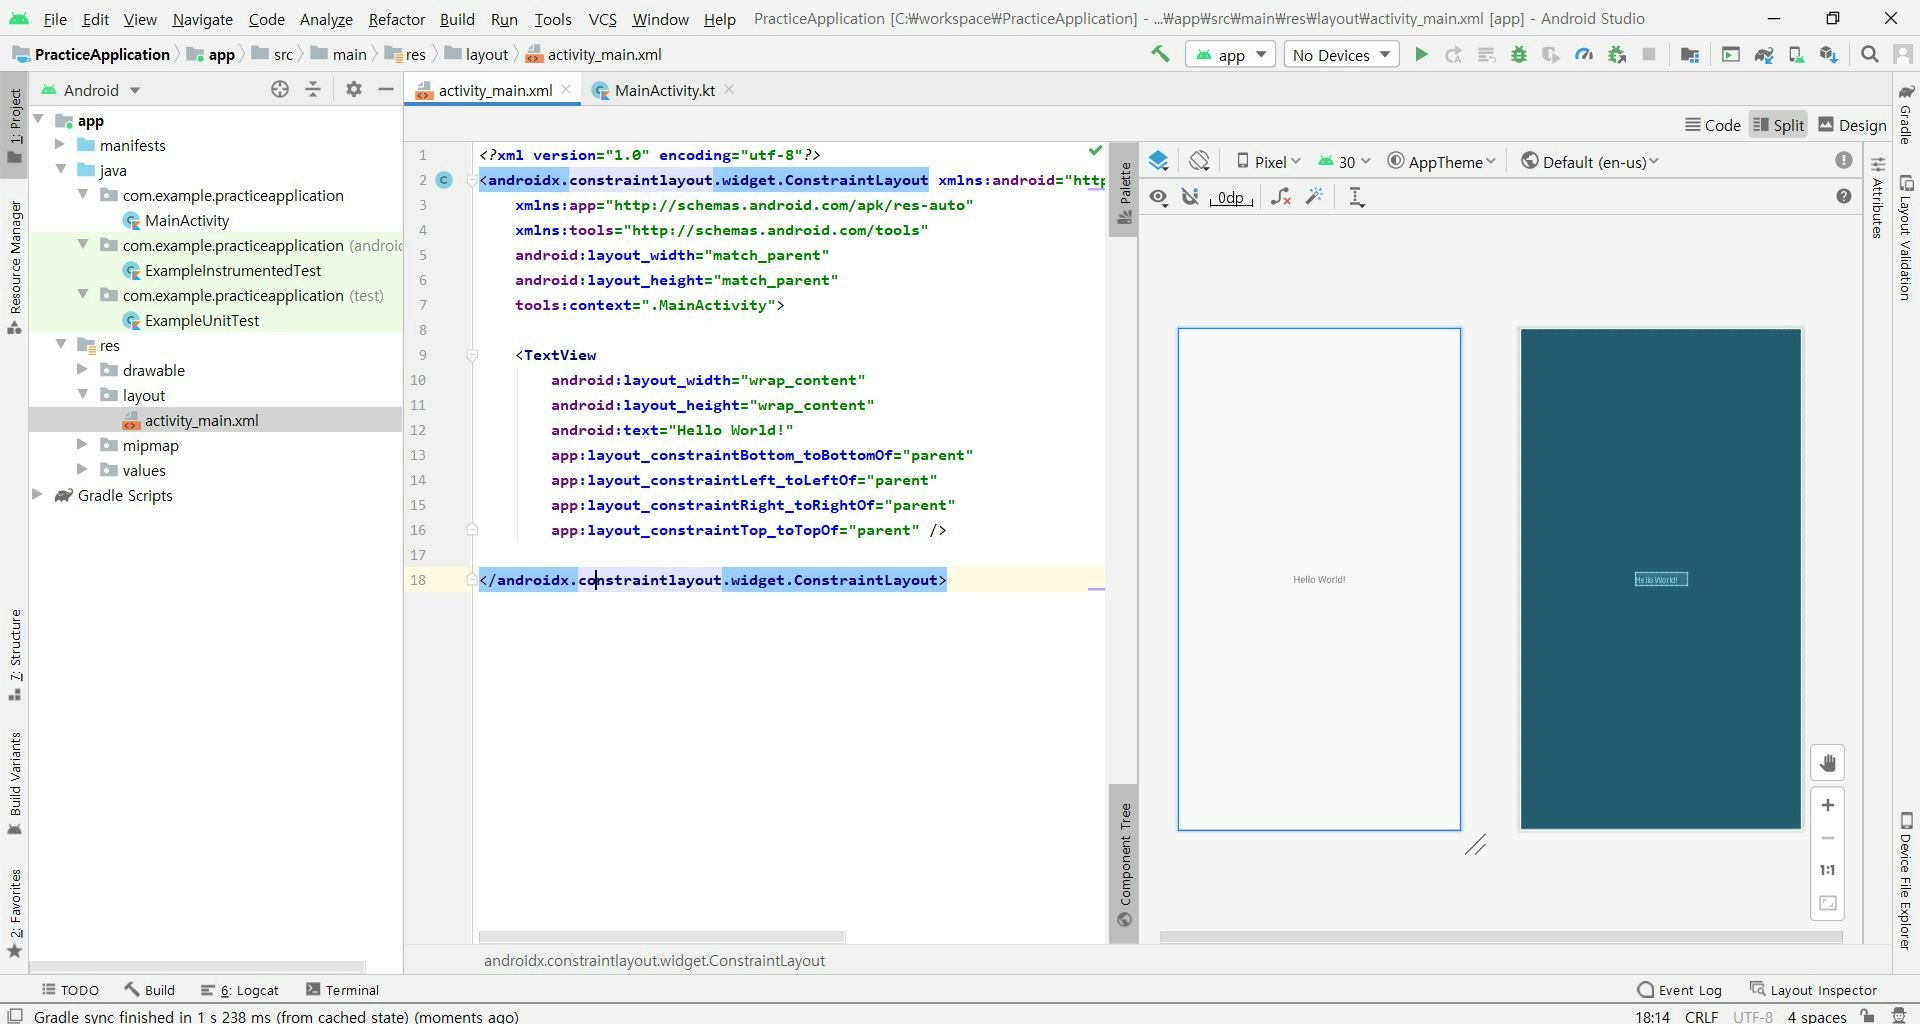
「res → layout」のパースに画面に表示されるxmlファイルがあります。
layoutのxmlファイルもアプリに画面を表示されるための一番基本となる要素です。
終わりに
今回は、アンドロイドスタジオのインストールとプロジェクトの作成の手順について説明しました。
次回は画面にボタンとテキストを追加し、イベントを設定していきます。
2. 【Android/Kotlin】ボタン追加
最新内容については下記のリンク(DreamHanksのブログ)で確認することができます。
DreamHanksブログ(Android/Kotlinアプリ開発)
