はじめに
DreamHanksのMOONです。
前回はAndroid開発ツールのAndroid Studioをインストールしました。
1. 【Android/Kotlin】Android Studioインストール
今回はアプリの画面にボタンを追加し、そのボタンにイベント機能を追加していきます。
Viewの概要
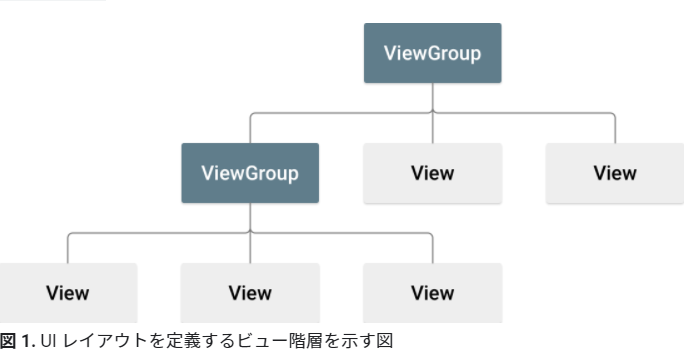
View オブジェクトは、通常は「ウィジェット」と呼ばれ、Button や TextView などの多数のサブクラスの 1 つです。ViewGroup オブジェクトは、通常は「レイアウト」と呼ばれ、LinearLayout や ConstraintLayout などの異なるレイアウト構造を提供する多数のタイプの 1 つです。
詳細な概要は、
https://developer.android.com/guide/topics/ui
上記のリンクで確認することができます。
ボタン追加とイベント設定
まず、ボタンヴューをレイアウトに追加します。
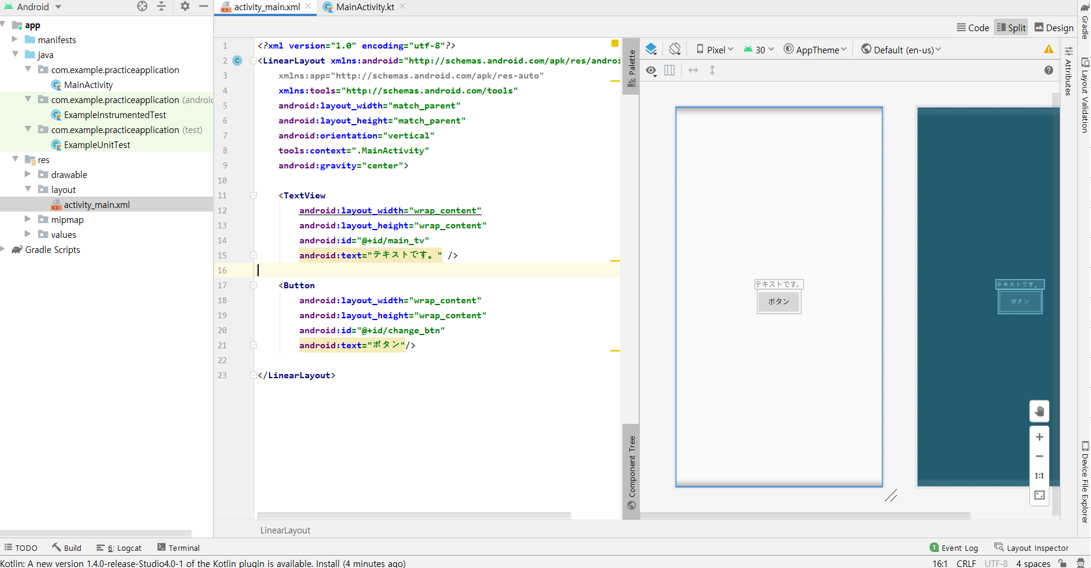
<?xml version="1.0" encoding="utf-8"?>
<LinearLayout xmlns:android="http://schemas.android.com/apk/res/android"
    xmlns:app="http://schemas.android.com/apk/res-auto"
    xmlns:tools="http://schemas.android.com/tools"
    android:layout_width="match_parent"
    android:layout_height="match_parent"
    android:orientation="vertical"
    tools:context=".MainActivity"
    android:gravity="center">

    <TextView
        android:layout_width="wrap_content"
        android:layout_height="wrap_content"
        android:id="@+id/main_tv"
        android:text="テキストです。" />

    <Button
        android:layout_width="wrap_content"
        android:layout_height="wrap_content"
        android:id="@+id/change_btn"
        android:text="ボタン"/>

</LinearLayout>
レイアウトには色んなレイアウトの種類がありますが、ヴューを配置する時に一番使いやすい「LinearLayout」を使用してヴューを追加します。
次にボタンを追加します。
package com.example.practiceapplication
import androidx.appcompat.app.AppCompatActivity
import android.os.Bundle
import android.widget.Button
import android.widget.TextView
class MainActivity : AppCompatActivity() {
override fun onCreate(savedInstanceState: Bundle?) {
super.onCreate(savedInstanceState)
setContentView(R.layout.activity_main)
val main_tv = findViewById<TextView>(R.id.main_tv) //画面のテキストヴュー
val change_btn = findViewById<Button>(R.id.change_btn) //画面のボタン
//ボタンクリックイベントリスナー設定
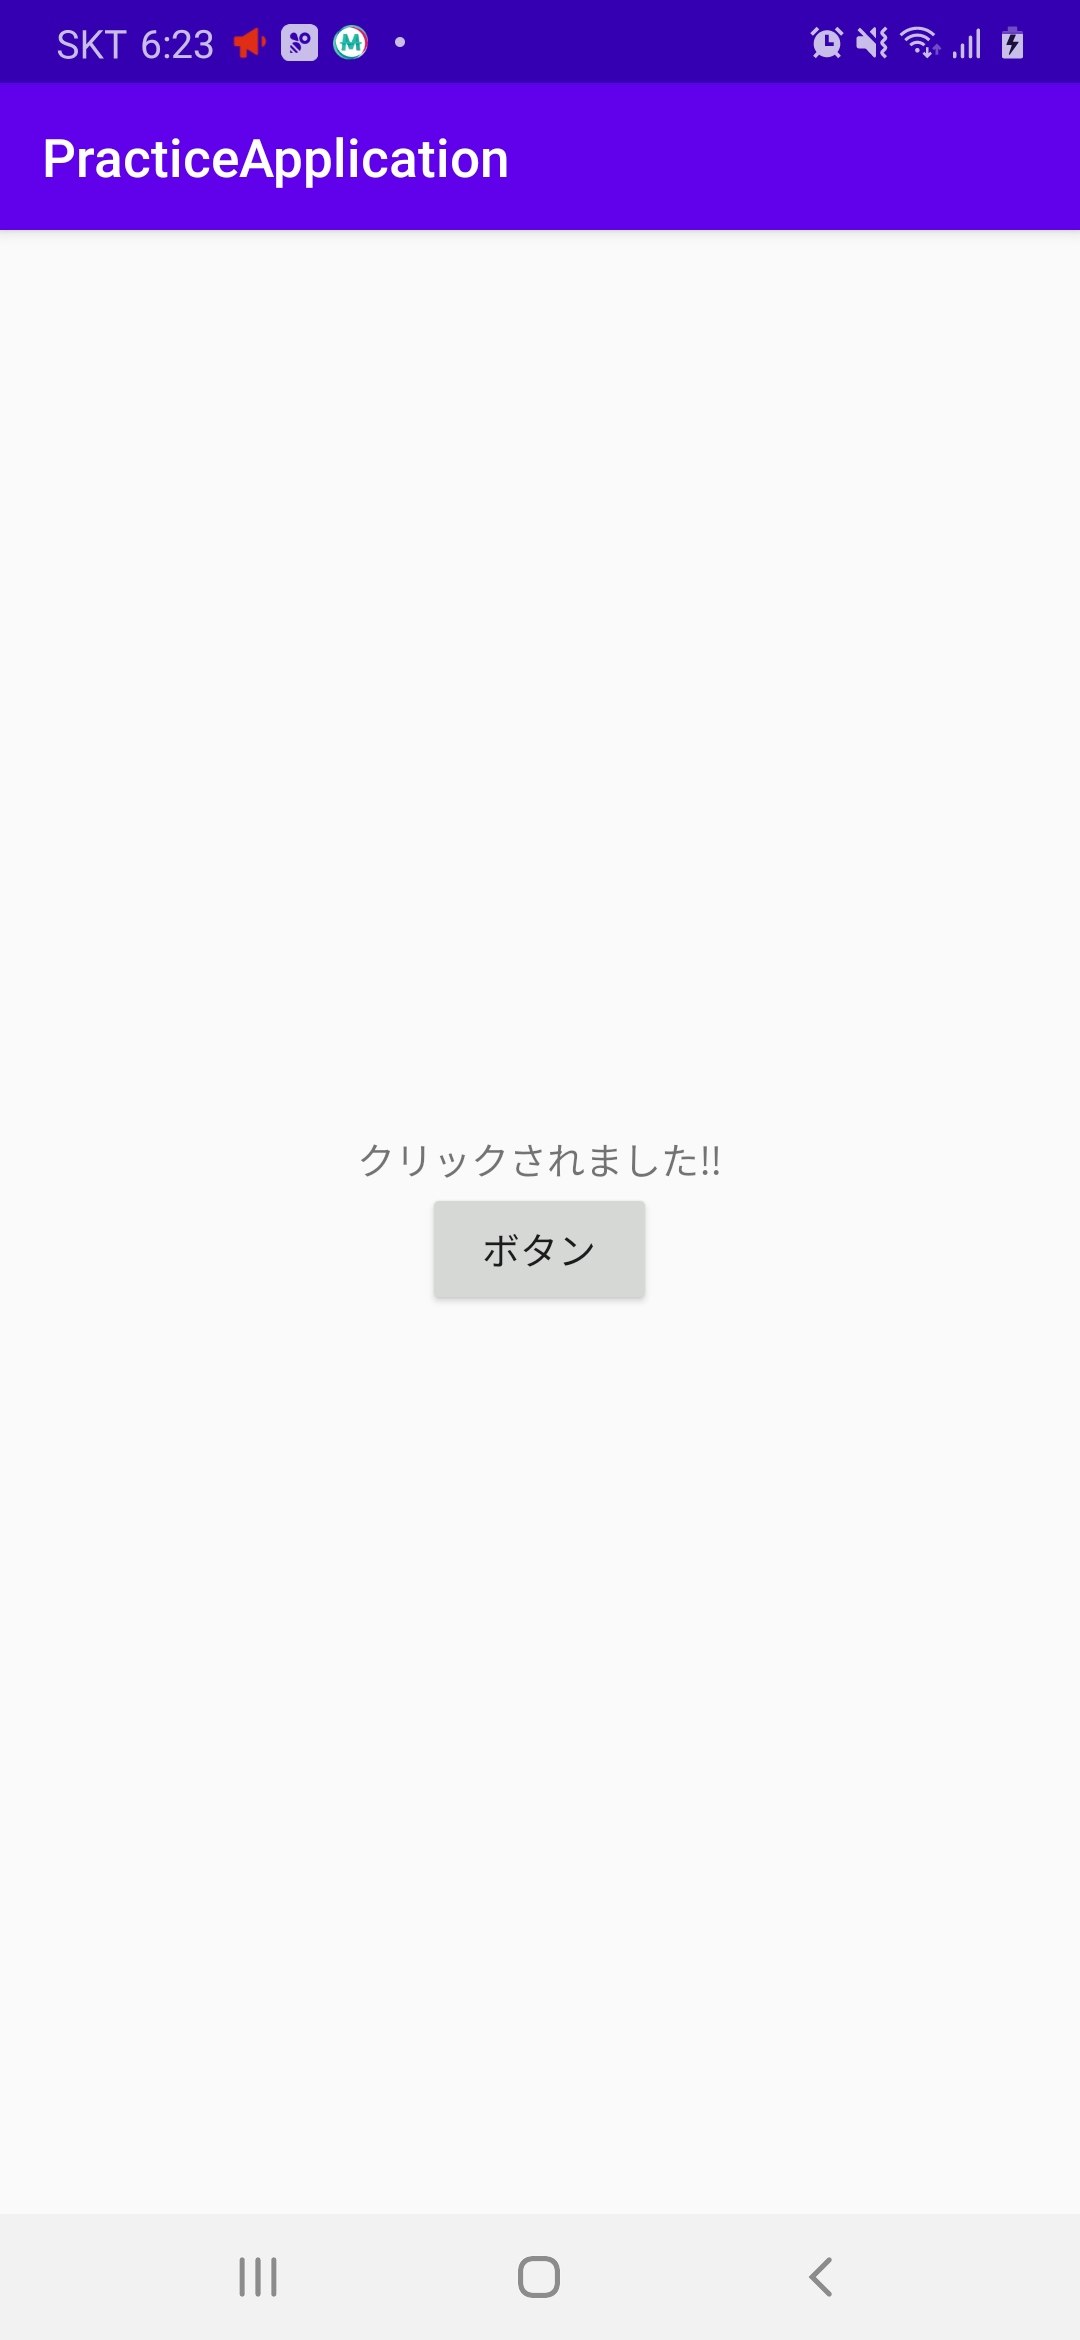
change_btn.setOnClickListener {
main_tv.text = "クリックされました‼"
}
}
}
1.「findViewById」メソッドでテキストヴューとボタンオブジェクトを取得します。
2.テキストの内容を変更させるクリックリスナーをボタンに設定します。
アプリ起動
このアプリを実行するためには仮想デバイスやアンドロイドスマホが必要です。
仮想デバイスのエミュレーターで実行する場合は、
https://developer.android.com/studio/run/emulator
ハードウェアデバイス上で実行する場合は、
https://developer.android.com/studio/run/device
各環境に合わせて設定後、アプリを実行
今回はハードウェアデバイス上で実行します。
・ボタンをクリックする前

・ボタンをクリックした後
終わりに
今回はボタンを追加し、クリックイベント設定までを説明しました。
次回は画面遷移について説明していきたいと思います。
3. 【Android/Kotlin】画面遷移
最新内容については下記のリンク(DreamHanksのブログ)で確認することができます。
DreamHanksブログ(Android/Kotlinアプリ開発)