全体の目次
目標の設定と環境の準備
ZoneMinderのインストール
ZoneMinderの全般設定
カメラの登録
パフォーマンスの調整
アクセスのブロック
外部からのアクセス
ZmNinjyaの使用(未)
このページでやること
このページでは、Raspberry PiにZoneMinderをインストールし、起動が完了するまでを行う。
手順中、特に sudo apt-get updateなどは書いていないが適宜実行する。
インストールについて
インストール自体は非常に簡単に終了する。
手順中、特に sudo apt-get updateは書いていないが適宜実行する。
LAMP(データベース、Webサーバー、PHPなど)をインストールする
基本的なソフトウェアとして Apache2、Maria-DB、PHPをインストールする。
nginx も使えるようだが試していない。ほとんどの場合、ネット上の資料ではApacheを使っている。すでにApacheが導入済みの場合不要。
$ sudo apt-get install apache2
ZoneMinderでは、キャプチャされたモーションファイル自体は普通のファイルシステムに格納されるが、その他の情報はデータベースに格納される。データベースは自由らしいがほとんどの場合、MySQL(Maria DB)を使用している。
もし、すでにMySQLが導入済みの場合、ここはスキップしてよい。
$ sudo apt-get update

$ sudo apt-get install mariadb-server
パッケージリストを読み込んでいます... 完了
依存関係ツリーを作成しています
 :
systemd (241-7~deb10u8+rpi1) のトリガを処理しています ...
man-db (2.8.5-2) のトリガを処理しています ...
libc-bin (2.28-10+rpt2+rpi1) のトリガを処理しています ...
PHPも導入しておく。libapache2-mod-php7.3については、インストールされるPHPのバージョンによって違う。Raspberry PI OS(5.10.63+)では7.3。
$ sudo apt install php php-mysql libapache2-mod-php7.3
パッケージリストを読み込んでいます... 完了
依存関係ツリーを作成しています
状態情報を読み取っています... 完了
 :
php7.3 (7.3.31-1~deb10u1) を設定しています ...
php (2:7.3+69) を設定しています ...
man-db (2.8.5-2) のトリガを処理しています ...
phpのタイムゾーンを設定する
sudo nano /etc/php/7.3/apache2/php.ini

sudo nano /etc/php/7.3/cli/php.ini

エディタ上でdate.timezoneを検索(CTRL+w)。コメントになっているので先頭の;を外し、Asia/Tokyoを設定。Ctrl+X で保存

[Date]
; Defines the default timezone used by the date functions
; http://php.net/date.timezone
date.timezone = Asia/Tokyo
Maria-DBのセキュリティ設定を行う。ほとんどがデフォルトで良い。リモートログインは同じRaspberry Pi内でZoneMinderとMariaDBを運用する場合は必須ではないと思う。
$ sudo mysql_secure_installation

NOTE: RUNNING ALL PARTS OF THIS SCRIPT IS RECOMMENDED FOR ALL MariaDB
 :
Enter current password for root (enter for none): (piユーザーのパスワード)
OK, successfully used password, moving on...
 :
You already have a root password set, so you can safely answer 'n'.
Change the root password? [Y/n] n (パスワードを変更するか…nで良い)
 ... skipping.
 :
Remove anonymous users? [Y/n] Y (匿名ユーザーを削除するか…Y)
 ... Success!
 :
Disallow root login remotely? [Y/n] Y (リモートログインを許可するか…Y)
 ... Success!
 :
Remove test database and access to it? [Y/n] Y (テストDBを削除するか…Y)
 - Dropping test database...
 ... Success!
 - Removing privileges on test database...
 ... Success!
 :
Reload privilege tables now? [Y/n] Y (権限テーブルの再読み込みを行うか…Y)
 ... Success!

Cleaning up...
 :
Thanks for using MariaDB!
ここまでで、maria-DB、apache、phpが動作するようになっているので確認しておく
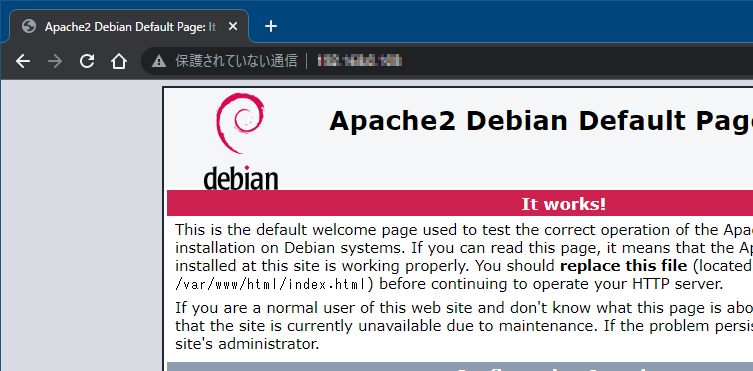
http://RaspberryPiのアドレス に、ほかのマシンからブラウザでアクセスし、Apacheのデフォルトページが表示されることを確認する。
phpのバージョンを確認する
$ php -v
PHP 7.3.31-1~deb10u1 (cli) (built: Oct 24 2021 15:18:08) ( NTS )
Copyright (c) 1997-2018 The PHP Group
Zend Engine v3.3.31, Copyright (c) 1998-2018 Zend Technologies
    with Zend OPcache v7.3.31-1~deb10u1, Copyright (c) 1999-2018, by Zend Technologies
mySQLにログインしてみる
$ sudo mysql -uroot mysql
Reading table information for completion of table and column names
You can turn off this feature to get a quicker startup with -A

Welcome to the MariaDB monitor.  Commands end with ; or \g.
Your MariaDB connection id is 68
Server version: 10.3.31-MariaDB-0+deb10u1 Raspbian 10

Copyright (c) 2000, 2018, Oracle, MariaDB Corporation Ab and others.

Type 'help;' or '\h' for help. Type '\c' to clear the current input statement.

MariaDB [mysql]>
libnumber-bytes-human-perlをインストールする
$ sudo apt-get install -y libnumber-bytes-human-perl
パッケージリストを読み込んでいます... 完了
依存関係ツリーを作成しています
 :
libnumber-bytes-human-perl (0.11-1) を展開しています...
libnumber-bytes-human-perl (0.11-1) を設定しています ...
man-db (2.8.5-2) のトリガを処理しています .
ZoneMinderをインストールする
$ sudo apt-get upgrade
(略)
$ sudo apt-get update
(略)
$ sudo apt-get install zoneminder
パッケージリストを読み込んでいます... 完了
依存関係ツリーを作成しています
状態情報を読み取っています... 完了
以下の追加パッケージがインストールされます:
    :
libapache2-mod-php7.3 (7.3.31-1~deb10u1) のトリガを処理しています ...
systemd (241-7~deb10u8+rpi1) のトリガを処理しています ...
man-db (2.8.5-2) のトリガを処理しています ...
インストール先は /usr/share/zoneminder になっているので確認する。
$ ls -a /usr/share/zoneminder
.  ..  db  www
LibVLCのインストール
LibVLCを使用する場合。最終的に使用しなかったのでインストールしなくても良い。標準で使用できるffmpegでも十分だった。
Debianに、マルチメディア関連のリポジトリを追加する
$ wget http://www.deb-multimedia.org/pool/main/d/deb-multimedia-keyring/deb-multimedia-keyring_2016.8.1_all.deb
--2021-10-27 17:39:36--  http://www.deb-multimedia.org/pool/main/d/deb-multimedia-keyring/deb-multimedia-keyring_2016.8.1_all.deb
www.deb-multimedia.org (www.deb-multimedia.org) をDNSに問いあわせています... 2001:41d0:1:c3c4::1, 91.121.146.196
  :
2021-10-27 17:39:39 (2.78 MB/s) - `deb-multimedia-keyring_2016.8.1_all.deb' へ保存完了 [10658/10658]
$ sudo dpkg  -i deb-multimedia-keyring_2016.8.1_all.deb
以前に未選択のパッケージ deb-multimedia-keyring を選択しています。
  :
deb-multimedia-keyring (2016.8.1) を設定しています ...

$ sudo apt update
ヒット:1 http://raspbian.raspberrypi.org/raspbian buster InRelease
ヒット:2 http://archive.raspberrypi.org/debian buster InRelease
パッケージリストを読み込んでいます... 完了
依存関係ツリーを作成しています
状態情報を読み取っています... 完了
パッケージはすべて最新です。
vlc-plugin-baseをインストールする
sudo apt-get install vlc-plugin-base
アップグレード: 6 個、新規インストール: 19 個、削除: 0 個、保留: 353 個。
9,891 kB のアーカイブを取得する必要があります。
この操作後に追加で 14.6 MB のディスク容量が消費されます。
  :
vlc-plugin-base:armhf (3.0.11-0+deb9u2) を設定しています ...
libc-bin (2.24-11+deb9u3) のトリガを処理しています ...
データベースにZoneMinderの設定を行う
ZoneMinderに同梱されているスクリプトを使用して、データベースの設定を行う。少し時間がかかる。
$ sudo mysql -uroot -p < /usr/share/zoneminder/db/zm_create.sql
Enter password: (前のステップで指定したパスワード。この手順のままなら pi ユーザーのもの)
データベースにzmuser というユーザーを作りアクセス権限を与える。
$ sudo mysql -uroot -p -e "grant all on zm.* to 'zmuser'@localhost identified by 'zmpass';"
Enter password:
権限付与テーブルをリロードする
$ sudo mysqladmin -uroot -p reload
Enter password:
ローカル(USBなど)で接続したカメラを使用する場合
Raspberry PIに直接接続(USBなど)したカメラを使用する場合は、videoグループに Apache2のwww-dataユーザーを追加する
$ sudo adduser www-data video
ユーザ `www-data' をグループ `video' に追加しています...
ユーザ www-data をグループ video に追加
完了。
ZoneMinderを起動させる
設定ファイルに所有者フルアクセス、グループ読み込みの権限を与える
$ sudo chmod 740 /etc/zm/zm.conf
Warning が出るのを避けるため、 /var/cache/zoneminder/events ディレクトリを作成する。ZoneManagerを起動すると、 /var/cache/zoneminder/eventsが無い、という警告がログに残る。これ自体、なくても動作に支障がないが、気持ち悪いのでディレクトリを作成しておく。
$sudo mkdir /var/cache/zoneminder/events
Apacheのrootユーザー、www-dataグループを構成ファイルの所有者に設定、キャッシュフォルダ以下のオーナーをwww-dataユーザーに設定する
$ sudo chown root:www-data /etc/zm/zm.conf
$ sudo chown -R www-data:www-data /var/cache/zoneminder

$ ls -l /etc/zm/zm.conf
-rwxr----- 1 root www-data 1473  MM月 DD  YYYY /etc/zm/zm.conf
$ ls -l /var/cache/zoneminder/
合計 12
drwxr-xr-x 2 www-data www-data 4096 MM月 DD  YYYY events
drwxr-xr-x 2 www-data www-data 4096 MM月 DD  YYYY images
drwxr-xr-x 2 www-data www-data 4096 MM月 DD  YYYY temp
ZoneMinderをサービスとして登録、起動する
$ sudo systemctl enable zoneminder.service
Synchronizing state of zoneminder.service with SysV service script with /lib/systemd/systemd-sysv-install.
Executing: /lib/systemd/systemd-sysv-install enable zoneminder
Created symlink /etc/systemd/system/multi-user.target.wants/zoneminder.service  → /lib/systemd/system/zoneminder.service.

$ sudo systemctl start zoneminder.service
起動したかを確認する。 systemctl status zoneminder.service の結果が、Active(Runnning) になっていること。
$ sudo systemctl status zoneminder.service
● zoneminder.service - ZoneMinder CCTV recording and surveillance system
   Loaded: loaded (/lib/systemd/system/zoneminder.service; enabled; vendor preset: enabled)
   Active: active (running) since Thu 2021-10-28 13:59:51 JST; 23min ago
  Process: 19209 ExecStart=/usr/bin/zmpkg.pl start (code=exited, status=0/SUCCESS)
 Main PID: 19240 (zmdc.pl)
 :
サービスが起動できることが確認出来たら、とりあえず停止しておく。
sudo systemctl stop zoneminder.service
Apatchの設定と動作確認
Apatchの設定を行いZoneManagerのフロントとして動作させる
リダイレクト処理とcgiを有効にする。cgiを有効にするとき、完全修飾名が不明であるという警告が出るが、無視しても構わない。
$ sudo a2enmod cgi
AH00558: apache2: Could not reliably determine the server's fully qualified domain name, using 127.0.1.1. Set the 'ServerName' directive globally to suppress this message
Enabling module cgi.
To activate the new configuration, you need to run:
  systemctl restart apache2

$ sudo a2enmod rewrite
Enabling module rewrite.
To activate the new configuration, you need to run:
  systemctl restart apache2
ZoneMinderのconfファイルを有効にする
$ sudo a2enconf zoneminder
Enabling conf zoneminder.
To activate the new configuration, you need to run:
  systemctl reload apache2
Apacheのサービスをリロードする
$sudo service apache2 reload
再起動とアップデートを行う
ここで、一度 Raspberry piの再起動を行う。不要な気がするが、ZoneMinder is not installed properly: php's date.timezone is not set to a valid timezone というエラーが出てZoneManagerが動作しなかったため
ブラウザから動作を確認する
systemctl status zoneminder.service の結果が、Active(Runnning) になっていることを確認する。
$ sudo systemctl status zoneminder.service
● zoneminder.service - ZoneMinder CCTV recording and surveillance system
   Loaded: loaded (/lib/systemd/system/zoneminder.service; enabled; vendor preset: enabled)
   Active: active (running) since Thu 2021-10-28 13:59:51 JST; 23min ago
  Process: 19209 ExecStart=/usr/bin/zmpkg.pl start (code=exited, status=0/SUCCESS)
 Main PID: 19240 (zmdc.pl)
 :
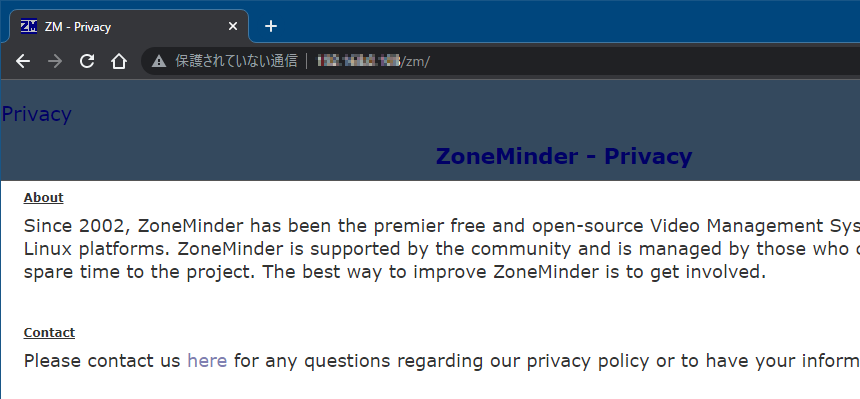
ブラウザから、http:///zmにアクセスする。最初の使用許諾のページが表示されればインストール自体は完了。