実務未経験エンジニアがLaravel&ReactでWebアプリケーション開発に挑戦してみた!(その20)
0. 初めに
二週間も投稿をお休みしてしまって大変申し訳ございませんでした。
色々ありましたが、結論から申し上げますと、今年一番モチベーションが下がっていました。
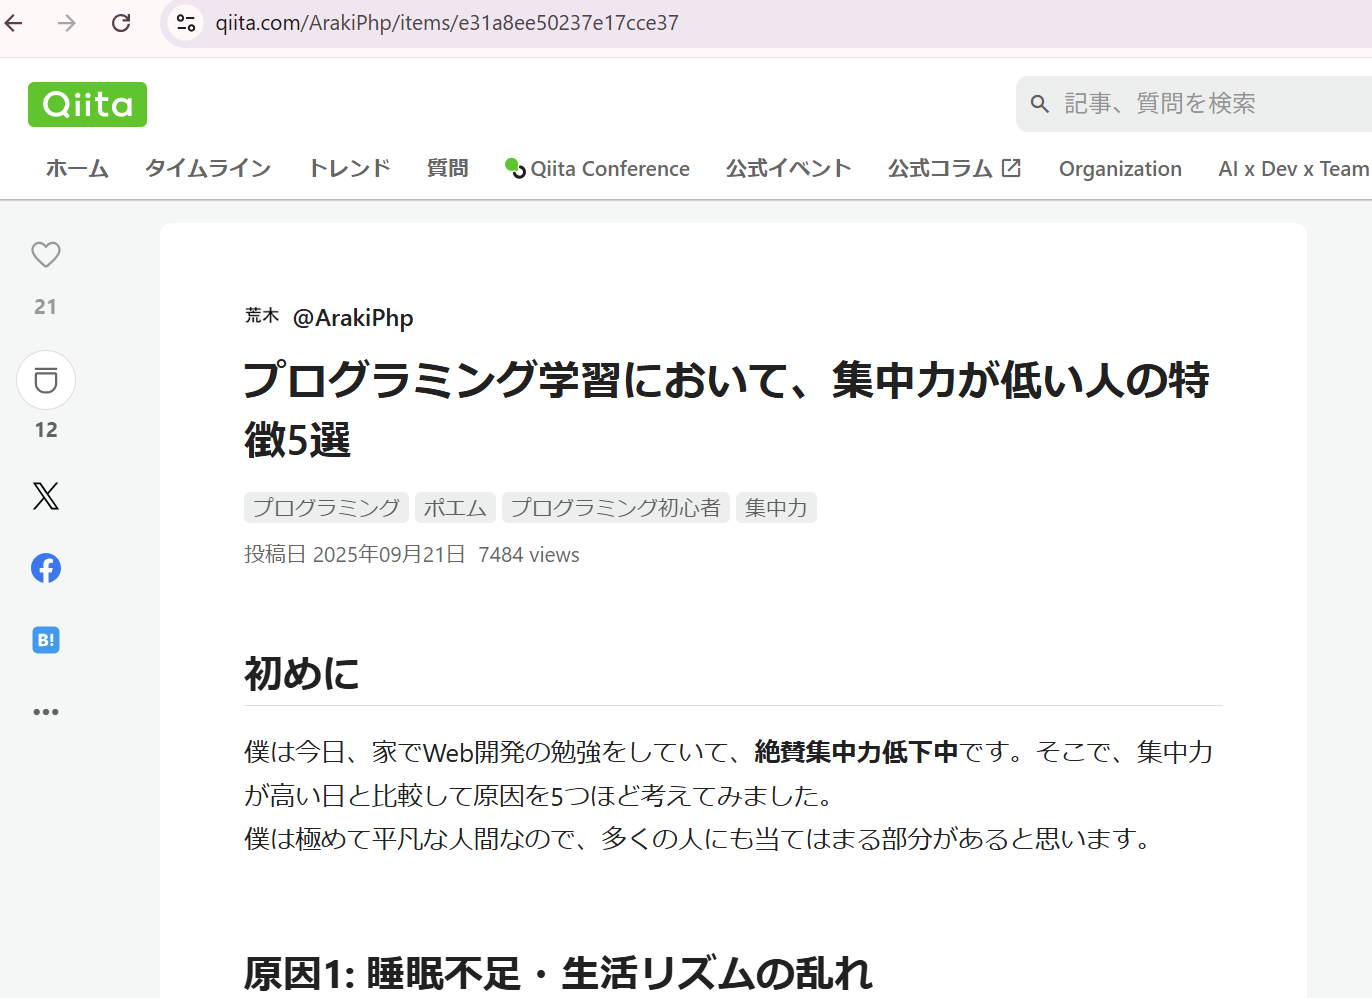
少し前に、プログラミング学習において、集中力が低い人の特徴5選という記事を投稿しましたが、まさか投稿した僕自身がその後さらに悪化することになるとは...
しかもテキトーに思いついたことをその場で書いただけの記事が7484 viewsもついている(2025年10月9日現在)ことに驚きです。
読んでくださった皆さん、ありがとうございました。
モチベーションが下がった要因はいろいろと考えられますが、また機会があればどこかでお話しできれば良いなと思います。
気を取り直して実装に入っていきましょう!
ついにその20になってしまいましたね。(笑)
バックエンドの機能も残りわずかとなってきましので、最後まで頑張りたいと思います!
本日は、Laravel Notificationを使って、通知機能を作成したいと思います!
実装するのは以下の2種類の通知機能です!
- 大学・学部・研究室削除依頼及び削除完了通知
- 作成済み大学・学部・研究室編集及び削除通知
頑張って行きましょう~!
1. ブランチ運用
前回は、忘れずにコミット・プッシュをしました?
もし、できているようでしたら、いつも通り develop ブランチを最新化して新しいブランチを切って作業をしましょう。
今日のブランチ名は、feature/18-notification でいきたいと思います。
2. 大学・学部・研究室削除依頼及び削除完了通知機能実装
まずは、大学・学部・研究室削除依頼の通知機能を作っていきたいと思います。
今回のアプリでは、大学・学部・研究室の削除は管理者のみが行えるようにしています。
一方で、一般ユーザーは削除権限がない代わりに、管理者に対して削除依頼を送信することができるようにしたいと思います。
修正: テーブル設計
今回は、アプリケーション内で通知を渡したいので、今回新たに二つのテーブルを作成したいと思います。
一つ目が、Deletion_requestsテーブルです。
これは、一般ユーザーが管理者に対して作成する削除依頼のデータを保存するためのテーブルです。
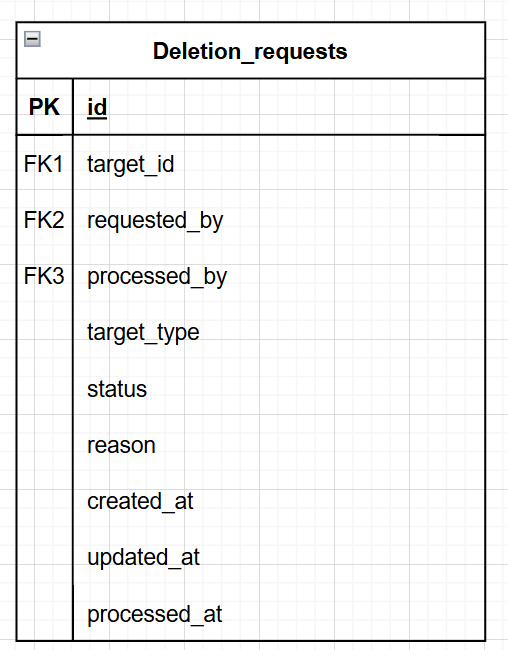
外部キーとして、
-
target_id(どの大学・学部・研究室を削除対象とするのか) -
requested_by(誰が削除依頼を申請するのか) -
processed_by(誰が削除依頼を承認し、削除処理をするのか。要は管理者のIDです)
の三つを用意しておきます。
ただし、'target_id'は大学・学部・研究室間で重複する可能性があります(例えば、idが1の大学と同じくidが1の学部が同時にあってもよい)。
そのため、以下のように、'target_type'というカラムを用意して、そこには、大学・学部・研究室のいずれかが入るようにすることで、このカラムの値と'target_id'の2つを合わせることで、削除対象を1つに特定します。
-
target_type(削除対象の種類。すなわち、大学・学部・研究室のいずれかが入るようにいします) -
status(申請の状況) -
reason(任意で申請理由) その他タイムスタンプ系
二つ目は、Notificationテーブルです。
これは、作成された削除依頼やその結果を通知するためのデータを入れます。
実は、Laravelの公式が提供してくれているものですが、ver11では非推奨となってしまっています。
詳しい事情は分かりかねますが、通知機能を実装する便利な外部ライブラリが増えてきて、Laravelの標準機能として、公式ドキュメントに掲載するのはやめようという感じでしょうか。
したがって、Laravelの最新のバージョンのドキュメントを見てもこのLaravel Notificationは見つかりません。
しかし、今回のようにメールや外部サービスのSNSではなく、自分のアプリケーション内で使う分には、問題なく動作する(多分w) ので、今回はこちらを採用したいと思います。
マイグレーションを作成・実行する
まずは、以下の2つのコマンドを実行して、Deletion_requestsテーブとNotificationテーブルを作成するためのマイグレーションファイルを作成しましょう。
実行コマンド
php artisan make:migration create_deletion_requests_table
実行コマンド
$ php artisan notifications:table
実行コマンド
php artisan migrate
次にマイグレーションファイルのup()メソッドの中身を書いていきます。
Deletion_requestsから見ていきます。
    public function up(): void
    {
        Schema::create('deletion_requests', function (Blueprint $table) {
            $table->id();
            $table->foreignId('requested_by')->constrained('users');
            $table->foreignId('processed_by')->nullable()->constrained('users');
            $table->morphs('target');
            $table->enum('status', ['pending', 'approved', 'rejected'])->default('pending');
            $table->text('reason')->nullable();
            $table->timestamps();
            $table->timestamp('processed_at')->nullable();
        });
    }
基本的には、先ほど説明したテーブル設計に沿った内容ですね。
一方で、初めて見るものが二つほどあると思います。
一つ目が、morphs() の部分です。
これは、ポリモーフィクリレーションと呼ばれる特殊なリレーションを実現するためのLaravelのメソッドです!
->morphs('xx')と書くことで、'xx_id'と'xx_type'の二つのカラムを生成することができます。
よって、->morphs('target')とすることで、
target_id-
target_type
というテーブル設計通りの2種類のカラムを作ることができます。
では、ポリモーフィックリレーションとは何かと言いますと、以下の記事にまとまっていますので良ければ読んでみてください!
Laravelでポリモーフィックリレーションを使いこなそう:共通の関係性をスマートに管理する方法
この記事によると、
ポリモーフィックリレーションは、「1つのモデルが複数の異なるモデルとリレーションを持つ」ことを可能にする仕組み
のことだそうです。
以下のような例が挙げられています。
- 記事(Post)にもコメント(Comment)を付けたい。
- 動画(Video)にもコメント(Comment)を付けたい。
今回の僕たちの場合ですと、削除依頼は、大学、学部、研究室の三つに対して行えるようにしたいので、当然必要なリレーションも三つになります。
モデルついては、この後作成しますが、まだmorphs()の使い勝手が理解しきれていない部分があると思うので、もう少し説明をします。
もし、morphs()を使わなかったらどうなるでしょうか?
以下のようにリレーション相手の主キーを外部キーとして三つもつ必要があります(ちょっとだけ行数が増えちゃうよ!)。
        $table->foreignId('university_id')->constrained('universities');
        $table->foreignId('faculty_id')->constrained('faculties');
        $table->foreignId('lab_id')->constrained('labs');
それだけならよいのですが、この中のうち、どれか一つだけにデータを入れて、それ以外はNULLにするというような処理を自分で考えないといけないですし、データベースのパフォーマンス的にもビミョーな気がします。
さらに、どの種類の削除対象なのかという判別の処理も必要です。
そう考えると、morphs()を書くだけで、idとtypeを自動で作成してくれるのは便利です。
二つ目が、enum()についてです。
まあ、これは見ただけでなんとなくわかった人も多いと思います。
要するに、第二引数に配列を渡すとその中のどれかの値しか入らなくなるって感じです。
phpの列挙型(Enum)に即しています。
続いて、Notificationテーブルの方も見てみましょう。
    public function up(): void
    {
        Schema::create('notifications', function (Blueprint $table) {
            $table->uuid('id')->primary();
            $table->string('type');
            $table->morphs('notifiable');
            $table->text('data');
            $table->timestamp('read_at')->nullable();
            $table->timestamps();
        });
    }
今日は、勉強もかねてUUIDというものを使ってみました。
ただのIDとは違って、1, 2, 3...と続くものではなく、e31a8ee50237e17cce37みたいな感じの長~いIDです。
UUIDは、Universally Unique Lexicographically Sortable Identifierの略で、文字通り世界に一つだけのIDというイメージです。
もともと特別なオンリーワン...
僕が過去に投稿したQiitaの記事にもおそらくこのUUIDが割り振られています。
1とか2とかではないので、推測が困難でセキュリティが高いというメリットがあるらしいです。
Laravelでは、uuid()と書くだけで、これが実現できます。
この機能で遊んでいる方がいる見たいみたいなので、載せておきます。
Laravel UUID、ULID で遊んでみる
今回ですと、通知は大量にしかも複数人に送る必要が出てくる可能性があるので、長い数字にしておくことにもメリットがあります。
まあ、細かい話を飛ばすなら、今までと同じテーブルにおいてデータを識別する主キーです。
次に、以下の部分です。
$table->string('type');
これは、Notificationクラスのパスを入れます。
まだ、Notificationクラスについては触れていない(この後登場します)ので、詳しくは説明できませんが、簡単に説明するとどの通知かを識別するための者です。
今回は、
- 大学・学部・研究室の削除依頼を管理者に通知
- 依頼を受けての削除処理の完了を通知
- 自分が作成した大学・学部・研究室が編集・削除されたときに通知
というように3種類の通知があり、これらを区別するために使用するカラムを生成します。
以下の部分では、通知相手を保存できるようにします。
$table->morphs('notifiable');
ポリモーフィックリレーションです。
先ほどの復習ですが、morphs('notifiable')と書くことで、
-
'notifiable_id'(通知相手のID) -
'notifiable_type'(通知相手のモデルタイプ: User)
の二つのカラムを生成します。
以下の部分は、実際の通知の本文の内容を保存できるようにしています。
$table->text('data');
あとは、以下の部分も一応触れておきます。
読まれた時刻を保存するものです。
要は、最初にNullにしておいて、値が入ったら未読が既読に変わるという仕掛けです。
$table->timestamp('read_at')->nullable();
モデル作成・修正する
続いて、新しく削除依頼モデルを作成します!
実行コマンド
$ php artisan make:model DeletionRequest
<?php

namespace App\Models;

use Illuminate\Database\Eloquent\Model;
use Illuminate\Database\Eloquent\Relations\MorphTo;

class DeletionRequest extends Model
{
    protected $fillable = [
        'requested_by',
        'processed_by',
        'target_id',
        'target_type',
        'status',
        'reason',
        'processed_at',
    ];

    protected $casts = [
        'processed_at' => 'datetime',
    ];

    // リレーションの定義
    // 削除対象モデルとのポリモーフィックリレーション(多対一)
    public function target(): MorphTo
    {
        return $this->morphTo();
    }

    // 依頼者とのリレーション(多対一)
    public function requester()
    {
        return $this->belongsTo(User::class, 'requested_by');
    }

    // 対応する管理者とのリレーション(多対一)
    public function processor()
    {
        return $this->belongsTo(User::class, 'processed_by');
    }
}
いつものようにprotected $fillable = [ ]で一括代入を許可して、安全にリクエストを受け付けます。
以下の部分ですが、依頼を受けて管理者が削除を実行した日付を入れる'processed_at'カラムについての処理です。
文字列を日付型に変換して取り出せるようにします。
    protected $casts = [
        'processed_at' => 'datetime',
    ];
また、リレーションについては、以下の二つは今まで通りです。
    // 依頼者とのリレーション(多対一)
    public function requester()
    {
        return $this->belongsTo(User::class, 'requested_by');
    }

    // 対応する管理者とのリレーション(多対一)
    public function processor()
    {
        return $this->belongsTo(User::class, 'processed_by');
    }
そして、以下の部分がポリモーフィックリレーションです!
一つの削除対象について削除依頼は複数作成できてもよいものとしたいので、一対一のリレーションを組みます。
一対一のリレーションにおいて、多の方には、morphTo()と書きます。
    public function target(): MorphTo
    {
        return $this->morphTo();
    }
一方で、一の側には以下のようにmorphMany()のように書きます。
以下を大学・学部・研究室のモデル三つすべてに追加してください。
    // 追加: 削除依頼とのポリモーフィックリレーション(一対多)
    public function deletionRequests()
    {
        return $this->morphMany(DeletionRequest::class, 'target');
    }
これで、ポリモーフィックリレーションができました!
また、ユーザーモデルに通知機能が使えるようにメソッドを追加します。
先ほどマイグレーションで設定した'notifiable'です。
    // 追加: 通知とのリレーション(一対多)
    public function notifications()
    {
        return $this->morphMany(DatabaseNotification::class, 'notifiable')->latest();
    }
コントローラーを作成する
お次は、コントローラーの作成です。
実行コマンド
$ php artisan make:controller DeletionRequestController
実行コマンド
$ php artisan make:controller NotificationController
DeletionRequestControllerから作ってみましょう。
<?php

namespace App\Http\Controllers;

use App\Models\DeletionRequest;
use App\Models\Faculty;
use App\Models\Lab;
use App\Models\University;
use App\Models\User;
use App\Notifications\DeletionRequestNotification;
use Illuminate\Http\Request;
use Inertia\Inertia;

class DeletionRequestController extends Controller
{
    // 一般ユーザーが削除依頼を作成するためのフォーム表示
    public function create(string $type, int $id)
    {
        $model = match ($type) {
            'university' => University::find($id),
            'faculty' => Faculty::find($id),
            'lab' => Lab::find($id),
            default => null,
        };

        if (!$model) {
            return redirect()->back()->withErrors(['target' => '対象が見つかりませんでした。']);
        }

        return Inertia::render('DeletionRequest/Create', [
            'target' => [
                'id' => $model->id,
                'name' => $model->name,
                'type' => $type,
            ]
        ]);
    }

    // 削除依頼の保存
    public function store(Request $request)
    {
        $validated = $request->validate([
            'target_id' => 'required|integer',
            'target_type' => 'required|string|in:university,faculty,lab',
            'reason' => 'nullable|string|max:1000',
        ]);

        $model = match ($validated['target_type']) {
            'university' => University::class,
            'faculty' => Faculty::class,
            'lab' => Lab::class,
            default => null,
        };

        if (!$model || !$model::find($validated['target_id'])) {
            return redirect()->back()->withErrors(['target_id' => '無効な対象IDです。']);
        }

        $deletionRequests = new DeletionRequest();
        $deletionRequests->requested_by = $request->user()->id;
        $deletionRequests->target_id = $validated['target_id'];
        $deletionRequests->target_type = $model;
        $deletionRequests->reason = $validated['reason'] ?? null;
        $deletionRequests->status = 'pending';

        $deletionRequests->save();

        $admins = User::where('is_admin', true)->get();

        foreach ($admins as $admin) {
            $admin->notify(new DeletionRequestNotification(
                $model::find($validated['target_id'])->name,
                $validated['target_type'],
                $validated['target_id']
            ));
        }

        return redirect()->route('mypage.index')->with('success', '削除依頼が送信されました。');
    }

    // 管理者に削除依頼を表示
    public function index()
    {
        $deletionRequests = DeletionRequest::with(['requester', 'target'])
            ->where('status', 'pending')
            ->latest()
            ->get();

        return Inertia::render('DeletionRequest/Index', [
            'deletionRequests' => $deletionRequests,
        ]);
    }
}
削除依頼を作成するページを表示するためのcreate()、削除依頼を保存するためのstore()、削除依頼一覧を管理者に表示するindex()メソッドを作ります。
認可も付けてもよかったのですが、ルーティングですべて制限する予定なので、今回は割愛しますw
基本的に上から一行ずつ読んでもらえれば内容は大体わかると思います。
一方で、目新しいものとして、match()関数があると思いますので、軽く解説しておきます。
詳しく知りたい方は、公式ドキュメントを読んでみてください。
今回ですと、削除対象の種類(大学か学部か研究室か)の文字列を受け取って、例えばそれが'university'ならば、create()の引数に応じた大学モデルを取ってきて変数$modelに代入するといった感じです。
また、肝心のNotificationの部分についての説明ですが、いったん後回しにしておきますね。
NotificationController.phpも中身を書いていきましょう。
<?php

namespace App\Http\Controllers;

use Illuminate\Http\Request;
use Illuminate\Support\Facades\Auth;
use Inertia\Inertia;

class NotificationController extends Controller
{
    public function index()
    {
        $user = Auth::user();

        $notifications = $user->notifications()->latest()->get();

        return Inertia::render('Notification/Index', [
            'user' => $user,
            'notifications' => $notifications,
        ]);
    }
}
こちらはかなりシンプルです。
ログインしているユーザーとその通知の情報をReactコンポーネントに渡すindex()メソッドがあるだけです。
先ほどユーザーモデルにリレーションを書いたのでこれが実現できます。
さらに、削除処理をしているAdminController.php(これは前回作成したものです)に削除を完了したことを一般ユーザーに通知するための処理も追加します。
これについても、詳しくはこの後解説します。
<?php

namespace App\Http\Controllers\Admin; // 名前空間が他のコントローラーと異なり、整理されている

use App\Http\Controllers\Controller;
use App\Models\Comment;
use App\Models\DeletionRequest; // 追加
use App\Models\Faculty;
use App\Models\Lab;
use App\Models\University;
use App\Notifications\DeletionCompletedNotification; // 追加
use Illuminate\Foundation\Auth\Access\AuthorizesRequests;
use Illuminate\Http\Request;
use Inertia\Inertia;

class AdminController extends Controller
{
    use AuthorizesRequests;

    public function destroyUniversity(University $university)
    {
        // 認可チェック
        $this->authorize('delete', $university);

        // 追加: 対象の削除依頼があれば取得
        $deletionRequest = DeletionRequest::where('target_type', University::class)
            ->where('target_id', $university->id)
            ->first();

        // 追加: 通知送信
        if ($deletionRequest) {
            $requester = $deletionRequest->requester;
            $requester->notify(new DeletionCompletedNotification($university->name, '大学'));

            $deletionRequest->processed_by = auth()->id();
            $deletionRequest->status = 'approved';
            $deletionRequest->save();
        }

        $university->delete();
        return redirect()->route('labs.home')->with('success', '大学が削除されました。');
    }

    public function destroyFaculty(Faculty $faculty)
    {
        // 認可チェック
        $this->authorize('delete', $faculty);

        // 追加: 対象の削除依頼があれば取得
        $deletionRequest = DeletionRequest::where('target_type', Faculty::class)
            ->where('target_id', $faculty->id)
            ->first();

        // 追加: 通知送信
        if ($deletionRequest) {
            $requester = $deletionRequest->requester;
            $requester->notify(new DeletionCompletedNotification($faculty->name, '学部'));

            $deletionRequest->processed_by = auth()->id();
            $deletionRequest->status = 'approved';
            $deletionRequest->save();
        }

        $faculty->delete();
        return redirect()->route('labs.home')->with('success', '学部が削除されました。');
    }

    public function destroyLab(Lab $lab)
    {
        // 認可チェック
        $this->authorize('delete', $lab);

        // 追加: 対象の削除依頼があれば取得
        $deletionRequest = DeletionRequest::where('target_type', Lab::class)
            ->where('target_id', $lab->id)
            ->first();

        // 追加: 通知送信
        if ($deletionRequest) {
            $requester = $deletionRequest->requester;
            $requester->notify(new DeletionCompletedNotification($lab->name, '研究室'));

            $deletionRequest->processed_by = auth()->id();
            $deletionRequest->status = 'approved';
            $deletionRequest->save();
        }

        $lab->delete();
        return redirect()->route('labs.home')->with('success', '研究室が削除されました。');
    }

    public function destroyComment(Comment $comment)
    {
        // 認可チェック
        $this->authorize('delete', $comment);

        $comment->delete();
        return redirect()->route('labs.home')->with('success', 'コメントが削除されました。');
    }
}
ルーティングを追加する
Route::middleware('auth')->group(function () {
    Route::get('/profile', [ProfileController::class, 'edit'])->name('profile.edit');
    Route::patch('/profile', [ProfileController::class, 'update'])->name('profile.update');
    Route::delete('/profile', [ProfileController::class, 'destroy'])->name('profile.destroy');

    // レビュー関連
    // ...

    // 大学関連
    // ...

    // 学部関連
    // ...

    // 研究室関連
    // ...

    // コメント関連
    // ...

    // ブックマーク関連
    // ...

    // マイページ関連
    // ...

    // 追加: 削除依頼関連
    Route::get('/deletion-requests/create/{type}/{id}', [DeletionRequestController::class, 'create'])->name('deletion_requests.create');
    Route::post('/deletion-requests', [DeletionRequestController::class, 'store'])->name('deletion_requests.store');

    // 追加: 通知関連
    Route::get('/notifications', [NotificationController::class, 'index'])->name('notifications.index');

    // 管理者用ルート
    Route::prefix('admin')->name('admin.')->group(function () {
        Route::delete('/universities/{university}', [AdminController::class, 'destroyUniversity'])->name('universities.destroy');
        Route::delete('/faculties/{faculty}', [AdminController::class, 'destroyFaculty'])->name('faculties.destroy');
        Route::delete('/labs/{lab}', [AdminController::class, 'destroyLab'])->name('labs.destroy');
        Route::delete('/comments/{comment}', [AdminController::class, 'destroyComment'])->name('comments.destroy');
        Route::get('/deletion-requests', [DeletionRequestController::class, 'index'])->name('deletion_requests.index'); // 追加
    });
});
以下の部分だけ注意が必要です。
先ほども確認しましたが、削除依頼を作成するには、
- 削除対象の種類(
'target_type') - 削除対象のID(
'target_id')
の2つの情報が必要でした。
そのため、以下のようにルーティングパラメータを2種類用意することで、正しくルーティングを作成することができます。
Route::get('/deletion-requests/create/{type}/{id}', [DeletionRequestController::class, 'create'])->name('deletion_requests.create');
Notificationを作成する
いよいよ、Laravel Notificationの仕組みを利用していきたいと思います!
※もしかしたら、あらかじめ以下の記事に目を通しておくとわかりやすいかもしれません。
Laravel Notification をやさしく解説する
まずは、以下のコマンドを実行してみましょう。
実行コマンド
$ php artisan make:notification DeletionRequestNotification
実行コマンド
$ php artisan make:notification DeletionCompletedNotification
実行出来たら、ファイルの中身を書いてきましょう!
まずは、削除依頼通知からです。
<?php

namespace App\Notifications;

use Illuminate\Bus\Queueable;
use Illuminate\Contracts\Queue\ShouldQueue;
use Illuminate\Notifications\Messages\MailMessage;
use Illuminate\Notifications\Notification;

class DeletionRequestNotification extends Notification
{
    use Queueable;

    protected $targetName;
    protected $targetType;
    protected $targetId;

    /**
     * Create a new notification instance.
     */
    public function __construct(string $targetName, string $targetType, int $targetId)
    {
        $this->targetName = $targetName;
        $this->targetType = $targetType;
        $this->targetId = $targetId;
    }

    /**
     * Get the notification's delivery channels.
     *
     * @return array<int, string>
     */
    public function via(object $notifiable): array
    {
        return ['database'];
    }

    /**
     * Get the array representation of the notification.
     *
     * @return array<string, mixed>
     */
    public function toArray(object $notifiable): array
    {
        return [
            'message'     => "「{$this->targetName}」に削除依頼が届きました。",
            'target_type' => $this->targetType,
            'target_id'   => $this->targetId,
        ];
    }
}
では、中身を一つずつ見ていきましょう!
まずは、こちら。
class DeletionRequestNotification extends Notification {}
ご覧の通り、Notificationクラスを継承します。
先ほどのコマンドを実行すると、src/app配下のNotificationsというフォルダ内にファイルが作成されます。
次に以下。
use Queueable;
結論から言うとこれは気にしなく大丈夫です。
キューと呼ばれるものを利用して非同期で通知を送信できるようにするためのもので、これにより時間差で通知を送ったりできるようですが、今回は特に使いません(useって言っとるのにw)。
続いて、プロパティの定義です。
    protected $targetName;
    protected $targetType;
    protected $targetId;
この削除依頼通知クラスにおいて、必要な情報を保持するための変数を用意します。
次のコンストラクタで使います。
    public function __construct(string $targetName, string $targetType, int $targetId)
    {
        $this->targetName = $targetName;
        $this->targetType = $targetType;
        $this->targetId = $targetId;
    }
「コンストラクタって何だっけ?」っていう方はいらっしゃいますか?(笑)
コンストラクタは、phpの基本文法なのできちんとした説明は割愛しますが、ざっくりとだけ言いますと、
クラスがインスタンス化した時に自動で呼び出されるメソッド
のことでしたね!
new演算子でクラスをインスタンス化することができました。
どこでインスタンス化するのかというと、実は、先ほどコントローラーの説明において説明を後回しにしていた部分を思い出してください。
        $deletionRequests = new DeletionRequest();
        $deletionRequests->requested_by = $request->user()->id;
        $deletionRequests->target_id = $validated['target_id'];
        $deletionRequests->target_type = $model;
        $deletionRequests->reason = $validated['reason'] ?? null;
        $deletionRequests->status = 'pending';

        $deletionRequests->save();

        $admins = User::where('is_admin', true)->get();

        foreach ($admins as $admin) {
            $admin->notify(new DeletionRequestNotification(
                $model::find($validated['target_id'])->name,
                $validated['target_type'],
                $validated['target_id']
            ));
        }
この部分の最初の方で、削除依頼モデルをインスタンス化して、一つずつプロパティを設定していき、save()で保存します。
この時点では、”削除依頼そのもの”がデータベースにデータが保存されていますが、実際に”削除依頼の通知”を送信するところまではできていません。
そこで、以下のように今作成した削除依頼通知クラスをnewでインスタンス化して使います。
        foreach ($admins as $admin) {
            $admin->notify(new DeletionRequestNotification(
                $model::find($validated['target_id'])->name,
                $validated['target_type'],
                $validated['target_id']
            ));
        }
foreach(){}は管理者が複数いると想定しているだけなので、正直気にしなくてよいです。
newでインスタンス化して、コンストラクタに必要な先ほど定義した3つの引数を渡して、それをnotify()で最終的な送信処理を行っていることを理解できれば完璧です!
一つ注意するとすれば、$modelには、削除対象のモデル自体が入っているので、削除対象の名前(例えば、〇〇研究室)を取得したければ、::find()で引数にidを渡した後に、nameカラムを取ってくる必要があることくらいですかね。
もしもわかりにくければ、コメントで教えてください。(; ・`д・´)
削除依頼通知クラスの説明に戻りますね。
次はこちらですね。
    public function via(object $notifiable): array
    {
        return ['database'];
    }
viaメソッドには、通知の手段を書くようです。
mailなどを指定できるようですが、今回はアプリケーション内通知にとどめているので、データベースに保存するだけです。
最後の部分ですね。
    public function toArray(object $notifiable): array
    {
        return [
            'message'     => "「{$this->targetName}」に削除依頼が届きました。",
            'target_type' => $this->targetType,
            'target_id'   => $this->targetId,
        ];
    }
これは、通知を実際にデータベースに保存するためのものです。
これによって、通知に必要なデータが'data'というカラムにJSON形式で保存されるようにできます。
ちょっと何言っているかよくわからないと思います。
そもそもこのシリーズでは、APIを活用していなかったので「JSONって何だよ?厚切り??」っていう人も少なくないと思います。
まあ、とりあえずは、気にしなくて大丈夫です!(笑)
データベースに通知を保存しているのだなと分かってもらえればおkです。
このように、いつものようなモデルクラスを使わなくても通知のデータをデータベースに保存することができるのです!
次に、削除完了通知クラスの中身を書いてみましょう!
<?php

namespace App\Notifications;

use Illuminate\Bus\Queueable;
use Illuminate\Contracts\Queue\ShouldQueue;
use Illuminate\Notifications\Messages\MailMessage;
use Illuminate\Notifications\Notification;

class DeletionCompletedNotification extends Notification
{
    use Queueable;

    protected $targetName;
    protected $targetType;

    /**
     * Create a new notification instance.
     */
    public function __construct(string $targetName, string $targetType)
    {
        $this->targetName = $targetName;
        $this->targetType = $targetType;
    }

    /**
     * Get the notification's delivery channels.
     *
     * @return array<int, string>
     */
    public function via(object $notifiable): array
    {
        return ['database'];
    }

    /**
     * Get the array representation of the notification.
     *
     * @return array<string, mixed>
     */
    public function toArray(object $notifiable): array
    {
        return [
            'message' => "あなたが削除依頼した「{$this->targetName}({$this->targetType})」は管理者によって削除されました。",
        ];
    }
}
先ほどの削除依頼通知とほぼほぼ変わらないですね。
今回は、削除が完了したことだけを伝えられれば良いかなと思うので、プロパティは、$targetNameと$targetTypeだけにしています。
そして、コンストラクタの呼び出しですが、こちらも先ほど後回しにすると言っていたAdmin/AdminController.phpで行います。
...というのも、削除処理はAdminControllerで行っていたので、通知処理もそこに一緒に書くのが分かりやすいかなと思ったからです。
destroyLab()を例に見てみましょう。
    public function destroyLab(Lab $lab)
    {
        // 認可チェック
        $this->authorize('delete', $lab);

        // 追加: 対象の削除依頼があれば取得
        $deletionRequest = DeletionRequest::where('target_type', Lab::class)
            ->where('target_id', $lab->id)
            ->first();

        // 追加: 通知送信
        if ($deletionRequest) {
            $requester = $deletionRequest->requester;
            $requester->notify(new DeletionCompletedNotification($lab->name, '研究室'));

            $deletionRequest->processed_by = auth()->id();
            $deletionRequest->status = 'approved';
            $deletionRequest->save();
        }

        $lab->delete();
        return redirect()->route('labs.home')->with('success', '研究室が削除されました。');
    }
削除依頼を取得する処理と通知を送信する処理の二つを追加しています。
DeletionRequestモデルから今回削除したい研究室に対する削除依頼があるかどうかを調べます。
それを、$deletionRequestsという変数に代入しています。
もし、削除依頼が来ていなければ$deletionRequestsはNullになるので、if()の中身がFalseになり、通知送信は行われないという仕掛けです。
これにより、削除依頼がなく、管理者の独断で削除を行う場合でも、これまでと同じように通知送信を行わずに削除ができるというわけです。
正直、トランザクション処理にしたり、共通の処理を別ファイルに切りだしたり、Null安全性を考慮したり...と直したいところはまだまだたくさんあるのですが、ちょっと今日はこの辺で勘弁してくださいw
機会があれば、リファクタリング編もやろうかなと思っているので、その時にでも。(笑)
あと、認可ですが、第二引数にはインスタンスを渡すのが一般的だそうです。
destroyComment()はそうなっていたのですが、他がそうなっていなかったのでしれっと統一しておきました。(^O^)
Reactコンポーネントを作成・修正する
最後にViewを作ります。
まずは、削除依頼を作成するページとして、新しいファイルを作成してください。
import React from 'react';
import { useForm } from '@inertiajs/react';

export default function Create({ target }) {
  const { data, setData, post, processing, errors } = useForm({
    target_id: target.id,
    target_type: target.type,
    reason: '',
  });

  const handleSubmit = (e) => {
    e.preventDefault();
    post(route('deletion_requests.store'));
  };

  return (
    <div>
      <h1>削除依頼フォーム</h1>
      <p>対象: {target.name}({target.type})</p>

      <form onSubmit={handleSubmit}>
        <div>
          <label htmlFor="reason">削除理由(任意):</label><br />
          <textarea
            id="reason"
            value={data.reason}
            onChange={(e) => setData('reason', e.target.value)}
          />
          {errors.reason && <div>{errors.reason}</div>}
        </div>

        <button type="submit" disabled={processing}>
          削除依頼を送信
        </button>
      </form>
    </div>
  );
}
次に削除依頼の一覧を見ることができるページを作ります。これも新規ファイルです。
import React from 'react';
import { Link } from '@inertiajs/react';
import dayjs from 'dayjs';

const getTargetRoute = (type, id) => {
  switch (type) {
    case 'App\\Models\\University':
      return route('faculties.index', { university: id });
    case 'App\\Models\\Faculty':
      return route('labs.index', { faculty: id });
    case 'App\\Models\\Lab':
      return route('labs.show', { lab: id });
    default:
      return '#';
  }
};

const getTargetLabel = (type) => {
  switch (type) {
    case 'App\\Models\\University':
      return '大学';
    case 'App\\Models\\Faculty':
      return '学部';
    case 'App\\Models\\Lab':
      return '研究室';
    default:
      return '不明';
  }
};

export default function DeletionRequestIndex({ deletionRequests }) {
  return (
    <div>
      <h1>削除依頼一覧</h1>
      <table border="1" cellPadding="8">
        <thead>
          <tr>
            <th>ID</th>
            <th>対象名</th>
            <th>種別</th>
            <th>理由</th>
            <th>依頼者</th>
            <th>依頼日時</th>
          </tr>
        </thead>
        <tbody>
          {deletionRequests.map((req) => (
            <tr key={req.id}>
              <td>{req.id}</td>
              <td>
                <Link href={getTargetRoute(req.target_type, req.target_id)}>
                  {req.target?.name ?? '(名称不明)'}
                </Link>
              </td>
              <td>{getTargetLabel(req.target_type)}</td>
              <td>{req.reason || '(理由なし)'}</td>
              <td>{req.requester?.name ?? '(不明)'}</td>
              <td>{dayjs(req.created_at).format('YYYY/MM/DD HH:mm')}</td>
            </tr>
          ))}
        </tbody>
      </table>
    </div>
  );
}
続いて、通知一覧を見られるページを新規作成します。
import AuthenticatedLayout from '@/Layouts/AuthenticatedLayout';
import { Head, Link } from '@inertiajs/react';

export default function Index({ notifications, user }) {
    return (
        <AuthenticatedLayout>
            <Head title="通知一覧" />

            <div>
                <h2>通知一覧</h2>
                {notifications.length === 0 ? (
                    <p>通知はありません。</p>
                ) : (
                    <ul>
                        {notifications.map((notification) => (
                            <li key={notification.id}>
                                {notification.data?.message || '通知メッセージがありません'}
                            </li>
                        ))}
                    </ul>
                )}
            </div>
        </AuthenticatedLayout>
    );
}
最後は、マイページを修正して、通知件数が表示されるようにしましょう。
import AuthenticatedLayout from '@/Layouts/AuthenticatedLayout';
import { Head, Link, router } from '@inertiajs/react';

export default function Index({ user, notifications = [] }) {
    const handleDeleteAccount = () => {
        if (confirm('本当に退会しますか?この操作は取り消せません。')) {
            router.delete(route('mypage.delete'));
        }
    };

    // 未読の通知数を計算(read_at が null のもの)
    const unreadCount = notifications.filter(notification => !notification.read_at).length;

    return (
        <AuthenticatedLayout>
            <Head title="マイページ" />

            <div>
                {/* 通知件数とボタンをユーザー種別に応じて表示 */}
                <div style={{ marginBottom: '1em', color: user.is_admin ? 'red' : 'black' }}>
                    <div>未読の通知: {unreadCount}件</div>
                    <Link href={route('notifications.index')}>
                        <button style={{ marginTop: '0.5em' }}>
                            通知一覧を見る
                        </button>
                    </Link>
                </div>

                <h3>ユーザー情報</h3>
                <p>名前: {user.name}</p>
                <p>メールアドレス: {user.email}</p>
                <p>登録日: {new Date(user.created_at).toLocaleDateString('ja-JP')}</p>

                <Link href={route('mypage.edit')}>
                    <button>編集する</button>
                </Link>

                <Link href={route('mypage.bookmarks')}>
                    <button>ブックマーク済み研究室</button>
                </Link>

                <button onClick={handleDeleteAccount}>
                    退会する
                </button>
            </div>
        </AuthenticatedLayout>
    );
}
動作確認をする
今回も管理者が必要なので、もし準備ができていない方は前回同様Tinkerで事前に作成しておきましょう。
実行コマンド(必要なら)
$ php artisan tinker
use App\Models\User;
use Illuminate\Support\Facades\Hash;

User::create([
    'name' => '管理者1',
    'email' => 'admin@example1.com',
    'password' => Hash::make('password'),
    'is_admin' => true,
]);
また、今回Reactコンポーネント内で日付を扱う関係上以下のコマンドをあらかじめ実行しておく必要があります。
実行コマンド
$ npm install dayjs
それでは、始めます。
まずは、一般ユーザーでログインします。
次に削除依頼を作成します。
例えば、以下のURLにアクセスしてtypeが”研究室”でidが1に対する削除依頼作成ページを開くことができます。
http://localhost/deletion-requests/create/lab/1
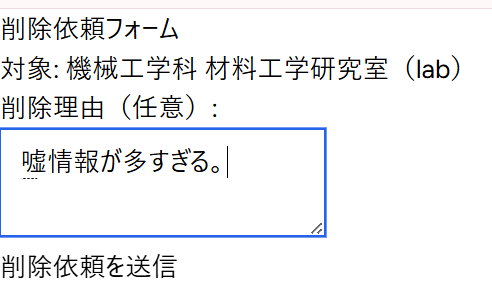
削除理由を入力して、「削除依頼を送信」をクリックしてみます。
DBクライアントでDeletion_requestsとNotificationsテーブルにそれぞれデータが入っていることを確認しましょう。


続いて、削除依頼通知が表示されるかを確認しましょう。
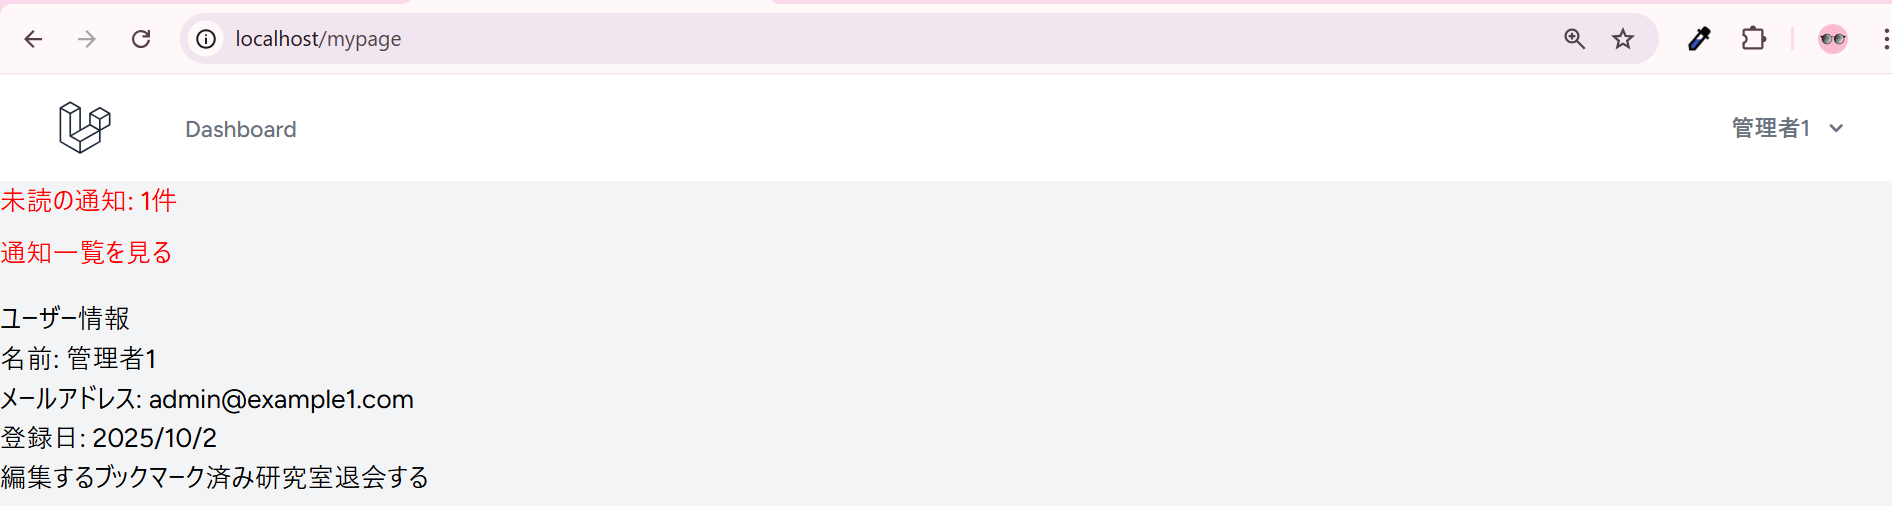
いったん今のユーザーからログアウトして、管理者でログインします。
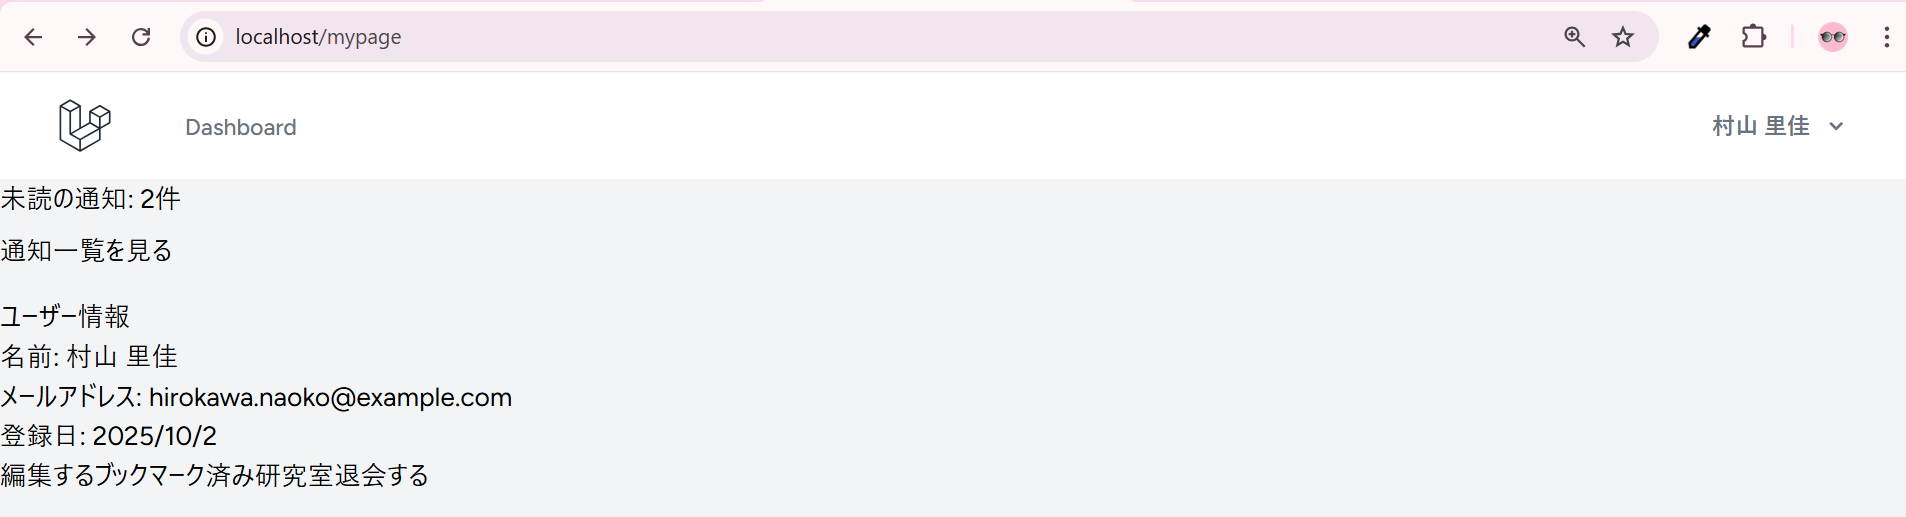
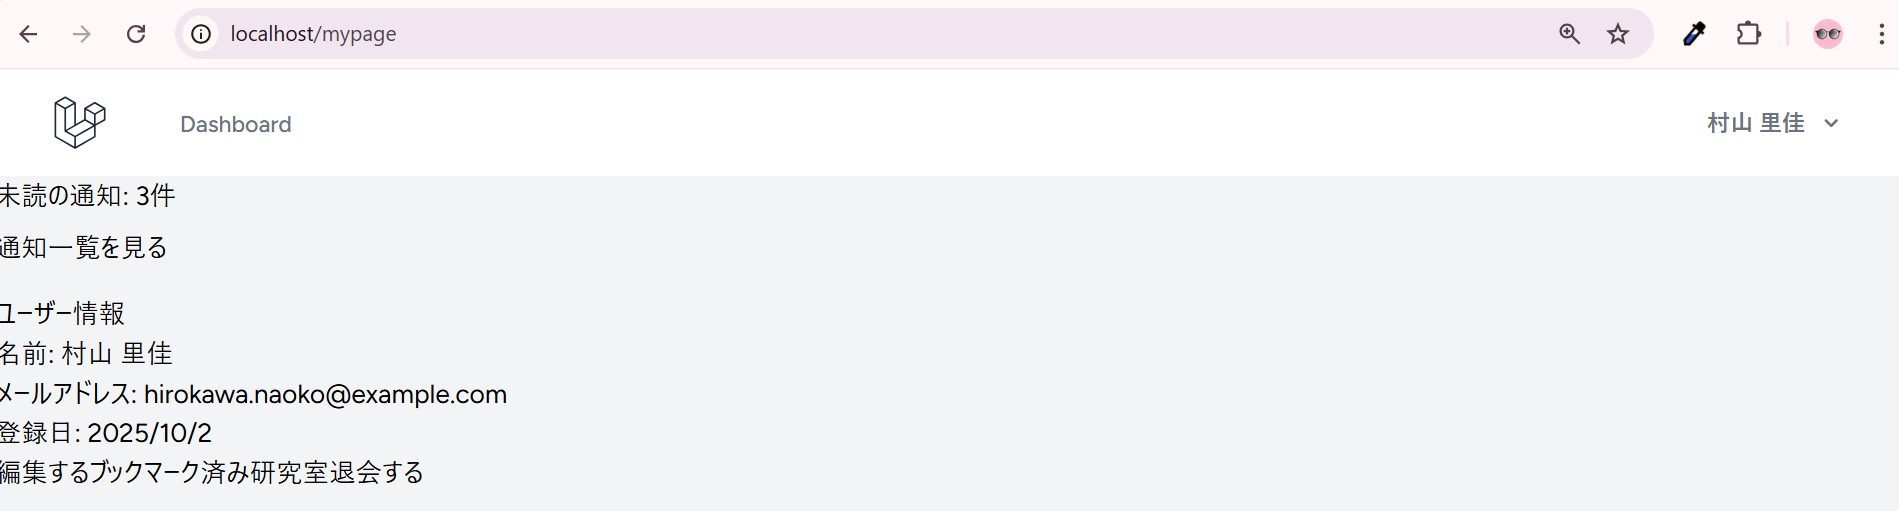
ログイン出来たら、マイページに移動してみると、通知件数が表示されていることが確認できます。
http://localhost/mypage
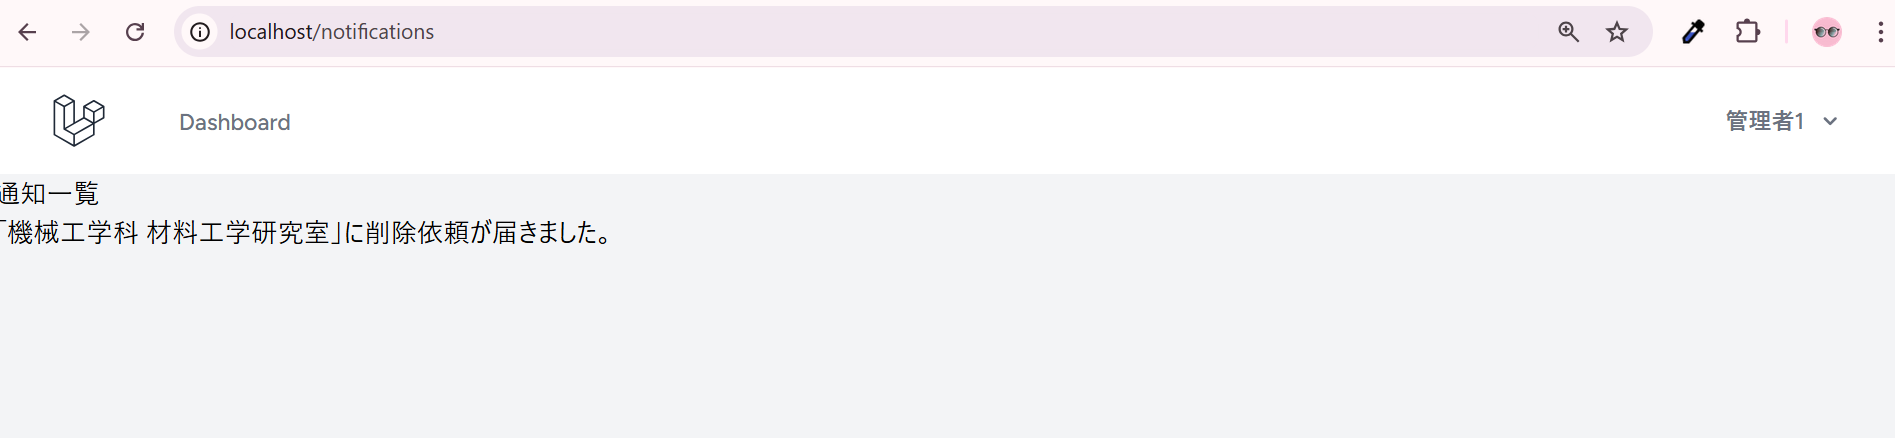
さらに、「通知一覧を見る」をクリックすることで、一覧が表示されます。
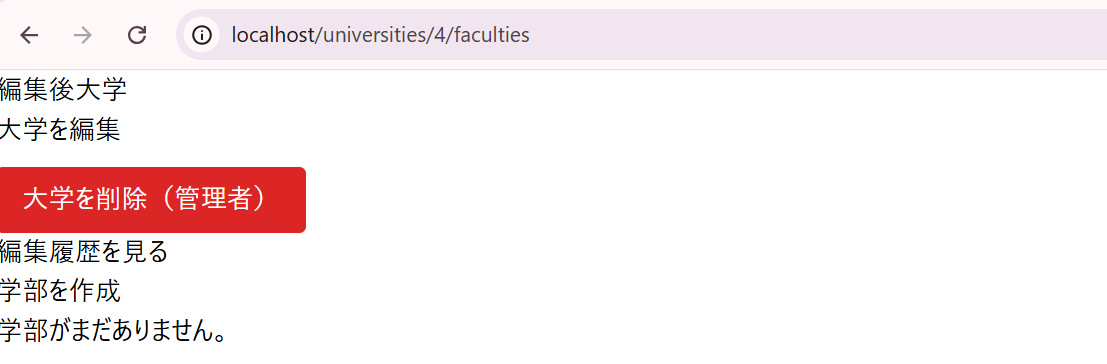
また、以下のURLにアクセスすると管理者だけが見られる削除依頼一覧を見ることもできます。
http://localhost/admin/deletion-requests

「対象名」の部分をクリックするとその対象のページへ移動できます。
このページで削除をしましょう。

削除完了通知が通知テーブルに追加されています。

最後にこれが表示されるかを確認しましょう。
管理者でログアウトして、先ほど削除依頼を作成したユーザーでログインしてみます。
マイページを開くと通知件数1が表示されています。
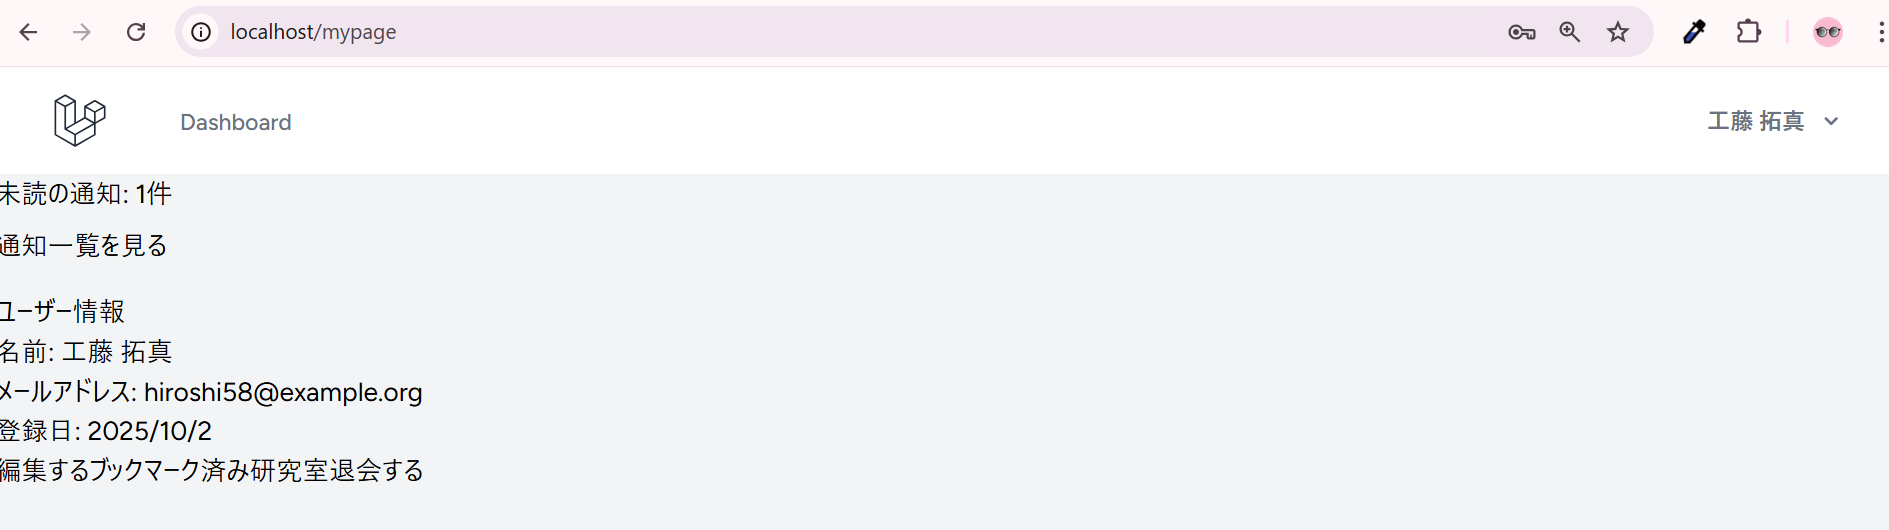
「通知一覧を見る」をクリックして、一覧も見られることを確認してください。

正直まだまだ課題はありますが、とりあえず大学・学部・研究室削除依頼通知機能は一旦ここまでとします!
3. 作成済み大学・学部・研究室編集及び削除通知機能実装
さて、後半戦です。
今度は、自分が作成した大学・学部・研究室が編集・削除されたときに通知が来るようにしたいです。
自分が作成したものが知らないうちに編集・削除されていて何の連絡もないと寂しいですよね。
がんばって作っていきましょう!
修正: テーブル設計
もうええ加減にせえよ!
って感じかと思いますが、またしてもテーブル設計を修正します(設計とは?)。
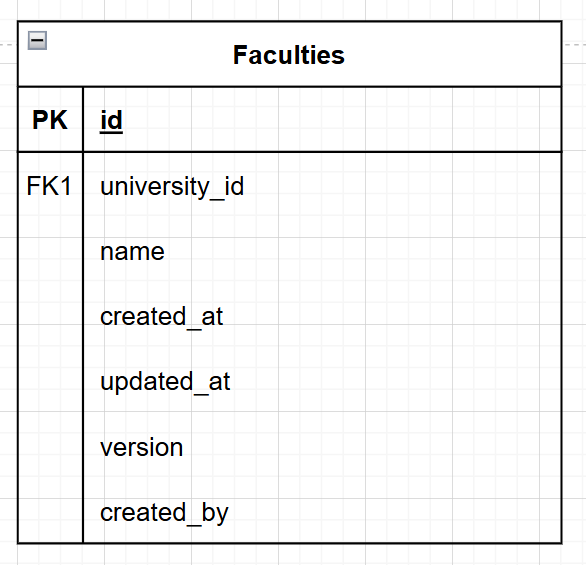
どこを直すかと言いますと、大学・学部・研究室テーブルに作成者を表すカラム('created_by')を追加します。
Universitiesテーブル
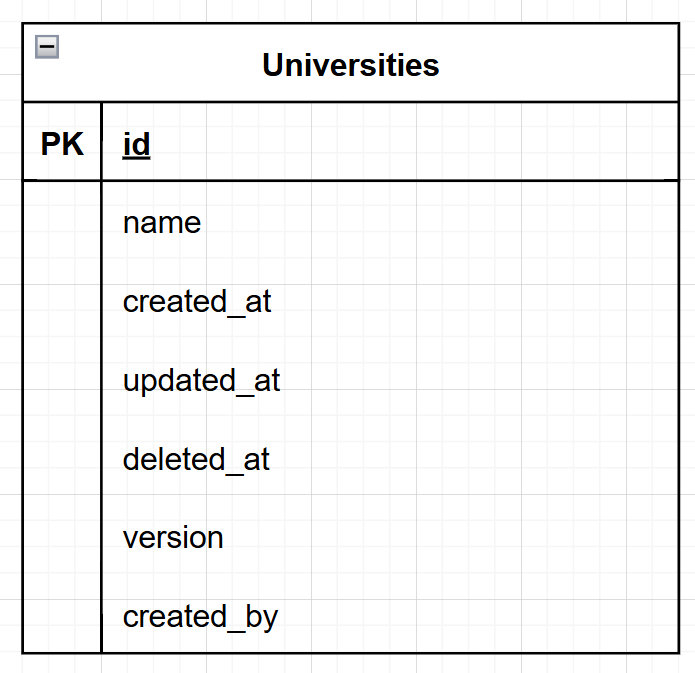
Facultiesテーブル
Labsテーブル
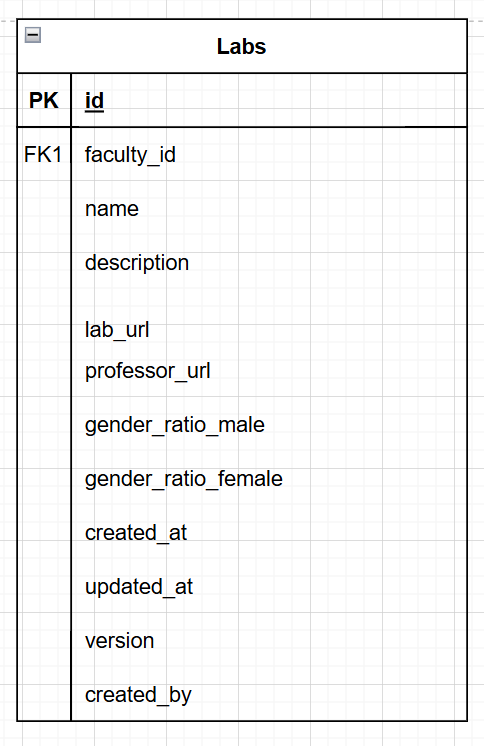
確かにこれまで、Usersテーブルとは中間テーブルを介してリレーションを組んできました。
しかし、それはあくまで、編集者としてのリレーションだっため、作成者と明確に区別するためにはこのように新たなカラムを追加するのが手っ取り早いかなと思い、設計を修正しました。
マイグレーションを作成・実行する
ということで、それぞれのテーブルに'cretated_by'カラムを追加するためのマイグレーションファイルを作成しましょう。
実行コマンド
$ php artisan make:migration add_created_by_to_universities_table --tabl
e=universities
実行コマンド
$ php artisan make:migration add_created_by_to_faculties_table --table=f
aculties
実行コマンド
$ php artisan make:migration add_created_by_to_labs_table --table=labs
それぞれのup()メソッドは以下のような感じです。
    public function up(): void
    {
        Schema::table('universities', function (Blueprint $table) {
            if (!Schema::hasColumn('universities', 'created_by')) {
                $table->foreignId('created_by')->constrained('users')->cascadeOnDelete();
            }
        });
    }
    public function up(): void
    {
        Schema::table('faculties', function (Blueprint $table) {
            if (!Schema::hasColumn('faculties', 'created_by')) {
                $table->foreignId('created_by')->after('university_id')->constrained('users')->cascadeOnDelete();
            }
        });
    }
    public function up(): void
    {
        Schema::table('labs', function (Blueprint $table) {
            if (!Schema::hasColumn('labs', 'created_by')) {
                $table->foreignId('created_by')->after('faculty_id')->constrained('users')->cascadeOnDelete();
            }
        });
    }
Null, OKにしたのは、既存の大学・学部・研究所との整合性を保つためですが、あまり気にしなくても大丈夫です。
モデルを修正する
次に、モデルです。
新たにリレーションを追加しましょう!
大学・学部・研究室のすべてのモデルに新たなメソッドを追加しておいてください。
追加するメソッド↓
    // 追加: 作成者とのリレーション(多対一)
    public function creator()
    {
        return $this->belongsTo(User::class, 'created_by');
    }
Notificationを作成する
Notificationを作成しましょう!
実行コマンド
$ php artisan make:notification ModelChangedNotification
大学・学部・研究室のいずれかが編集または削除された際に、作成者に通知を送信するためのNotificationクラスをModelChangedNotificationという名前で作成しました。
<?php

namespace App\Notifications;

use Illuminate\Bus\Queueable;
use Illuminate\Contracts\Queue\ShouldQueue;
use Illuminate\Notifications\Messages\MailMessage;
use Illuminate\Notifications\Notification;

class ModelChangedNotification extends Notification
{
    use Queueable;

    protected $action; // 'edited' or 'deleted'
    protected $modelType; // '大学', '学部', '研究室'
    protected $modelName; // 対象の名前
    protected $changes;

    /**
     * Create a new notification instance.
     */
    public function __construct(string $action, string $modelType, string $modelName, ?array $changes = null)
    {
        $this->action = $action;
        $this->modelType = $modelType;
        $this->modelName = $modelName;
        $this->changes = $changes;
    }

    /**
     * Get the notification's delivery channels.
     *
     * @return array<int, string>
     */
    public function via(object $notifiable): array
    {
        return ['database'];
    }

    /**
     * Get the array representation of the notification.
     *
     * @return array<string, mixed>
     */
    public function toArray(object $notifiable): array
    {
        $message = match($this->action) {
            'edited' => "あなたが作成した「{$this->modelName}({$this->modelType})」が編集されました。",
            'deleted' => "あなたが作成した「{$this->modelName}({$this->modelType})」が削除されました。",
            default => "あなたが作成した「{$this->modelName}({$this->modelType})」に変更がありました。",
        };

        return [
            'message' => $message,
            'action' => $this->action,
            'model_type' => $this->modelType,
            'model_name' => $this->modelName,
            'changes' => $this->changes,
        ];
    }
}
コメントもそれなりに書きましたし、本記事の前半で作成した二つのNotificationとかなり似ているので特段解説するべきところはないかなと思います。
強いて言いうなら、タイプヒントの部分ですかね...
特にこれ
?array $changes = null
本シリーズでもたびたび登場しているタイプヒントですが、もしかしたら少しわかりにくい形をしているかもしれませんね。
復習ですが、phpは他の言語(JavaやTypeScriptなど)のように型の指定をすることができるのでしたね。
array $changes
まず、このように仮引数の前に型を明示することでそれ以外の方の値を代入しようとするとエラーを発生させることができます。
この場合ですと、$cahngesは配列型でなければなりません。
?array $changes
次に、?は、NullでもOKという意味を表します。
今回、編集されたときの差分(どの部分が変わったのか)を$changesで受け取るようにしようと思ったのですが、これは削除時には使用しないため、Nullでもよいようにしています。
?array $changes = null
最後に、=を付けることで、初期値を設定できます。
これの良い点としては、関数を使う側がその引数を省略した時に自動的にその初期値が代入される点です。
// ?array $changes
new ModelChangedNotification('deleted', '研究室', '情報学研究室', null); // OK
new ModelChangedNotification('deleted', '研究室', '情報学研究室'); // エラー(引数が足りない)

// ?array $changes = null
new ModelChangedNotification('deleted', '研究室', '情報学研究室'); // OK(第四引数に自動的に`null`が代入される)
このようにすることで、コードを書いて実行する段階でエラーが発生してくれるため、関数やメソッドの作成者とそれを使用する人との間の認識祖語による不具合を未然に防ぐことができます。
と言いましたが、本シリーズではタイプヒントをしたり・しなかったりで、一貫性にかける気持ち悪い感じのコードが多かったと思います。
心と時間の余裕があれば(←ここ重要)、リファクタリング編で直してみたいと思いますw
コントローラーを修正する
続いて、コントローラーです。
テーブル定義の修正に伴って、store()メソッドに一行追加です。
    public function store(Request $request)
    {
        $this->authorize('create', University::class);

        $validated = $request->validate([
            'name' => 'required|string|max:50|unique:universities,name',
        ]);

        $university = new University();
        $university->name = $validated['name'];
        $university->created_by = $request->user()->id; // 追加: 作成者のIDを設定
        $university->save();

        $userId = $request->user()->id;
        $university->users()->attach($userId);

        return redirect()->route('faculties.index', ['university' => $university])->with('success', '大学が作成されました。'); // 修正: リダイレクト先を変更
    }
    public function store(Request $request, University $university)
    {
        $this->authorize('create', Faculty::class);

        $validated = $request->validate([
            'name' => 'required|string|max:50|unique:faculties,name,NULL,id,university_id,' . $university->id,
        ]);

        $faculty = new Faculty();
        $faculty->name = $validated['name'];
        $faculty->university_id = $university->id;
        $faculty->created_by = $request->user()->id; // 追加: 作成者のIDを設定
        $faculty->save();

        $userId = $request->user()->id;
        $faculty->users()->attach($userId);

        return redirect()->route('labs.index', ['faculty' => $faculty])->with('success', '学部が作成されました。');
    }
    public function store(Request $request, Faculty $faculty)
    {
        // 認可
        $this->authorize('create', Lab::class);

        // バリデーション
        $validated = $request->validate([
            'name' => 'required|string|max:50|unique:labs,name,NULL,id,faculty_id,' . $faculty->id,
            'description' => 'nullable|string|max:500',
            'url' => 'nullable|url|max:255',
            'professor_url' => 'nullable|url|max:255',
            'gender_ratio_male' => 'required|integer|min:0|max:10',
            'gender_ratio_female' => [
                'required',
                'integer',
                'min:0',
                'max:10',
                function ($attribute, $value, $fail) use ($request) {
                    $male = (int) $request->input('gender_ratio_male', 0);
                    $female = (int) $value;
                    if ($male + $female > 10) {
                        $fail('男女比の合計は10である必要があります。');
                    }
                },
            ],
        ]);

        $lab = new Lab();
        $lab->name = $validated['name'];
        $lab->description = $validated['description'];
        $lab->url = $validated['url'];
        $lab->professor_url = $validated['professor_url'];
        $lab->gender_ratio_male = $validated['gender_ratio_male'];
        $lab->gender_ratio_female = $validated['gender_ratio_female'];
        $lab->faculty_id = $faculty->id;
        $lab->created_by = $request->user()->id; // 追加: 作成者のIDを設定
        $lab->save();

        $userId = $request->user()->id;
        $lab->users()->attach($userId);

        return redirect()->route('labs.show', ['lab' => $lab])->with('success', '研究室が作成されました。');
    }
また、それぞれのコントローラーのupdate()メソッドに先ほど作成したModelChangedNotificationクラスを呼び出す処理を追加します。
    public function update(Request $request, University $university)
    {
        $this->authorize('update', University::class);

        $validated = $request->validate([
            'name' => 'required|string|max:50|unique:universities,name,' . $university->id,
            'comment' => 'required|string|max:255',
            'version' => 'required|integer',
        ]);

        // トランザクション開始
        DB::beginTransaction();

        try {
            // 他のユーザーが更新している可能性がある
            // そのため、最初に最新の university を取得
            $current = University::find($university->id);

            if ($validated['version'] !== $current->version) {
                throw ValidationException::withMessages([
                    'version' => '他のユーザーがこの大学情報を更新しました。最新の情報を確認してください。',
                ]);
            }

            // データ更新
            $current->name = $validated['name'];
            $current->version += 1; // バージョンを1増やす
            $current->save();

            // 履歴保存
            $userId = $request->user()->id;
            $current->users()->attach($userId, [
                'comment' => $validated['comment'],
                'created_at' => now(),
                'updated_at' => now(),
            ]);

            DB::commit(); // トランザクション処理終了

            // 追加: 作成者へ通知を送信
            if ($userId !== $current->created_by && $current->creator) {
                $changes = collect($current->getChanges())
                    ->only(['name'])
                    ->map(fn($new, $key) => [
                        'old' => $old[$key] ?? null,
                        'new' => $new,
                    ])
                    ->toArray();

                $current->creator->notify(
                    new ModelChangedNotification('edited', '大学', $current->name, $changes)
                );
            }

             // リダイレクト
            return redirect()->route('faculties.index', ['university' => $current])->with('success', '大学情報が更新されました。');
        } catch (\Exception $e) {
            DB::rollBack(); // エラー時はロールバック
            throw $e;
        }
    }
    public function update(Request $request, Faculty $faculty)
    {
        $this->authorize('update', Faculty::class);

        $validated = $request->validate([
            'name' => 'required|string|max:50|unique:universities,name,' . $faculty->id,
            'comment' => 'required|string|max:255',
            'version' => 'required|integer',
        ]);

        // トランザクション
        DB::beginTransaction();

        try {
            // 現在のバージョンを取得して比較
            $current = Faculty::find($faculty->id);
            if ($validated['version'] !== $current->version) {
                throw ValidationException::withMessages([
                    'version' => '他のユーザーがこの学部情報を更新しました。最新の情報を確認してください。',
                ]);
            }

            // 更新
            $current->name = $validated['name'];
            $current->version += 1;
            $current->save();

            // 履歴保存
            $userId = $request->user()->id;
            $current->users()->attach($userId, [
                'comment' => $validated['comment'],
                'created_at' => now(),
                'updated_at' => now(),
            ]);

            DB::commit();

            // 追加: 作成者へ通知を送信
            if ($userId !== $current->created_by && $current->creator) {
                $changes = collect($current->getChanges())
                    ->only(['name'])
                    ->map(fn($new, $key) => [
                        'old' => $old[$key] ?? null,
                        'new' => $new,
                    ])
                    ->toArray();

                $current->creator->notify(
                    new ModelChangedNotification('edited', '学部', $current->name, $changes)
                );
            }

            return redirect()->route('labs.index', ['faculty' => $current])->with('success', '大学情報が更新されました。');
        } catch (\Exception $e) {
            DB::rollBack();
            throw $e;
        }
    }
    public function update(Request $request, Lab $lab)
    {
        $this->authorize('update', Lab::class);

        $validated = $request->validate([
            'name' => 'required|string|max:50|unique:labs,name,' . $lab->id . ',id,faculty_id,' . $lab->faculty_id,
            'description' => 'nullable|string|max:500',
            'url' => 'nullable|url|max:255',
            'professor_url' => 'nullable|url|max:255',
            'gender_ratio_male' => 'required|integer|min:0|max:10',
            'gender_ratio_female' => [
                'required',
                'integer',
                'min:0',
                'max:10',
                function ($attribute, $value, $fail) use ($request) {
                    $male = (int) $request->input('gender_ratio_male', 0);
                    $female = (int) $value;
                    if ($male + $female !== 10) {
                        $fail('男女比の合計は10である必要があります。');
                    }
                },
            ],
            'comment' => 'required|string|max:255',
            'version' => 'required|integer',
        ]);

        DB::beginTransaction();

        try {
            // 現在のバージョンを取得して比較
            $current = Lab::find($lab->id);
            if ($validated['version'] !== $current->version) {
                throw ValidationException::withMessages([
                    'version' => '他のユーザーがこの研究室情報を更新しました。最新の情報を確認してください。',
                ]);
            }

            // 更新
            $current->name = $validated['name'];
            $current->description = $validated['description'];
            $current->url = $validated['url'];
            $current->professor_url = $validated['professor_url'];
            $lab->gender_ratio_male = $validated['gender_ratio_male'];
            $lab->gender_ratio_female = $validated['gender_ratio_female'];
            $current->version += 1;
            $current->save();

            // 履歴保存
            $userId = $request->user()->id;
            $lab->users()->attach($userId, [
                'comment' => $validated['comment'],
                'created_at' => now(),
                'updated_at' => now(),
            ]);

            DB::commit();

            // 追加: 作成者へ通知を送信
            if ($userId !== $current->created_by && $current->creator) {
                $changes = collect($current->getChanges())
                    ->only(['name','description','url','professor_url'])
                    ->map(fn($new, $key) => [
                        'old' => $old[$key] ?? null,
                        'new' => $new,
                    ])
                    ->toArray();

                $current->creator->notify(
                    new ModelChangedNotification('edited', '研究室', $current->name, $changes)
                );
            }

            return redirect()->route('labs.show', ['lab' => $lab])->with('success', '研究室が更新されました。');
        } catch (\Exception $e) {
            DB::rollBack();
            throw $e;
        }
    }
use宣言もお忘れなく!
use App\Notifications\ModelChangedNotification;
さらに、管理者コントローラーのそれぞれの削除メソッドに通知送信処理を追加しておきまっしょい!(*´ω`)
    public function destroyUniversity(University $university)
    {
        // 認可チェック
        $this->authorize('delete', $university);

        $creator = $university->creator; // 追加: 作成者を取得
        $universityName = $university->name; // 追加: 通知用に大学名を取得

        // 対象の削除依頼があれば取得
        $deletionRequest = DeletionRequest::where('target_type', University::class)
            ->where('target_id', $university->id)
            ->first();

        // 追加: 通知送信
        if ($deletionRequest) {
            $requester = $deletionRequest->requester;
            $requester->notify(new DeletionCompletedNotification($university->name, '大学'));

            $deletionRequest->processed_by = auth()->id();
            $deletionRequest->status = 'approved';
            $deletionRequest->save();
        }

        $university->delete();

        // 追加: 通知送信(作成者へ)
        if ($creator && auth()->id() !== $creator->id) {
            $creator->notify(new ModelChangedNotification(
                'deleted',
                '大学',
                $universityName
            ));
        }

        return redirect()->route('labs.home')->with('success', '大学が削除されました。');
    }

    public function destroyFaculty(Faculty $faculty)
    {
        // 認可チェック
        $this->authorize('delete', $faculty);

        $creator = $faculty->creator; // 追加: 作成者を取得
        $facultyName = $faculty->name; // 追加: 通知用に学部名を取得

        // 対象の削除依頼があれば取得
        $deletionRequest = DeletionRequest::where('target_type', Faculty::class)
            ->where('target_id', $faculty->id)
            ->first();

        // 追加: 通知送信
        if ($deletionRequest) {
            $requester = $deletionRequest->requester;
            $requester->notify(new DeletionCompletedNotification($faculty->name, '学部'));

            $deletionRequest->processed_by = auth()->id();
            $deletionRequest->status = 'approved';
            $deletionRequest->save();
        }

        $faculty->delete();

        // 追加: 通知送信(作成者へ)
        if ($creator && auth()->id() !== $creator->id) {
            $creator->notify(new ModelChangedNotification(
                'deleted',
                '学部',
                $facultyName
            ));
        }

        return redirect()->route('labs.home')->with('success', '学部が削除されました。');
    }

    public function destroyLab(Lab $lab)
    {
        // 認可チェック
        $this->authorize('delete', $lab);

        $creator = $lab->creator; // 追加: 作成者を取得
        $labName = $lab->name; // 追加: 通知用に研究室名を

        // 対象の削除依頼があれば取得
        $deletionRequest = DeletionRequest::where('target_type', Lab::class)
            ->where('target_id', $lab->id)
            ->first();

        // 通知送信(削除依頼者へ)
        if ($deletionRequest) {
            $requester = $deletionRequest->requester;
            $requester->notify(new DeletionCompletedNotification($lab->name, '研究室'));

            $deletionRequest->processed_by = auth()->id();
            $deletionRequest->status = 'approved';
            $deletionRequest->save();
        }

        $lab->delete();

        // 追加: 通知送信(作成者へ)
        if ($creator && auth()->id() !== $creator->id) {
            $creator->notify(new ModelChangedNotification(
                'deleted',
                '研究室',
                $labName
            ));
        }

        return redirect()->route('labs.home')->with('success', '研究室が削除されました。');
    }
こちらもuse宣言を忘れないでね!(≧◇≦)
動作確認をする
先に、編集機能から取り組みます。
今回は大学についてテストしたいと思います。
まずは、大学の作成者となるユーザーを一人適当に選んでログインします。
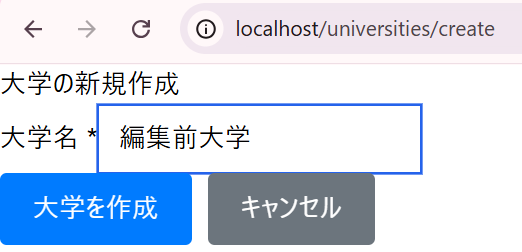
以下にアクセスして適当な大学を作成します。
http://localhost/universities/create
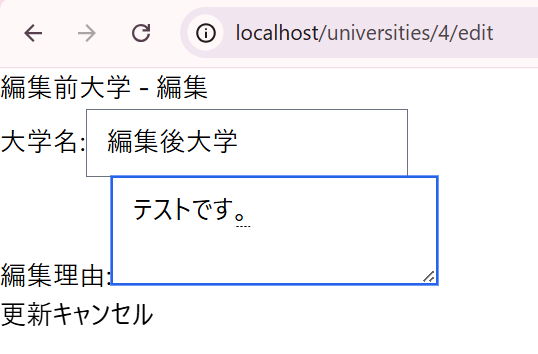
次に、今のユーザーでログアウトしたのちに、編集者となる別のユーザーを一人適当に選んでログインします。
以下にアクセスして、適当に編集します。
http://localhost/universities/4/edit
更新ボタンを押したら、ログアウトして、再び作成者に選んだユーザーでログインして、マイページを開きます。
http://localhost/mypage
通知件数が表示されていれば成功です。(僕はミスったので2件ありますが、一度しか編集していなければ1件と表示されるはずです)
通知一覧にも情報が表示されていることを確認します。

続けて、削除機能の通知も見ます。
今のユーザーでログアウトして、管理者でログインします。
先ほど作成した大学を管理者権限で削除します。
削除出来たら、管理者からログアウトして、先ほどこの大学を作成したユーザーで再びログインし、マイページを見ます。
通知件数が増えていることを確認してください。
さらに、通知一覧ページを開いて内容が表示されていることを確認してください。

どのように編集されたのかという詳細を表示したり、通知の未読・既読を管理する機能はできていないのですが、正直疲れた(←w)ので今日のところはこの辺で勘弁してください。(笑)
通知自体は送信できていることが確認できました!
4. まとめ・次回予告
というわけで、今回もボリューミーでしたが、お疲れ様でした!
今回は、通知機能を実現するためにLaravel Notificationを活用しました。
その際、初めてとなるポリモーフィックリレーションの仕組みを利用しました。
まだまだ、不完全な部分もありますが、その辺はフロントエンド編でしれっと直すかもしれませんw
次回はとうとうバックエンド編最後の機能ソーシャルログインを実装したいと思います。
最後までよろしくお願いします!
これまでの記事一覧
--- 要件定義・設計編 ---
--- 環境構築編 ---
- その2: 環境構築編① ~WSL, Ubuntuインストール~
- その3: 環境構築編② ~Docker Desktopインストール~
- その4: 環境構築編③ ~Dockerコンテナ立ち上げ~
- その5: 環境構築編④ ~Laravelインストール~
- その6: 環境構築編⑤ ~Gitリポジトリ接続~
--- バックエンド実装編 ---
- その7: バックエンド実装編① ~認証機能作成~
- その8: バックエンド実装編②前編 ~レビュー投稿機能作成~
- その8.5: バックエンド実装編②後編 ~レビュー投稿機能作成~
- その9: バックエンド実装編③ ~レビューCRUD機能作成~
- その10: バックエンド実装編④ ~レビューCRUD機能作成その2~
- その11: バックエンド実装編⑤ ~新規大学・学部・研究室作成機能作成~
- その12: バックエンド実装編⑥ ~大学検索機能作成~
- その13: バックエンド実装編⑦ ~大学・学部・研究室編集機能作成~
- その14: バックエンド実装編⑧ ~コメント投稿機能~
- その15: バックエンド実装編⑨ ~コメント編集・削除機能~
- その16: バックエンド実装編⑩ ~ブックマーク機能~
- その17: バックエンド実装編⑪ ~排他制御・トランザクション処理~
- その18: バックエンド実装⑫編 ~マイページ機能作成~
- その19: バックエンド実装編⑬ ~管理者アカウント機能作成~