Docker × Spring Boot環境構築
概要
Dockerを使って、Spring Bootの環境を構築します。
動作確認として、Hello Worldをブラウザに表示させます。
環境
- macOS Catalina バージョン10.15.5
- Docker version 19.03.8
- docker-compose version 1.25.5
- openjdk 14.0.1 2020-04-14
- Spring Boot 2.3.1
構成
最終的には以下のような構成になります。
├── docker-compose.yml
└── server
    ├── HELP.md
    ├── build
    │   ├── classes
    │   │   └── java
    │   │       ├── main
    │   │       │   └── com
    │   │       │       └── example
    │   │       │           └── api
    │   │       │               └── ApiApplication.class
    │   │       └── test
    │   │           └── com
    │   │               └── example
    │   │                   └── api
    │   │                       └── ApiApplicationTests.class
    │   ├── generated
    │   │   └── sources
    │   │       ├── annotationProcessor
    │   │       │   └── java
    │   │       │       ├── main
    │   │       │       └── test
    │   │       └── headers
    │   │           └── java
    │   │               ├── main
    │   │               └── test
    │   ├── libs
    │   │   └── api-0.0.1-SNAPSHOT.jar
    │   ├── reports
    │   │   └── tests
    │   │       └── test
    │   │           ├── classes
    │   │           │   └── com.example.api.ApiApplicationTests.html
    │   │           ├── css
    │   │           │   ├── base-style.css
    │   │           │   └── style.css
    │   │           ├── index.html
    │   │           ├── js
    │   │           │   └── report.js
    │   │           └── packages
    │   │               └── com.example.api.html
    │   ├── resources
    │   │   └── main
    │   │       ├── application.properties
    │   │       ├── static
    │   │       └── templates
    │   ├── test-results
    │   │   └── test
    │   │       ├── TEST-com.example.api.ApiApplicationTests.xml
    │   │       └── binary
    │   │           ├── output.bin
    │   │           ├── output.bin.idx
    │   │           └── results.bin
    │   └── tmp
    │       ├── bootJar
    │       │   └── MANIFEST.MF
    │       ├── compileJava
    │       └── compileTestJava
    ├── build.gradle
    ├── gradle
    │   └── wrapper
    │       ├── gradle-wrapper.jar
    │       └── gradle-wrapper.properties
    ├── gradlew
    ├── gradlew.bat
    ├── settings.gradle
    └── src
        ├── main
        │   ├── java
        │   │   └── com
        │   │       └── example
        │   │           └── api
        │   │               └── ApiApplication.java
        │   └── resources
        │       ├── application.properties
        │       ├── static
        │       └── templates
        └── test
            └── java
                └── com
                    └── example
                        └── api
                            └── ApiApplicationTests.java
手順
1. docker-compose.yml作成
今回はjavaコンテナ1つのみのシンプルな構成です。
docker-compose.yml
version: '3.6'
services:
  java:
    image: openjdk:14-slim
    ports:
      - 8080:8080
    tty: true
    volumes:
      - ./server:/srv:cached
    working_dir: /srv
2. Gradleプロジェクト作成
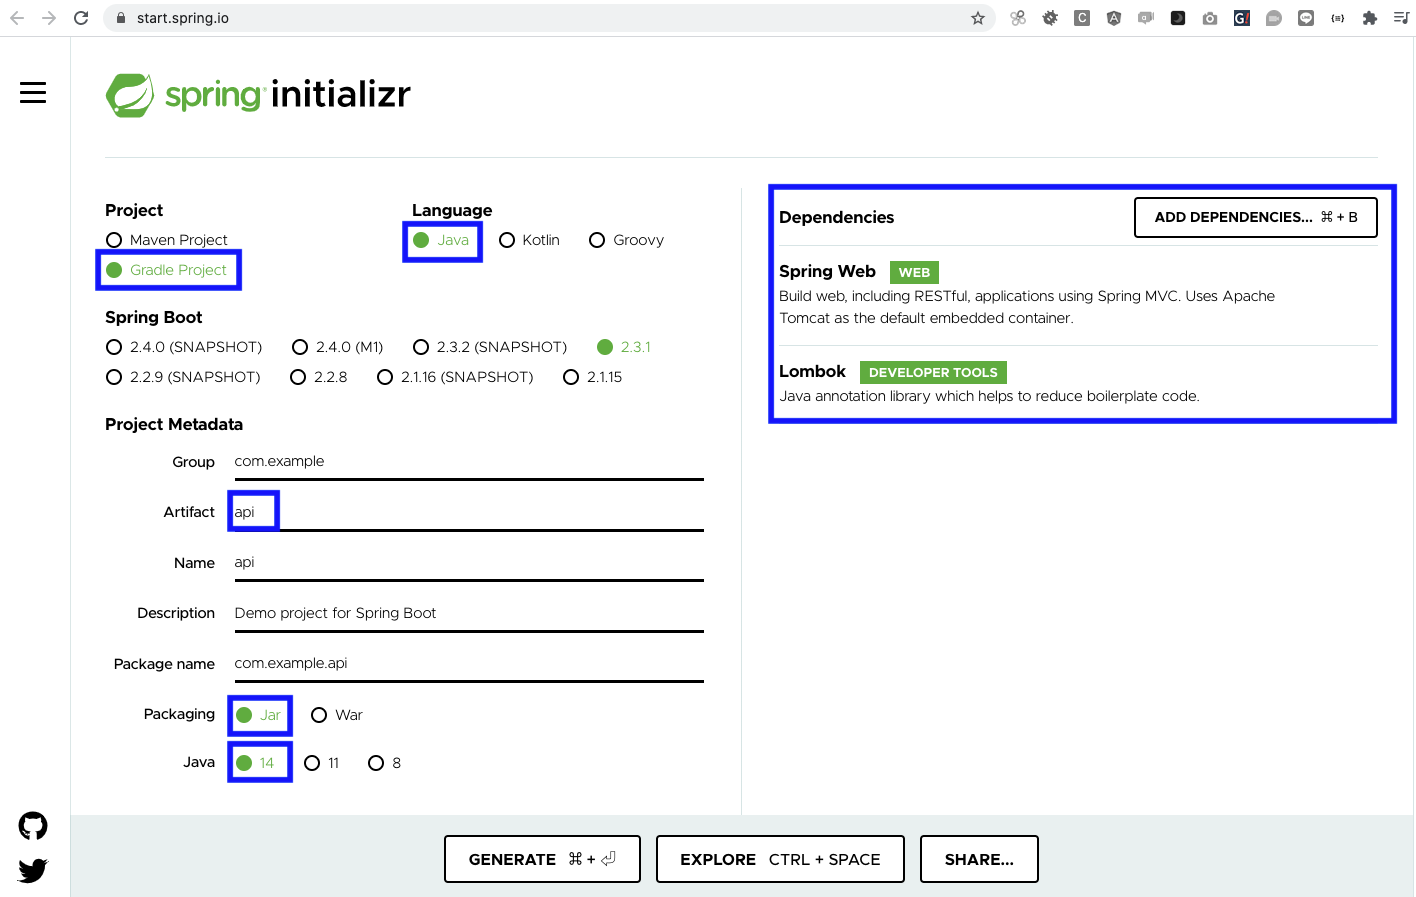
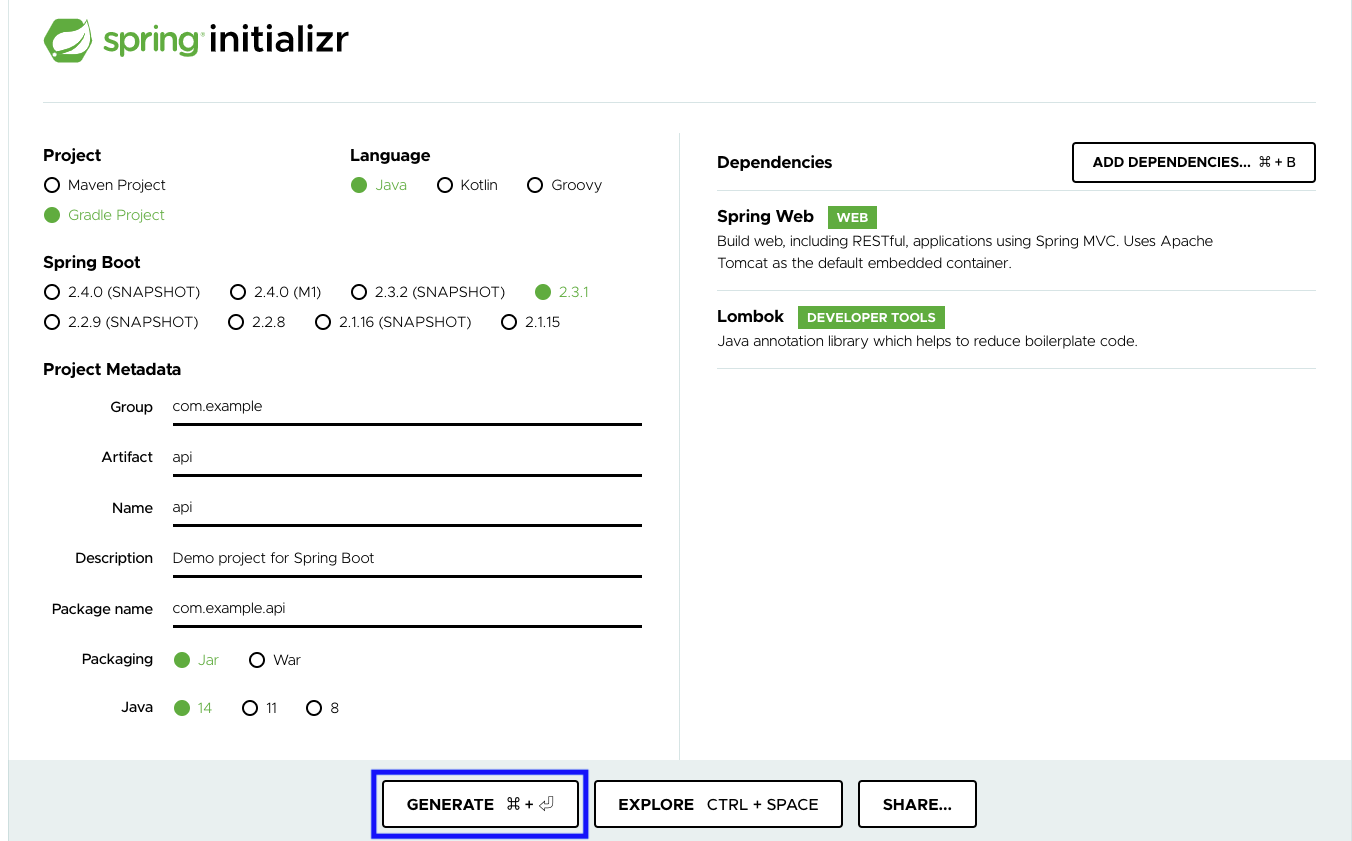
2.1 spring initializrにてGradleプロジェクトの雛形を作成

2.3 プロジェクトに展開
プロジェクトディレクトリ直下にserverディレクトリを作成します。
2.2でダウンロードした api.zipを展開し、中身をserver直下に移します。
3. アプリケーションファイルを編集
server/src/main/java/com/example/api/ApiApplication.javaを以下のように編集します。
server/src/main/java/com/example/api/ApiApplication.java
package com.example.api;

import org.springframework.boot.SpringApplication;
import org.springframework.boot.autoconfigure.SpringBootApplication;
import org.springframework.web.bind.annotation.RequestMapping;
import org.springframework.web.bind.annotation.RestController;

@SpringBootApplication
@RestController
public class ApiApplication {

    @RequestMapping("/")
    public String home() {
        return "Hello World";
    }

    public static void main(String[] args) {
        SpringApplication.run(ApiApplication.class, args);
    }

}
4. Docker起動
// docker環境ビルド
% docker-compose build

// dockerをバックグラウンドで起動
% docker-compose up -d
5. Gradleのビルド
// javaコンテナにインスペクション
% docker-compose exec java bash

// gradleビルド
root@62acca270468:/srv# sh gradlew build
...
BUILD SUCCESSFUL in 1m 38s
5 actionable tasks: 3 executed, 2 up-to-date
server直下にbuildディレクトリができていることを確認する。
6. アプリケーションの実行
root@62acca270468:/srv# java -jar build/libs/api-0.0.1-SNAPSHOT.jar
7. 動作確認
http://localhost:8080/ にアクセスしてみましょう。
Hello Worldが表示されていたら成功です。
