JavaのSpring BootでWebアプリを開発しようと思った時に、どうせならDockerの勉強も兼ねてDockerを使って開発環境を構築しようと思いました。
動作環境
- OS: Mac OS X 10.12.6 x86_64 (macOS Sierra)
- Gradle: 3.5.1
- JVM: 1.8.0_152-ea
- Docker for Mac: Version 17.09.0-ce-mac35
Spring Bootの実装
雛形のダウンロード
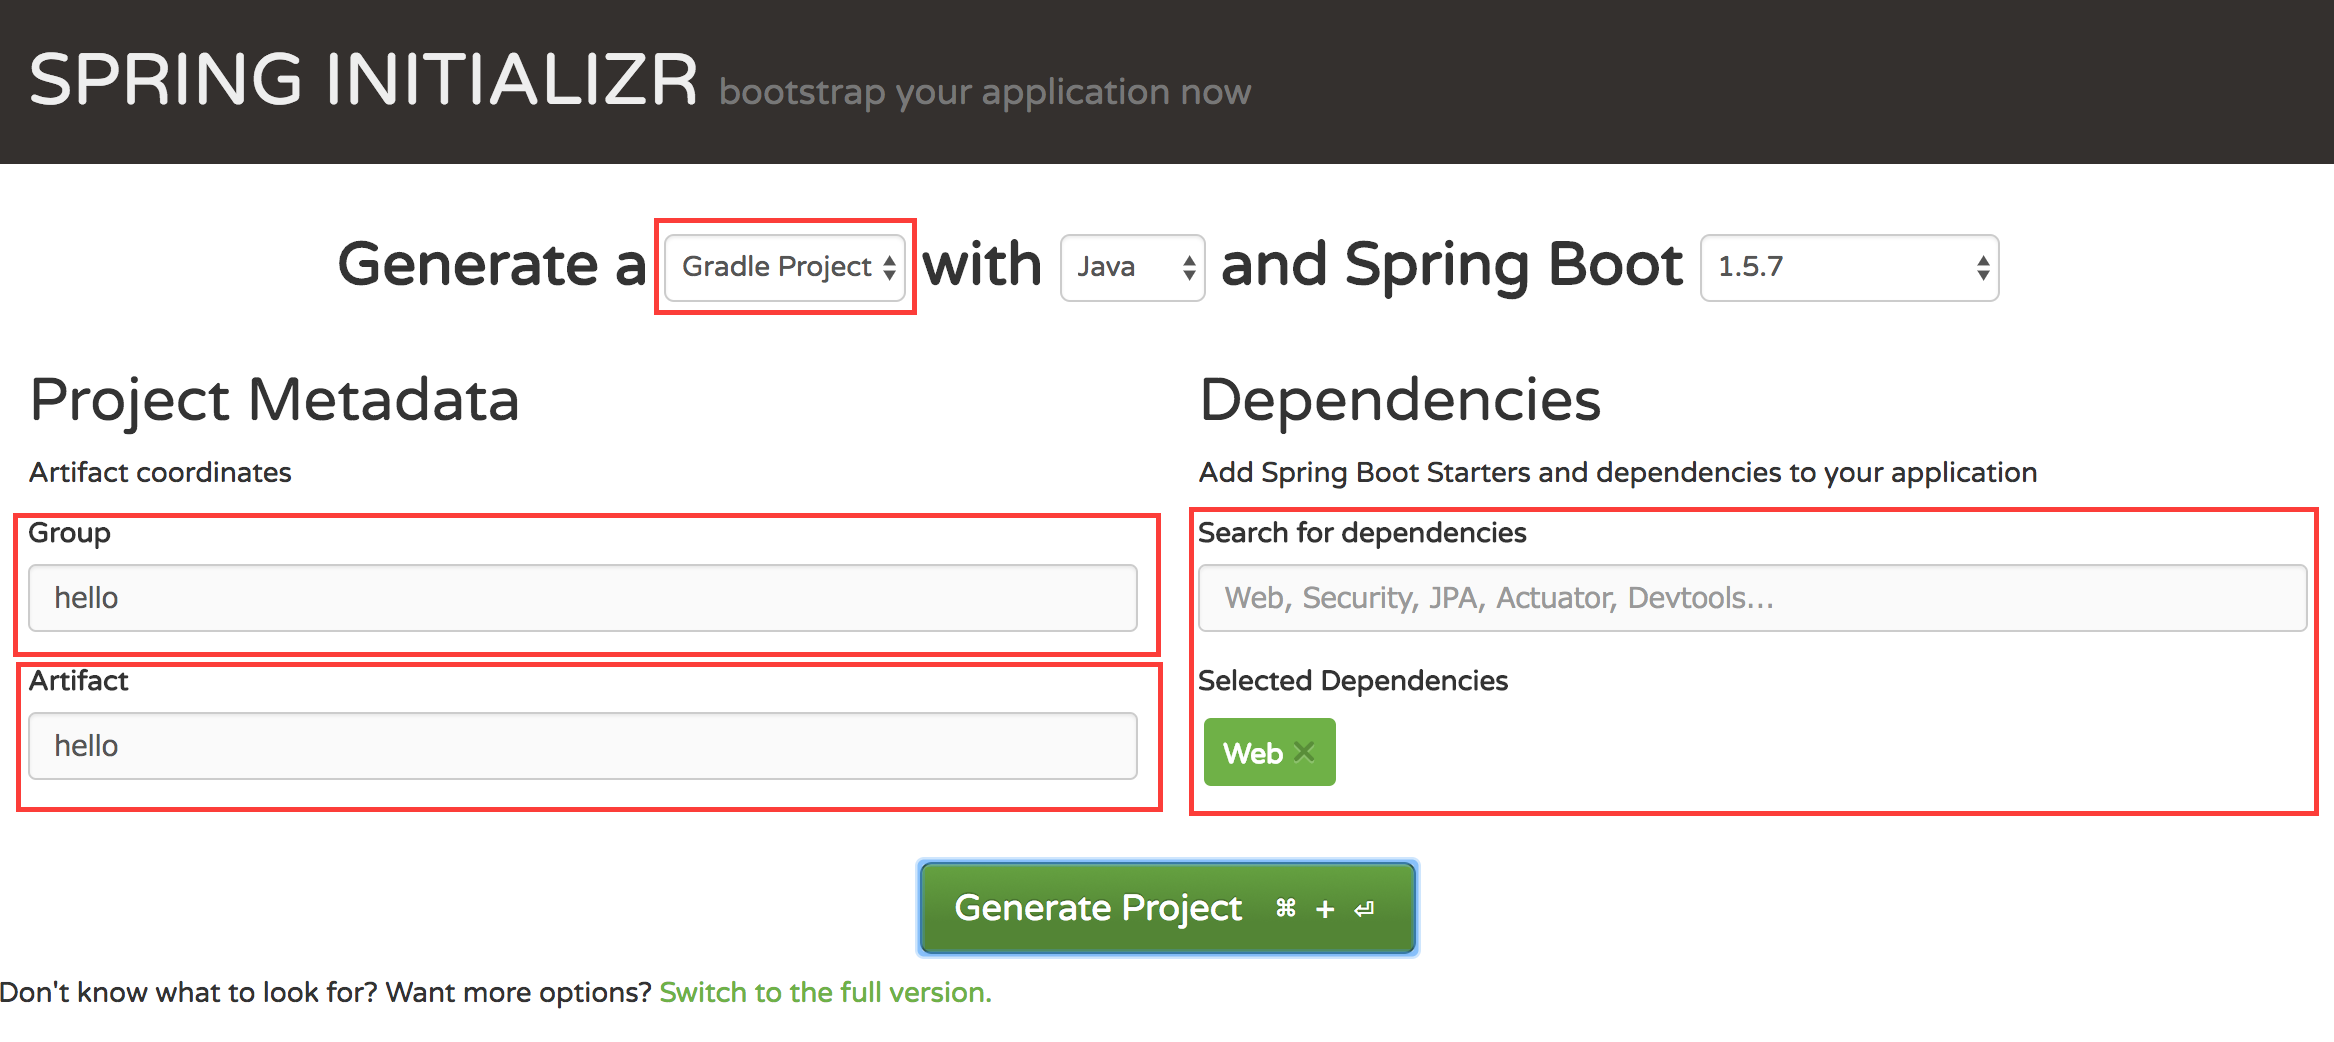
まず、Spring Initializrで、Spring Bootの雛形を作成します。
-
Gradle Projectを選択 -
Groupをhelloに変更(デフォルトのままでも大丈夫です) -
Artifactをhelloに変更(デフォルトのままでも大丈夫です) -
DependenciesにWebを追加
それからGenerate Projectで雛形をダウンロードします。
build.gradleの変更
アプリのビルドや依存ライブラリ管理にGradleを使用します。
上記でダウンロードした雛形にビルドスクリプトであるbuild.gradleが含まれているので、こちらを以下のように変更します。
buildscript {
    ext {
        springBootVersion = '1.5.7.RELEASE'
    }
    repositories {
        mavenCentral()
    }
    dependencies {
        classpath("org.springframework.boot:spring-boot-gradle-plugin:${springBootVersion}")
    }
}

apply plugin: 'java'
apply plugin: 'eclipse'
apply plugin: 'idea'
apply plugin: 'org.springframework.boot'

jar {
    baseName = 'hello-world'
    version = '0.1.0'
}

sourceCompatibility = 1.8

repositories {
    mavenCentral()
}

dependencies {
    compile('org.springframework.boot:spring-boot-starter-web')
    testCompile('org.springframework.boot:spring-boot-starter-test')
}
エディターをIntelliJ IDEAにしていれば、勝手に必要なライブラリをインストールしてくれます。
もしお使いでなければ、gradlew clean buildを実行してください。
HelloApplication.javaの変更
ダウンロードした雛形の中のsrc/main/java/hello/hello/HelloApplication.javaを以下のように変更します。
package hello.hello;

import org.springframework.boot.SpringApplication;
import org.springframework.boot.autoconfigure.SpringBootApplication;
import org.springframework.web.bind.annotation.RequestMapping;
import org.springframework.web.bind.annotation.RestController;

@SpringBootApplication
@RestController
public class HelloApplication {

    @RequestMapping("/")
    public String home() {
        return "Hello World from Docker";
    }

    public static void main(String[] args) {
        SpringApplication.run(HelloApplication.class, args);
    }

}
動作確認
ここでひとまず動作確認をします。
jarファイルはbuild/libs下に作成されているはずです。
以下のコマンドを実行して、Hello World from Dockerと出力されるか確認してください。
$ ./gradlew build && java -jar build/libs/hello-world-0.1.0.jar
$ curl http://localhost:8080
Dockerによる環境構築
Dockerfileの作成
ここまできたら、Dockerでの環境設定をします。
Dockerのインストールがされていない場合は、こちらからダウンロードしてインストールしてください。
ルートディレクトリにDockerfileを配置し、中身を以下の通りに記述します。
FROM openjdk:jdk-alpine
VOLUME /tmp
RUN mkdir /app
WORKDIR /app
ENV JAVA_OPTS=""
ENTRYPOINT [ "sh", "-c", "java $JAVA_OPTS -Djava.security.egd=file:/dev/./urandom -jar build/libs/hello-world-0.1.0.jar" ]
docker-composeの設定
今後アプリケーション用のコンテナとDB用のコンテナを分けて管理したいといったことも出てくると思うので、docker-composeを使います。
ルートディレクトリにdocker-compose.ymlを配置し、中身を以下の通りに記述します。
version: '2'
services:
    app:
        build: .
        image: tiqwab/boot:0.0.1
        ports:
            - "8080:8080"
        volumes:
            - .:/app
docker imageのビルド&コンテナ起動
これで準備が整ったので、以下のコマンドでdocker imageをビルドし、コンテナを起動します。
$ docker-compose up --build
この状態で、http://localhost:8080/にアクセスしてみてください。
Hello World from Dockerと表示されているはずです。
今後、コンテナの起動などは、以下のコマンドでできます。
# 起動
$ docker-compose up -d

# 停止
$ docker-compose stop
以上で、Dockerを使って簡単にSpring Bootの開発環境を構築できました。
