はじめに
異なるRDBMS間で、データを転送する業務が発生しました。
調べている中で、今更ながらEmbulkを知ったのでその使い方のメモです。
今回は、MySQL -> PostgreSQLのデータロードを行います。
Embulkとは
Embulk is a parallel bulk data loader that helps data transfer between various storages, databases, NoSQL and cloud services.
Embulk supports plugins to add functions. You can share the plugins to keep your custom scripts readable, maintainable, and reusable.
ザックリ説明すると
- Embulkとは大量のデータを並列でロードを行うツール
- ロードの入出力先はストレージ、データベース、NoSQLやクラウドサービスが対応
- プラグインを使用することで、機能を追加することが可能
環境構築
Dockerを利用して、環境構築を行います。
前提
- Docker, Docker Composeをインストール済み
ディレクトリ構成
embulk
├── Dockerfile
├── docker-compose.yml
├── mysql
│   └── init
│       ├── 01_database.sql
│       └── 02_mock_data.sql
└── postgres
    └── init
        └── 01_database.sql
データベース
Docker Composeを利用してMySQLとPostgreSQlを構築します。
version: "3"
services:
  mysql:
    image: mysql:5.7
    ports:
      - "3306:3306"
    volumes:
      - ./mysql/init:/docker-entrypoint-initdb.d
    command: --default-authentication-plugin=mysql_native_password
    environment:
      MYSQL_ROOT_PASSWORD: root

  postgres:
    image: postgres:12
    ports:
      - "5432:5432"
    environment:
      POSTGRES_USER: root
      POSTGRES_PASSWORD: root
    volumes:
      - ./postgres/init:/docker-entrypoint-initdb.d/

  adminer:
    image: adminer
    ports:
      - 8080:8080
データベースの初期化
MySQL
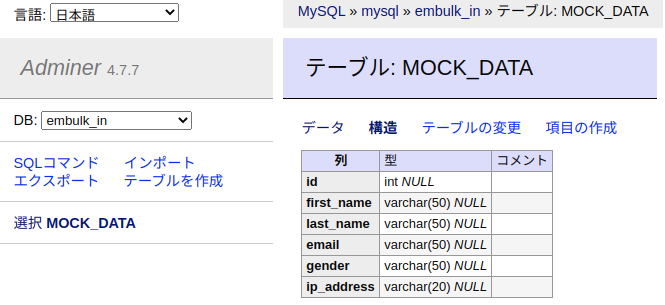
ここからサンプルデータのsqlをダウンロードします。
create database embulk_in;
se embulk_in;

create table MOCK_DATA (
	id INT,
	first_name VARCHAR(50),
	last_name VARCHAR(50),
	email VARCHAR(50),
	gender VARCHAR(50),
	ip_address VARCHAR(20)
);
insert into MOCK_DATA (id, first_name, last_name, email, gender, ip_address) values (1, 'August', 'Stribling', 'astribling0@meetup.com', 'Male', '11.65.224.59');
insert into MOCK_DATA (id, first_name, last_name, email, gender, ip_address) values (2, 'Ian', 'Danovich', 'idanovich1@i2i.jp', 'Male', '135.187.239.143');
...
PostgreSQL
create database embulk_out;
embulk
Embulk用のDockerfileを作成します。
こちらを参考にDockerfileを作成します。
FROM openjdk:8-jre-alpine

# install Embulk
RUN wget -q https://dl.embulk.org/embulk-latest.jar -O /bin/embulk \
    && chmod +x /bin/embulk

# add plugin
RUN apk add --no-cache libc6-compat \
    && embulk gem install embulk-input-mysql \
    && embulk gem install embulk-output-postgresql

WORKDIR /embulk

ENTRYPOINT ["java", "-jar", "/bin/embulk"]
プラグイン
-
embulk-input-mysql
- MySQL input用
-
embulk-output-postgresql
- PostgreSQL output用
起動
embulkのイメージ作成し、コンテナを起動します。
# embulkのイメージを作成
docker build -y embulk .
# MySQLとPostgreSQLのコンテナを起動
docker-compose up -d
確認

ロード
コンフィグファイルの作成
MySQLからPostgreSQLへデータをロードするためのコンフィグファイルを作成します。
in:
  type: mysql
  host: {localhostのプライベートアドレス}
  user: root
  password: "root"
  database: embulk_in
  table: MOCK_DATA
out:
  type: postgresql
  host: {localhostのプライベートアドレス}
  user: root
  password: "root"
  database: embulk_out
  table: MOCK_DATA
  mode: insert
  column_options:
    id: { type: "INT" }
    first_name: { type: " VARCHAR(50)" }
    last_name: { type: " VARCHAR(50)" }
    email: { type: " VARCHAR(50)" }
    gender: { type: " VARCHAR(50)" }
    ip_address: { type: " VARCHAR(20)" }
実行
ロードを行います。
# seed.ymlから完全なコンフィグファイルを生成
docker run --rm -it -v $(pwd):/embulk embulk guess seed.yml -o config.yml
# dry run
docker run --rm -it -v $(pwd):/embulk embulk preview config.yml
# 実行
docker run --rm -it -v $(pwd):/embulk embulk run config.yml
確認
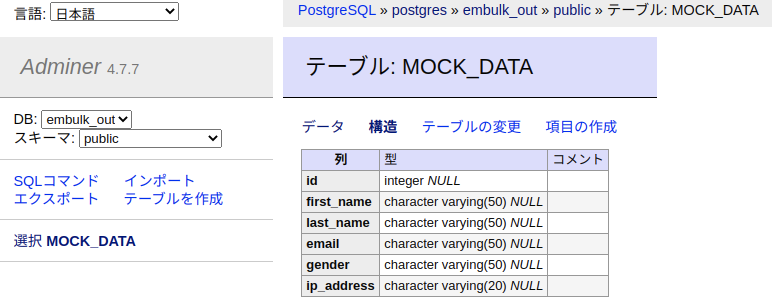
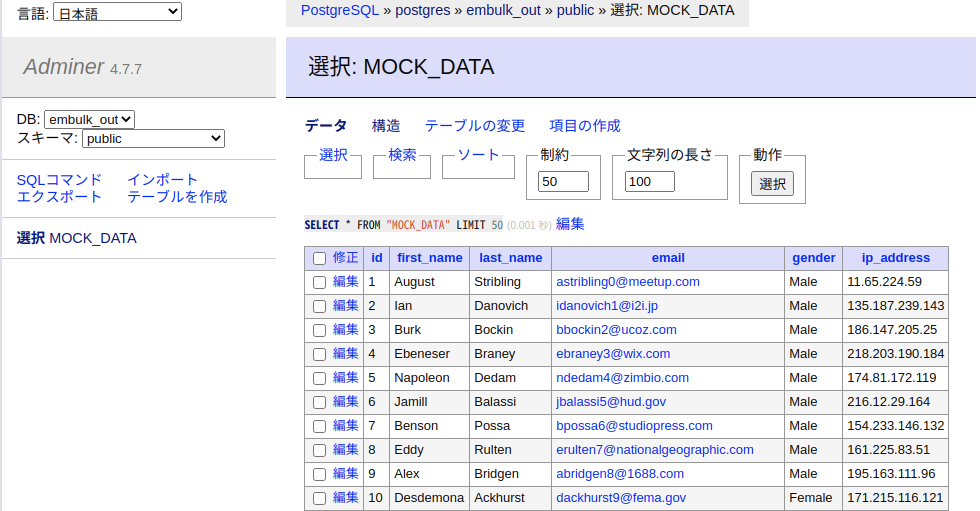
AdminerからPostgreSQLのデータを確認します。


終わりに
利用したいプラグインがない場合でも(Hiveとか)、JDBCが存在すればembulk-input-jdbcでロードでき、利用範囲が広いと感じました。
