Laravel10でS3に画像をアップロードしたり、S3の画像を表示する処理を書いたのでメモとしてまとめておくことにしました。
S3バケットの用意
バケットを作成します。
バケット名を入力し、パブリックアクセスのチェックを外します。これ以外はデフォルトのままバケットを作成します。

IAMの作成
S3を操作するためのIAMユーザーを作成します。ポリシーは必要なものをアタッチすれば大丈夫です。

セキュリティ認証情報のタブからアクセスキーを作成しておきます。.csvファイルも念のため保存しておくと良いです。
バケットポリシーの設定
S3のバケットを選択し、アクセス許可のタブを開きます。
バケットポリシーの項目から編集ボタンを押します。
ポリシージェネレーターを使用して作成すると簡単です。こんな感じで入力しました。

下のようなポリシーが生成されます。
{
    "Version": "2012-10-17",
    "Id": "policyId xxxx",
    "Statement": [
        {
            "Sid": "xxxxxxxxxx",
            "Effect": "Allow",
            "Principal": {
                "AWS": "IAMユーザーのarn"
            },
            "Action": "s3:*",
            "Resource": "s3バケットのarn"
        }
    ]
}
Laravelの準備
以下のライブラリを使用するのでインストールします。flysystem-aws-s3-v3
composer require league/flysystem-aws-s3-v3
追記します。
  'cloud' => env('FILESYSTEM_CLOUD', 's3'),
  's3' => [
            'driver' => 's3',
            'key' => env('AWS_ACCESS_KEY_ID'),
            'secret' => env('AWS_SECRET_ACCESS_KEY'),
            'region' => env('AWS_DEFAULT_REGION'),
            'bucket' => env('AWS_BUCKET'),
            'url' => env('AWS_URL'),
            'endpoint' => env('AWS_ENDPOINT'),
    ],
.envにも必要な情報を追記します。
AWS_ACCESS_KEY_ID='IAMユーザーのAccess key ID'
AWS_SECRET_ACCESS_KEY='IAMユーザーのSecret access key'
AWS_DEFAULT_REGION=ap-northeast-1
AWS_BUCKET='作成したバケット名'
コントローラーを作成し以下の処理を記述しておきます。
php artisan make:controller ImageUploadController
    public function showUploadForm()
    {
        return view('/upload');
    }

    public function uploadImage(Request $request)
    {
        $request->validate([
            'image' => 'required|image|mimes:jpeg,png,jpg,gif|max:2048',
        ]);

        $file = $request->file('image');

        $fileName = time() . '.' . $file->getClientOriginalExtension();
        $path = 'images/' . $fileName;

        $result = Storage::disk('s3')->put($path, file_get_contents($file));
        if (!$result) {
            Log::error('File could not be uploaded to S3.');
            return response()->json(['error' => 'File could not be uploaded'], 500);
        }
        // 公開URLを取得
        $url = Storage::disk('s3')->url($path);
        return back()->with('success', 'Image uploaded successfully.')->with('url', $url);
    }
web.phpにroutingも追記します
Route::get('/upload', [ImageUploadController::class, 'showUploadForm']);
Route::post('/upload', [ImageUploadController::class, 'uploadImage'])->name('uploadToS3');
viewも簡単に作成しておきます。
<body>
    @if ($message = Session::get('success'))
        <div>
            <strong>{{ $message }}</strong>
        </div>
        <div>
            <img src="{{ Session::get('url') }}" width="300" />
        </div>
    @endif

    @if (count($errors) > 0)
        <div>
            <strong>Whoops!</strong> There were some problems with your input.
            <ul>
                @foreach ($errors->all() as $error)
                    <li>{{ $error }}</li>
                @endforeach
            </ul>
        </div>
    @endif

    <form action="{{ route('uploadToS3') }}" method="POST" enctype="multipart/form-data">
        @csrf
        <div>
            <input type="file" name="image" />
        </div>
        <div>
            <button type="submit">Upload</button>
        </div>
    </form>
</body>
動作確認
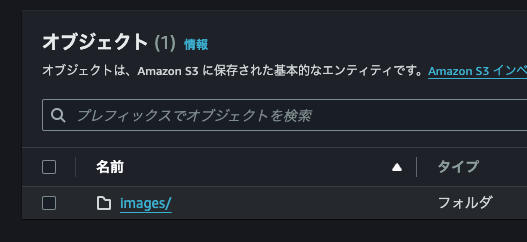
ファイルを選択してアップロードします。Uploadボタンを押すとバケットにimageフォルダが作成され、その中にアップロードした画像を確認できます。
権限まわりで若干悩みましたが意外と簡単にできました。

