最近知り合いのエンジニアから「Jotai」という状態管理ライブラリがRecoil より軽くてつかいやすいよ!と教えてもらったので早速「Jotai」をさわってみみました
🐣Jotaiとは?
- パッケージ名は日本語の「状態」から名付けられた
-
Recoilにインスパイアされたatomモデルを採用しReactの状態管理を行える - atom依存関係に基づいてレンダリングが最適化されるためReactコンテキストの余分な再レンダリングの問題を解決し、メモ化技術の必要性を排除している
- ミニマルなAPIを提供している
- TypeScriptで開発されている
📝使い方
*https://jotai.org/ より引用
import { atom, useAtom } from 'jotai'

// Create your atoms and derivatives
const textAtom = atom('hello')
const uppercaseAtom = atom(
  (get) => get(textAtom).toUpperCase()
)

// Use them anywhere in your app
const Input = () => {
  const [text, setText] = useAtom(textAtom)
  const handleChange = (e) => setText(e.target.value)
  return (
    <input value={text} onChange={handleChange} />
  )
}

const Uppercase = () => {
  const [uppercase] = useAtom(uppercaseAtom)
  return (
    <div>Uppercase: {uppercase}</div>
  )
}

// Now you have the components
const App = () => {
  return (
    <>
      <Input />
      <Uppercase />
    </>
  )
}
Jotaiでは Provider, atom, useAtom というAPIが提供されています。
Provider
React Contextと同じように動作します。
Atomの値は、別のストアに存在します。Providerはストアを含むコンポーネントで、コンポーネントツリーの下にatomの値を提供します。
const Root = () => (
  <Provider>
    <App />
  </Provider>
)
atom
Jotaiの状態を表すオブジェクトです。
数値、文字列、配列、オブジェクトなど様々な値を保持することができます。
import { atom } from 'jotai'

const priceAtom = atom(100)
const messageAtom = atom('hello world')
const productAtom = atom({ id: 12, name: 'taro' })
useAtom
atomの値を読み取ることができます。
useAtom関数は、React の useStateのように動作します。
const [ value , updateValue ] = useAtom ( anAtom )
🦖つくってみた
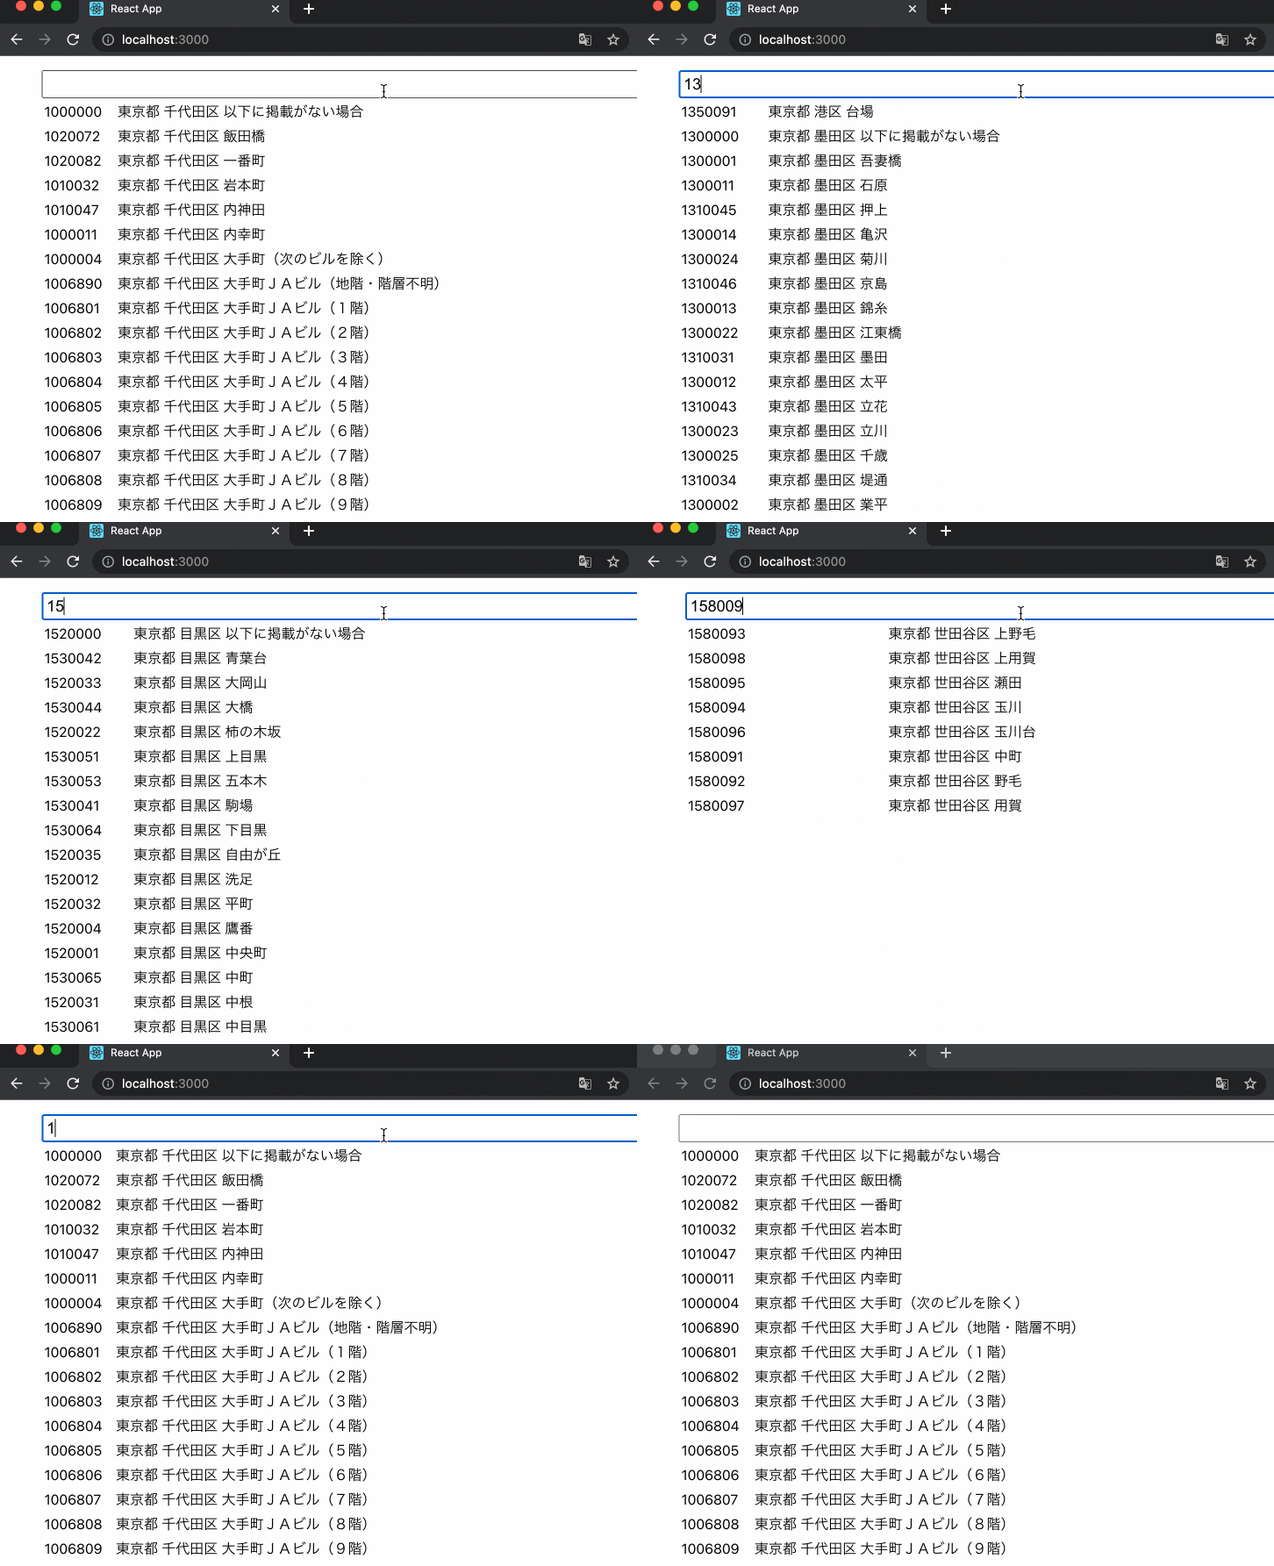
ジャック・ハリントンさんのIntroducing Jotai || React State Manager Tutorial - YouTubeを参考にしつつ郵便番号から住所を検索するアプリを作ってみたいと思います!
完成イメージ
 |
|---|
下準備
検索対象の郵便番号データを日本郵便から拝借させていただきます。
日本郵便のサイトからはCSVのデータがダウンロードできるためこちらをJSONへ変換します。今回はhttps://csvjson.com/さんを利用させていただきました。
JSON形式の郵便番号データが準備できたらGistへあげておきます
JSONデータは以下のような形式となっています。
なお、今回はデータ容量の都合で東京都の住所のみとしました。
[
{"zipcode":"1000000","prefecture":"東京都","city":"千代田区","town":"以下に掲載がない場合"},
{"zipcode":"1020072","prefecture":"東京都","city":"千代田区","town":"飯田橋"},
{"zipcode":"1020082","prefecture":"東京都","city":"千代田区","town":"一番町"},
{"zipcode":"1010032","prefecture":"東京都","city":"千代田区","town":"岩本町"},
{"zipcode":"1010047","prefecture":"東京都","city":"千代田区","town":"内神田"},
{"zipcode":"1000011","prefecture":"東京都","city":"千代田区","town":"内幸町"},
...
]
create-react-app でReactのプロジェクトを作成したら早速作っていきましょう!
npx create-react-app hello-jotai
Providerの作成
import React from "react";
import { Provider } from "jotai";

import "./App.css";


function App() {
  ...
}

export default () => (
  <Provider>
    <App />
  </Provider>
);
atomの作成
次にatomを作っていきます。
今回は「入力された値をあらわすatom」「JSONデータをfetchするatom」「JSONデータに入力された値がある場合にその値を返すatom」を作ります。
const URL = "https://gist.githubusercontent.com/55enokky/8d38751807d84af2f544b9442b6cbd22/raw/9f8353906d11c6edbf951177f47a23978b06b9cf/address-tokyo.json";

// URLからデータをfetchする
const addressAtom = atom(async () =>
  fetch(URL + `?ts=${new Date().getTime()}`).then((resp) => resp.json())
);

// inputに入力された値を保持する
const filterAtom = atom("");

// jsonに入力された値が含まれる場合にデータを返す
const filteredAddressAtom = atom((get) =>
  get(addressAtom).filter((p) =>
    p.zipcode.startsWith(get(filterAtom))
  )
);
フォームと表の作成
データを取得する部分はできたので入力フォームをデータのソート部分の表示を作っていきましょう。
import React from "react";
import { Provider, atom, useAtom } from "jotai";


const FilterInput = () => {
  const [filter, filterSet] = useAtom(filterAtom);

  return (
    <input value={filter} onChange={(evt) => filterSet(evt.target.value)} />
  );
}

const AddressTable = () => {
  const [filtered] = useAtom(filteredAddressAtom);
  return (
    <table width="100%">
      <tbody>
        {filtered.map((p, index) => (
          <tr key={index}>
            <td>{p.zipcode}</td>
            <td>{`${p.prefecture} ${p.city} ${p.town}`}</td>
          </tr>
        ))}
      </tbody>
    </table>
  );
}

const App = () => {
  return (
    <div className="App">
      <FilterInput />
      <AddressTable />
    </div>
  );
}
完成〜!!
今回作成したコードは こちら です。
※本来はコンポーネントやAtomはファイルに分割しますが今回は簡単のため App.js にまとめて書いています。
import React from "react";
import { Provider, atom, useAtom } from "jotai";

import "./App.css";

const URL = "https://gist.githubusercontent.com/55enokky/8d38751807d84af2f544b9442b6cbd22/raw/9f8353906d11c6edbf951177f47a23978b06b9cf/address-tokyo.json";

// URLからデータをfetchする
const addressAtom = atom(async () =>
  fetch(URL + `?ts=${new Date().getTime()}`).then((resp) => resp.json())
);

// inputに入力された値を保持する
const filterAtom = atom("");

// jsonに入力された値が含まれる場合にデータを返す
const filteredAddressAtom = atom((get) =>
  get(addressAtom).filter((p) =>
    p.zipcode.startsWith(get(filterAtom))
  )
);
const FilterInput = () => {
  const [filter, filterSet] = useAtom(filterAtom);

  return (
    <input value={filter} onChange={(evt) => filterSet(evt.target.value)} />
  );
}

const AddressTable = () => {
  const [filtered] = useAtom(filteredAddressAtom);
  return (
    <table width="100%">
      <tbody>
        {filtered.map((p, index) => (
          <tr key={index}>
            <td>{p.zipcode}</td>
            <td>{`${p.prefecture} ${p.city} ${p.town}`}</td>
          </tr>
        ))}
      </tbody>
    </table>
  );
}

const App = () => {
  return (
    <div className="App">
      <FilterInput />
      <AddressTable />
    </div>
  );
}

export default () => (
  <Provider>
    <React.Suspense fallback={<div>Loading</div>}>
      <App />
    </React.Suspense>
  </Provider>
);
🏋️♂️まとめ
めちゃめちゃ簡単でした!!
普段Recoilを触っている方でしたら書き方はほぼ変わらないのですぐに使えると思いますし、全体がスッキリと書けるのでコードの見通しが良くなります。
ただRecoilと比べて軽量ですがRecoilを使っているひとがわざわざJotaiへ乗り換えるほどでもないのかも?という印象です。
React 状態管理ライブラリの選定で迷っている方は新たな選択肢の1つとして検討してみるのはいかがでしょうか。
🌈参考サイト
- React状態管理ライブラリ Jotai と Jotai Friends - Qiita
- React状態管理ライブラリ Jotai の始め方 #JotaiFriends
- 【Next.js / React】URLのクエリパラメータで状態を指定する 【Recoil / Jotai】 - Qiita
- Jotai: 状態?! 日本語っぽい名称のReact用ステート管理ライブラリ - Qiita
- インフォメティス株式会社のReact Nativeアプリ開発でJotaiを導入してみた第一印象 - Qiita
- React状態管理ライブラリ「Jotai」のProvider-less modeで楽々コーディング - Qiita
- Jotai, primitive and flexible state management for React
- Jotai vs. Recoil: What are the differences? - LogRocket Blog
- React状態管理ライブラリ Jotai のCore API #JotaiFriends
- State Management for React: Jotai From Beginners to Masters - YouTube
- Introducing Jotai || React State Manager Tutorial - YouTube
- What is Jotai? - YouTube
- Jotai Tutorial - Better than Recoil? - YouTube