Index
1.VueCLIでHelloWorld
2.VueJSでフォームを使おう
3.VueJSで単一ファイルコンポーネント
4.VueJSでAPI通信
5.VueJSで猫検索アプリ作成
6.おまけ
7.おまけ Rails x Vue.js
8.おまけ Rails x Vue.js x VueX
Vue.jsをお手軽に始められるVueCLIを使って実装を始めます。
とってもお手軽なMVVCフレームワークでコンポーネント(部品)の管理が容易でしかも覚えやすいと評判なので早速試してみましょう。
前提条件
- HTML,CSS,Javascriptの経験者
- NPMをインストールしている事
- MACユーザー
- ChromeWebDebug機能が使える状態
- VueJSのデバッガも入れておきましょう
- vue --version 2.8.1
- npm --version 3.10.8
- JS記述式はES6
1.環境構築
1.1.VueCLIのインストール
Node環境には詳しくないので、ぱっと使えるCLIツールで環境構築を片付けます。
npm install -g vue-cli
vue init webpack my-project
cd my-project
npm install
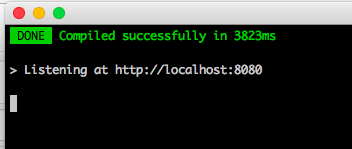
npm run dev
成功すると8080にアクセスできます
Docs for This Templateをクリックしてドキュメントを確認しましょう。
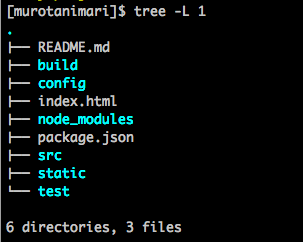
上記のようなディレクトリが自動的に作成されます。
シングルページアプリケーションなので、index.htmlが一つだけ設定されています。
1.2. SCSSを有効化
npm install sass-loader node-sass --save-dev
srcに移動して上記コマンドの実行をしましょう。
これをする事でlang="scss"、lang="sass"をstyleに指定できるようになります。
<style lang="scss">
/* write SASS! */
</style>
2.コーディング
2.1. TOPページを編集してみる
-
ここからのコード
srcに移動してHelloWorldをしていきましょう。
まずは、src/components/の下にあるHello.vueをコピーしてScene1.vueを作成します。
下記の記述を見つけて、msgを書き換えましょう。
    return {
      msg: 'コピーしたHello'
    }
src/router/index.jsにルーティングの設定をします。
今回はHelloを自作のScene1に差し替えしましょう。
import Vue from 'vue'
import Router from 'vue-router'
import Scene1 from '@/components/Scene1'

Vue.use(Router)

export default new Router({
  routes: [
    {
      path: '/',
      name: 'Scene1',
      component: Scene1
    }
  ]
})
上記のように書き換えをして、
http://localhost:8080/
にアクセスすると、「コピーしたHello」と表示されます。
2.2. Sceneを更に追加
src/components/の下にScene2.vueを追加しましょう。
<template>
  <h2>シーン2だよ</h2>
</template>
router/index.jsにScene2を追加します。
import Scene2 from '@/components/Scene2'

....
    {
      path: '/scene2',
      name: 'Scene2',
      component: Scene2
    }
....
Scene1.vueの中にリンクを追加します。
<router-link to="/scene2">Scene2にいくよ!</router-link>
ページ上に現れた、Scene2に行くよリンクから、Scene2だよのページに遷移する事ができます。

2.3. ヘッダーを変えてみる
常に、vueのロゴが表示されているのが気になりますね。
こちらがどこに記述されているのか調べて変更してみましょう。
App.viewはsrc/main.jsのnew Vue(..)の中で「#app」エレメントの部分に置換されるように記述がしてあります。
さらに、「#app」エレメントはindex.htmlタグのbodyに記載されており、こちらがトップレベルの要素になります。
<div id="app"></div>
App.vueに戻ってみます。
<router-view></router-view>
こちらのrouter-viewタグには
export default new Router(...)で指定したコンポーネントが置換されます。
router-viewの部分以外を好きなようにカスタマイズします。
今回は共通ヘッダーと共通フッダーをつけていきます。
「Step 2. SCSSを有効化」でscssを有効にしたので、
**