Index
1.VueCLIでHelloWorld
2.Vue.jsでフォームを使おう
3.Vue.jsで単一ファイルコンポーネント
4.Vue.jsでAPI通信
5.Vue.jsで猫検索アプリ作成
6.おまけ
前回、Vue.extendを利用したカスタムコンポーネントを作成しましたが、CSSを梱包したカスタムコンポーネントの作成方法を紹介していきます。前回のコードをリファクタリングしつつ進めて行きましょう。
ソース
1.前提条件
[カスタムコンポーネントの実習の終了]
(http://qiita.com/MariMurotani/items/10702fbcae2997fcae80)
2.まずは、コンポーネントを全部単一ファイル化します。
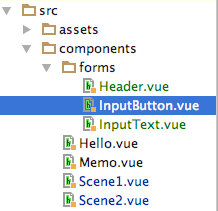
components/forms/Header.vue
<template>
  <div class="nickname">{{ sharedState.state.property.nickname }}</div>
</template>

<script>
//  インポートします。
import PropertyStore from '../../models/PropertyStore.js'

export default {
  name: 'nickname_header',
  data: function () {
    return {
      privateState: {},
      sharedState: PropertyStore
    }
  }
}
</script>
<style scoped>
.nickname{
  display: block;
  height: 3rem;
}
</style>
components/forms/InputText.vue
<template>
  <input class="input" v-model="sharedState.state.property.nickname" placeholder="NICKNAMEを入力してください。">
</template>

<script>
//  インポートします。
import PropertyStore from '../../models/PropertyStore.js'

export default {
  name: 'nickname_input',
  data: function () {
    return {
      privateState: {},
      sharedState: PropertyStore
    }
  }
}
</script>
<style scoped>
.input{
  width: 130pt;
  height:30pt;
}
</style>
components/forms/InputButton.vue
<template>
  <button class="button" v-on:click="validate">START</button>
</template>

<script>
//  インポートします。
import PropertyStore from '../../models/PropertyStore.js'

export default {
  name: 'input-button',
  data: function () {
    return {
      privateState: {},
      sharedState: PropertyStore
    }
  },
  methods: {
    validate: function (event) {
      console.log(this.$el)
      var valid = false
      try {
        valid = this.$data.sharedState.validate()
        if (valid) {
          this.$router.push('/scene2')
        }
      } catch (e) {
        alert(e.message)
      }
    }
  }
}
</script>
<style scoped>
.button {
  display: block;
  position: relative;
  margin: 0 auto;
  width: 70pt;
  background-color: white;
  border: solid 1px silver;
  border-radius: 0.5rem 0.5rem;
  padding: 0.5rem 1.5rem;
  margin-top: 1rem;
  text-decoration: none;
}
</style>
3. Scene1,Scene2の書き換え
components/Scene1.vue
<template>
  <div class="scene1">
    <nickname-header></nickname-header>
    <input-text></input-text>
    <input-button></input-button>
  </div>
</template>

<script>
//  インポート
import Vue from 'vue'
import InputButton from './forms/InputButton'
import NickNameHeader from './forms/Header'
import InputText from './forms/InputText'

export default {
}

//  コンポーネントを登録
Vue.component('nickname-header', NickNameHeader)
//  コンポーネントを登録
Vue.component('input-text', InputText)
//  コンポーネントを登録
Vue.component('input-button', InputButton)

</script>

<!-- Add "scoped" attribute to limit CSS to this component only -->
<style scoped lang="scss">
.scene1{
  font-size: 1.8rem;
  text-align: center;
  a div p{
    display: block;
    margin: 0 auto;
    height:30pt;
  }
}
</style>
components/Scene2.vue
<template>
  <div class="scene2">
    <h2>シーン2だよ</h2>
    <nickname-header></nickname-header>

  </div>
</template>

<script>
//  インポート
import Vue from 'vue'
import NickNameHeader from './forms/Header'

//  デフォルト値定義
export default {
  data () {
    return {

    }
  }
}
//  コンポーネントを登録
Vue.component('nickname-header', NickNameHeader)

</script>

  <!-- Add "scoped" attribute to limit CSS to this component only -->
<style scoped lang="scss">
.scene2{
  font-size: 1.8rem;
  text-align: center;
}
</style>
やっと、キレイになってきましたね!
これでどんどん開発が進められそうです。