やったこと
fugaしか答えない残念なBotに8万語の辞書を持たせてインテリBotにした話の続き、常時起動できないLINE Botだったので、Heroku化して常時利用できるようにしました。あと、AWSのAPI GatewayにAPIキーを設定してアクセス制御しました。
構成変更
- 変更前
- Nodejsが個人パソコン上にあるためLINE Botを常時起動するにはよくない構成でした
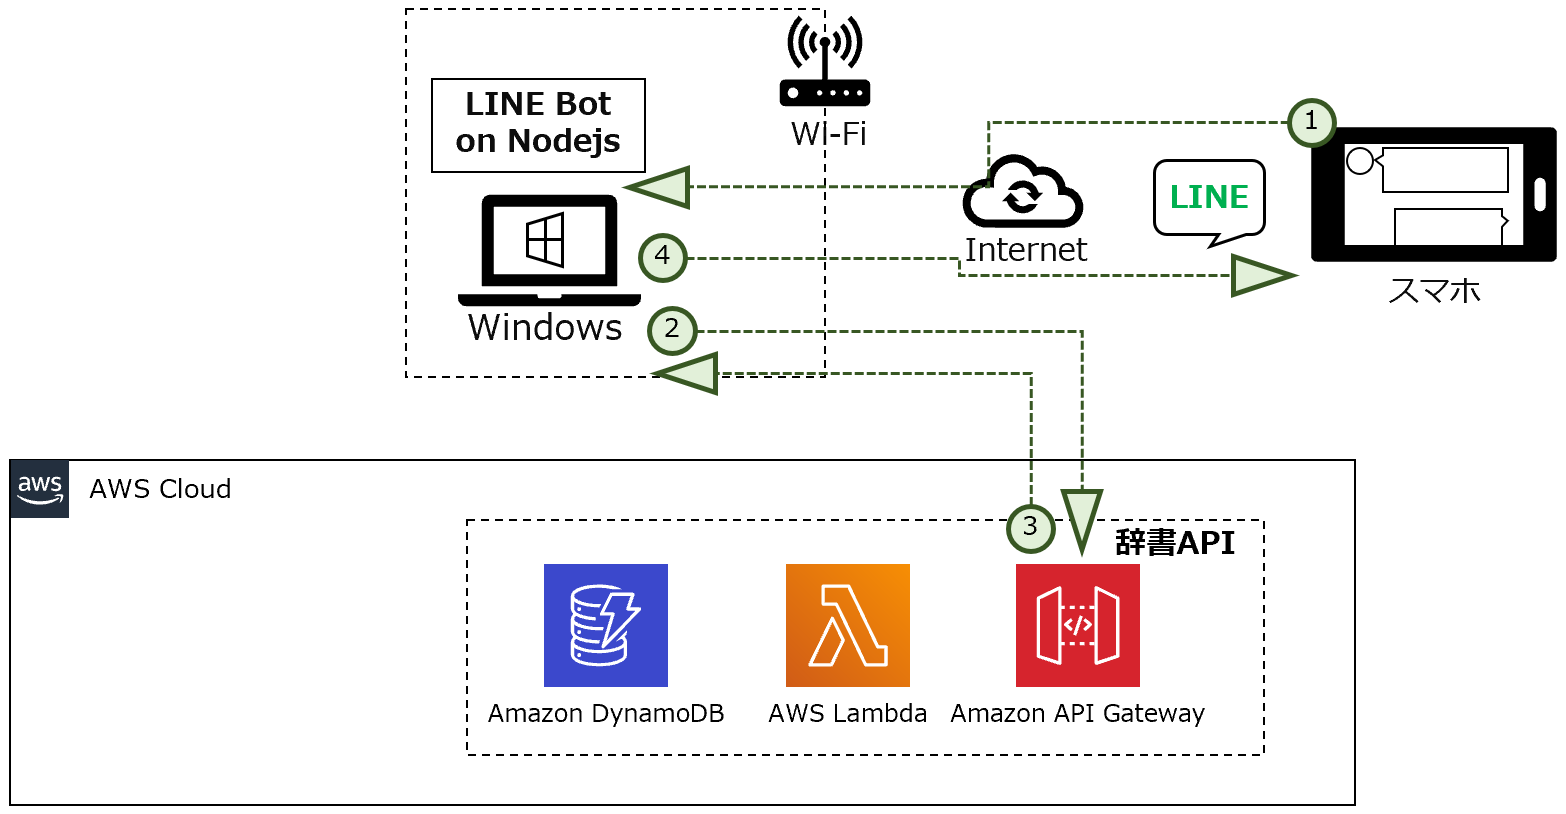
- 変更後
- 個人パソコン上の環境をHeroku化することで常時起動に適した環境にしました。
- 辞書APIのアクセス制御(APIキー)を設定しました。

参考サイト
-
[API Gateway] APIキーと使用量プランを使用してアクセス制限を掛ける
- APIキーの設定方法を参考にさせて頂きました
では設定方法を紹介します。
1.[AWS] API GatewayにAPIキーを設定しよう
- API Gatewayで作成した辞書BotにAPIキーを設定します。
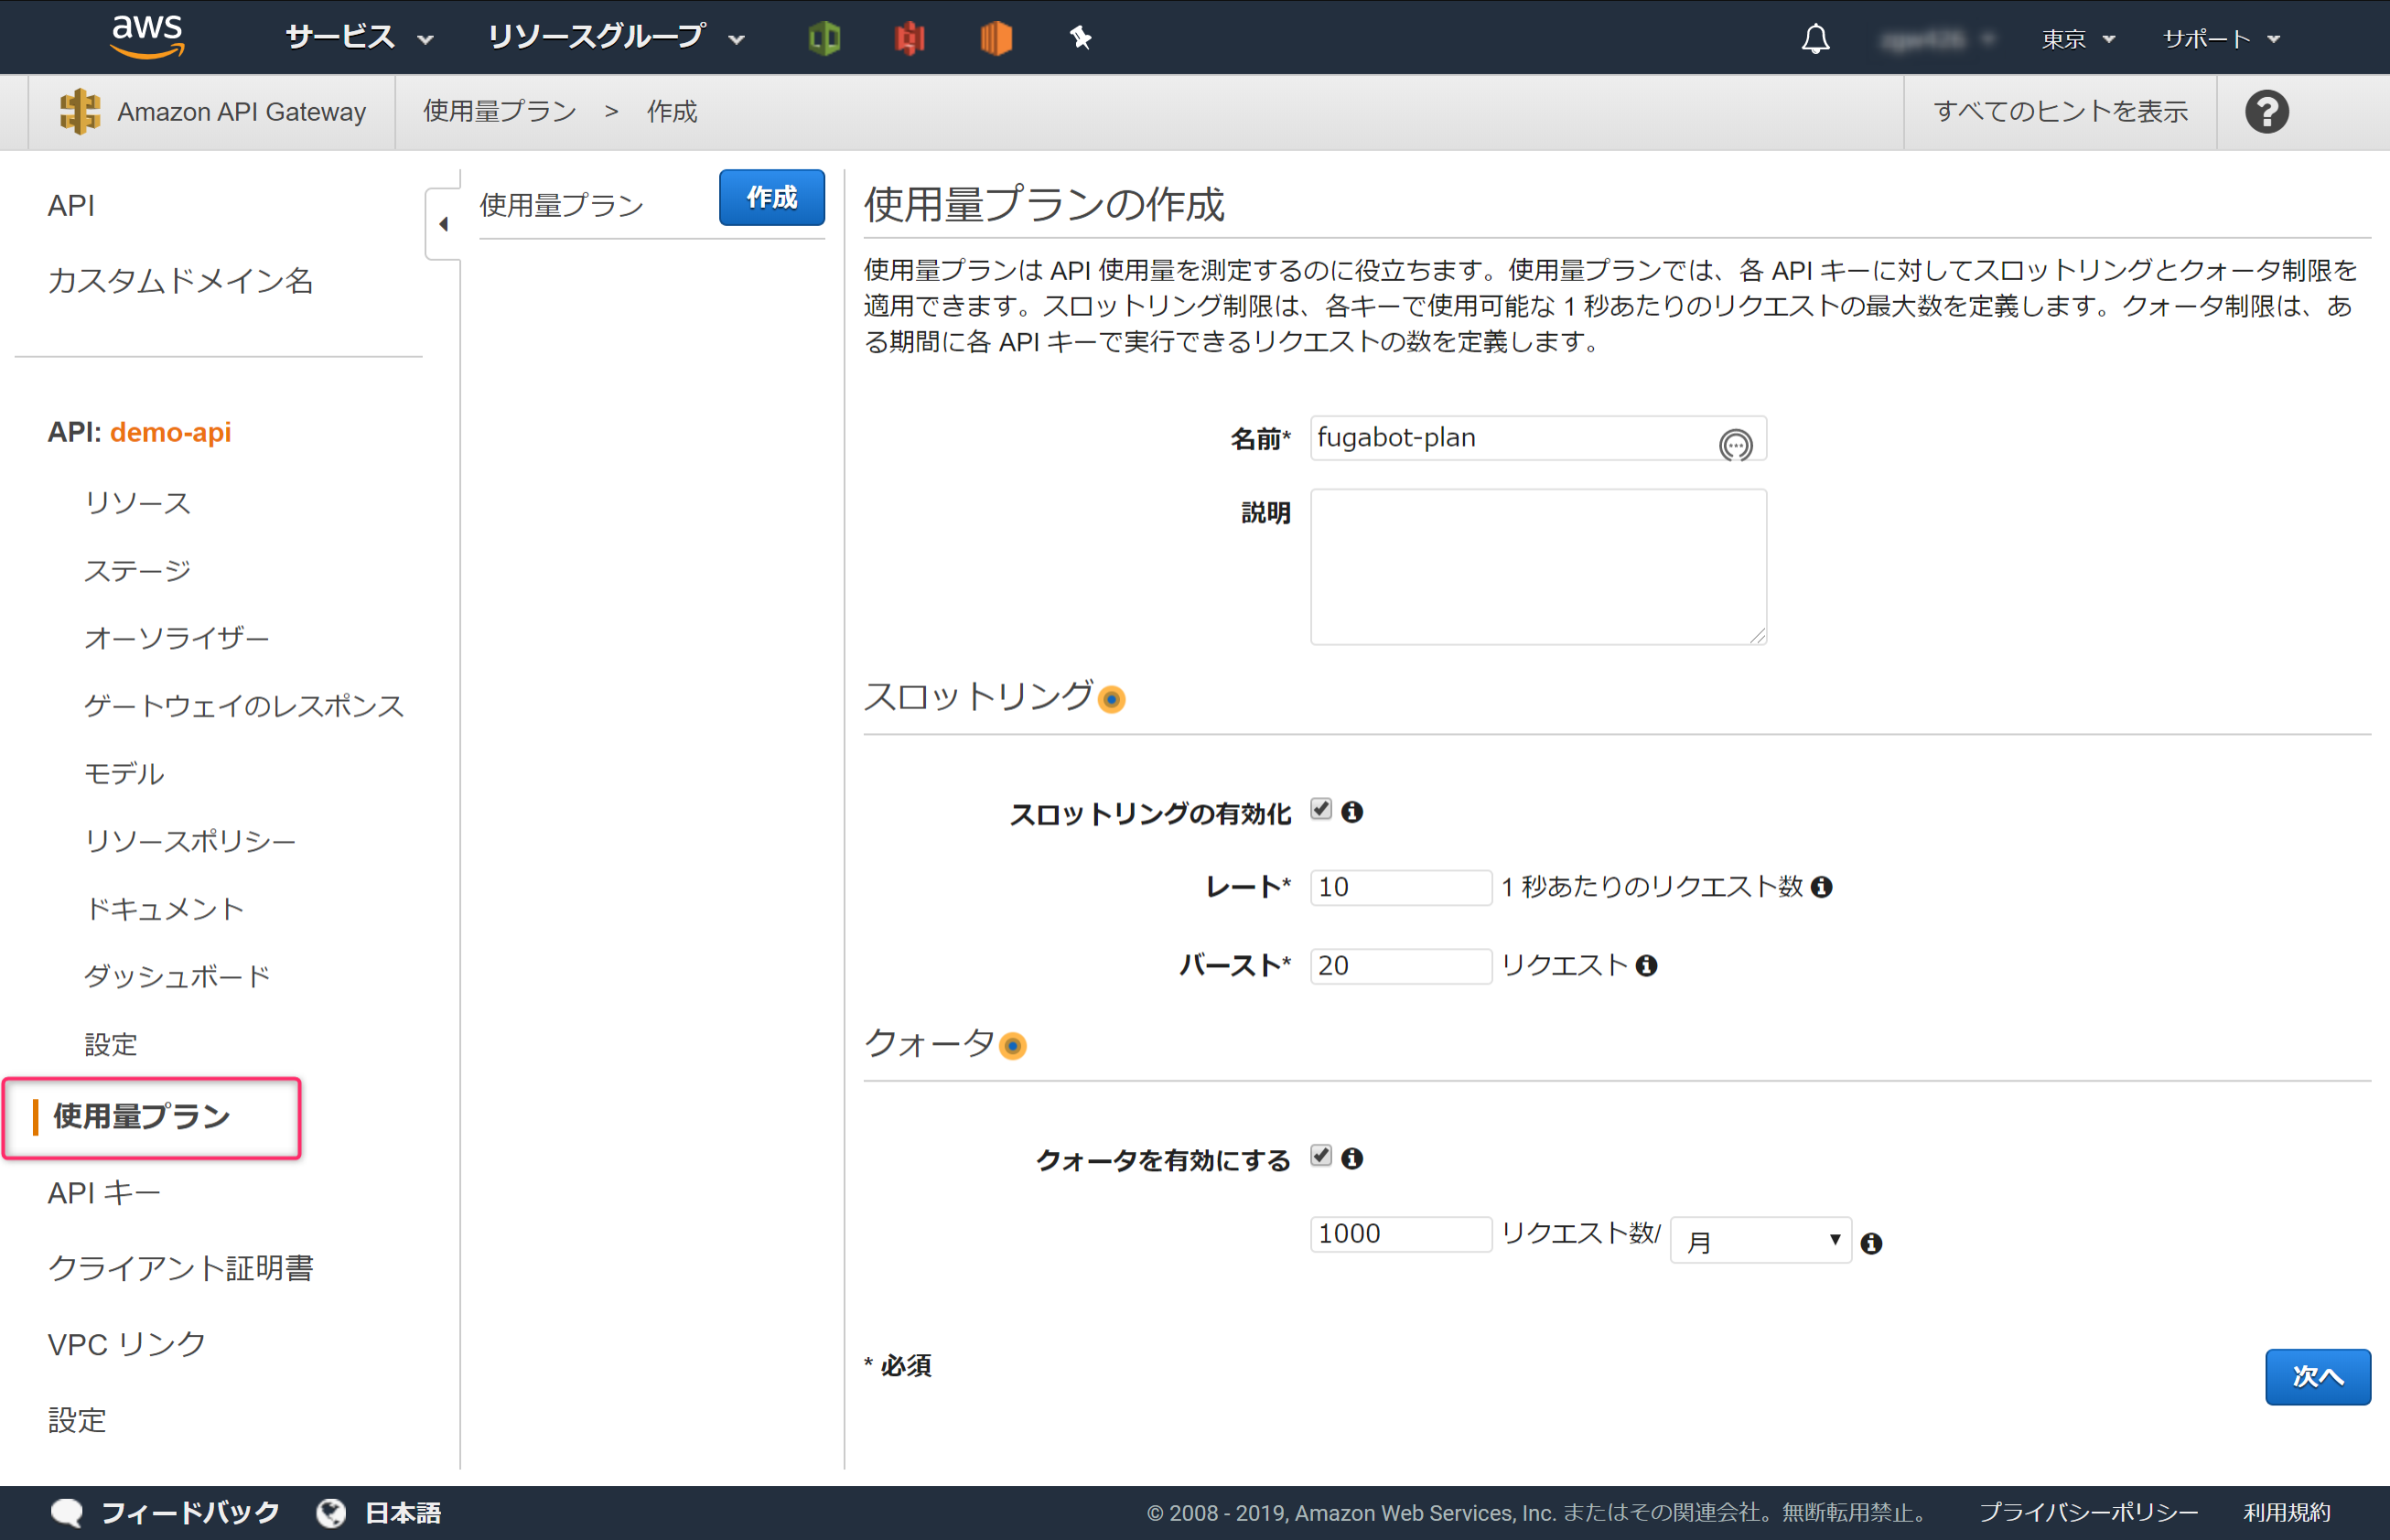
1-1.使用量プラインを作成しよう
AWSコンソールで、APIキーを設定するAPIを開き、使用量プランをクリックします。
名前、レートなどの項目を設定し次へボタンをクリックします。
APIステージの追加で、APIキーを設定するAPIを設定し次へボタンをクリックします。(※辞書Botは、AWS上ではdemo-apiステージdemoで登録しています)
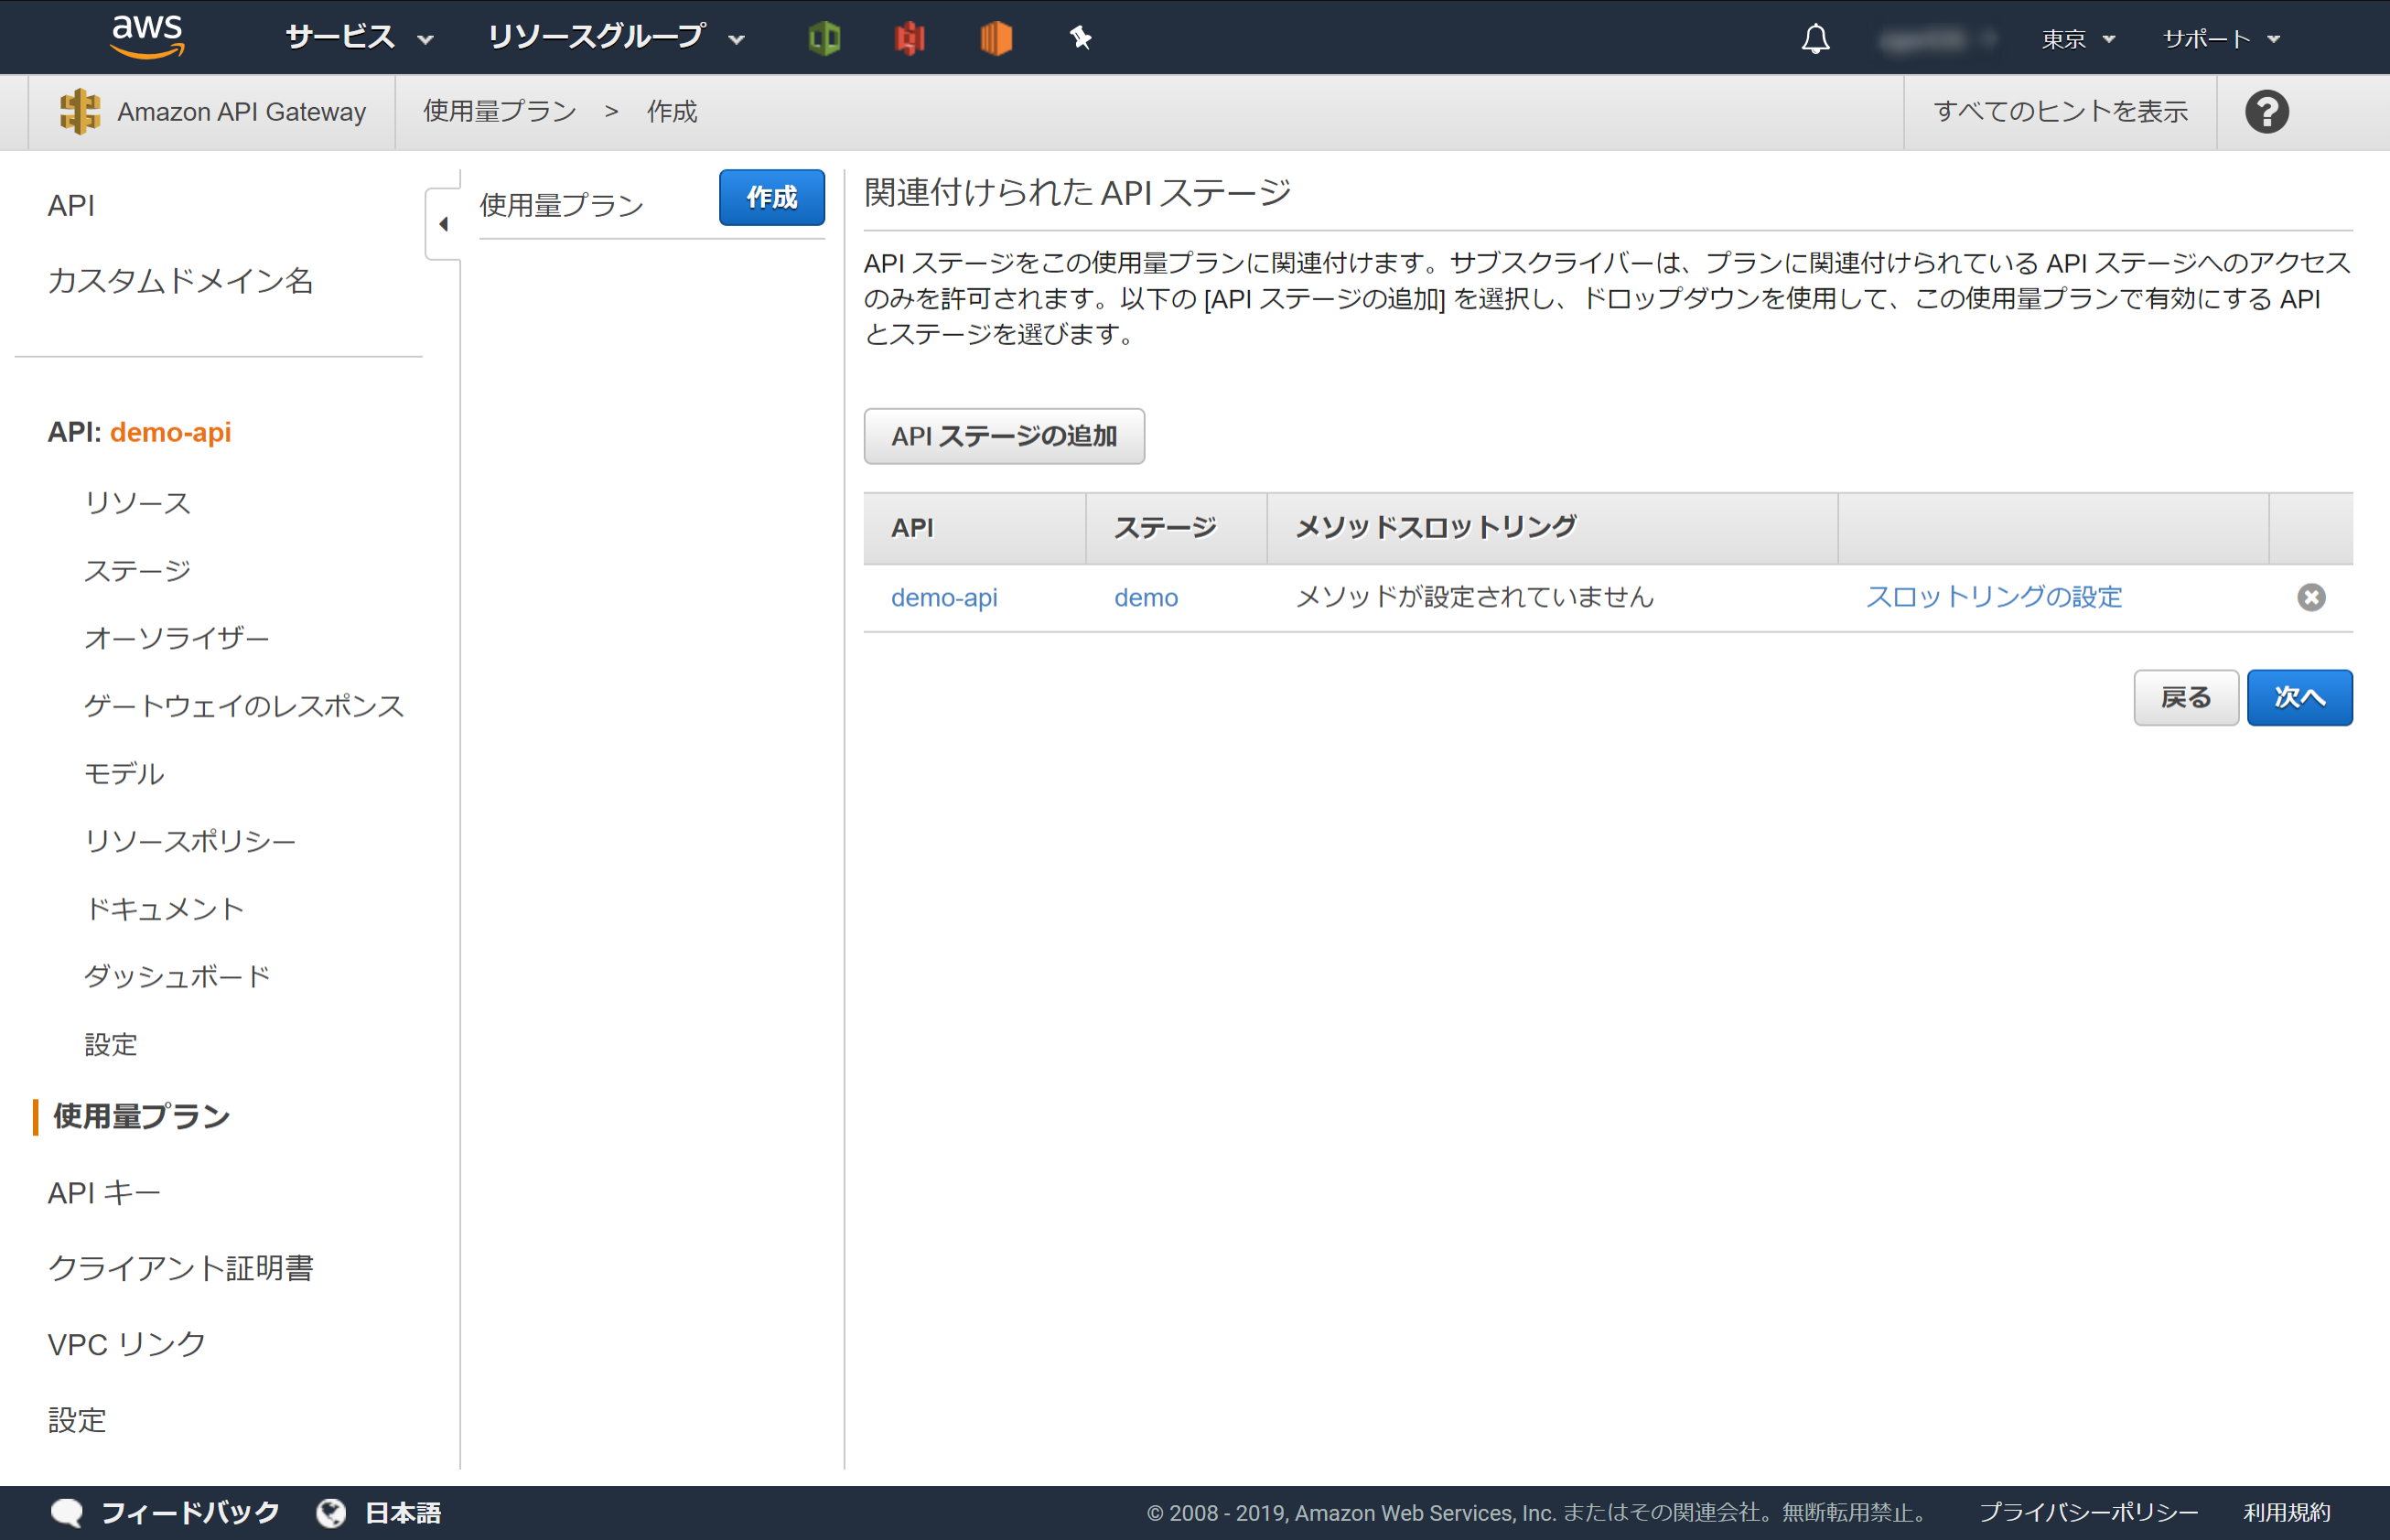
これで使用量プランの作成が完了しました。
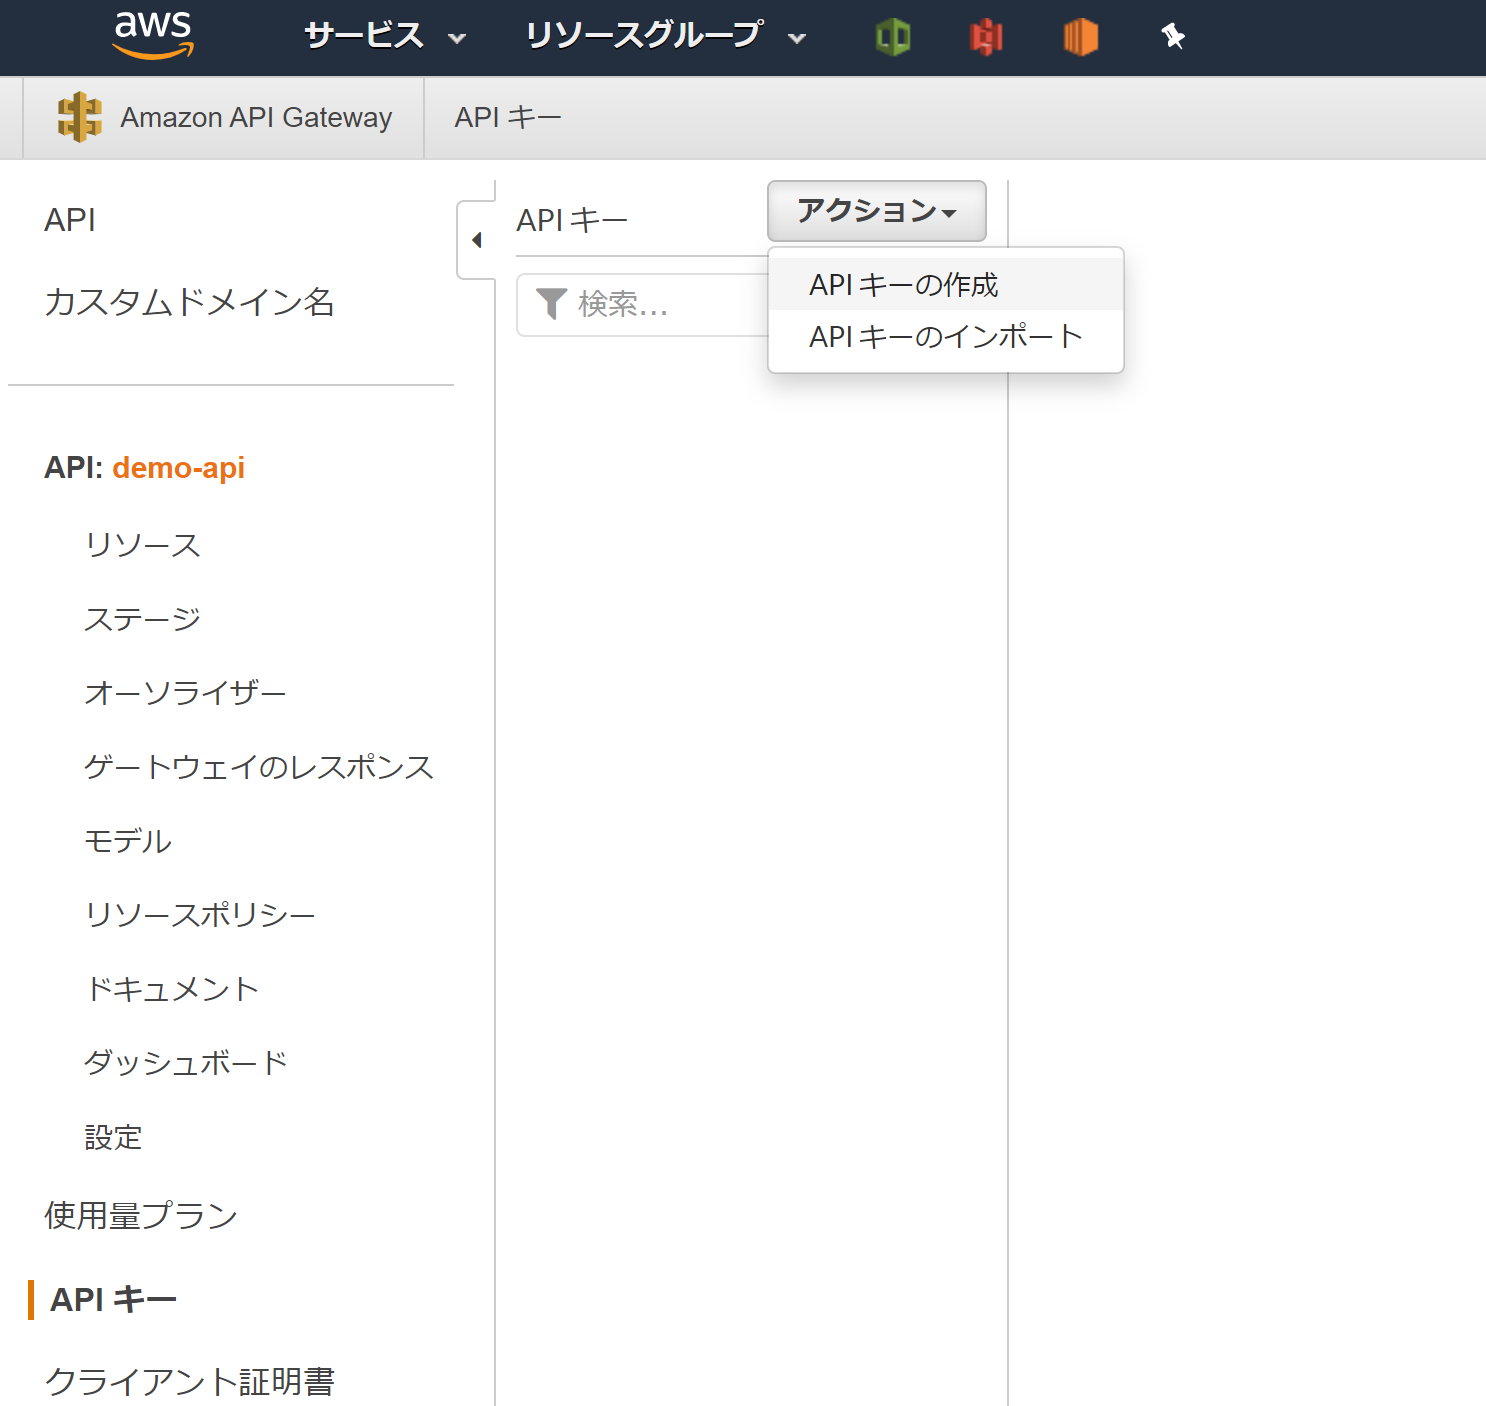
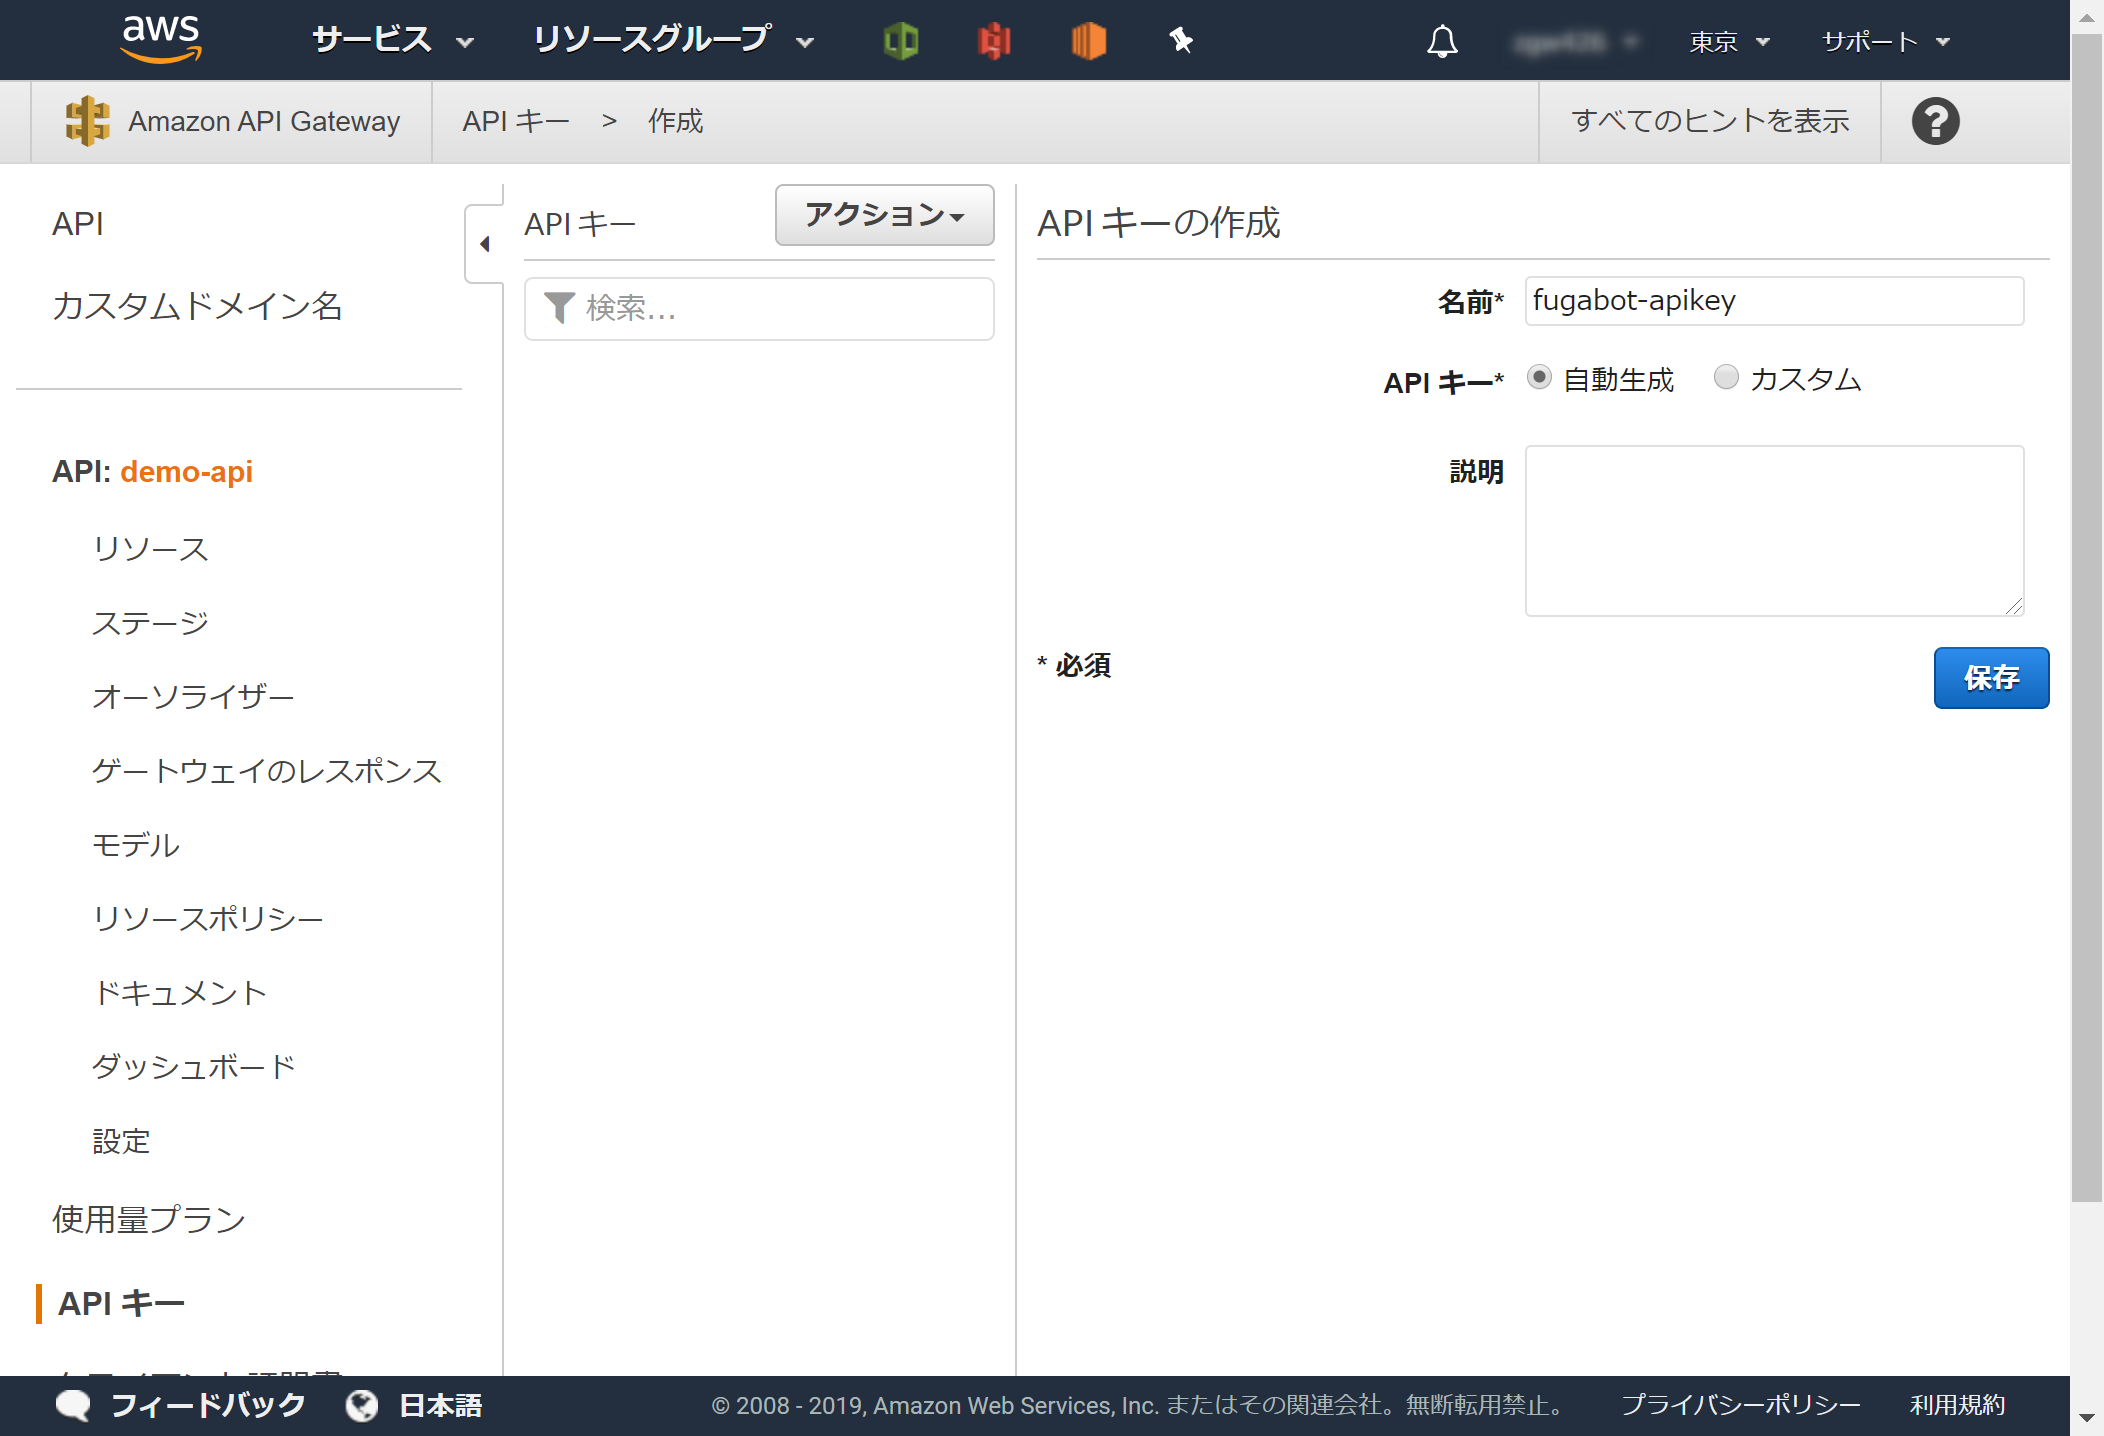
1-2.APIキーを作成しよう
AWSコンソールで、APIキーを設定するAPIを開き、アクション->APIキーの作成をクリックします。
名前を設定し保存ボタンをクリックします。
手順1-1で作成した使用量プランを設定します。
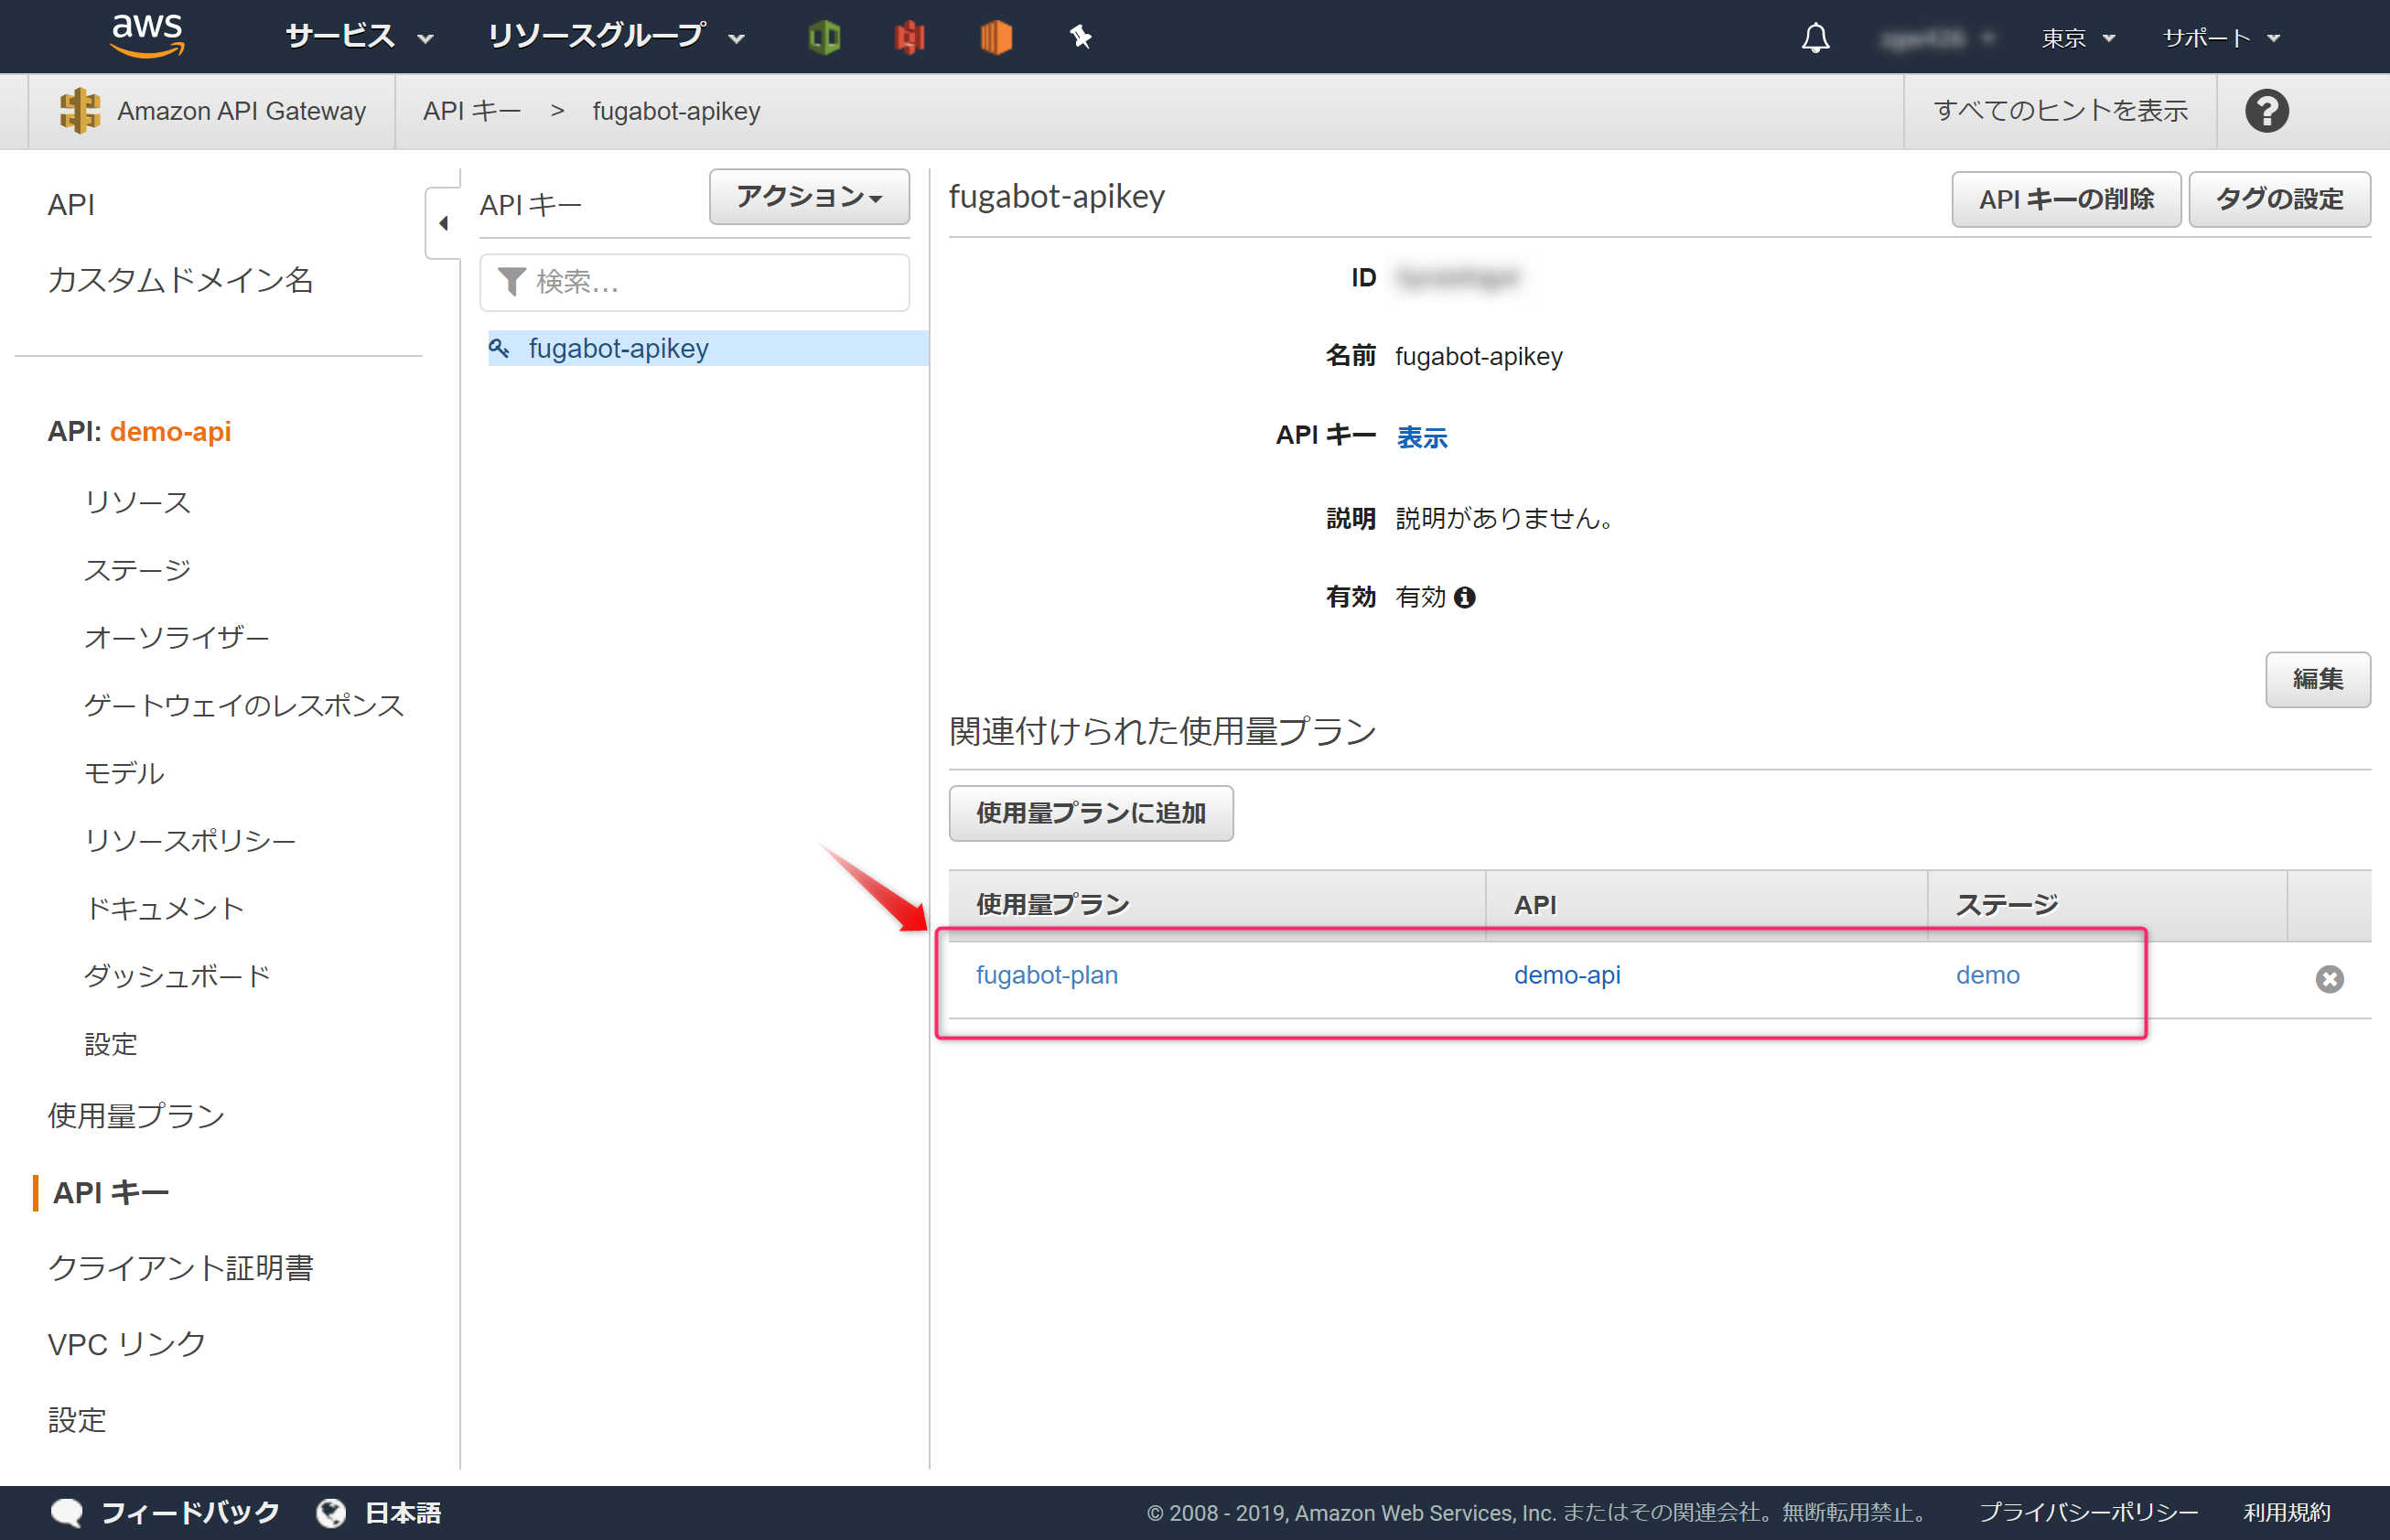
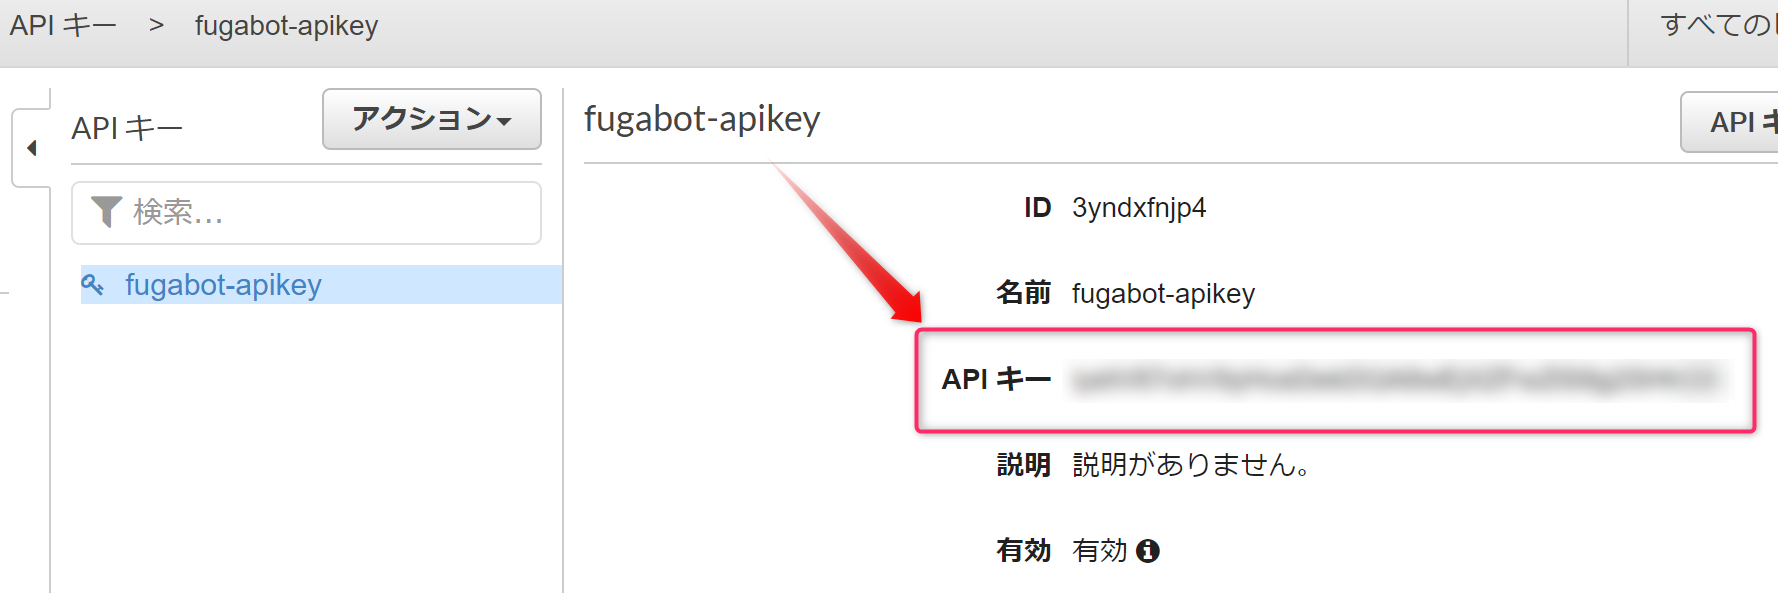
これで、APIキーの作成が完了しました。APIキーはここに表示されます。あとで使うのでどこかにコピーしておきます。
2.API GatewayでAPIキーを有効化しよう
作成したAPIキーを辞書Bot(API Gateway)のAPIで有効にします。
メソッドのリクエストをクリックします。
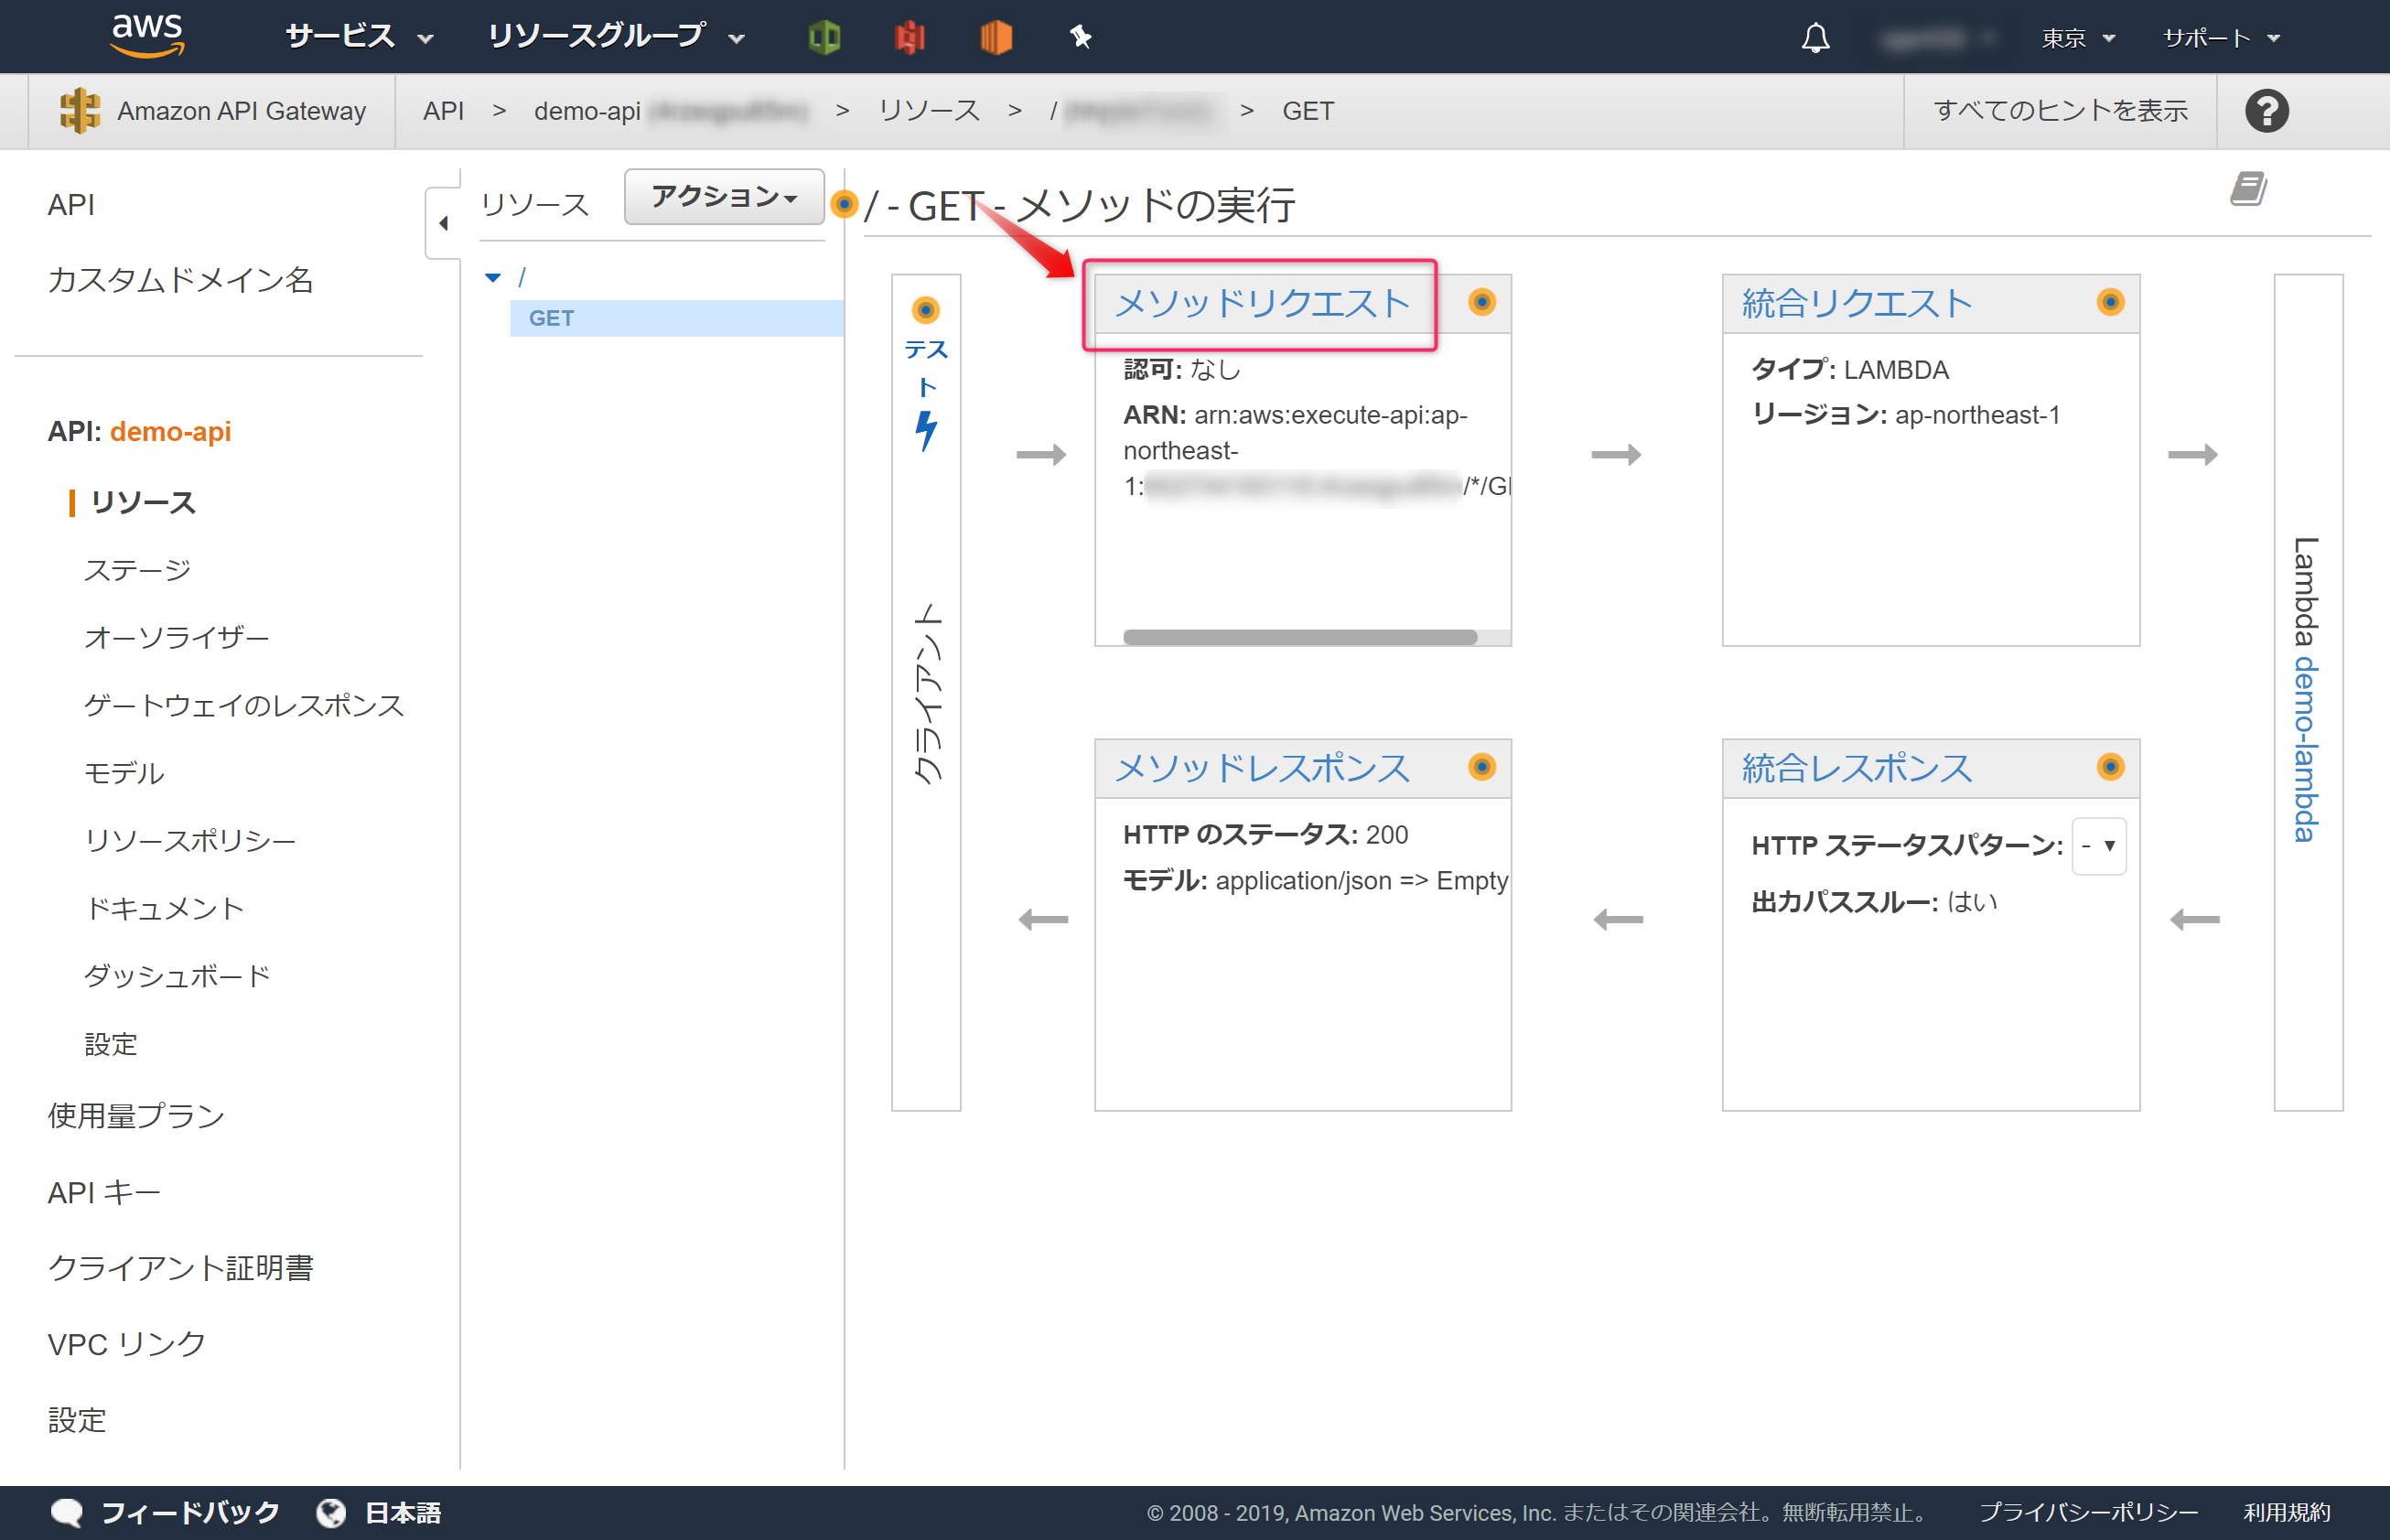
APIキーの必要性をTrueにします。
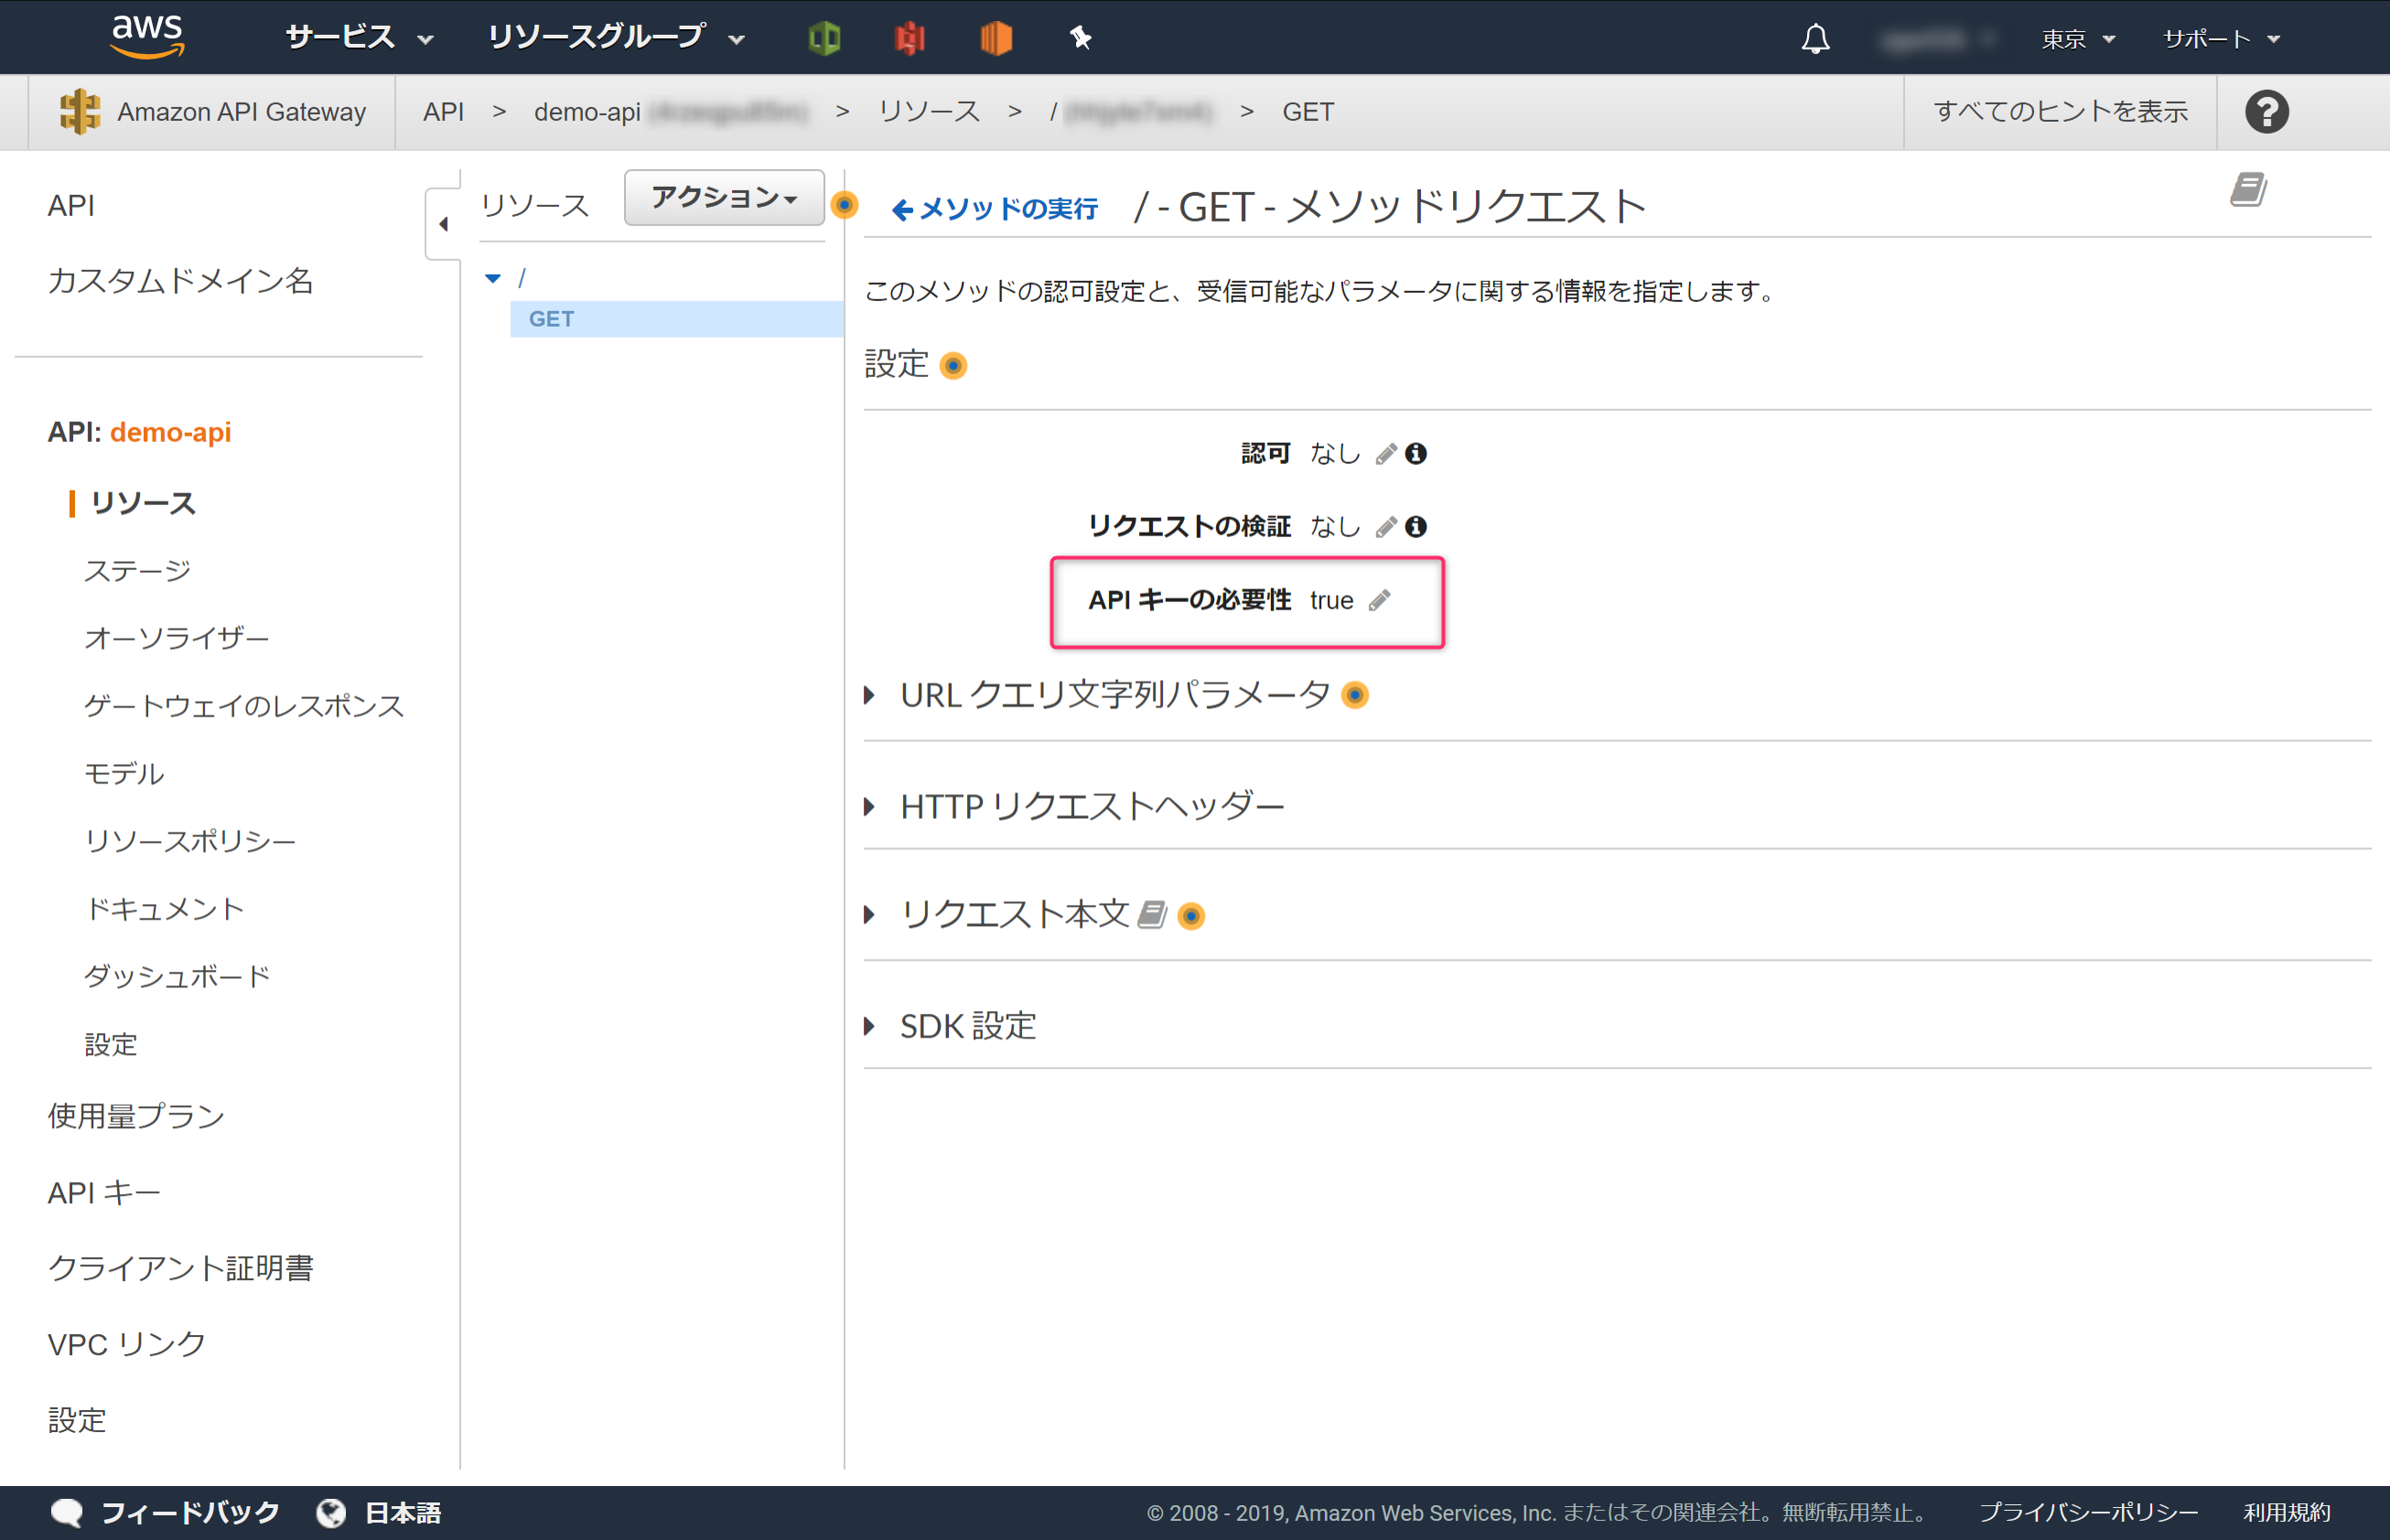
これでAPIキーの有効化が完了しました。API Gatewayをデプロイすれば完了です。
3.動作確認しよう
APIキーによる制御ができるか動作確認します。
3-1.検証① APIキー無しで辞書APIにアクセスする
APIキー無しで辞書APIにアクセスすると、{"message":"Forbidden"}となり、辞書の情報が返ってきません、これは想定した動作になります。
$ curl https://xxx.execute-api.ap-northeast-1.amazonaws.com/demo?test_id=book
  % Total    % Received % Xferd  Average Speed   Time    Time     Time  Current
                                 Dload  Upload   Total   Spent    Left  Speed
100    23  100    23    0     0    306      0 --:--:-- --:--:-- --:--:--   315{"message":"Forbidden"}
3-2.検証② APIキー有りで辞書APIにアクセスする
APIキー有りで辞書APIにアクセスすると、辞書の情報が返ってきました。これは想定した動作になります。
$ curl https://xxx.execute-api.ap-northeast-1.amazonaws.com/demo?test_id=book --header "x-api-key:xxxxxx"
  % Total    % Received % Xferd  Average Speed   Time    Time     Time  Current
                                 Dload  Upload   Total   Spent    Left  Speed
100   107  100   107    0     0    104      0  0:00:01  0:00:01 --:--:--   104{"name": "(1) \u30db\u30c6\u30eb\u306e\u4e88\u7d04\u4fc2\u306b\u767b\u9332\u3059\u308b", "test_id": "book"}
4.Nodejsで作ったLINE Botを更新しよう
Nodejsで作成したLINE Botを更新し以下の対応をします。
- APIキー対応
- Heroku化対応
'use strict';

const express = require('express');
const line = require('@line/bot-sdk');
const axios = require('axios');
const PORT = process.env.PORT || 3000;

const config = {
    channelSecret: 'xxxx',
    channelAccessToken: 'xxxx'
};

const app = express();

app.post('/webhook', line.middleware(config), (req, res) => {
    console.log(req.body.events);
    Promise
      .all(req.body.events.map(handleEvent))
      .then((result) => res.json(result));
});

const client = new line.Client(config);

function handleEvent(event) {
  if (event.type !== 'message' || event.message.type !== 'text') {
    return Promise.resolve(null);
  }

  let mes = ''
  mes = '『' + event.message.text + '』の意味は…'
  getNodeVer(event.source.userId , event.message.text);

  return client.replyMessage(event.replyToken, {
    type: 'text',
    text: mes
  });
}

const getNodeVer = async (userId, argKey) => {
    // 辞書API(API Gateway)のエンドポイント
    let apiUrl = 'https://xxxxx.execute-api.ap-northeast-1.amazonaws.com/demo?test_id='+ argKey;
    apiUrl = encodeURI(apiUrl); // URLエンコード
    // ↓ヘッダーにAPIキーの設定なし
    //const res = await axios.get( apiUrl );
    // ↓ヘッダーにAPIキーを設定
    const res = await axios.get( apiUrl , {
      headers: { "x-api-key": "ここに、手順1.2で作成したAPIキーを設定する" }
    });

    console.log(res.data.name);

    await client.pushMessage(userId, {
        type: 'text',
        text: res.data.name,
    });
}

//Heroku非対応↓
//app.listen(PORT);
//Heroku対応↓
app.listen(process.env.PORT || 8080);
console.log(`Server running at ${PORT}`);
5.Nodejsで作ったLINE BotをHeroku化しよう
ローカルのNodejs環境をHerokuにアップロードします。Procfile、.gitignoreファイルを作成し、いくつかコマンドを実行するとHeroku化が完了します。
※ Herokuにログインした状態で実行します
Procfileファイルを作り、Herokuにアップロードした後に実行するコマンドを指定します。
web: node server.js
.gitignoreファイルを作り、Herokuにアップロード不要なファイルを指定します。
# Logs
logs
*.log
npm-debug.log*
yarn-debug.log*
yarn-error.log*

# Runtime data
pids
*.pid
*.seed
*.pid.lock

# Directory for instrumented libs generated by jscoverage/JSCover
lib-cov

# Coverage directory used by tools like istanbul
coverage

# nyc test coverage
.nyc_output

# Grunt intermediate storage (http://gruntjs.com/creating-plugins#storing-task-files)
.grunt

# Bower dependency directory (https://bower.io/)
bower_components

# node-waf configuration
.lock-wscript

# Compiled binary addons (https://nodejs.org/api/addons.html)
build/Release

# Dependency directories
node_modules/
jspm_packages/

# TypeScript v1 declaration files
typings/

# Optional npm cache directory
.npm

# Optional eslint cache
.eslintcache

# Optional REPL history
.node_repl_history

# Output of 'npm pack'
*.tgz

# Yarn Integrity file
.yarn-integrity

# dotenv environment variables file
.env

# next.js build output
.next
以下コマンドを実行しHeroku化します。
# 初期化
git init

# ファイル追加
git add --a

# コミット
git commit -m "commit"

# アプリ名を設定
heroku create アプリ名

# Herokuにプッシュ
git push heroku master
git push …まで実行完了するとHeroku化成功です(2回目以降は、アプリ名の設定heroku create …は不要です)
6.LINE Botの設定を変更しよう
LINE DevelopersでBotのWebhookをHeroku化したサイトに設定します。

トラブルシュート
git push heroku masterでエラーになりました。heroku create アプリ名で失敗していたのが原因でした。
PS C:\Users\fuga> git push heroku master
remote: !       Your account hoge@gmail.com does not have access to fugabot.
fatal: unable to access 'https://git.heroku.com/fugabot.git/': The requested URL returned error: 403
このエラーが出たとき、configに[remote "heroku"]の情報がありませんでした。
PS C:\Users\fuga> cat .git\config
[core]
        repositoryformatversion = 0
        filemode = false
        bare = false
        logallrefupdates = true
        symlinks = false
        ignorecase = true
上記のようになったときのheroku createコマンドの実行結果がこれ↓
PS C:\Users\fuga> heroku create fugabot
Creating ⬢ fugabot... !
 !    Name fugabot is already taken
heroku createコマンドがエラー無く実行できたときはこんな感じになります。
PS C:\Users\fuga> heroku create fugabot2
Creating ⬢ fugabot2... done
https://fugabot2.herokuapp.com/ | https://git.heroku.com/fugabot2.git
heroku createコマンド実行後のconfigはこんな感じでした。
PS C:\Users\fuga> cat .\.git\config
[core]
        repositoryformatversion = 0
        filemode = false
        bare = false
        logallrefupdates = true
        symlinks = false
        ignorecase = true
[remote "heroku"]
        url = https://git.heroku.com/fugabot2.git
        fetch = +refs/heads/*:refs/remotes/heroku/*