概要
こちらの記事を参考に、サーバーレスでwebアプリ開発をしたメモシリーズの2つ目です。
https://qiita.com/minato-naka/items/7b445bcf0794189e65a0
Hostingでアプリ公開&自動デプロイ実装編
vol.2の終わりに書いた通り、⑥ Hostingでアプリ公開&自動デプロイ実装編になります。
AmplifyのHostingで自動デプロイ設定
今回は自前のGitHubリポジトリを用意して、そこからデプロイするようにします。
ここまでリポジトリを用意しないまま進んできたので、用意してコミットしておきます。
Hostingを使用するようコマンド実行します。
>amplify add hosting
? Select the plugin module to execute ...  (Use arrow keys or type to filter)
❯ Hosting with Amplify Console (Managed hosting with custom domains, Continuous deployment)
  Amazon CloudFront and S3
? Choose a type
> Continuous deployment (Git-based deployments)
  Manual deployment
  Learn more
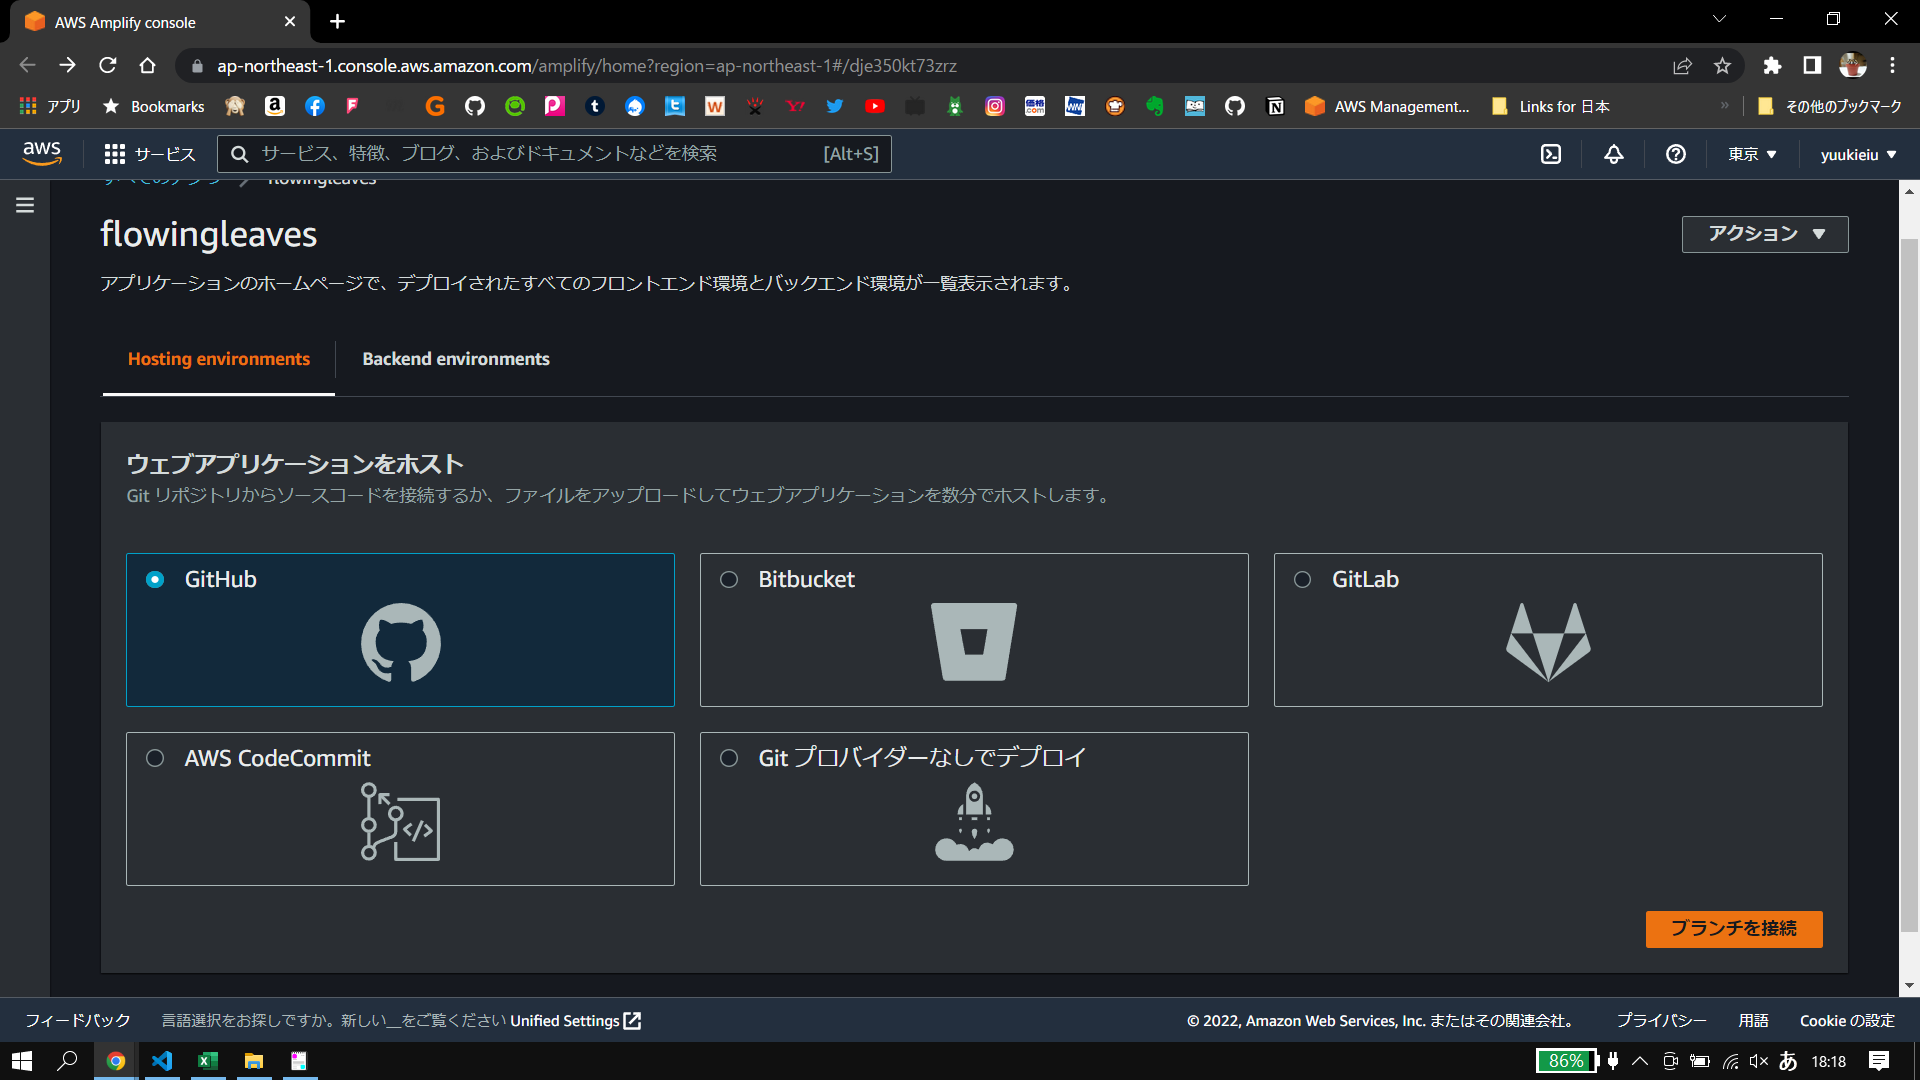
リポジトリブランチの追加
ここまで入力するとブラウザでAWSコンソールが開きます。
僕の場合はBackend environmentが表示されていたので…
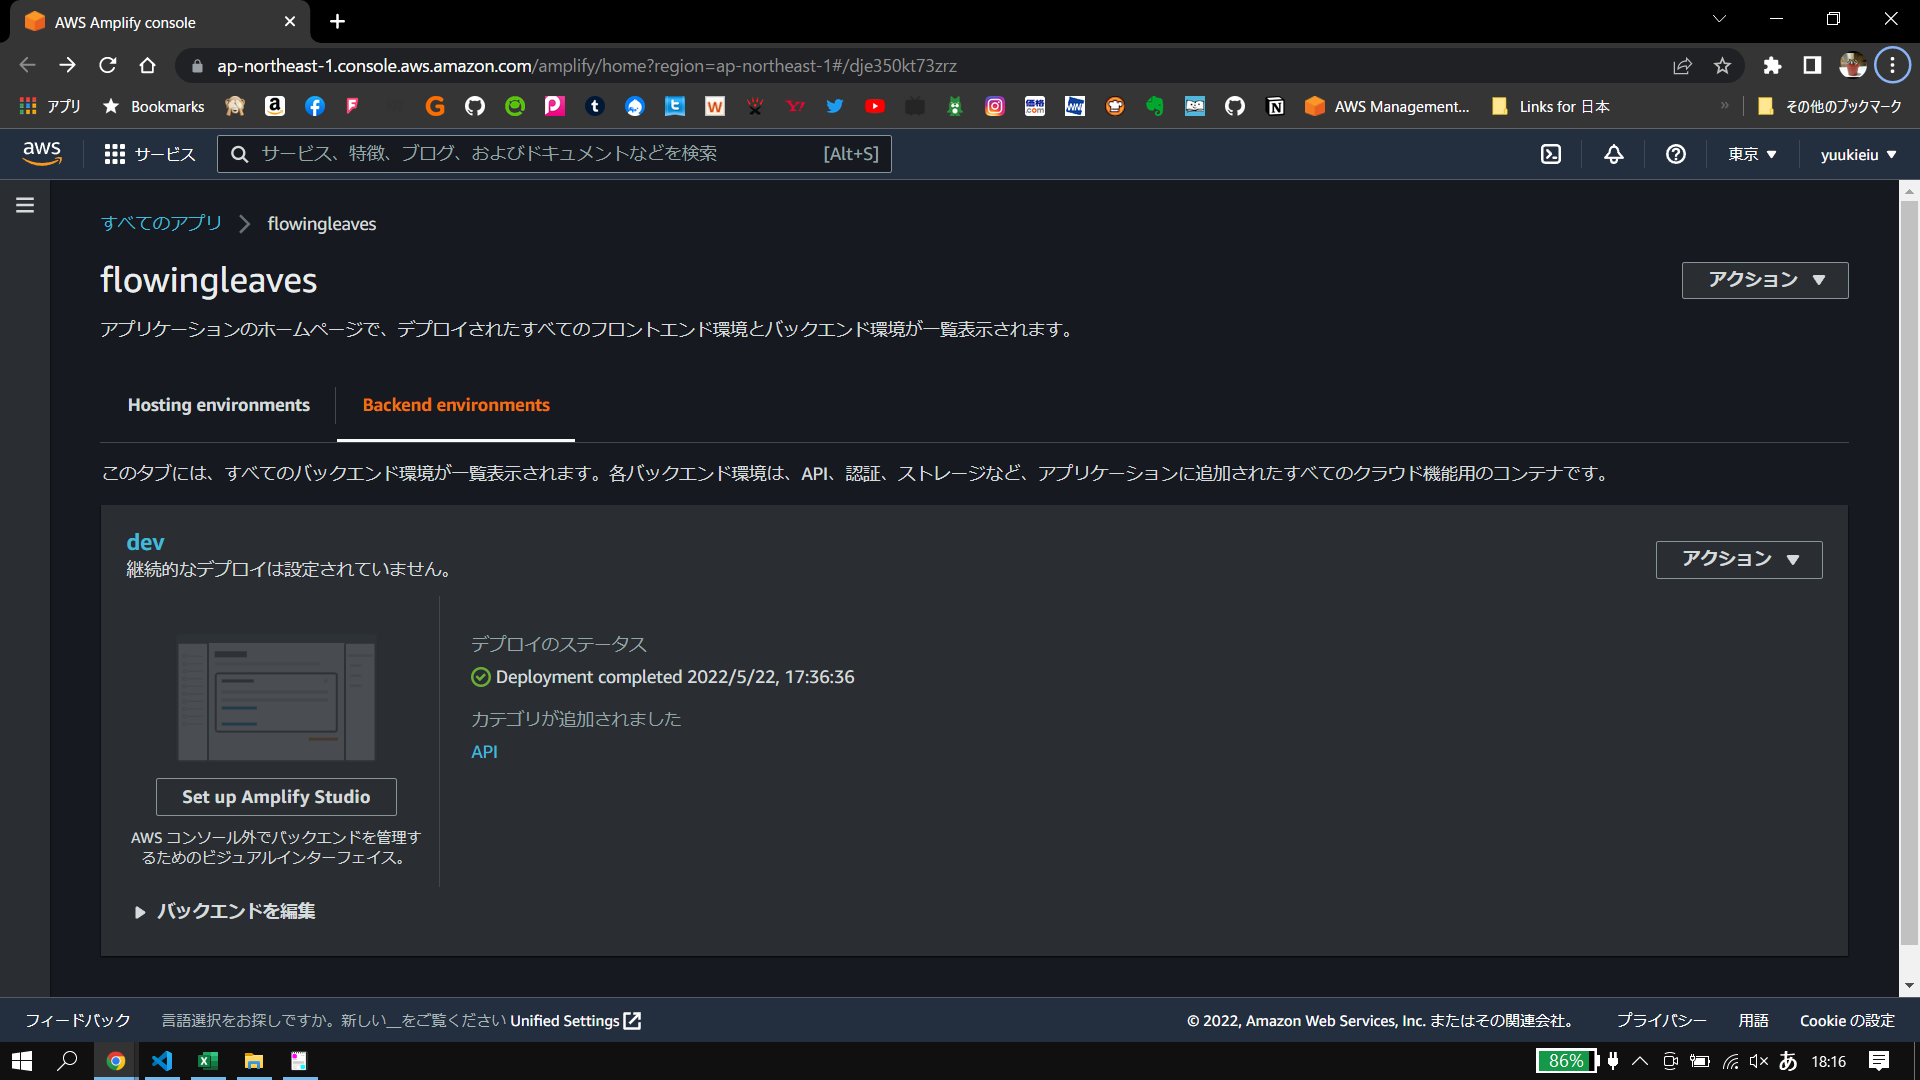
・「Hosing environments」のタブを開く
・「GitHub」を選択
・「ブランチを接続」をクリック
しました。
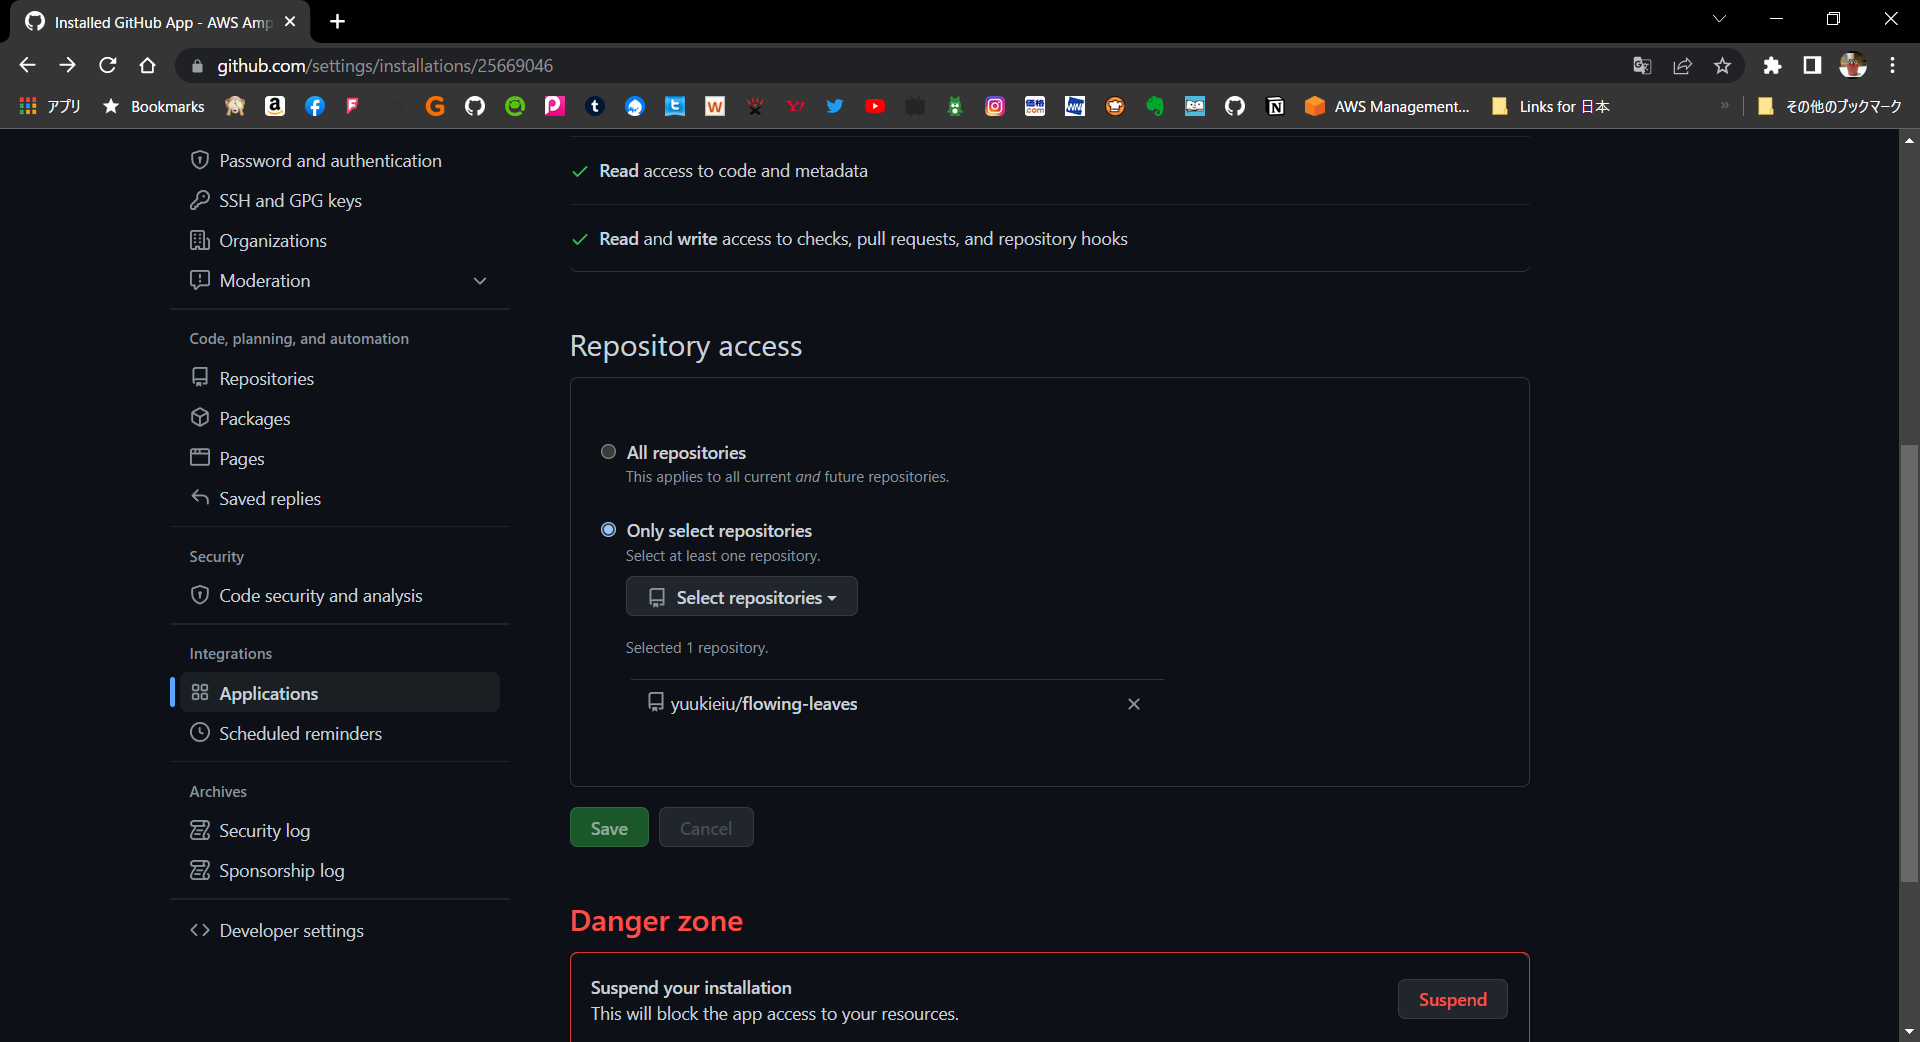
GitHubの認証をしたら、GitHub側にAWSからのアクセスを許可する設定をします。
Repository accessはOnly select repositoriesにした方が気持ちが穏やかかもしれません。
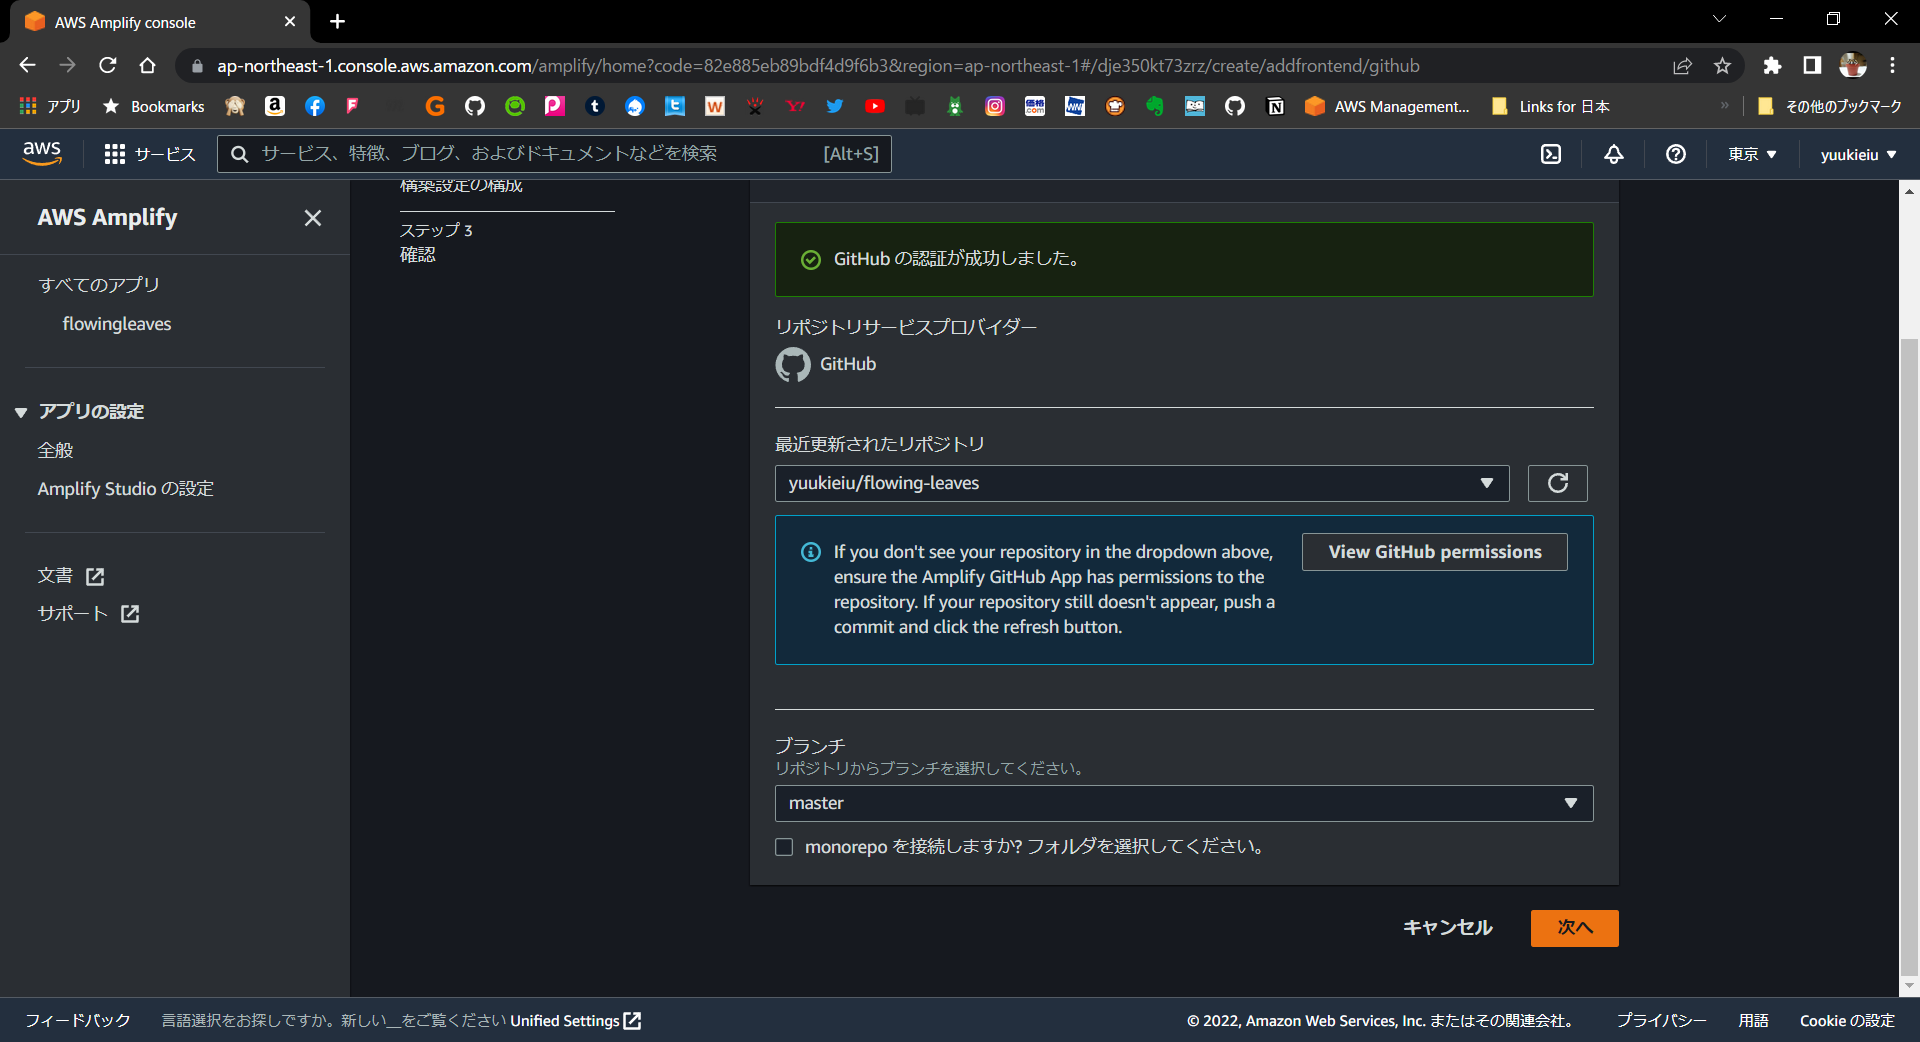
AWSコンソールでリポジトリやブランチを設定して次へ
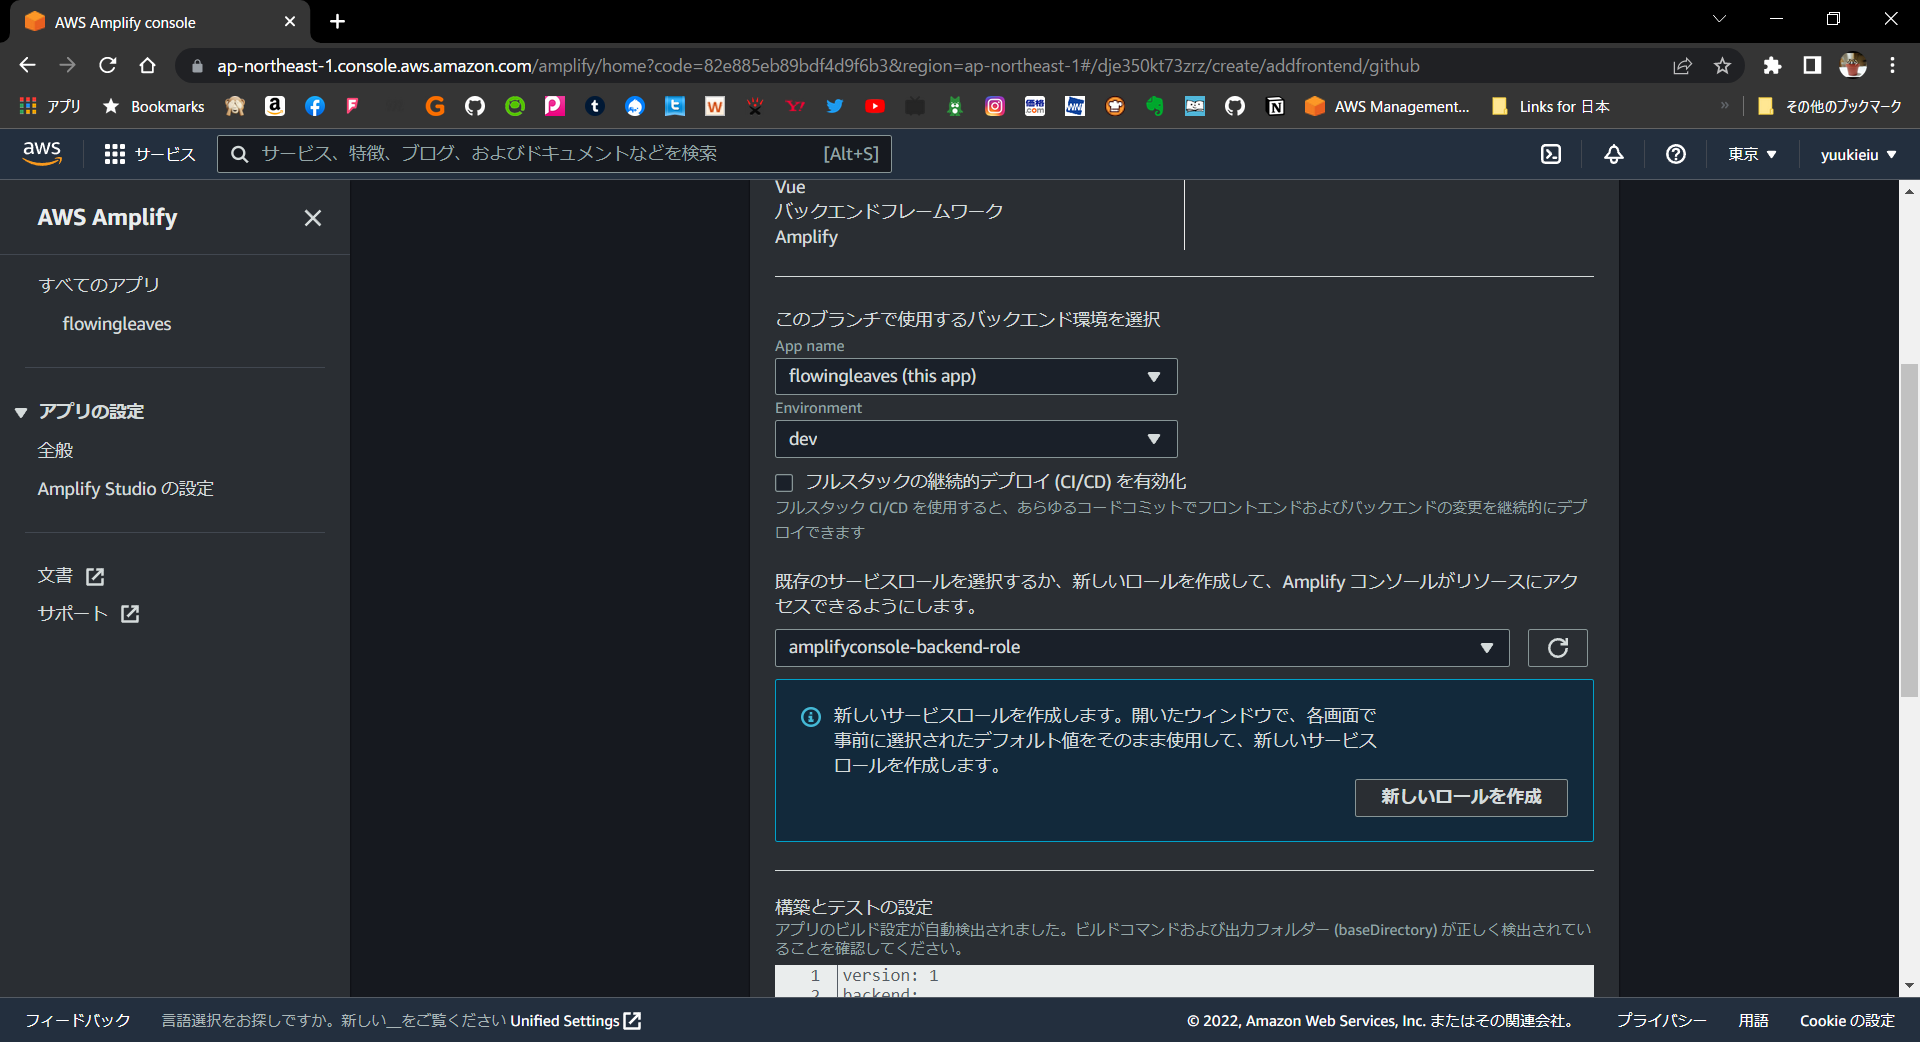
ビルド設定の構成
「このブランチで使用するバックエンド環境を選択」の「Environment」を「dev」を選択します。
「amplifyconsole-backend-role」は参考ページのそのまま作成しました。
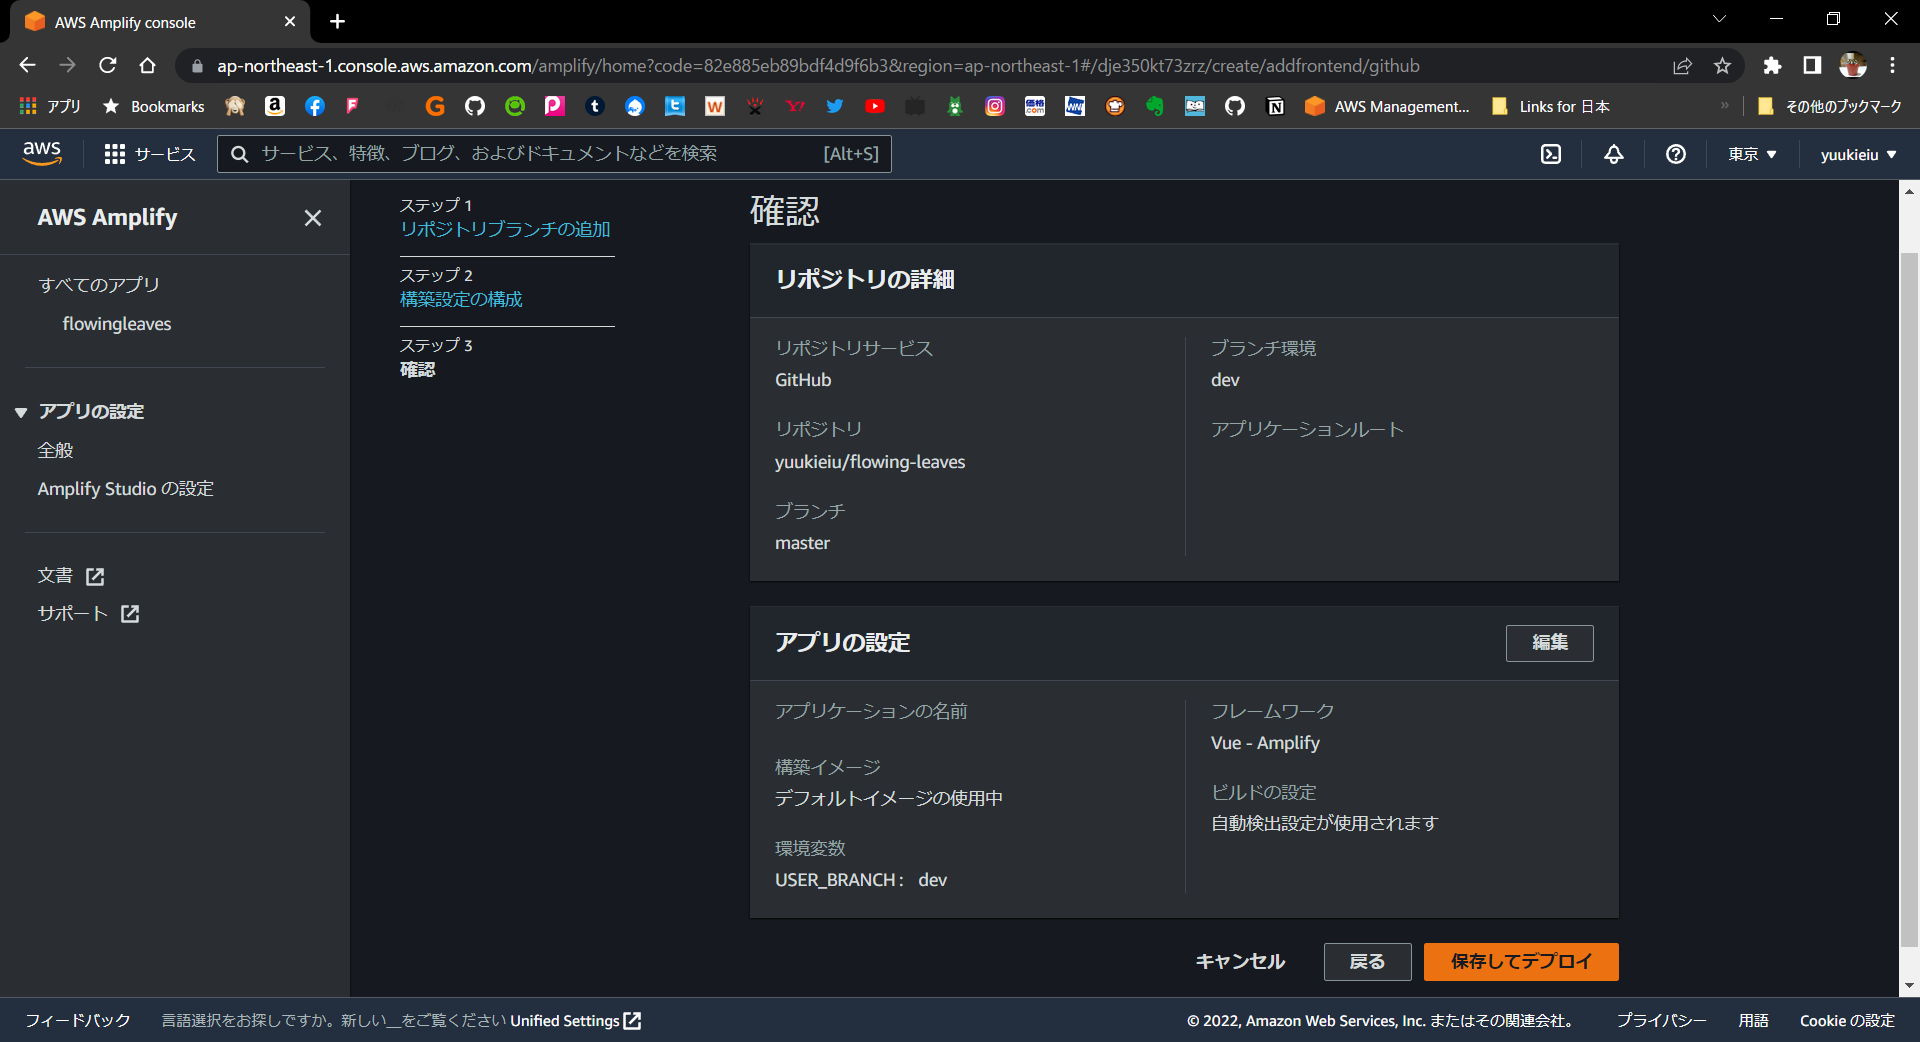
確認
内容を確認して保存してデプロイ。
デプロイ失敗
デプロイ失敗したのでログを確認。
ESLintのルールで怒られている。
2022-05-22T09:32:00.494Z [INFO]: ERROR  Failed to compile with 1 error9:31:59 AM
2022-05-22T09:32:00.495Z [INFO]: /codebuild/output/src038903468/src/flowing-leaves/src/main.js
                                 7:8  error  Identifier 'aws_exports' is not in camel case  camelcase
                                 ✖ 1 problem (1 error, 0 warnings)
                                 You may use special comments to disable some warnings.
                                 Use // eslint-disable-next-line to ignore the next line.
                                 Use /* eslint-disable */ to ignore all warnings in a file.
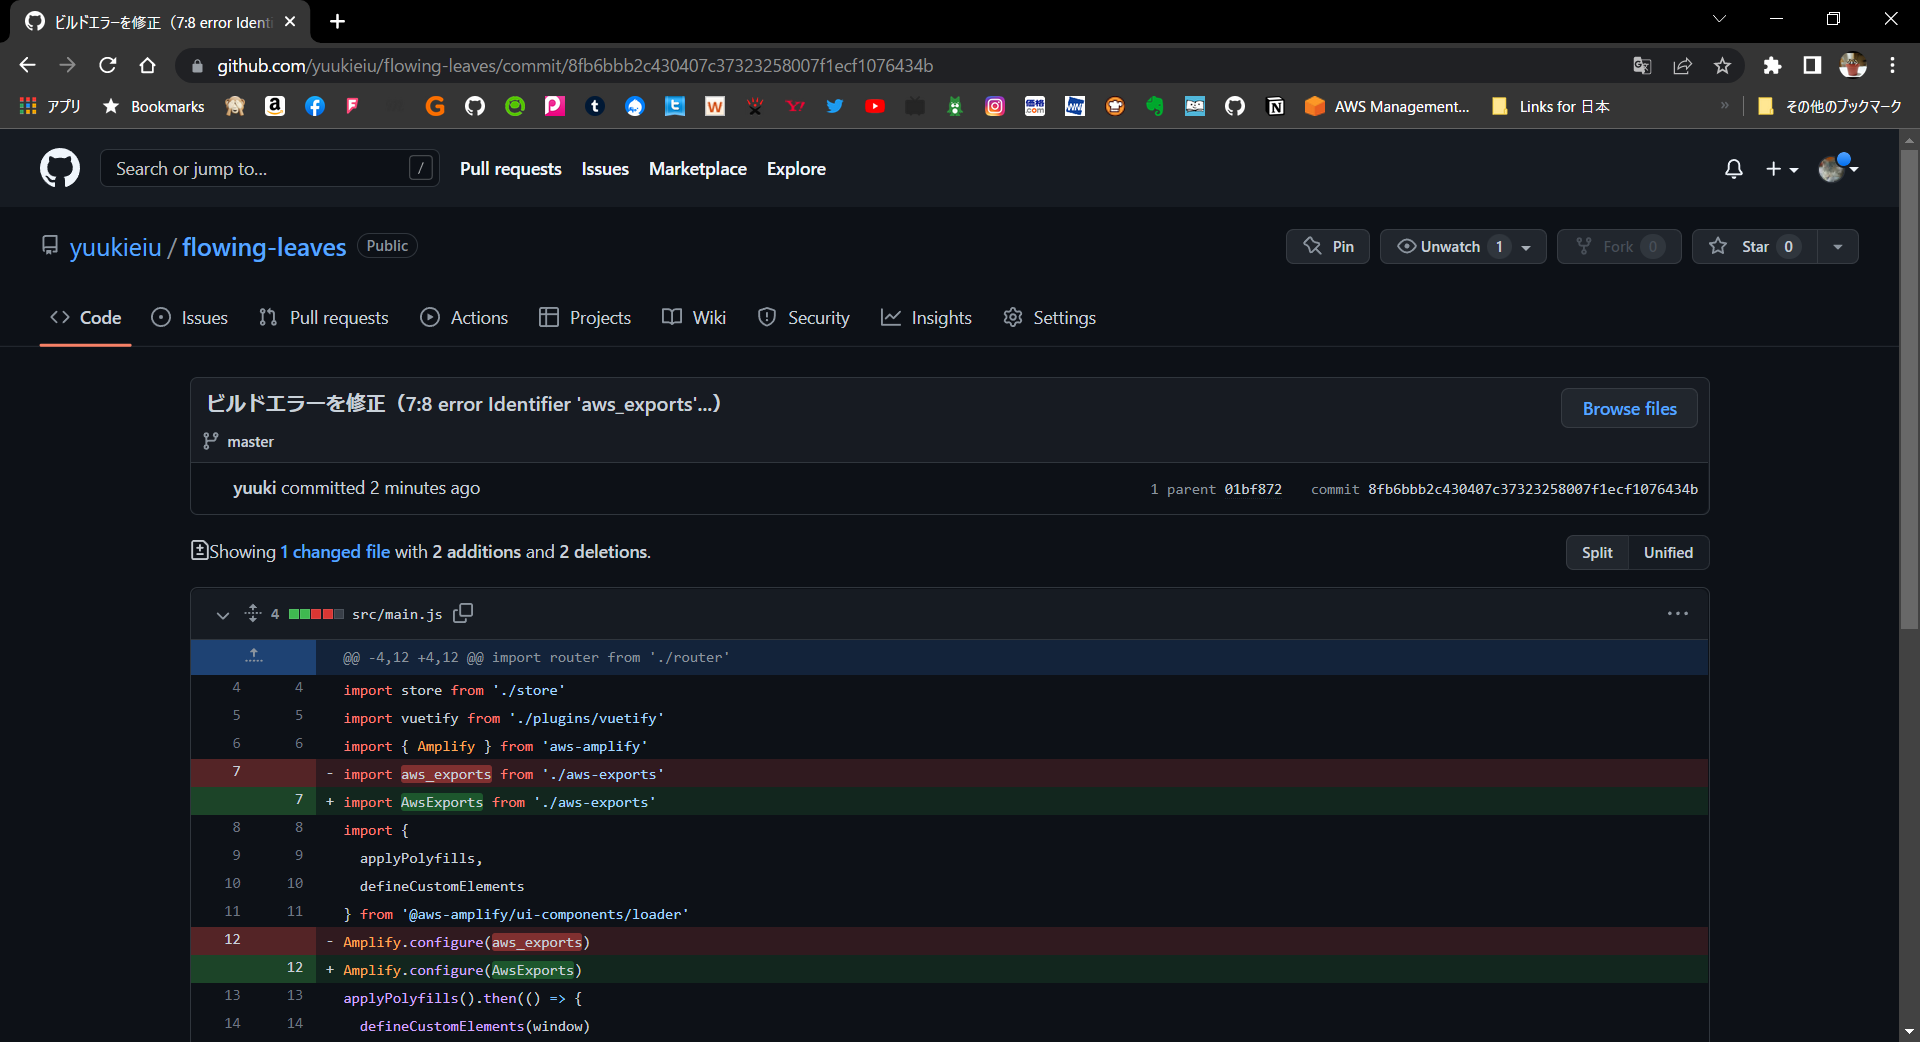
src/main.jsを以下の通り修正。
import Vue from 'vue'
import App from './App.vue'
import router from './router'
import store from './store'
import vuetify from './plugins/vuetify'
import { Amplify } from 'aws-amplify'
import AwsExports from './aws-exports'    <- ここの命名をCamelCaseに変更
import {
  applyPolyfills,
  defineCustomElements
} from '@aws-amplify/ui-components/loader'
Amplify.configure(AwsExports)
applyPolyfills().then(() => {
  defineCustomElements(window)
})

Vue.config.productionTip = false

new Vue({
  router,
  store,
  vuetify,
  render: h => h(App)
}).$mount('#app')
ついでにGitHubにPushするとAmplifyのデプロイが走るか確認できてラッキーだったね。
GitHubのコミット
Amplifyのコンソール
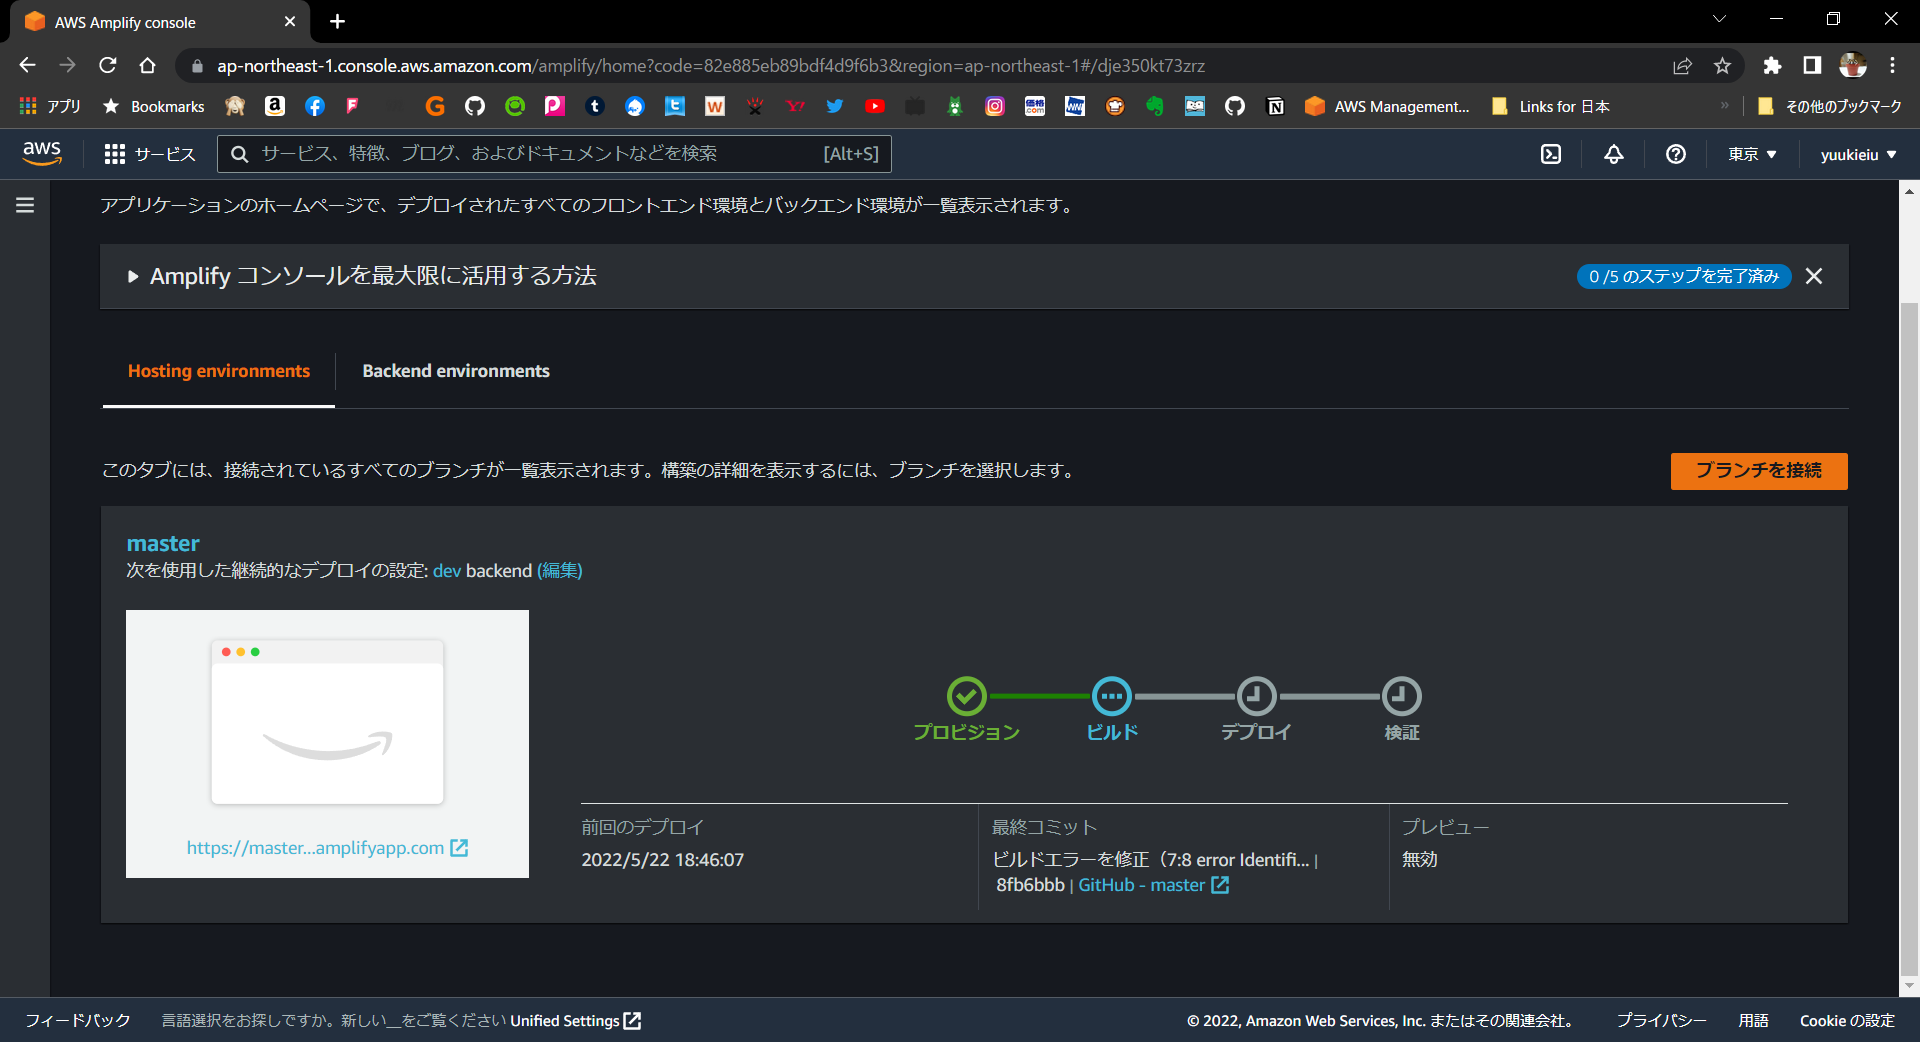
無事デプロイできたので、左下のリンクからアプリを開いてみる。
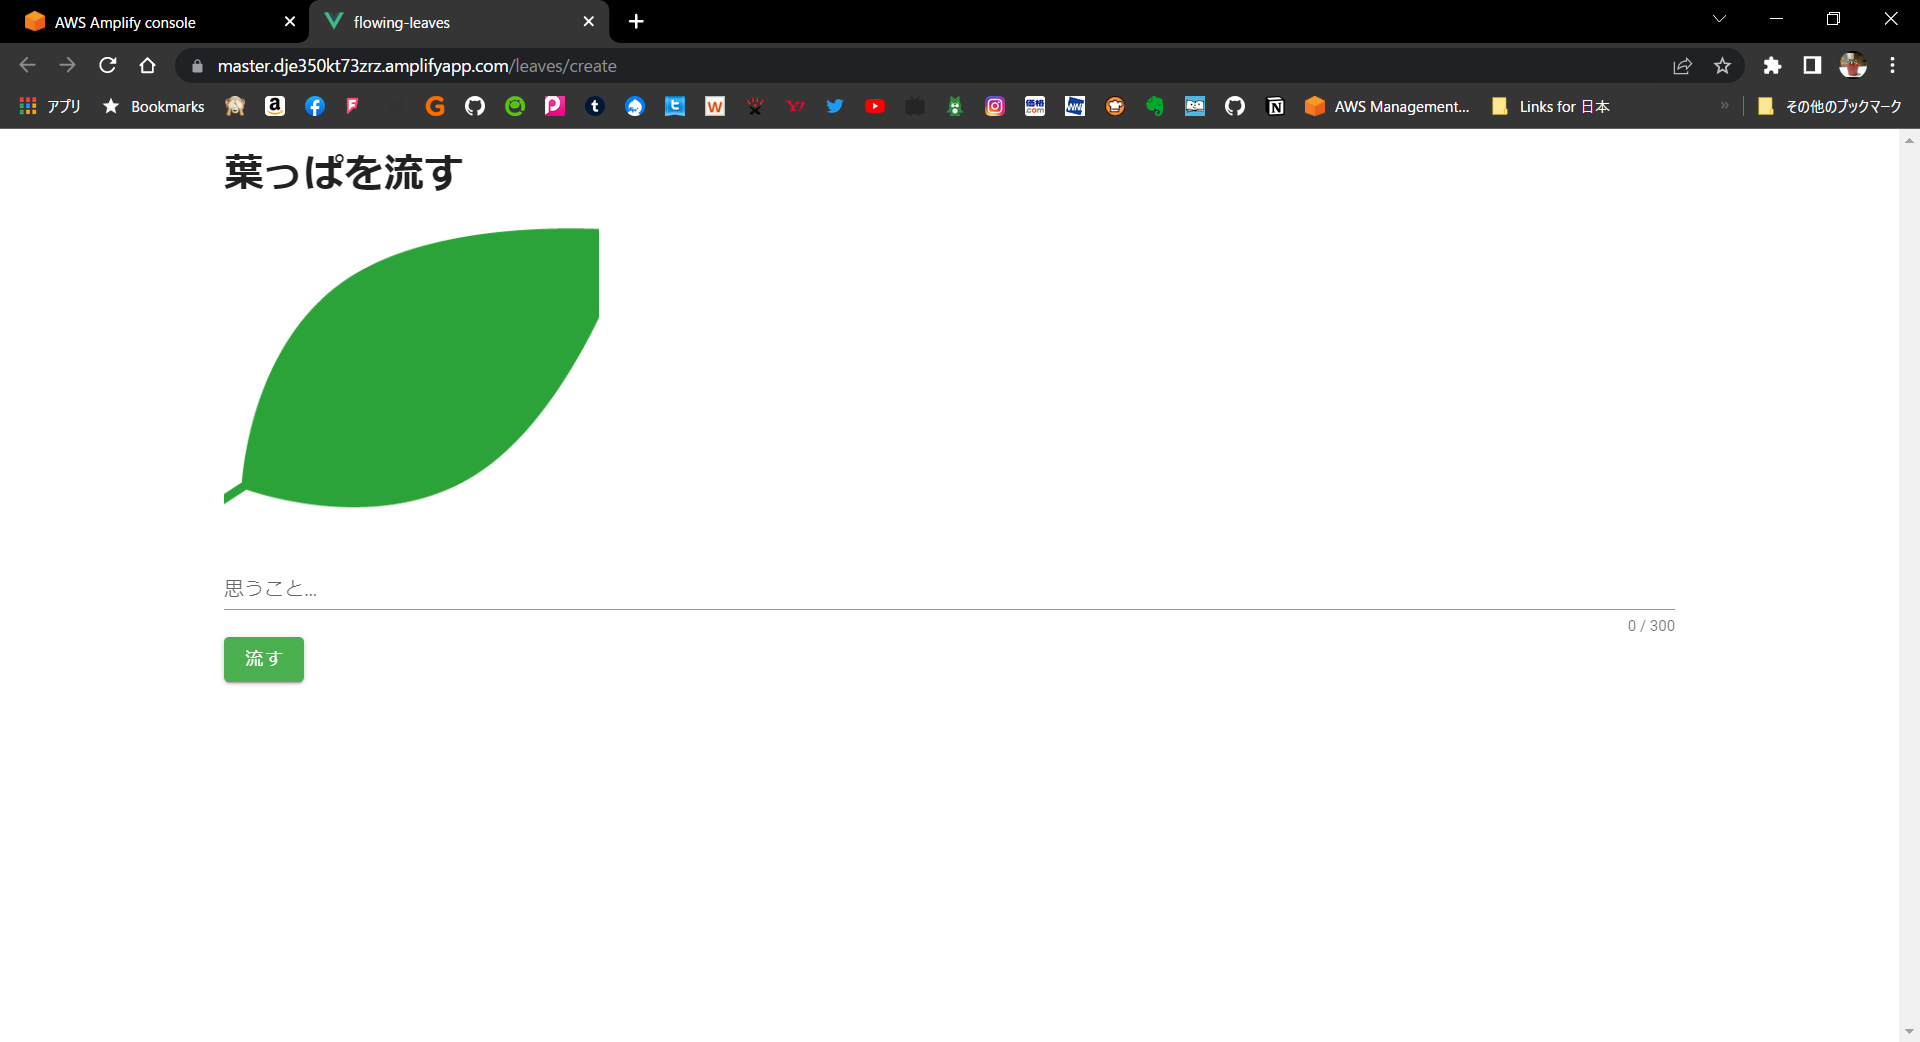
(葉っぱが見切れてる…)
適当に書いて流してみました。
DynamoDBに登録されるはずです。
(思ってないことを書いています)

DynamoDBのテーブルが自動的にできているので、そこを見ると項目ができています。

微調整
最後にアプリの挙動を少し調整します。
①流すボタンを押したらテキストボックスをリセットする。
ちょこちょこ修正しました。
<template>
  <v-container>
    <h1>葉っぱを流す</h1>
    <v-img
      max-height="300"
      max-width="300"
      src='../../../public/img/leaf1.png'
      >
      <v-row align-content="center" style="height: 300px">
        <v-col align="center">{{ form.message }}</v-col>
      </v-row>
    </v-img>
    <v-form
        ref="form"
        v-model="valid"
        lazy-validation
        @submit.prevent="submitCreate">
        <v-text-field
          v-model="form.message"
          :counter="300"
          :rules="nameRules"
          label="思うこと…"
          required
          clearable
        ></v-text-field>
        <v-btn
          :disabled="!valid"
          color="success"
          class="mr-4"
          type="submit"
        >
          流す
        </v-btn>
      </v-form>
  </v-container>
</template>

<script>
import { API } from 'aws-amplify'
import { createLeaf } from '../../graphql/mutations'

export default {
  name: 'LeafCreate',
  data () {
    return {
      form: {
        message: ''
      },
      valid: true,
      nameRules: [
        v => !!v || 'なにか入力してね',
        v => (v && v.length <= 300) || '300文字未満にしてね'
      ]
    }
  },
  methods: {
    async submitCreate () {
      if (this.$refs.form.validate()) {  // 送信ボタンを押したときにValidateしてOKの場合だけ送信する
        await API.graphql({
          query: createLeaf,
          variables: { input: this.form }
        })
          .then((result) => {
            console.log(result)
            this.$router.push({ name: 'LeafCreate' })
            this.form.message = ''  // テキストフィールドにバインドしている変数をリセット
            this.$refs.form.resetValidation()  // Validation状態もリセット
          })
          .catch((error) => {
            console.log(error)
          })
      }
    }
  }
}
</script>
②ブラウザ更新したりするとAccessDeniedになる
このように。
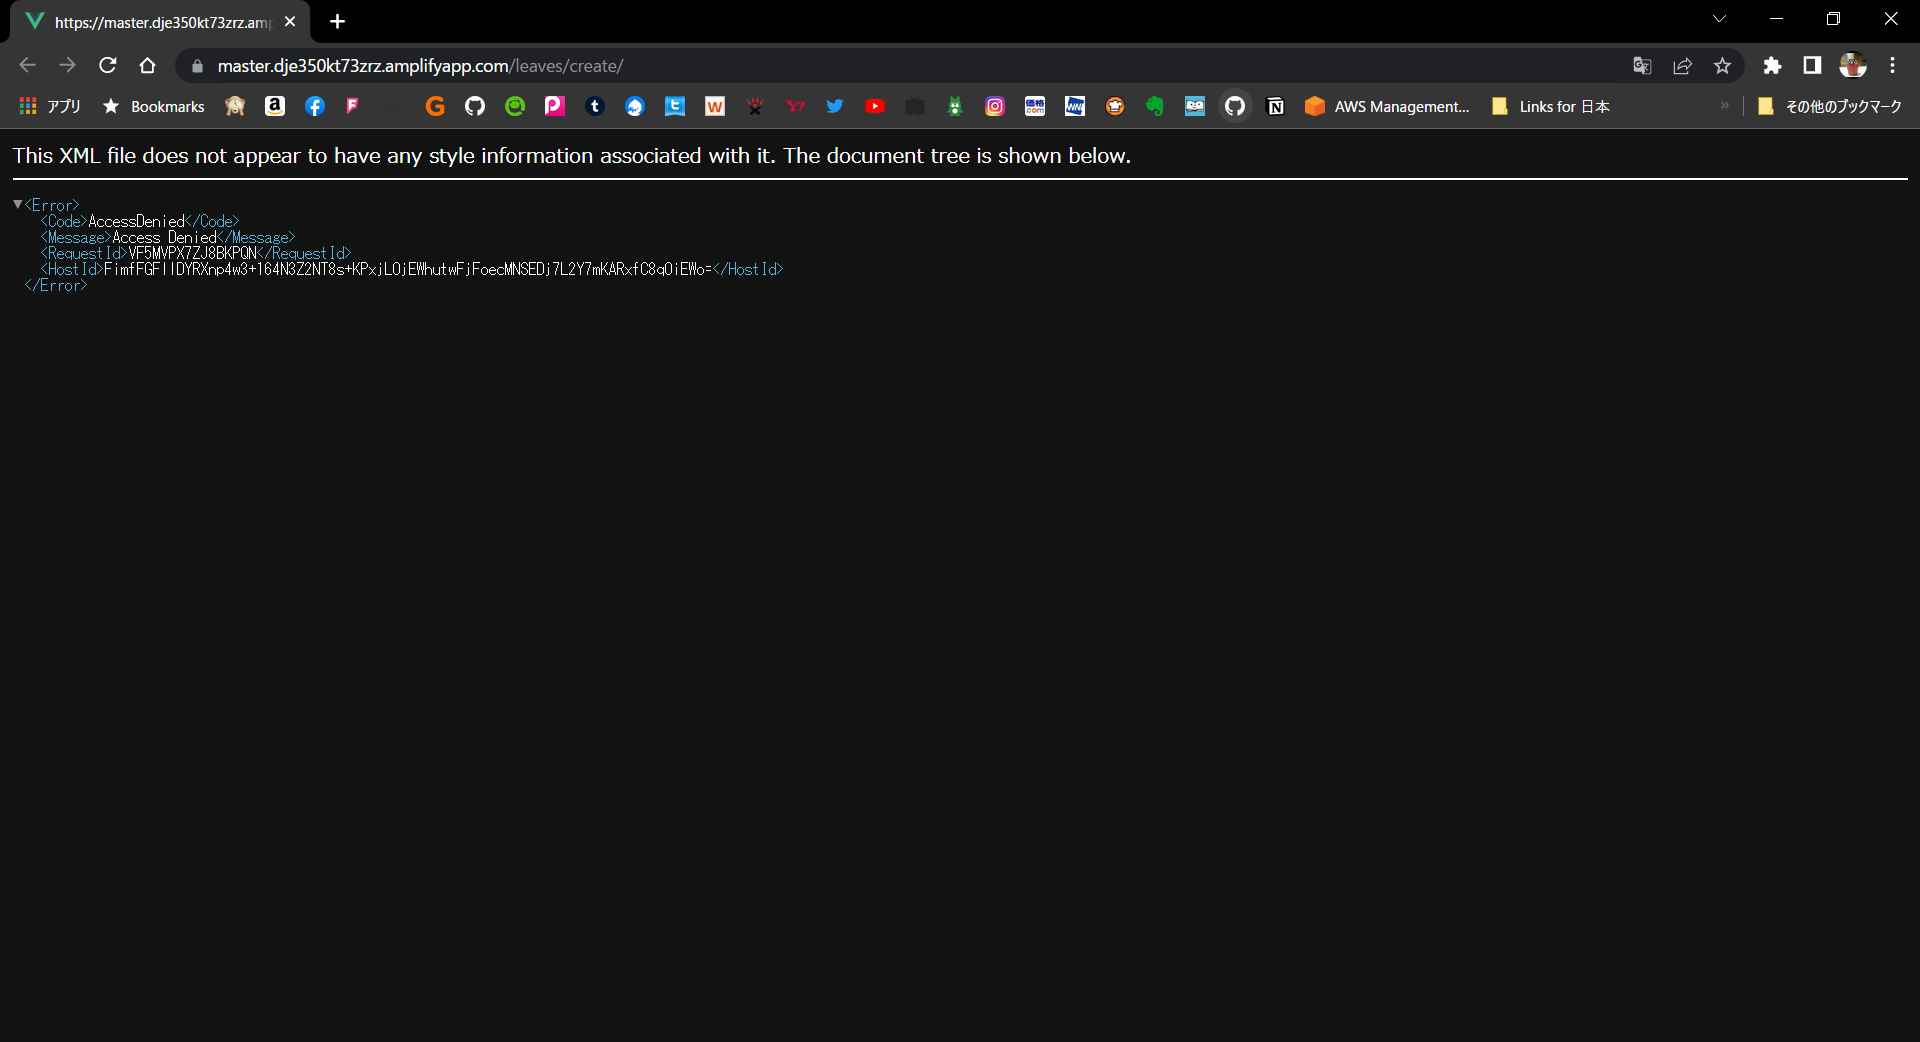
AmplifyでSPAを使う時に発生してしまうそうです。これを回避する場合はAmplifyに設定を追加します。
参考:https://blog.serverworks.co.jp/tech/2020/03/02/amplify-console-redirect/
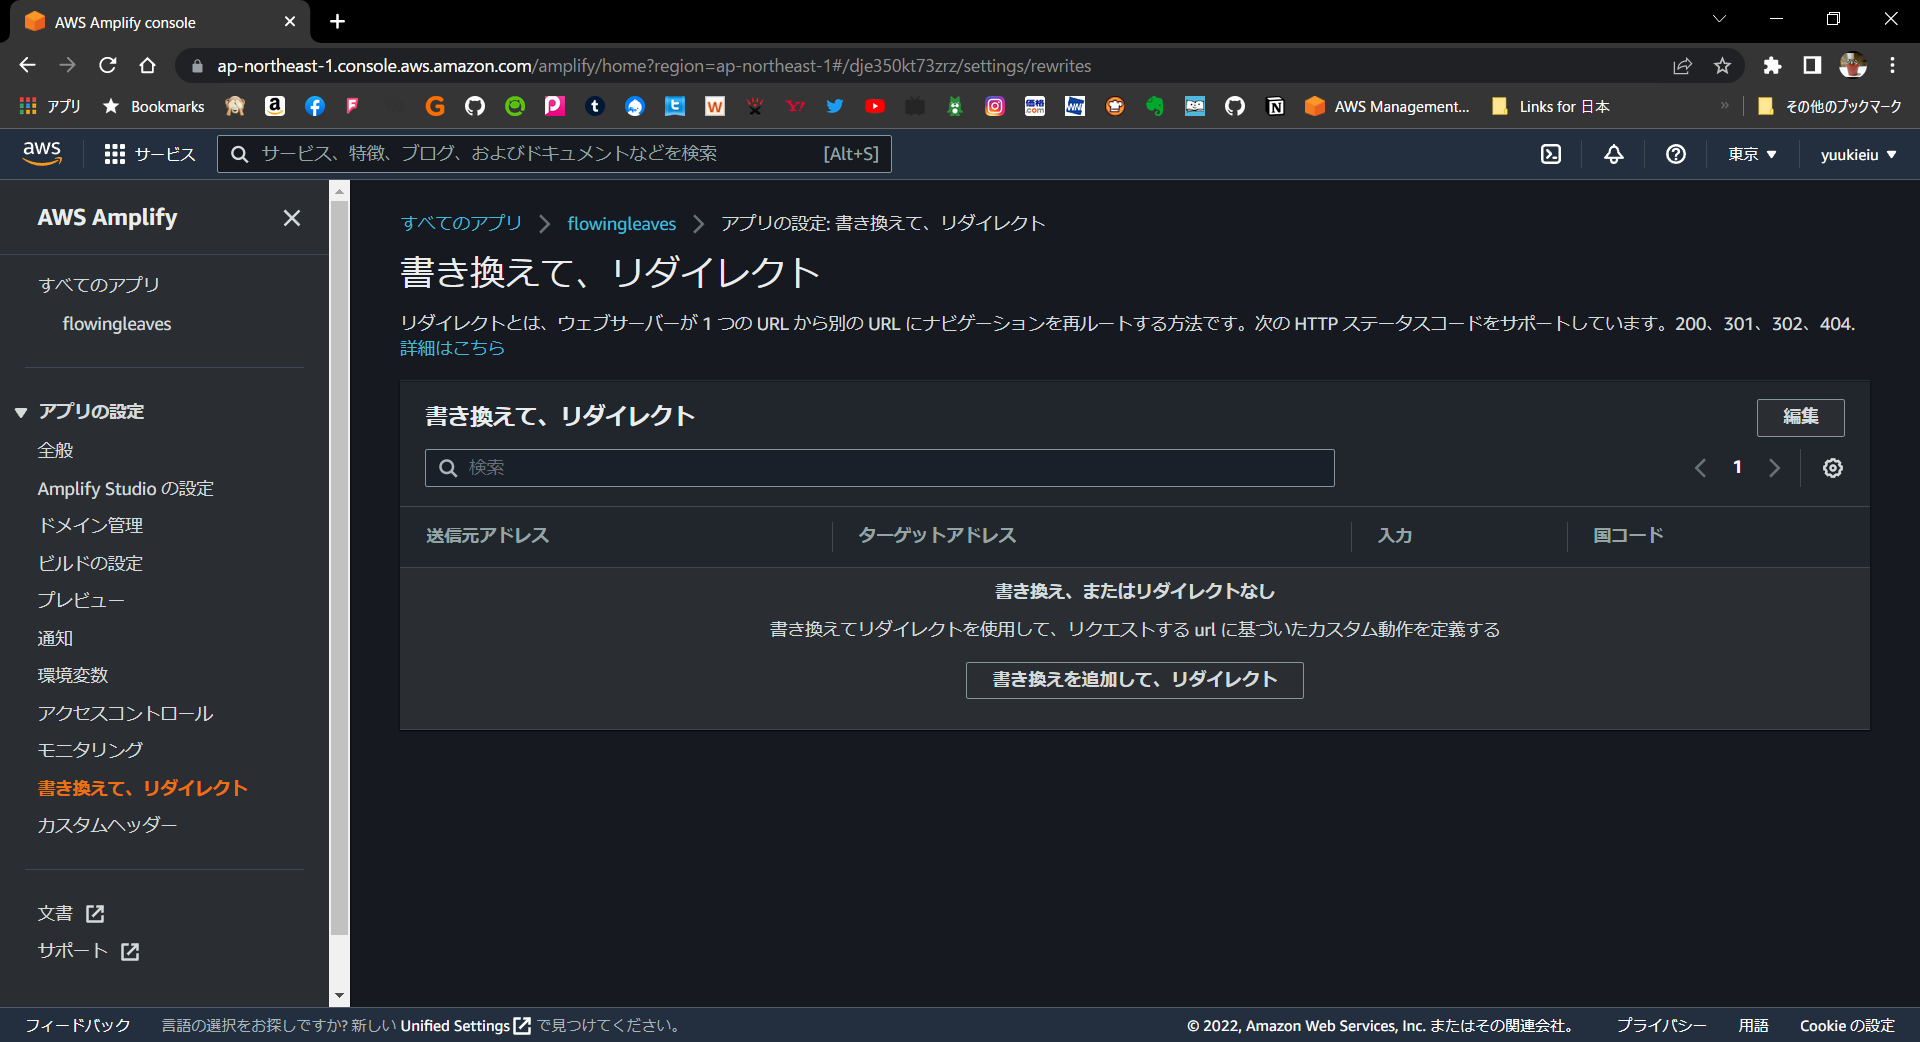
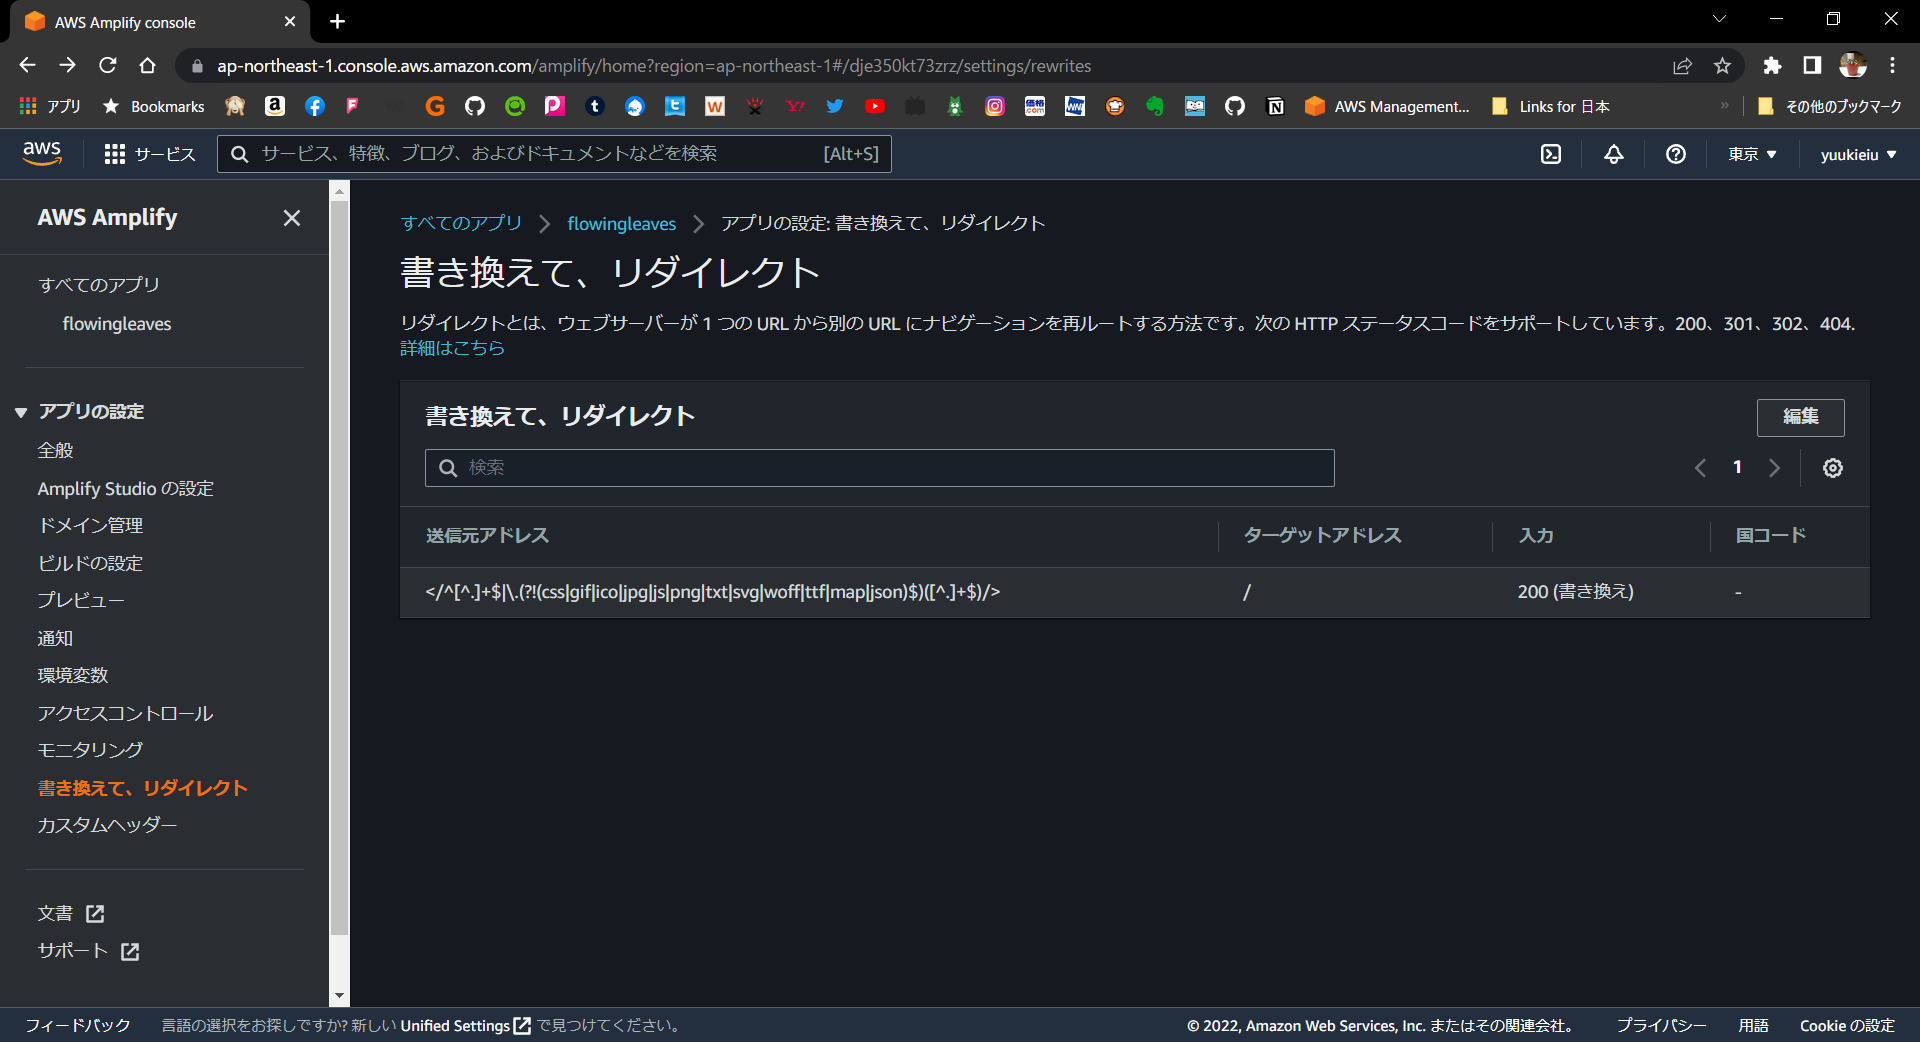
Amplifyコンソールの「書き換えて、リダイレクト」を開き、「書き換えを追加して、リダイレクト」を押下します。
下記のように入力します。
- 送信元アドレス:
</^[^.]+$|\.(?!(css|gif|ico|jpg|js|png|txt|svg|woff|ttf|map|json)$)([^.]+$)/> - ターゲットアドレス:
/ - 入力:
200

最後に「保存」を押すと設定が保存されます。これでF5を押しても403になりません。
次回
なんとかして川に流す動きを作りたいです