概要
こちらの記事を参考に、サーバーレスでwebアプリ開発をしたメモです。
https://qiita.com/minato-naka/items/7b445bcf0794189e65a0
今回作るアプリは、メッセージをサーバに送り付けるだけのアプリです。
心理学界隈では有名な「川と葉っぱのイメージワーク」を視覚的に行うアプリを作ります。
※川と葉っぱのイメージワークとは:https://yoi.shueisha.co.jp/mental/health/462/
①環境
使用したNode.js、npmのバージョンは下記です。
>node --version
v16.15.0
>npm --version
8.5.5
JSのフレームワークはVue.js、UIフレームワークはVuetifyを利用します。
それぞれの説明はほかのすごい方々がやっているので割愛。
②Amplify利用準備・初期設定
参考記事はこちら
https://qiita.com/minato-naka/items/8e5c0999867d170a5f66
Vue CLIインストール
インストール済みなのでバージョン確認のみ。
>vue -V
@vue/cli 5.0.4
Vueプロジェクト作成
プロジェクト名は「flowing-leaves」にしました。
パスカルケースが好きなのですが、プロジェクト名に大文字を入れることはできません。
>vue create flowing-leaves

Vue CLI v5.0.4
? Please pick a preset:
  Default ([Vue 3] babel, eslint)
  Default ([Vue 2] babel, eslint)
> Manually select features

? Check the features needed for your project: (Press <space> to select, <a> to toggle all, <i> to invert selection, and <enter> to proceed)
 (*) Babel
 ( ) TypeScript
 ( ) Progressive Web App (PWA) Support
 (*) Router
 (*) Vuex
 ( ) CSS Pre-processors
 (*) Linter / Formatter
 ( ) Unit Testing
>( ) E2E Testing

? Choose a version of Vue.js that you want to start the project with
  3.x
> 2.x    <-VuetifyがVue3に対応していない(Bataはあるけど)ので2を使います。

? Use history mode for router? (Requires proper server setup for index fallback in production) (Y/n) Y

? Pick a linter / formatter config:
  ESLint with error prevention only
  ESLint + Airbnb config
> ESLint + Standard config
  ESLint + Prettier

? Pick additional lint features: (Press <space> to select, <a> to toggle all, <i> to invert selection, and <enter> to proceed)
>(*) Lint on save
 ( ) Lint and fix on commit

? Where do you prefer placing config for Babel, ESLint, etc.? (Use arrow keys)
> In dedicated config files
  In package.json

? Save this as a preset for future projects? (y/N) N
ここまで入力するとプロジェクトが作成されます。
✨  Creating project in C:\Path\to\flowing-leaves.
🗃  Initializing git repository...
⚙️  Installing CLI plugins. This might take a while...


added 844 packages, and audited 845 packages in 52s

86 packages are looking for funding
  run `npm fund` for details

found 0 vulnerabilities
🚀  Invoking generators...
📦  Installing additional dependencies...


added 145 packages, and audited 990 packages in 13s

124 packages are looking for funding
  run `npm fund` for details

found 0 vulnerabilities
⚓  Running completion hooks...

📄  Generating README.md...

🎉  Successfully created project flowing-leaves.
👉  Get started with the following commands:

 $ cd flowing-leaves
 $ npm run serve
正常に作成できたので、サーバー起動してみます。
>cd flowing-leaves
>npm run serve
 DONE  Compiled successfully in 6139ms                                                                                                                                               17:47:52


  App running at:
  - Local:   http://localhost:8080/
  - Network: http://192.168.11.10:8080/

  Note that the development build is not optimized.
  To create a production build, run npm run build.
無事動きました。
不要な既存コードの削除
若干コードが違ったので載せておく。
<template>
  <div id="app">
-    <nav>
-      <router-link to="/">Home</router-link> |
-      <router-link to="/about">About</router-link>
-    </nav>
    <router-view/>
  </div>
</template>

-<style>
-#app {
-  font-family: Avenir, Helvetica, Arial, sans-serif;
-  -webkit-font-smoothing: antialiased;
-  -moz-osx-font-smoothing: grayscale;
-  text-align: center;
-  color: #2c3e50;
-}

-nav {
-  padding: 30px;
-}

-nav a {
-  font-weight: bold;
-  color: #2c3e50;
-}

-nav a.router-link-exact-active {
-  color: #42b983;
-}
-</style>
import Vue from 'vue'
import VueRouter from 'vue-router'
-import HomeView from '../views/HomeView.vue'

Vue.use(VueRouter)

const routes = [
-  {
-    path: '/',
-    name: 'home',
-    component: HomeView
-  },
-  {
-    path: '/about',
-    name: 'about',
-    // route level code-splitting
-    // this generates a separate chunk (about.[hash].js) for this route
-    // which is lazy-loaded when the route is visited.
-    component: () => import(/* webpackChunkName: "about" */ '../views/AboutView.vue')
-  }
]

const router = new VueRouter({
  mode: 'history',
  base: process.env.BASE_URL,
  routes
})

export default router
src/views/Home.vue src/views/About.vue src/components/HelloWorld.vue
この3つも削除しました。
ページ一覧作成
今回のアプリは、葉っぱにイメージを乗せる画面のみの1画面で構成されます。
葉っぱ作成画面と名付けましょう。
一旦タイトルだけ作ります。
<template>
  <div>
    <h1>葉っぱ作成</h1>
  </div>
</template>

<script>
export default {
  name: 'LeafCreate'
}
</script>
ルーティング設定
src/router/index.jsの設定は下記のようにしました。
import Vue from 'vue'
import VueRouter from 'vue-router'
import LeafCreate from '../views/leaves/Create.vue'

Vue.use(VueRouter)

const routes = [
  {
    path: '/',
    redirect: { name: 'LeafCreate' }
  },
  {
    path: '/leaves/create',
    name: 'LeafCreate',
    component: LeafCreate
  }
]

const router = new VueRouter({
  mode: 'history',
  base: process.env.BASE_URL,
  routes
})

export default router
http://localhost:8080/ にアクセスするとhttp://localhost:8080/albums/create にリダイレクトされます。
Vuetifyインストール
ここでVuetifyを導入しておきます。(もっと早い方がいいのかな?)
参考ページ:https://vuetifyjs.com/ja/getting-started/installation/#vue-cli-306b3088308b30a430f330b930c830fc30eb
>vue add vuetify
 WARN  There are uncommitted changes in the current repository, it's recommended to commit or stash them first.
? Still proceed? Yes <-未コミットがあるけどいいの?的な質問。問題ないのでYes

📦  Installing vue-cli-plugin-vuetify...


added 7 packages, and audited 997 packages in 3s

125 packages are looking for funding
  run `npm fund` for details

found 0 vulnerabilities
✔  Successfully installed plugin: vue-cli-plugin-vuetify

? Choose a preset: (Use arrow keys)
  Configure (advanced)
> Default (recommended)
  Vite Preview (Vuetify 3 + Vite)
  Prototype (rapid development)
  Vuetify 3 Preview (Vuetify 3)


🚀  Invoking generator for vue-cli-plugin-vuetify...
📦  Installing additional dependencies...


added 13 packages, and audited 1010 packages in 11s

128 packages are looking for funding
  run `npm fund` for details

found 0 vulnerabilities
\  Running completion hooks...
C:\Users\yuuki\OneDrive\ドキュメント\開発\葉っぱの川流れ\flowing-leaves\src\views\HomeView.vue
  9:9  error  Component name "Home" should always be multi-word  vue/multi-word-component-names

✖ 1 problem (1 error, 0 warnings)
エラーが出ちゃったけどHomeView.vueはいらないので問題なし。
削除しておきます。
サーバーを起動して、大丈夫そうか確認します。
>npm run serve

 DONE  Compiled successfully in 17166ms                                                                                                                                              18:38:34


  App running at:
  - Local:   http://localhost:8080/
  - Network: http://192.168.11.10:8080/

  Note that the development build is not optimized.
  To create a production build, run npm run build.
起動は問題ないですが、余計なものがついてきてるので直します。
(やっぱり先にやっておけばよかったな…)
<template>
  <v-app>
-    <v-app-bar
-      app
-      color="primary"
-      dark
-    >
-      <div class="d-flex align-center">
-        <v-img
-          alt="Vuetify Logo"
-          class="shrink mr-2"
-          contain
-          src="https://cdn.vuetifyjs.com/images/logos/vuetify-logo-dark.png"
-          transition="scale-transition"
-          width="40"
-        />

-        <v-img
-          alt="Vuetify Name"
-          class="shrink mt-1 hidden-sm-and-down"
-          contain
-          min-width="100"
-          src="https://cdn.vuetifyjs.com/images/logos/vuetify-name-dark.png"
-          width="100"
-        />
-      </div>

-      <v-spacer></v-spacer>

-      <v-btn
-        href="https://github.com/vuetifyjs/vuetify/releases/latest"
-        target="_blank"
-        text
-      >
-        <span class="mr-2">Latest Release</span>
-        <v-icon>mdi-open-in-new</v-icon>
-      </v-btn>
-    </v-app-bar>

    <v-main>
      <router-view/>
    </v-main>
  </v-app>
</template>

<script>

export default {
  name: 'App',

  data: () => ({
    //
  })
}
</script>
余計なものが消えました。
Amplify CLIインストール
AWSのアカウントは既に用意してあるので、Amplify CLIのインストールをします。
>npm i -g @aws-amplify/cli

changed 26 packages, and audited 27 packages in 1m

7 packages are looking for funding
  run `npm fund` for details

found 0 vulnerabilities
amplify configure
IAMユーザの設定をします。
>amplify configure
Follow these steps to set up access to your AWS account:

Sign in to your AWS administrator account:
https://console.aws.amazon.com/
Press Enter to continue
ブラウザでAWSコンソールにログインします。
その後ターミナルでEnter。
色々聞かれるので入力していきます。
Specify the AWS Region
? region:
  eu-west-2
  eu-west-3
  eu-central-1
> ap-northeast-1
  ap-northeast-2
  ap-southeast-1
  ap-southeast-2
(Move up and down to reveal more choices)

Specify the username of the new IAM user:
? user name:  flowing-leaves-user

Complete the user creation using the AWS console
https://console.aws.amazon.com/iam/home?region=ap-northeast-1#/users$new?step=final&accessKey&userNames=flowing-leaves-user&permissionType=policies&policies=arn:aws:iam::aws:policy%2FAdministratorAccess-Amplify
Press Enter to continue
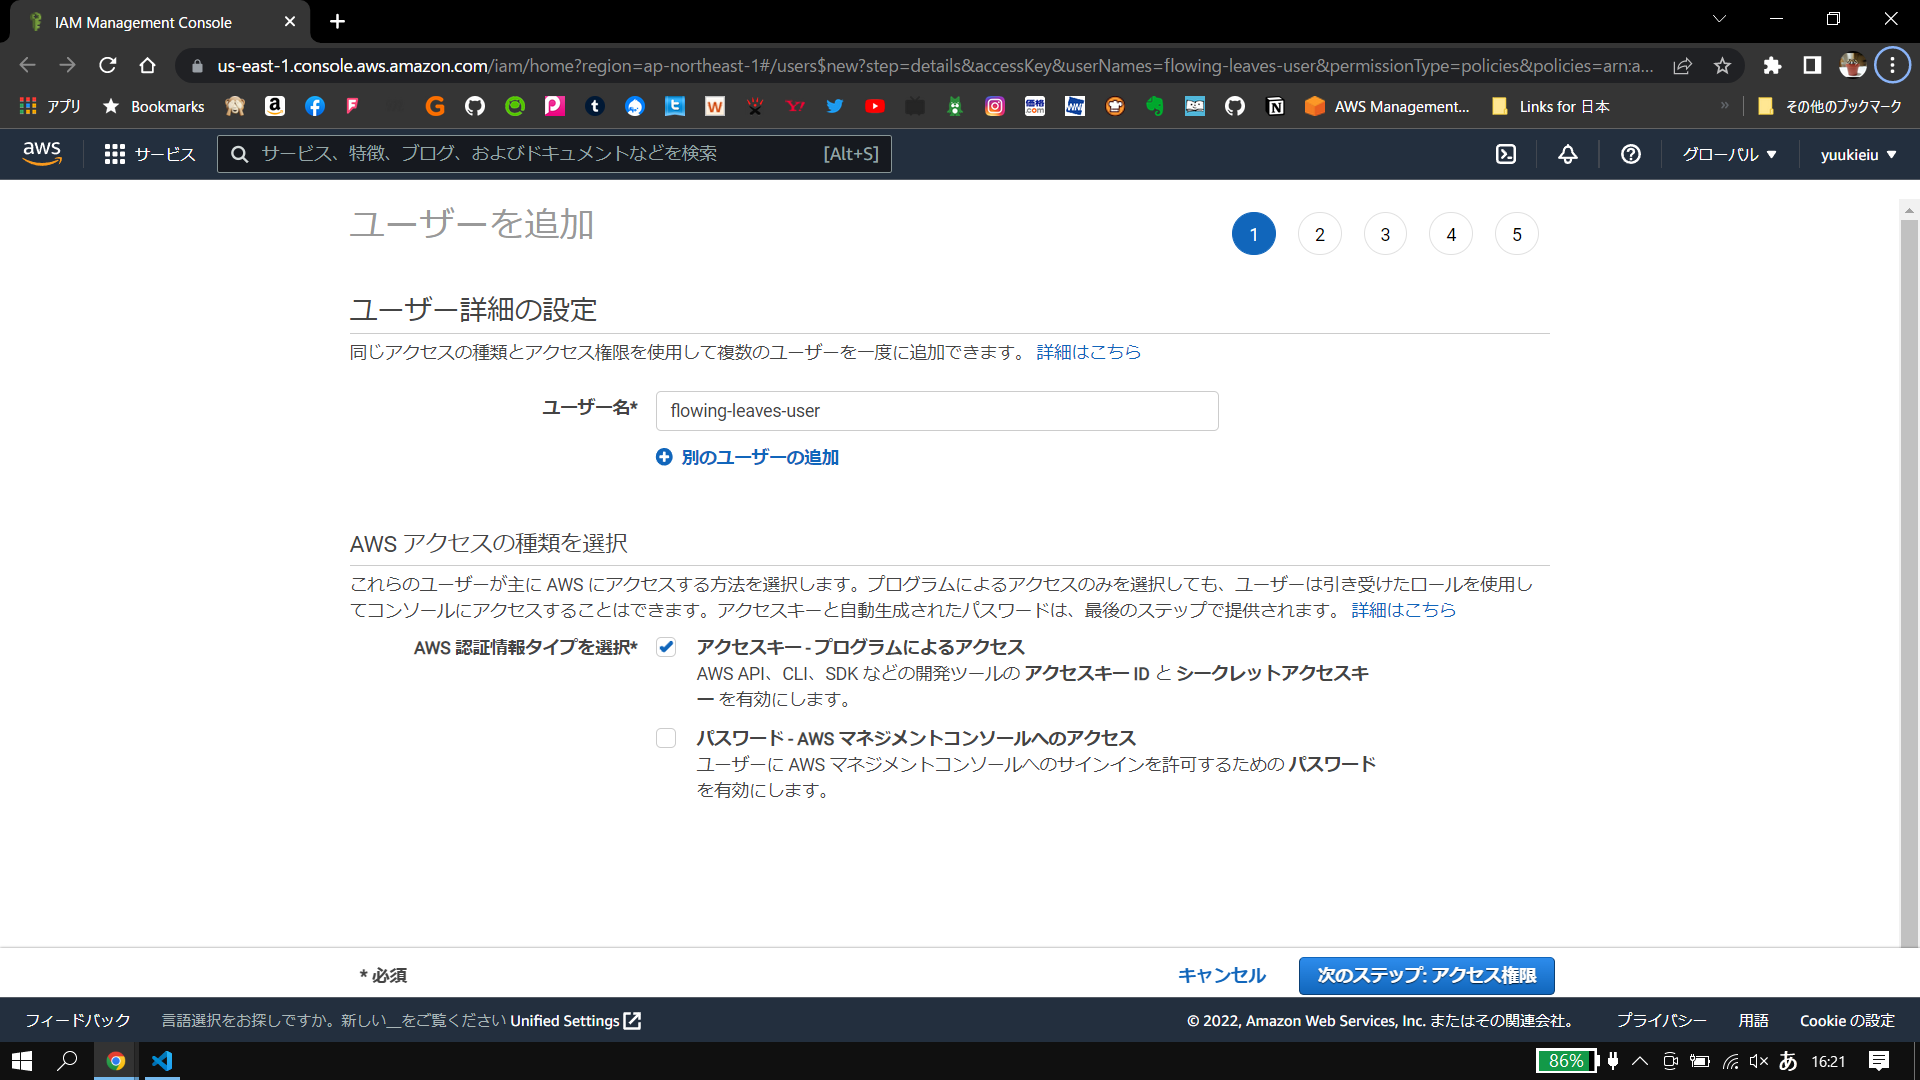
またブラウザに飛ばされますのでブラウザで設定していきます。
プログラムによるアクセスを選択して次のステップへ。(最初から選択されていました。)
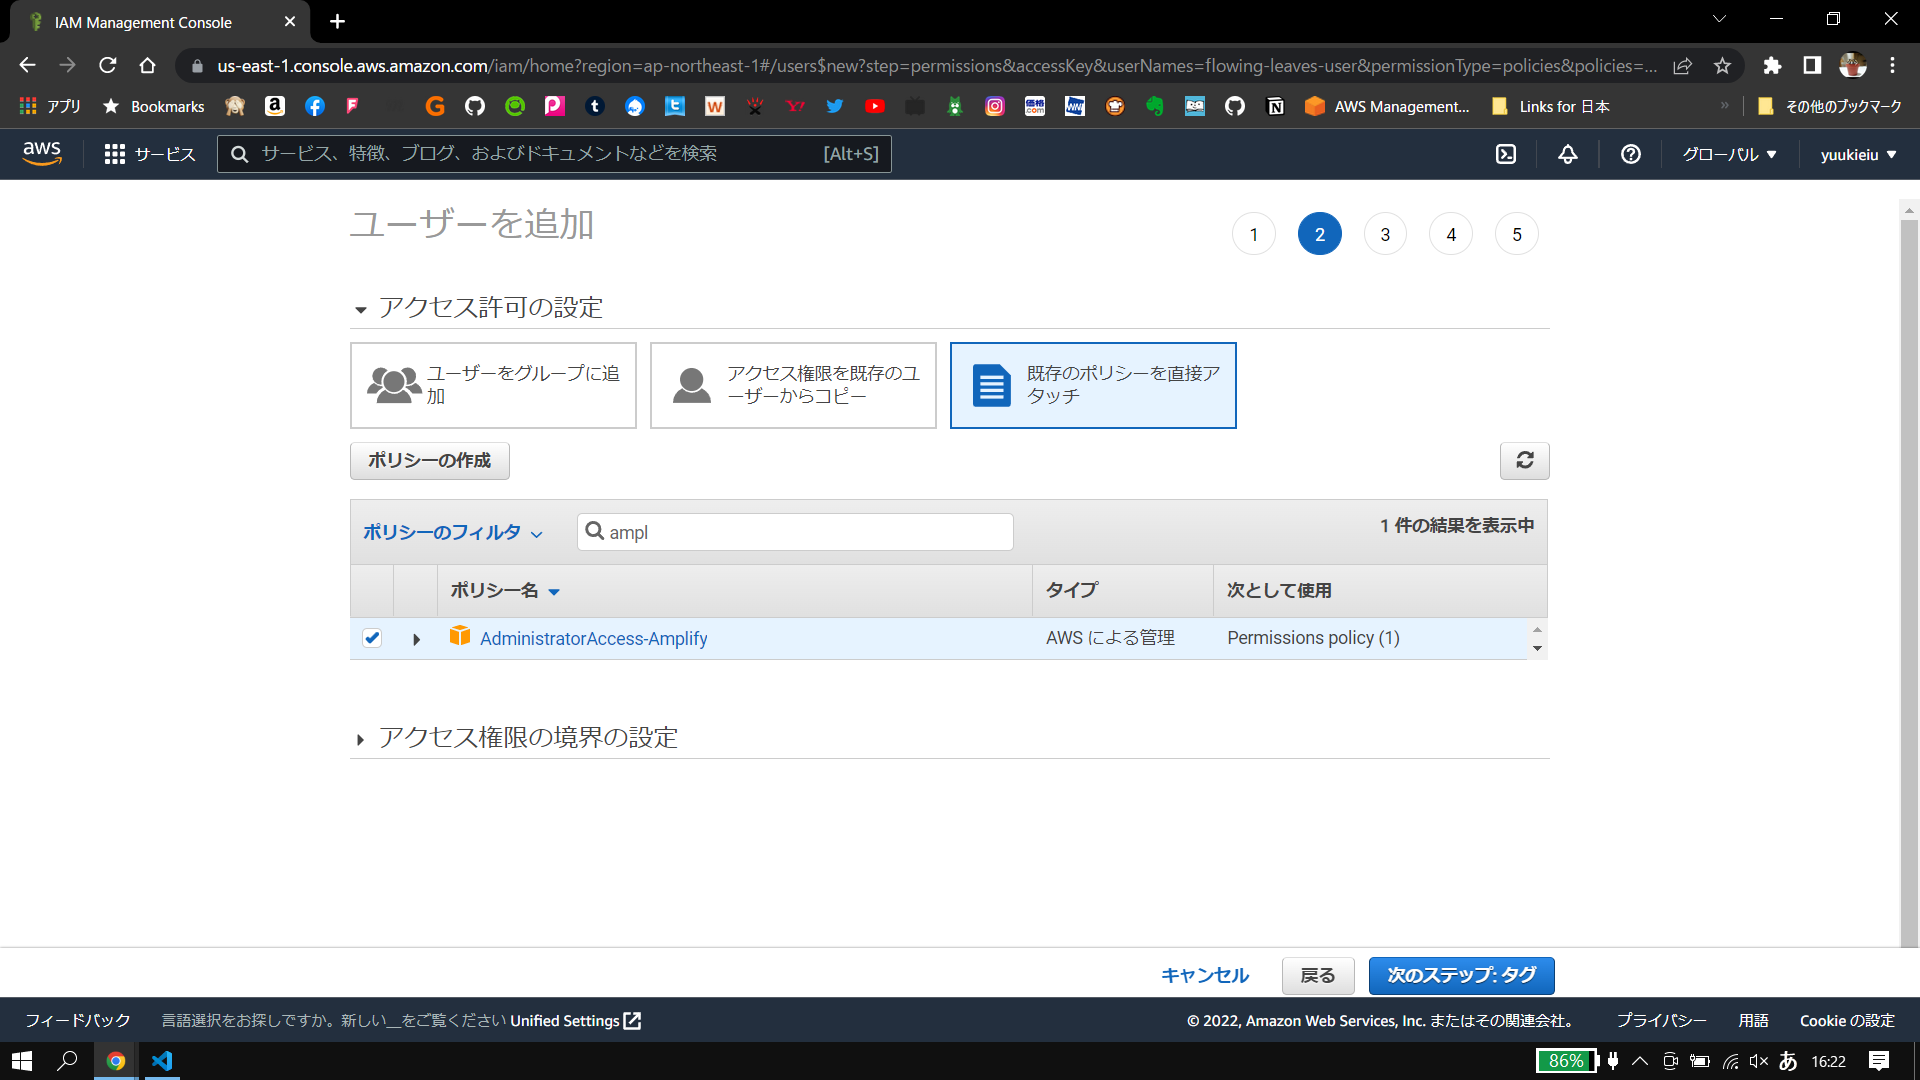
付与する権限を聞かれるので、参考記事の通り「AdministratorAccess-Amplify」にチェックし、次のステップへ。
(ほかに必要な場合は追加したりする。どの権限つけると何ができるかよく把握してないので、いつも「何かができない」→「その権限をつける」とやってしまいがち)
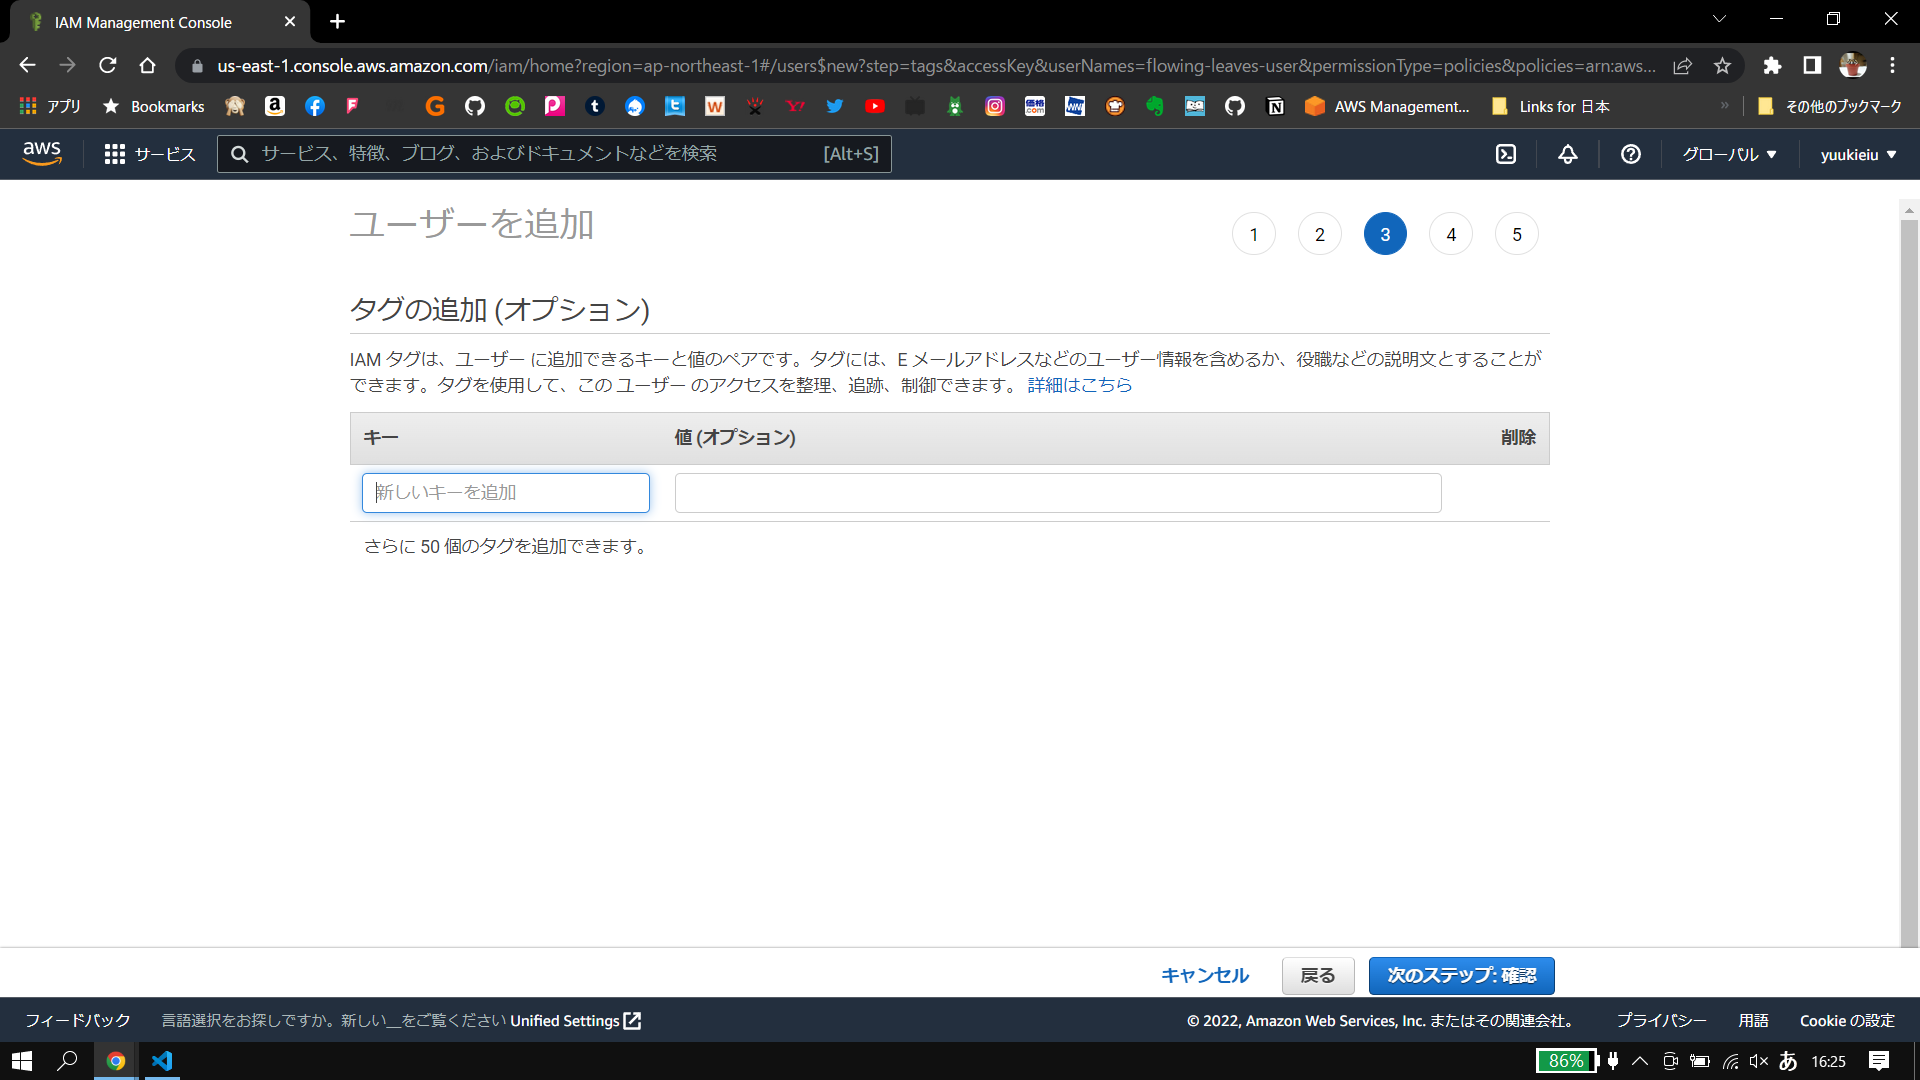
タグは特に設定しません。
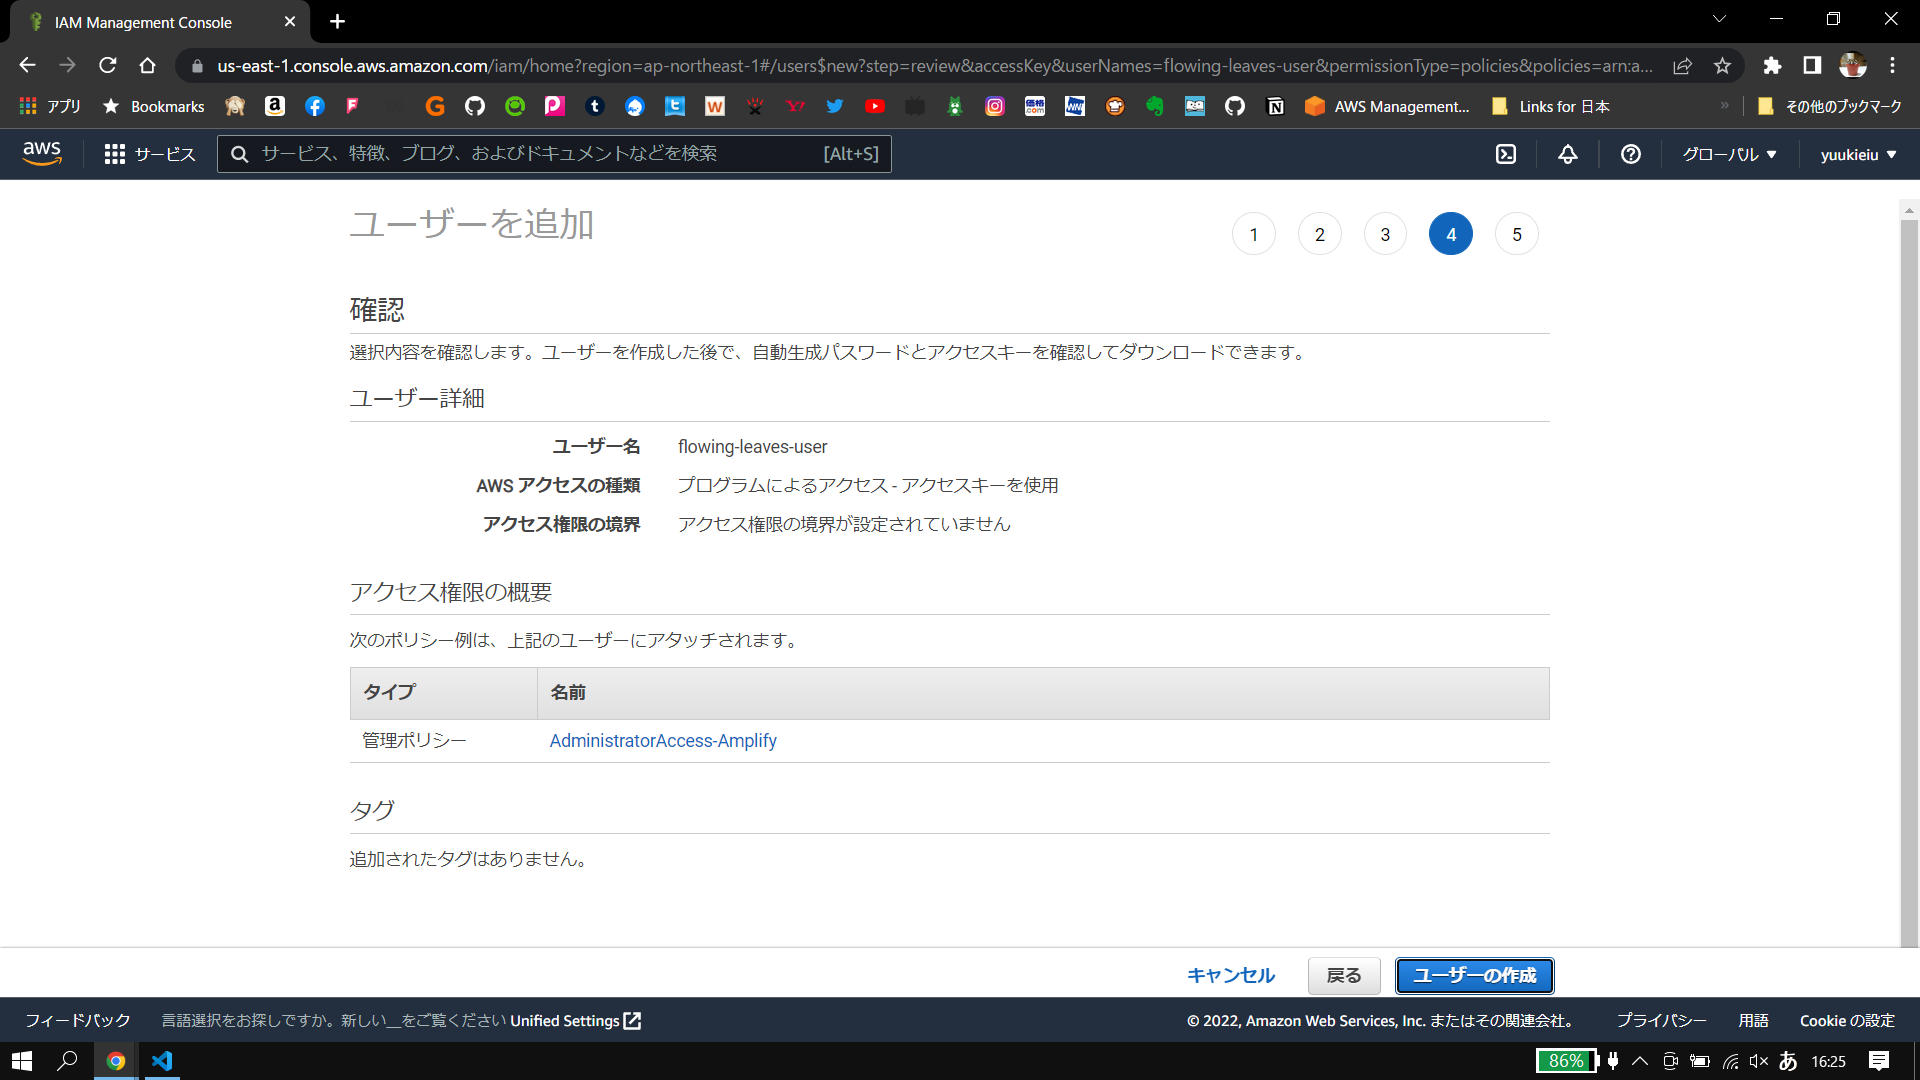
最後の確認画面でOKだったらユーザの作成。csvのダウンロードをしておきます。
ターミナルに戻りEnterキーを押して、IAMのアクセスキーとシークレットアクセスキーを入力。
プロファイル名はいつ使うんだかよくわかってないけどわかるように設定。いつか使う時にわかればいいや。
Enter the access key of the newly created user:
? accessKeyId:  ********************
? secretAccessKey:  ****************************************
This would update/create the AWS Profile in your local machine
? Profile Name:  flowing-leaves

Successfully set up the new user.
amplify init
Amplifyプロジェクトを作成します。
プロジェクト名を入力すると下記のように「これでいいか?」と聞かれます。
>amplify init
Note: It is recommended to run this command from the root of your app directory
? Enter a name for the project flowingleaves
The following configuration will be applied:

Project information
| Name: flowingleaves
| Environment: dev
| Default editor: Visual Studio Code
| App type: javascript
| Javascript framework: vue
| Source Directory Path: src
| Distribution Directory Path: dist
| Build Command: npm.cmd run-script build
| Start Command: npm.cmd run-script serve

? Initialize the project with the above configuration? (Y/n)
この設定だとBuild CommandとStart Commandでnpm-scriptを使う設定になっています。
普通にnpm run buildとnpm run serveでいいので、上記の質問はnにします。
? Initialize the project with the above configuration? No
? Enter a name for the environment dev
? Choose your default editor: Visual Studio Code
? Choose the type of app that you're building javascript
Please tell us about your project
? What javascript framework are you using vue
? Source Directory Path:  src
? Distribution Directory Path: dist
? Build Command:  npm run build
? Start Command: npm run serve
Using default provider  awscloudformation
? Select the authentication method you want to use: AWS profile

For more information on AWS Profiles, see:
https://docs.aws.amazon.com/cli/latest/userguide/cli-configure-profiles.html

? Please choose the profile you want to use flowing-leaves
ここまで入力するとAWS上にAmplifyプロジェクトが作成されます。
CREATE_COMPLETE amplify-flowingleaves-dev-163656 AWS::CloudFormation::Stack Sun May 22 2022 16:37:39 GMT+0900 (GMT+09:00)
√ Successfully created initial AWS cloud resources for deployments.
√ Initialized provider successfully.
✅ Initialized your environment successfully.
Your project has been successfully initialized and connected to the cloud!
Some next steps:
"amplify status" will show you what you've added already and if it's locally configured or deployed
"amplify add <category>" will allow you to add features like user login or a backend API
"amplify push" will build all your local backend resources and provision it in the cloud
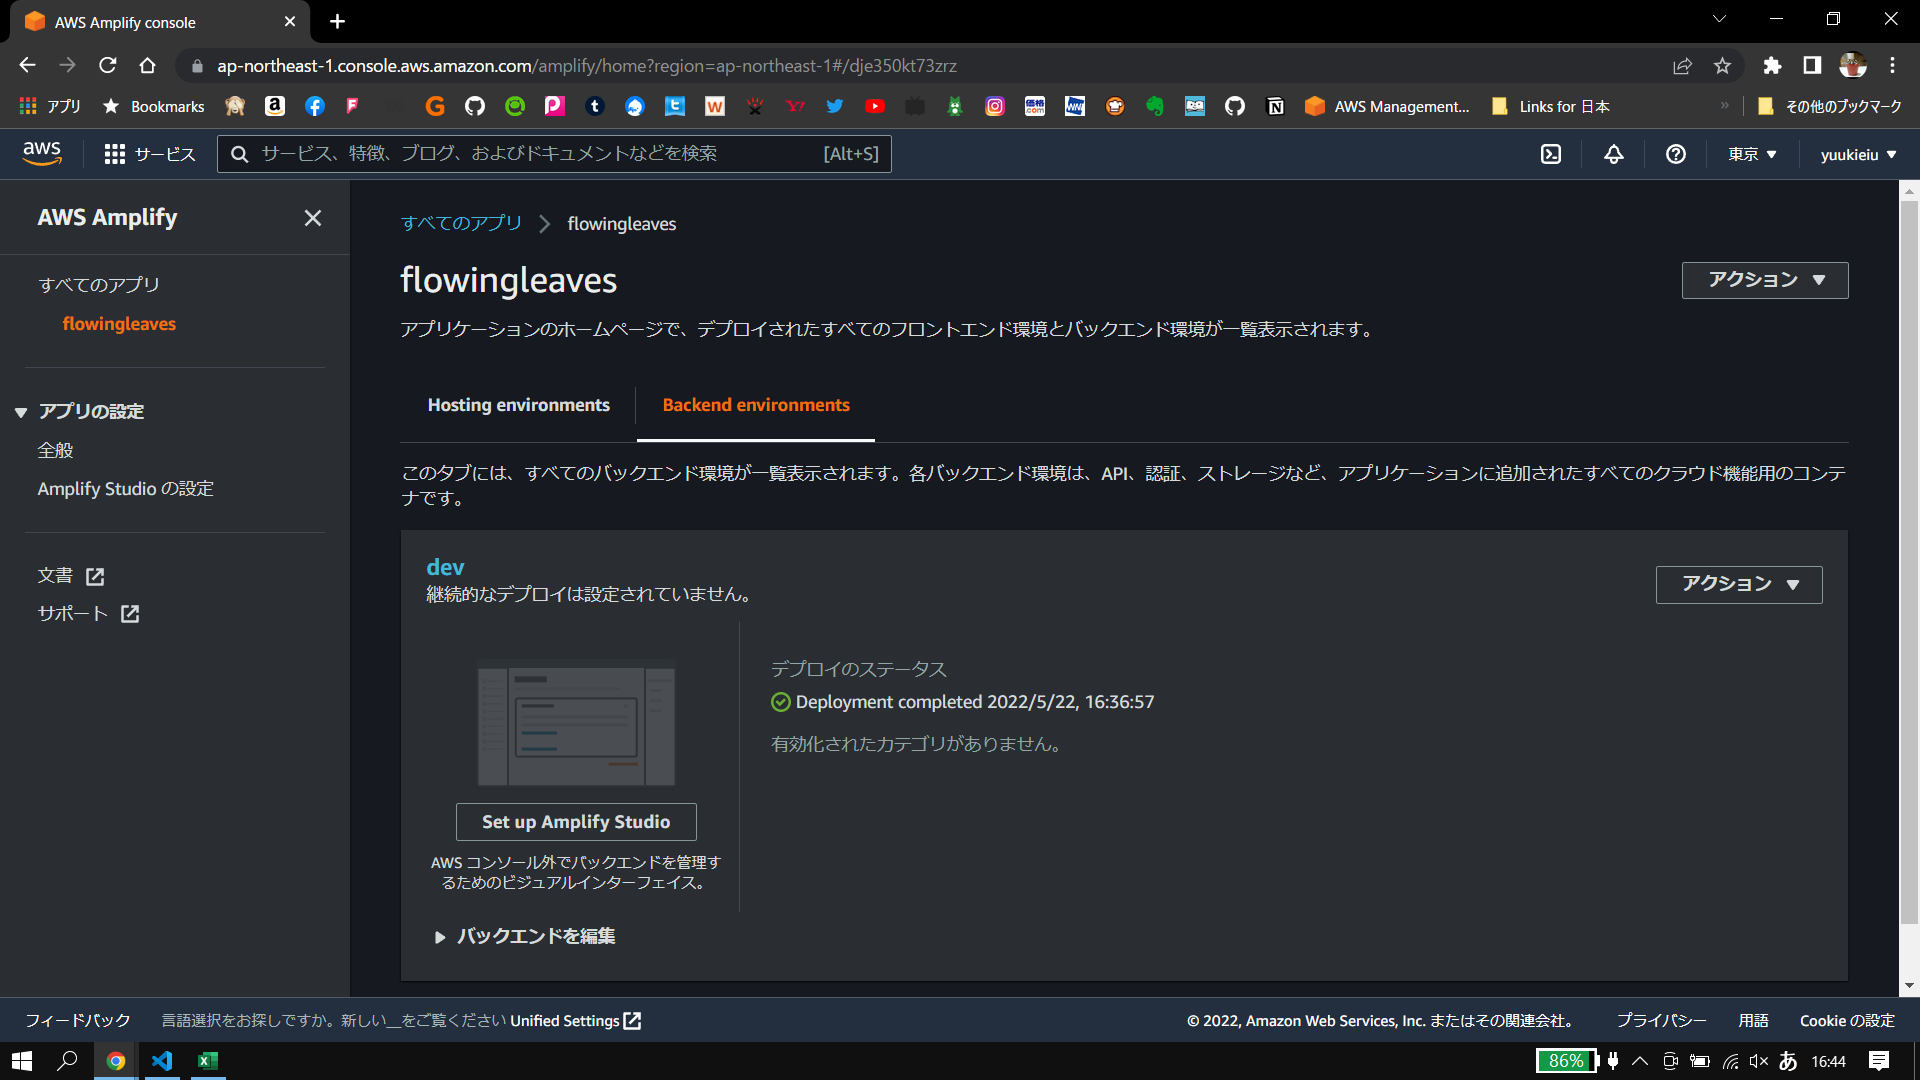
"amplify console" to open the Amplify Console and view your project status
"amplify publish" will build all your local backend and frontend resources (if you have hosting category added) and provision it in the cloud
Pro tip:
Try "amplify add api" to create a backend API and then "amplify push" to deploy everything
AWSのコンソールで確認できます。
フロントエンド用amplifyパッケージインストール
下記コマンド実行します。
めちゃめちゃWARN出ますがERRじゃないからOKでしょの精神で無視します。個人開発なんで。
>npm install aws-amplify @aws-amplify/ui-components
npm WARN deprecated source-map-url@0.4.1: See https://github.com/lydell/source-map-url#deprecated
npm WARN deprecated urix@0.1.0: Please see https://github.com/lydell/urix#deprecated
npm WARN deprecated resolve-url@0.2.1: https://github.com/lydell/resolve-url#deprecated
npm WARN deprecated source-map-resolve@0.5.3: See https://github.com/lydell/source-map-resolve#deprecated
npm WARN deprecated querystring@0.2.0: The querystring API is considered Legacy. new code should use the URLSearchParams API instead.
npm WARN deprecated uglify-es@3.3.9: support for ECMAScript is superseded by `uglify-js` as of v3.13.0
npm WARN deprecated uuid@3.4.0: Please upgrade  to version 7 or higher.  Older versions may use Math.random() in certain circumstances, which is known to be problematic.  See https://v8.dev/blog/math-random for details.
npm WARN deprecated uuid@3.4.0: Please upgrade  to version 7 or higher.  Older versions may use Math.random() in certain circumstances, which is known to be problematic.  See https://v8.dev/blog/math-random for details.
npm WARN deprecated uuid@3.4.0: Please upgrade  to version 7 or higher.  Older versions may use Math.random() in certain circumstances, which is known to be problematic.  See https://v8.dev/blog/math-random for details.
npm WARN deprecated uuid@3.4.0: Please upgrade  to version 7 or higher.  Older versions may use Math.random() in certain circumstances, which is known to be problematic.  See https://v8.dev/blog/math-random for details.
npm WARN deprecated uuid@3.4.0: Please upgrade  to version 7 or higher.  Older versions may use Math.random() in certain circumstances, which is known to be problematic.  See https://v8.dev/blog/math-random for details.
npm WARN deprecated uuid@3.4.0: Please upgrade  to version 7 or higher.  Older versions may use Math.random() in certain circumstances, which is known to be problematic.  See https://v8.dev/blog/math-random for details.
npm WARN deprecated uuid@3.4.0: Please upgrade  to version 7 or higher.  Older versions may use Math.random() in certain circumstances, which is known to be problematic.  See https://v8.dev/blog/math-random for details.
npm WARN deprecated uuid@3.3.2: Please upgrade  to version 7 or higher.  Older versions may use Math.random() in certain circumstances, which is known to be problematic.  See https://v8.dev/blog/math-random for details.

added 934 packages, and audited 1944 packages in 2m

137 packages are looking for funding
  run `npm fund` for details

found 0 vulnerabilities
フロントエンドでパッケージのセットアップ
src/main.jsにimportを追加します。
参考ページの通りに追記して(セミコロンとかとってるけど)こうなります。
import Vue from 'vue'
import App from './App.vue'
import router from './router'
import store from './store'
import vuetify from './plugins/vuetify'
import Amplify from 'aws-amplify'
import aws_exports from './aws-exports'
import {
  applyPolyfills,
  defineCustomElements
} from '@aws-amplify/ui-components/loader'
Amplify.configure(aws_exports)
applyPolyfills().then(() => {
  defineCustomElements(window)
})

Vue.config.productionTip = false

new Vue({
  router,
  store,
  vuetify,
  render: h => h(App)
}).$mount('#app')
で、このままだとAmplifyでdefaultが非推奨と言われます。
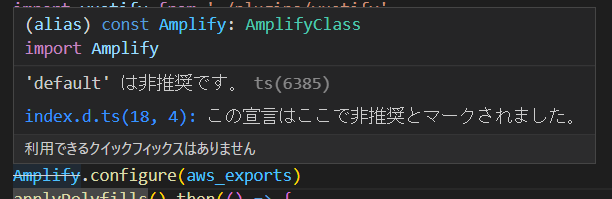
ググってみるとnamed exportされているAmplifyを使うといいとおっしゃっている方を発見(こちら)。
importの書き方をnamed exportの時の呼び出し方に変えたら、直りました。
import Vue from 'vue'
import App from './App.vue'
import router from './router'
import store from './store'
import vuetify from './plugins/vuetify'
import { Amplify } from 'aws-amplify' <- { } を追加しただけ
import aws_exports from './aws-exports'
import {
  applyPolyfills,
  defineCustomElements
} from '@aws-amplify/ui-components/loader'
Amplify.configure(aws_exports)
applyPolyfills().then(() => {
  defineCustomElements(window)
})

Vue.config.productionTip = false

new Vue({
  router,
  store,
  vuetify,
  render: h => h(App)
}).$mount('#app')
おわり
参考記事もいったんここで一区切りなので、次回に続きます。