はじめに
今回は,RaspberryPiにWindows 10 IoT Coreを導入したのでLチカをして遊んでみる.
環境
- Raspberry Pi 3 Model B(OS:Windows 10 IoT core ver10.0.17134.1)
- VisualStudio2017
手順
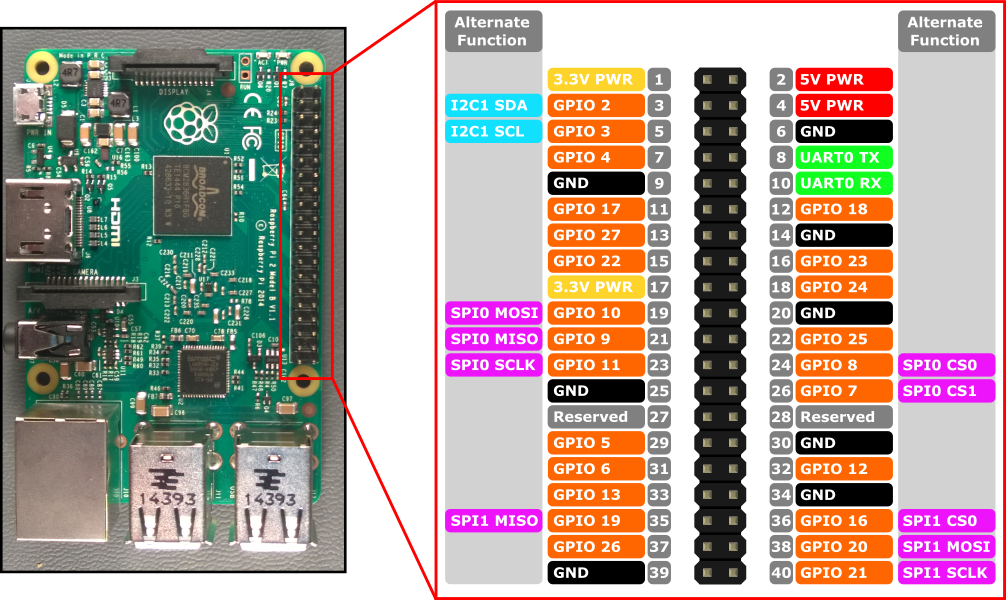
まず,RaspberryPi3のPinMappingを確認しておく.

今回は,
- GPIO 17(赤色LED用)
- GPIO 27(青色LED用)
- GPIO 22(緑色LED用)
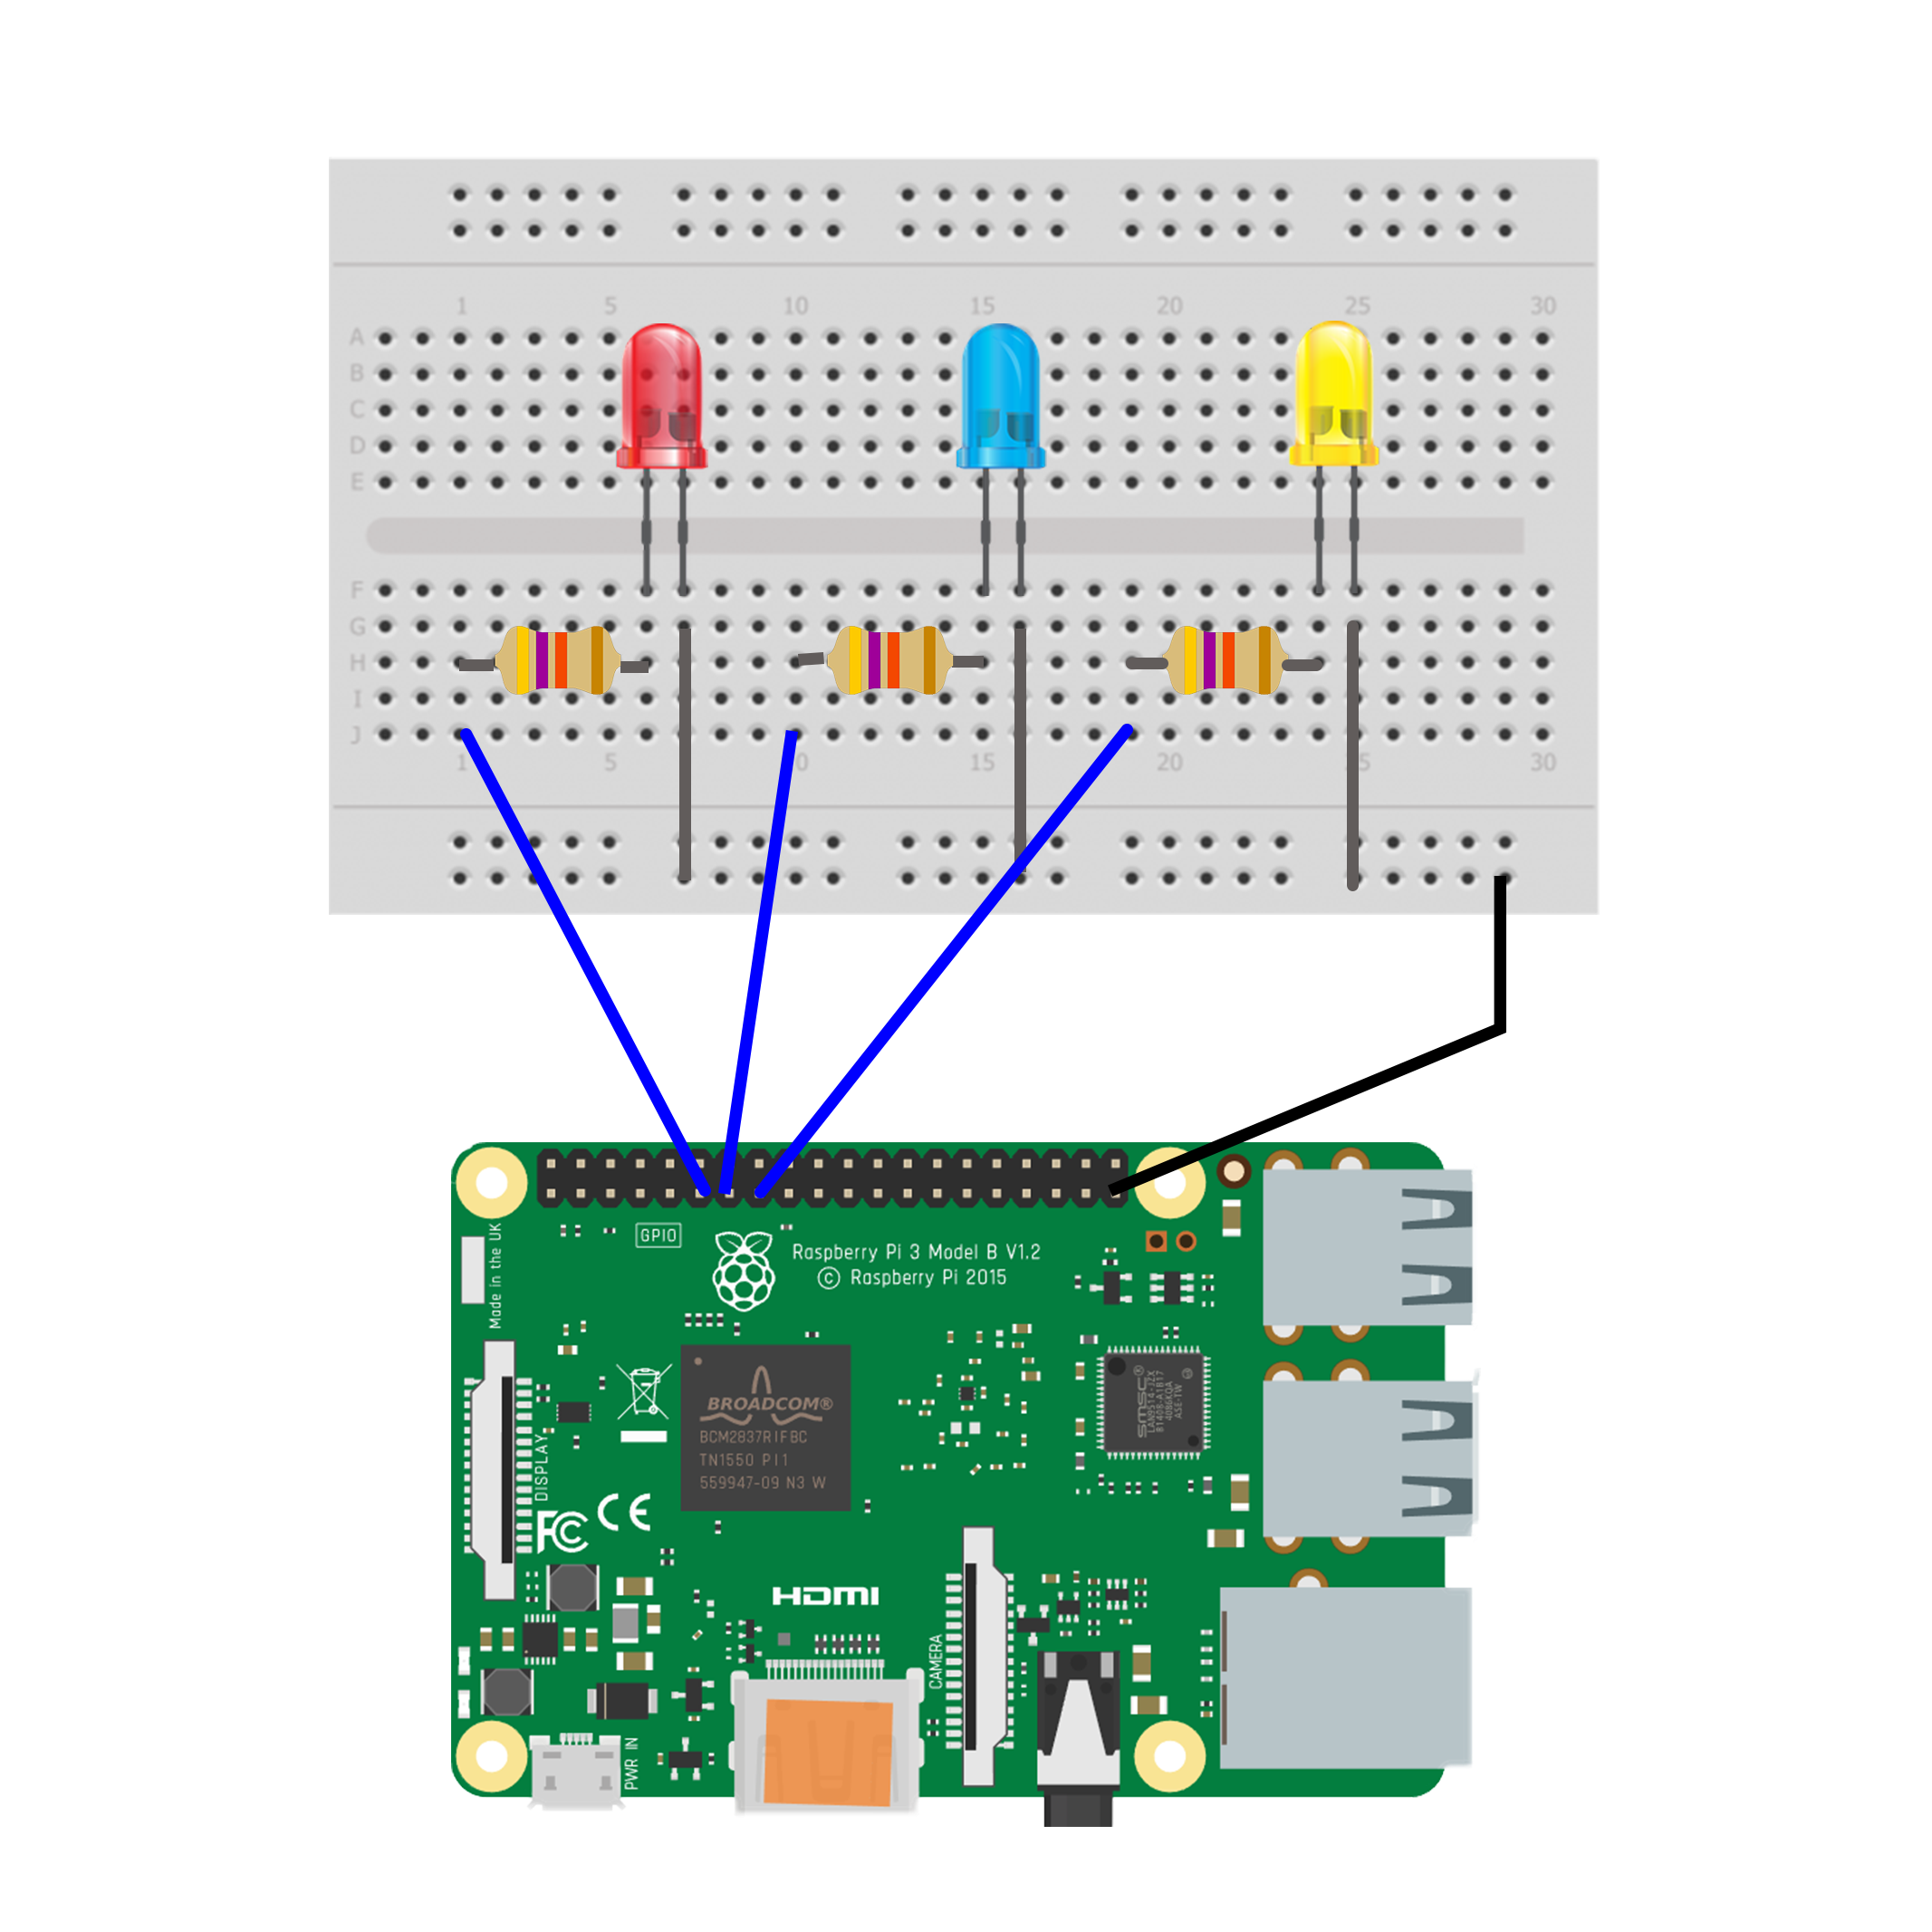
の3つのPINを使って回路を設計する.
そして以下のように回路を設計した.

コーディング
※まず初めに,VisualStudioから参照設定で【Windows IoT Extension SDK】を必ず追加してください.
csのみでxamlは省略します.
UsingModule.cs
using Windows.Devices.Gpio;
using Windows.UI.Xaml;
using Windows.UI.Xaml.Controls;

namespace UsingModule
{
    public sealed partial class MainPage : Page
    {
        private const int RED_LED_PIN = 17; // 接続してるGIOPピン番号
        private const int BLUE_LED_PIN = 27; // 接続してるGPIOピン番号
        private const int GREEN_LED_PIN = 22; // 接続してるGPIOピン番号
        private GpioPin pin_RED; //定義するGPIOピン
        private GpioPin pin_BLUE; //定義するGPIOピン
        private GpioPin pin_GREEN; //定義するGPIOピン
        private bool RED_bool = false;
        private bool BLUE_bool = false;
        private bool GREEN_bool = false;

        public MainPage()
        {
            this.InitializeComponent();

            /* 各GPIOピンをセットアップする */
            setupGPIO(ref pin_RED, RED_LED_PIN);
            setupGPIO(ref pin_GREEN, GREEN_LED_PIN);
            setupGPIO(ref pin_BLUE, BLUE_LED_PIN);

        }

        /// <summary>
        /// GPIOピンをセットアップするメソッド
        /// </summary>
        /// <param name="pin"></param>
        /// <param name="PIN"></param>
        private void setupGPIO(ref GpioPin pin, int PIN)
        {
            var gpio = GpioController.GetDefault();

            if (gpio == null)
            {
                pin = null;
                return;
            }

            pin = gpio.OpenPin(PIN); // GPIOをオープン
            pin.Write(GpioPinValue.Low); // 最初消しておく
            pin.SetDriveMode(GpioPinDriveMode.Output); //LEDをアウトプットモードに設定
        }

        private void onClick_RED(object sender, RoutedEventArgs e)
        {
            if (RED_bool == false)
            {
                pin_RED.Write(GpioPinValue.High); // LEDオン
                RED_bool = true;
            }
            else if(RED_bool == true)
            {
                pin_RED.Write(GpioPinValue.Low); // LEDオフ
                RED_bool = false;
            }
        }

        private void onClick_BLUE(object sender, RoutedEventArgs e)
        {
            if (BLUE_bool == false)
            {
                pin_BLUE.Write(GpioPinValue.High);
                BLUE_bool = true;
            }
            else if (BLUE_bool == true)
            {
                pin_BLUE.Write(GpioPinValue.Low);
                BLUE_bool = false;
            }
        }

        private void onClick_GREEN(object sender, RoutedEventArgs e)
        {
            if (GREEN_bool == false)
            {
                pin_GREEN.Write(GpioPinValue.High);
                GREEN_bool = true;
            }
            else if (GREEN_bool == true)
            {
                pin_GREEN.Write(GpioPinValue.Low);
                GREEN_bool = false;
            }
        }
    }
}
実行結果
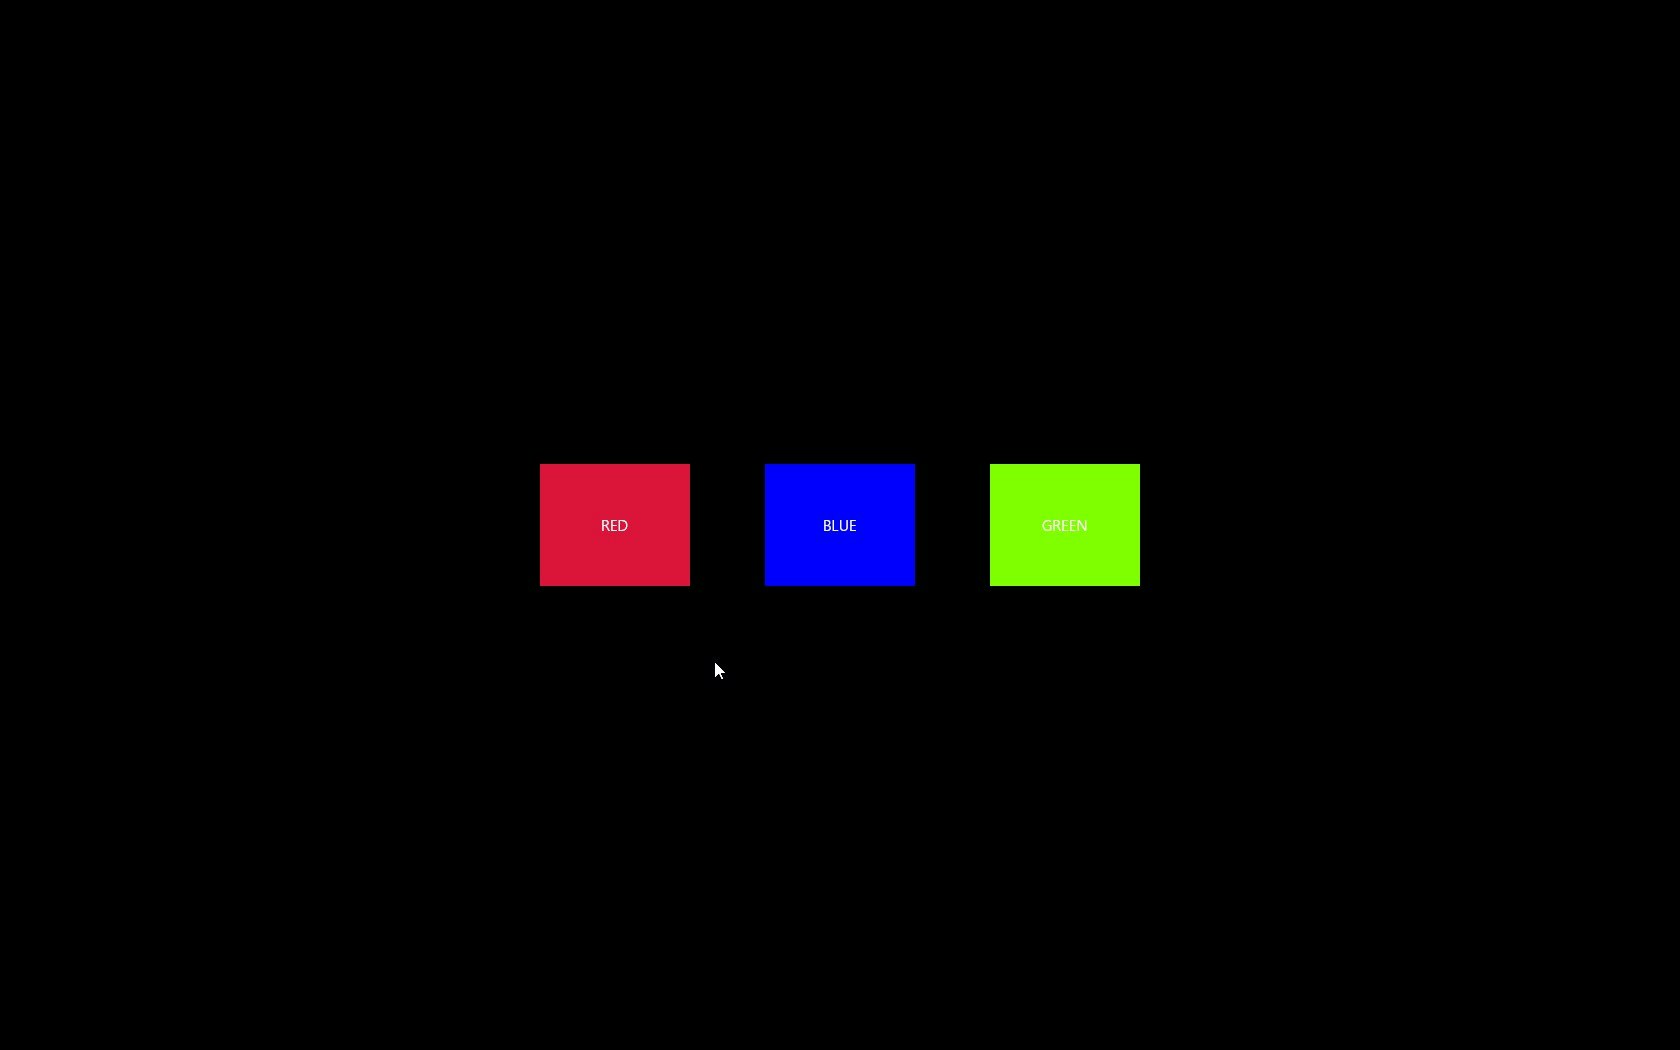
Raspberry Pi側での出力画面
ボタンを押すと,そのLEDが光ります.

UWPアプリでRaspBerryPiを動かすのにも少し慣れ的ました.