はじめに
WindowsでLinux環境が欲しい時にはWSL2のUbuntu等を構築する事があると思うが、そのWSL2のUbuntuにSSH接続する部分で躓いた。
(ググって色々出てきたが、それぞれやらなくてもいい事ややらないといけない事が抜けたりしていたので)その解決した部分について備忘録を残しておく。
WSL2でUbuntuを使えるようにする
公式のWSL のインストールを参照。
インストールに成功すると、以下のようなlogが出るが、eth0がUbuntuのホスト(IP)になるのでメモしておく(ip a show dev eth0コマンドでも確認できる)。
Installation successful!
# 省略
Welcome to Ubuntu 20.04 LTS (GNU/Linux 5.4.72-microsoft-standard-WSL2 x86_64)

# 省略
  Memory usage: 1%                 IPv4 address for eth0: 172.30.xx.xx
# 省略
パスワードでSSH接続できるか?を検証する
以下のコマンドを実行する。
$ sudo service ssh start
 * Starting OpenBSD Secure Shell server sshd                                                                     [ OK ]

$ sudo vim /etc/ssh/sshd_config

$ sudo service ssh status
 * sshd is running
※sudo vim /etc/ssh/sshd_configでは、PasswordAuthentication yesに変更する
※sudo service ssh startでsshdを立ち上げる際に以下のようなエラーが出る場合、sudo ssh-keygen -Aでホスト鍵(/etc/ssh/ssh_host_key、/etc/ssh/ssh_host_dsa_key)を生成する必要がある。
$ sudo service ssh start
 * Starting OpenBSD Secure Shell server sshd                                                                            sshd: no hostkeys available -- exiting.
                                                                                                                 [fail]
ホスト側(WindowsのPowerShellとかcmd)でssh {user name}@{Ubuntuのホスト(IP)}とすると接続できる。
PS C:\WINDOWS\system32> ssh yuta_katayama@172.30.xx.xx
The authenticity of host '172.30.xx.xx (172.30.xx.xx)' can't be established.
ECDSA key fingerprint is SHA256:MDE8NoX6PL56WvVkDsWPGX07ObTS+WP2dUywnh39sF8.
Are you sure you want to continue connecting (yes/no/[fingerprint])? yes
Warning: Permanently added '172.30.xx.xx' (ECDSA) to the list of known hosts.
yuta_katayama@172.30.xx.xx's password:
Welcome to Ubuntu 20.04 LTS (GNU/Linux 5.4.72-microsoft-standard-WSL2 x86_64)

yuta_katayama@DESKTOP-PS112J6:~$ exit
logout
Connection to 172.30.xx.xx closed.
公開鍵方式でSSH接続する
ホスト側でsshの公開鍵を作成し、Ubuntuの~/.ssh/authorized_keysに登録する。
## windowsのgit bash
$ ssh-keygen -t ed25519 -C ""
Generating public/private ed25519 key pair.
Enter file in which to save the key (/c/Users/user/.ssh/id_ed25519): wsl2_ubuntu
Enter passphrase (empty for no passphrase):
Enter same passphrase again:
Your identification has been saved in wsl2_ubuntu.
Your public key has been saved in wsl2_ubuntu.pub.

$ cat wsl2_ubuntu.pub
## Ubuntu
$ mkdir ~/.ssh
$ touch ~/.ssh/authorized_keys
$ vim ~/.ssh/authorized_keys
$ chmod 700 ~/.ssh
$ chmod 600 ~/.ssh/authorized_keys
$ sudo vim /etc/ssh/sshd_config
$ sudo service ssh restart
※sudo vim /etc/ssh/sshd_configでは、PasswordAuthentication no, PubkeyAuthentication yesにそれぞれ変更する
※上記のようにUbuntu上で手動でauthorized_keysを登録するのではなく、
ssh-copy-id -i ~/.ssh/id_rsa.pub <user_name>@<ip_address>
のようにして登録する事もできるので、そちらの方が簡単かも。
sshd_config全体はこちらを参照
yuta_katayama@DESKTOP-PS112J6:~$ cat /etc/ssh/sshd_config
#       $OpenBSD: sshd_config,v 1.103 2018/04/09 20:41:22 tj Exp $

# This is the sshd server system-wide configuration file.  See
# sshd_config(5) for more information.

# This sshd was compiled with PATH=/usr/bin:/bin:/usr/sbin:/sbin

# The strategy used for options in the default sshd_config shipped with
# OpenSSH is to specify options with their default value where
# possible, but leave them commented.  Uncommented options override the
# default value.

Include /etc/ssh/sshd_config.d/*.conf

#Port 22
#AddressFamily any
#ListenAddress 0.0.0.0
#ListenAddress ::

#HostKey /etc/ssh/ssh_host_rsa_key
#HostKey /etc/ssh/ssh_host_ecdsa_key
#HostKey /etc/ssh/ssh_host_ed25519_key

# Ciphers and keying
#RekeyLimit default none

# Logging
#SyslogFacility AUTH
#LogLevel INFO

# Authentication:

#LoginGraceTime 2m
#PermitRootLogin prohibit-password
#StrictModes yes
#MaxAuthTries 6
#MaxSessions 10

PubkeyAuthentication yes

# Expect .ssh/authorized_keys2 to be disregarded by default in future.
#AuthorizedKeysFile     .ssh/authorized_keys .ssh/authorized_keys2

#AuthorizedPrincipalsFile none

#AuthorizedKeysCommand none
#AuthorizedKeysCommandUser nobody

# For this to work you will also need host keys in /etc/ssh/ssh_known_hosts
#HostbasedAuthentication no
# Change to yes if you don't trust ~/.ssh/known_hosts for
# HostbasedAuthentication
#IgnoreUserKnownHosts no
# Don't read the user's ~/.rhosts and ~/.shosts files
#IgnoreRhosts yes

# To disable tunneled clear text passwords, change to no here!
PasswordAuthentication no
#PermitEmptyPasswords no

# Change to yes to enable challenge-response passwords (beware issues with
# some PAM modules and threads)
ChallengeResponseAuthentication no

# Kerberos options
#KerberosAuthentication no
#KerberosOrLocalPasswd yes
#KerberosTicketCleanup yes
#KerberosGetAFSToken no

# GSSAPI options
#GSSAPIAuthentication no
#GSSAPICleanupCredentials yes
#GSSAPIStrictAcceptorCheck yes
#GSSAPIKeyExchange no

# Set this to 'yes' to enable PAM authentication, account processing,
# and session processing. If this is enabled, PAM authentication will
# be allowed through the ChallengeResponseAuthentication and
# PasswordAuthentication.  Depending on your PAM configuration,
# PAM authentication via ChallengeResponseAuthentication may bypass
# the setting of "PermitRootLogin without-password".
# If you just want the PAM account and session checks to run without
# PAM authentication, then enable this but set PasswordAuthentication
# and ChallengeResponseAuthentication to 'no'.
UsePAM yes

#AllowAgentForwarding yes
#AllowTcpForwarding yes
#GatewayPorts no
X11Forwarding yes
#X11DisplayOffset 10
#X11UseLocalhost yes
#PermitTTY yes
PrintMotd no
#PrintLastLog yes
#TCPKeepAlive yes
#PermitUserEnvironment no
#Compression delayed
#ClientAliveInterval 0
#ClientAliveCountMax 3
#UseDNS no
#PidFile /var/run/sshd.pid
#MaxStartups 10:30:100
#PermitTunnel no
#ChrootDirectory none
#VersionAddendum none

# no default banner path
#Banner none

# Allow client to pass locale environment variables
AcceptEnv LANG LC_*

# override default of no subsystems
Subsystem       sftp    /usr/lib/openssh/sftp-server

# Example of overriding settings on a per-user basis
#Match User anoncvs
#       X11Forwarding no
#       AllowTcpForwarding no
#       PermitTTY no
#       ForceCommand cvs server
これでホスト側からsshで接続してみると・・・
PS C:\WINDOWS\system32> ssh yuta_katayama@172.30.xx.xx -i C:\Users\user\.ssh\wsl2_ubuntu
Welcome to Ubuntu 20.04 LTS (GNU/Linux 5.4.72-microsoft-standard-WSL2 x86_64)
# 省略

yuta_katayama@DESKTOP-PS112J6:~$ exit
logout
Connection to 172.30.xx.xx closed.
というようにちゃんと接続できる事が確認できた。
※ssh接続時に鍵を指定するのが面倒だが、その時はC:/Users/user/.ssh以下のconfigに以下のように記載すればOK。
Host 172.30.xx.xx
  User yuta_katayama
  IdentityFile ~/.ssh/wsl2_ubuntu
おまけ
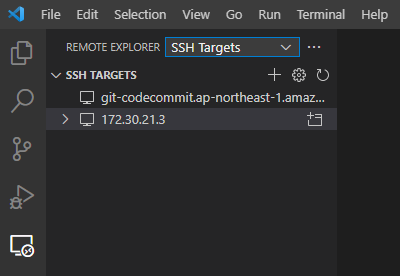
ここまでできているとVS CodeからSSHでUbuntuに接続して開発などもできる。
ExtensionのRemote - SSHを追加し、VS Codeの左のメニューのRemote Exploreを開いてSSH Targetsを選択すると、C:/Users/user/.ssh/configに定義されている設定先が表示されるので、これに接続するだけ。