Qiita Engineer Festa 2022のZoom枠でZoom Video SDKの存在を知りさっそく使ってみました。
最初はSwiftUIで実装しかけたのですが準備段階でつまずくところが多かったので、まずはプレーンなSwiftで試してみました。SwiftUI編は後日公開したいと思います。
完成イメージ
自分と相手の二人でビデオ会話できるアプリです。自分の名前の入力欄と参加/退出ボタンのみのシンプルなアプリです。自分の映像はカメラ目線になるように、インカメラの近くなるように左上に配置しました。

ハマりどころ
Swiftベースのサンプルアプリが公開されていないことに尽きると思います。
SDKドキュメントはObjective CとSwiftが併記されてはいますが、現在Zoom社から公開されているサンプルアプリはObjective CベースのみでSwift用は公開されていません。フォーラムを漁ると以前は公開されていたようなのですが現在はなぜかdeprecatedになっています。また、SDKドキュメントでは丁寧に手順が説明されていて好印象ですが、ときたま内容が古くあれ?ってなります。
ハマりポイント:
- Xcodeの初期ビルドが通らない
- お約束でMac M1チップの場合にシミュレータビルドでエラーを吐く(公式ではM1は非サポートですがBuild Settingsに設定を追加することで動作しました)
- JWT認証用のtokenを作るのがめんどい
- Zoom Video SDKの初期化でエラーが吐かれるけど原因がわからない
SDKの初期化さえ突破すればあとはドキュメントの通り進めていけると思いますので最初だけ辛抱どころです。つまずいたら、まずはZOOM Developer forumの記事を検索すると大抵解決すると思います。
ということで順番にやっていきたいと思います。
使用環境
- MacBook Air (M1, 2020)
- macOS Monterey 12.4
- Xcode 13.4.1
- iOS 15.5
- zoom-video-sdk-iOS-1.3.1
SDKクレデンシャルの取得
寄稿記事のはじめての Zoom Meeting SDK - 準備編にわかりやすくSDKクレデンシャルの取得方法が解説されています。
画面上に「SDK credentials」と表示されていることを確認してください。これが表示されていない場合は、Build App > app typeでSDKを選択していないかもしれません。
それと、SDK KeyとAPI Keyの二種類あって紛らわしいのですが、使用するのは上のSDK Keyのほうです。
Xcodeプロジェクト設定
-
ライブラリーの追加
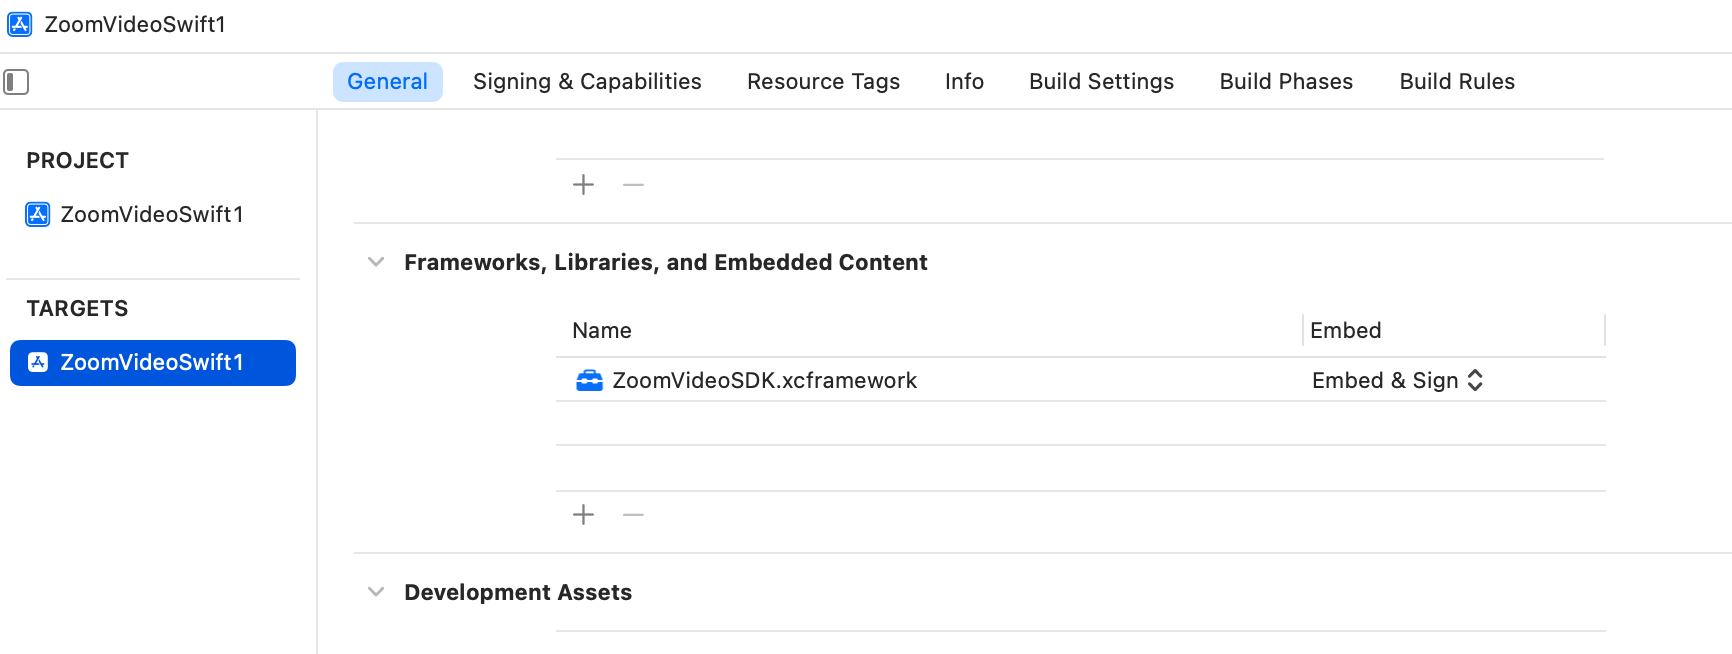
XcodeのGeneral > Frameworks, Libraries, and Embedded Content を開いて、ダウンロードしたSDKフォルダーからSDK/Sample-Libs/lib/ZoomVideoSDK.xcframeworkを追加します。

-
パーミンションを追加
SDKのドキュメントに従って、Info > Custom iOS Target Properties (info.plist)を開いてパーミンションを追加します。
- NSCameraUsageDescription - Required for Video
- NSMicrophoneUsageDescription - Required for Audio
- NSBluetoothPeripheralUsageDescription - Required for Bluetooth audio devices
- NSPhotoLibraryUsageDescription - Used for sharing images from the photo library

-
Bitcodeを無効化
これもSDKのドキュメントのとおりに、Build Settings > Enable Bitcodeを No にします。これをしないとビルドエラーになります。

-
Mac M1チップのシミュレータ用ビルド対策
公式ではM1チップでは動作しないと書かれていますが、Build Settingを変更することでシミュレータで動作しました。

iOSのシミュレータはカメラがサポートされていないので実機で動作すればそれほど支障はないかもしれませんが、カメラ以外のデバッグの手軽さを考えるとシミュレータで動作するにこしたことはありませんね。
Build Settings > Excluded ArchitecturesからiOSシミュレータを追加し、arm64を指定します。

JWTトークンの生成
当初はZoomマーケットプレイスのSDKクレデンシャル画面にあるJWTトークンを使って認証を試したのですが認証が通りませんでした…。jwt.ioのサイトでトークンを生成することができるようですが、時刻の生成がめんどうなのでドキュメントに掲載のNode.jsでやってみました。少しだけ改変して引数を外出しにしています。
注意ポイント
-
JWTトークン生成時で指定したセッション名、ユーザ名、パスワードとjoinSession呼び出し時のパラメータは完全に一致させる
どれかが不一致だとjoinSessionは一見成功しますが、onErrorコールバックで1500番台のエラーが返されます。Errors_JoinSession_Token_MismatchedSessionName(1507)など。 -
JWTトークンの期限に注意
JAT生成のNode.jsのサンプルで期限が2時間になっているので気がついたら期限切れになってErrors_Session_Join_Failed(2003)が発生します。かと言って長すぎる値を設定してもエラーになるので、最大の48時間の範囲で指定する必要があります。
JWTトークン生成サンプル(Node.js)
オリジナル版は https://github.com/zoom/videosdk-sample-signature-node.js にあります。
const KJUR = require('jsrsasign')

const sdkKey = "SDK KEY"
const sdkSecret = "SDK Secret"
const role = 1 // The user role. Required. Values: 0 to specify participant, 1 to specify host.
const sessionName = "Session1"
const sessionKey = "123"
const userIdentity = "user123"

console.log('=============================================')
console.log(generateSignature(sdkKey, sdkSecret, sessionName, role, sessionKey, userIdentity))
console.log('=============================================')

function generateSignature(sdkKey, sdkSecret, sessionName, role, sessionKey, userIdentity) {
  const iat = Math.round((new Date().getTime() - 30000) / 1000)
  const exp = iat + 60 * 60 * 2
  const oHeader = { alg: 'HS256', typ: 'JWT' }

  const oPayload = {
    app_key: sdkKey,
    tpc: sessionName,
    role_type: role,
    session_key: sessionKey,
    user_identity: userIdentity,
    iat: iat,
    exp: exp
  }

  const sHeader = JSON.stringify(oHeader)
  const sPayload = JSON.stringify(oPayload)
  const sdkJWT = KJUR.jws.JWS.sign('HS256', sHeader, sPayload, sdkSecret)
  return sdkJWT
}
% npm init
% npm install jsrsasign
% node jwt.js
これで準備完了です。
Swiftコード例
あとはSDKドキュメントにあるSwiftのコードスニペットを参考に実装していきます。ドキュメントはdeprecatedな呼び出しや古いSwift表記がありましたので適宜書き換える必要がありました。
storyboard
セッション名の入力欄とセッションへの参加ボタン、自分と相手のビデオ映像を表示させるためのViewを置いています。

ViewController.swift
ZoomVideoSDKDelegateで必要最小限のコールバックのみ処理しています。
ZoomのビデオキャンバスとViewの関連付けは usersVideoCanvas.subscribe() でやっています。セッション情報のUserIDを見て自分か相手かを判定してビデオ用のViewを切り替えています。相手が二人以上参加した場合は後勝ちで、後から参加したユーザーの映像を表示します。
import UIKit
import ZoomVideoSDK

class ViewController: UIViewController, ZoomVideoSDKDelegate {

    @IBOutlet weak var userNameTextField: UITextField!
    @IBOutlet weak var remoteVideoView: UIView!
    @IBOutlet weak var localViewView: UIView!
    @IBOutlet weak var joinButton: UIButton!

    private var userName = "user123"
    private var myUserID: UInt = 0
    private var isJoined = false

    override func viewDidLoad() {
        super.viewDidLoad()

        userNameTextField.text = userName
        zoomInit()
    }

    @IBAction func joinTouchUp(_ sender: Any) {
        userName = userNameTextField.text!
        print("userName: \(userName)")

        if let isInSession = ZoomVideoSDK.shareInstance()?.isInSession() {
            if isInSession {
                leave()
            } else {
                join()
            }
        }
    }

    func zoomInit() {
        let initParams = ZoomVideoSDKInitParams()
        initParams.domain = "zoom.us"
        initParams.enableLog = true

        let sdkInitReturnStatus = ZoomVideoSDK.shareInstance()?.initialize(initParams)
        switch sdkInitReturnStatus {
            case .Errors_Success:
                print("SDK initialized successfully")

                ZoomVideoSDK.shareInstance()?.delegate = self

            default:
                if let error = sdkInitReturnStatus {
                    print("SDK failed to initialize: \(error)")
            }
        }
    }

    func join() {
        let sessionContext = ZoomVideoSDKSessionContext()
        sessionContext.token = "Your jwt"
        sessionContext.sessionName = "Session1" // "Your session name"
        sessionContext.sessionPassword = "123" // "Your session password"
        sessionContext.userName = userName

        let videoOption = ZoomVideoSDKVideoOptions()
        videoOption.localVideoOn = true
        sessionContext.videoOption = videoOption

        let audioOption = ZoomVideoSDKAudioOptions()
        audioOption.connect = true
        audioOption.mute = false
        sessionContext.audioOption = audioOption

        if let session = ZoomVideoSDK.shareInstance()?.joinSession(sessionContext) {
            print("Session joined successfully.")
            print("  name: \(String(describing: session.getName()))")
        } else {
            print("joinSession: failed.")
        }
    }

    func leave() {
        ZoomVideoSDK.shareInstance()?.leaveSession(true)
        myUserID = 0
    }

    func onError(_ ErrorType: ZoomVideoSDKError, detail details: Int) {
        switch ErrorType {
        case .Errors_Success:
            print("Success")

        default:
            print("Error \(ErrorType) \(details)")
            return
        }
    }

    func onSessionJoin() {
        print("onSessionJoin")

        if let session = ZoomVideoSDK.shareInstance()?.getSession() {
            if let user = session.getMySelf() {
                print("  id: \(String(describing: user.getID()))")
                print("  name: \(String(describing: user.getName()))")
                myUserID = user.getID()
            }
        }

        isJoined = true
        joinButton.setTitle("Leave", for: .normal)
    }

    func onSessionLeave() {
        print("onSessionLeave")

        isJoined = false
        joinButton.setTitle("Join", for: .normal)
    }

    func onUserLeave(_ helper: ZoomVideoSDKUserHelper?, users userArray: [ZoomVideoSDKUser]?) {
        print("onUserLeave")

        if let userArray = userArray {
            for user in userArray {
                print(user)
                if let usersVideoCanvas = user.getVideoCanvas() {
                    if user.getID() == myUserID {
                        usersVideoCanvas.unSubscribe(with: localViewView)
                    } else {
                        usersVideoCanvas.unSubscribe(with: remoteVideoView)
                    }
                }
            }
        }
    }

    func onUserVideoStatusChanged(_ helper: ZoomVideoSDKVideoHelper?, user userArray: [ZoomVideoSDKUser]?) {
        print("onUserVideoStatusChanged")

        if let userArray = userArray {
            for user in userArray {
                print("  id: \(user.getID())")
                print("  name: \(String(describing: user.getName()))")

                // ZoomのビデオキャンバスとViewの関連付け
                if let usersVideoCanvas = user.getVideoCanvas() {
                    let videoAspect = ZoomVideoSDKVideoAspect.panAndScan
                    if user.getID() == myUserID {
                        usersVideoCanvas.subscribe(with: localViewView, andAspectMode: videoAspect)
                    } else {
                        usersVideoCanvas.subscribe(with: remoteVideoView, andAspectMode: videoAspect)
                    }
                }

                // 親Viewを更新すると子Viewが裏に隠れるので前面に持ってくる
                remoteVideoView.bringSubviewToFront(localViewView)
            }
        }
    }
}
まとめ
Zoom Video SDKを使ってSwiftで簡単なiOSアプリを作成してみました。SDKの最初の導入で戸惑うところがありましたが導入さえ済んでしまえば、わりとさくっと実装できました。手軽に自分のアプリにZoomのビデオ会話機能を実装することができるのはいいですね。
次回はSwiftUIを使ってZoom Video SDKをView化してみたいと思います。SwiftUIの宣言的UIにより動的に入れ替わる複数人のビデオ会話やテキストチャットもさらに手軽に実装できるのでは? と思っています。
それでは、また!
