初めに
皆さん、はじめまして、RavenLeeです。東京に住んでるIT技術者です。
今回は私Qiitaに初めて投稿です、よろしくお願いします。
次はOpenCVで二つの画像を合成する方法を紹介したいと思います。使用された方法は簡単なので、pythonの初心者でも理解安いです。
PS:日本語勉強中ですが、上手く伝えられない場合、コメントしてください。 ;)
事前準備
1. 環境
- python環境
- opencv
- matplotlib
python環境内パッケージをインストール:
pip install matplotlib
pip install opencv-python
2. 画像
使用したのはネットでダウンロードした画像です。
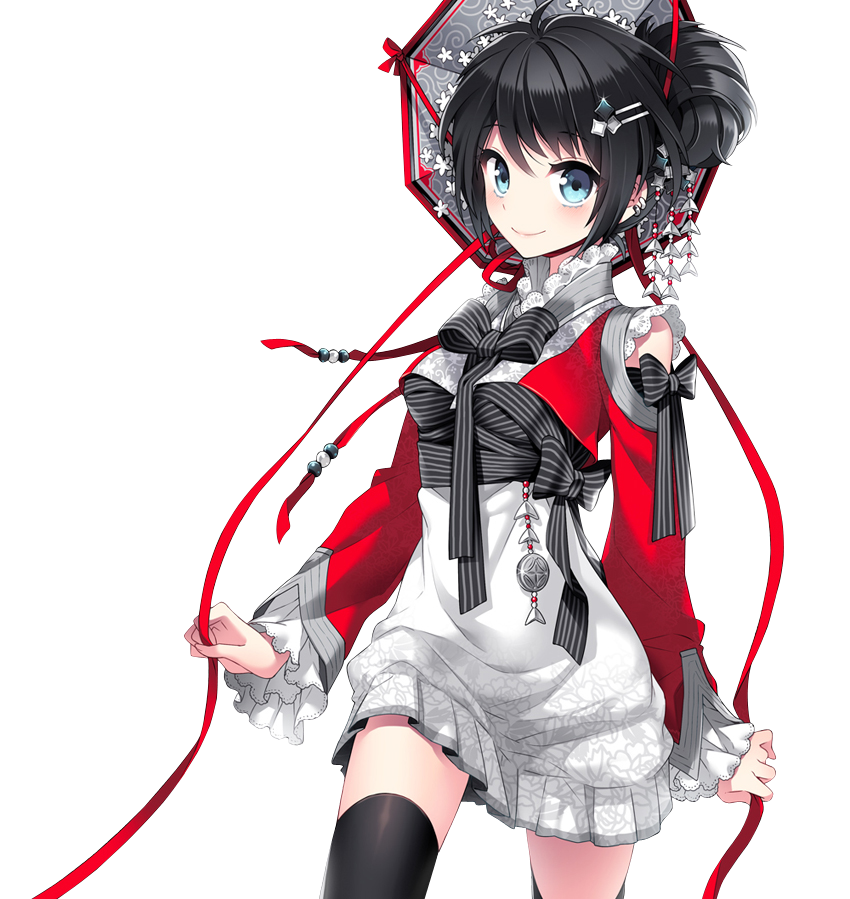
キャラクター(png:透過画像)
背景(jpg)

3 import パッケージ
import cv2
import matplotlib.pyplot as plt
4 画像入力
img_background = cv2.imread("background.jpg")
plt.imshow(cv2.cvtColor(img_background,cv2.COLOR_RGB2BGR))
print(img_background.shape)


img_character = cv2.imread("character.png", flags=-1)
img_character = cv2.resize(
     img_character,
    (
        int(img_background.shape[0]/img_character.shape[0] * img_character.shape[1]),
        int(img_background.shape[0]/img_character.shape[0] * img_character.shape[0])
    ),
     interpolation=cv2.INTER_AREA)

plt.imshow(cv2.cvtColor(img_character,cv2.COLOR_RGB2BGR))
print(img_character.shape)
注意点:png透過画像は4のチャンネルがあるので、ロードする時はflags=-1の引数が必要です。
画像処理
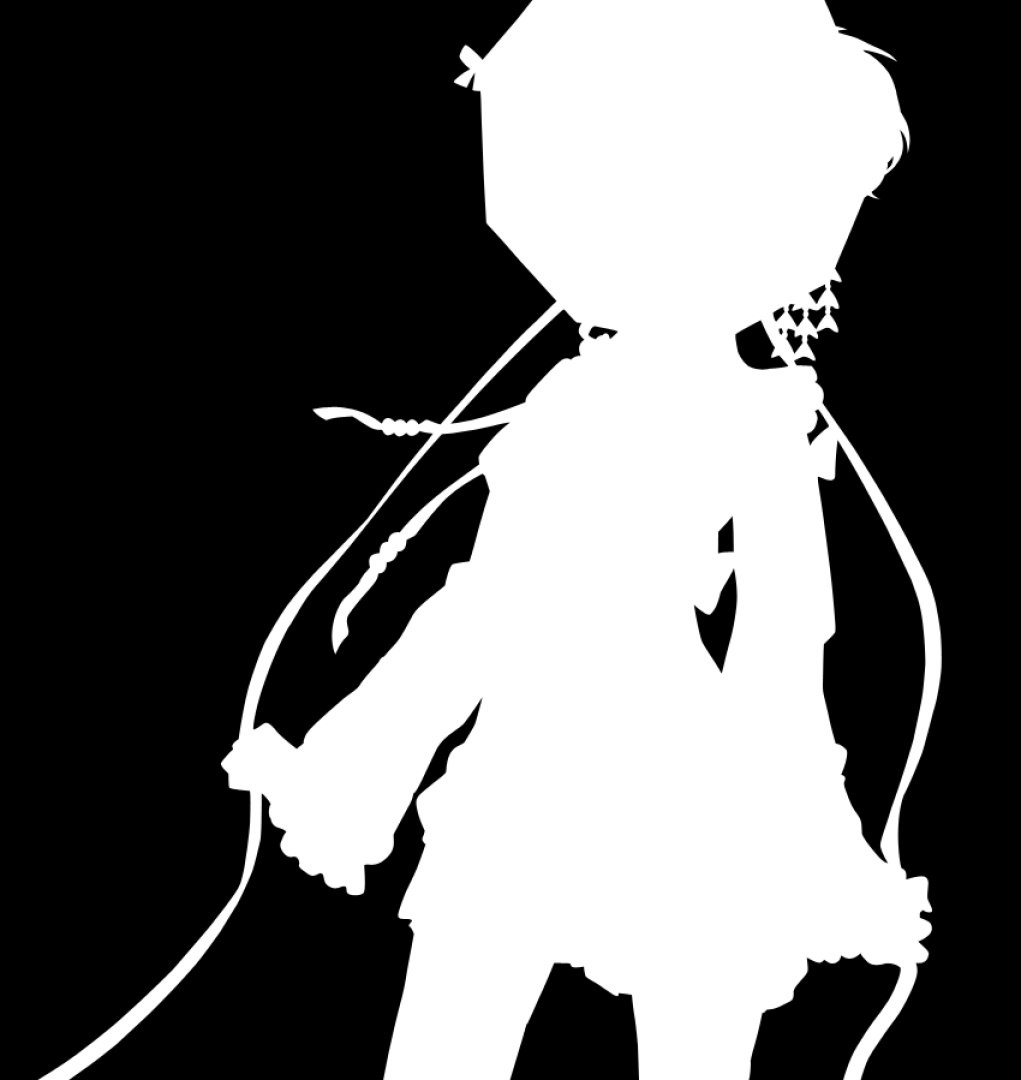
透過画像のalphaチャンネルを抽出し、マスクを作ります
mask = cv2.cvtColor(img_character[:,:,3], cv2.COLOR_GRAY2BGR)
plt.imshow(mask)
print(mask.shape)
出力結果
マスクによる、背景の色要素を選択する
bias_x = 0.2 # 人物の位置調整

img_copy_mask = np.zeros(img_background.shape,dtype=np.uint8)

y_ = int(img_background.shape[0]/2) - int(img_character.shape[0]/2)
x_ = int(img_background.shape[1]/2) - int(img_character.shape[1]/2) + int(bias_x * img_background.shape[1]/2)

img_copy_mask[y_:y_+img_character.shape[0],x_:x_+img_character.shape[1]] = mask  # 人物画像のマスクを作る
人物のmask 出力結果

img_copy_mask_2 = np.zeros(img_background.shape,dtype=np.uint8)
img_copy_mask_2[y_:y_+img_character.shape[0],x_:x_+img_character.shape[1]] = img_character[:,:,:-1]

mask_inv = cv2.bitwise_not(img_copy_mask) # 背景画像のマスクを作る
背景のmask 出力結果

次は、二つの画像を合成する
res = cv2.bitwise_and(img_background,mask_inv)
res2 = cv2.bitwise_and(img_copy_mask_2,img_copy_mask)

res_final = cv2.bitwise_or(res,res2)
plt.imshow(cv2.cvtColor(res_final,cv2.COLOR_RGB2BGR))
cv2.imwrite("result.jpg",res_final)
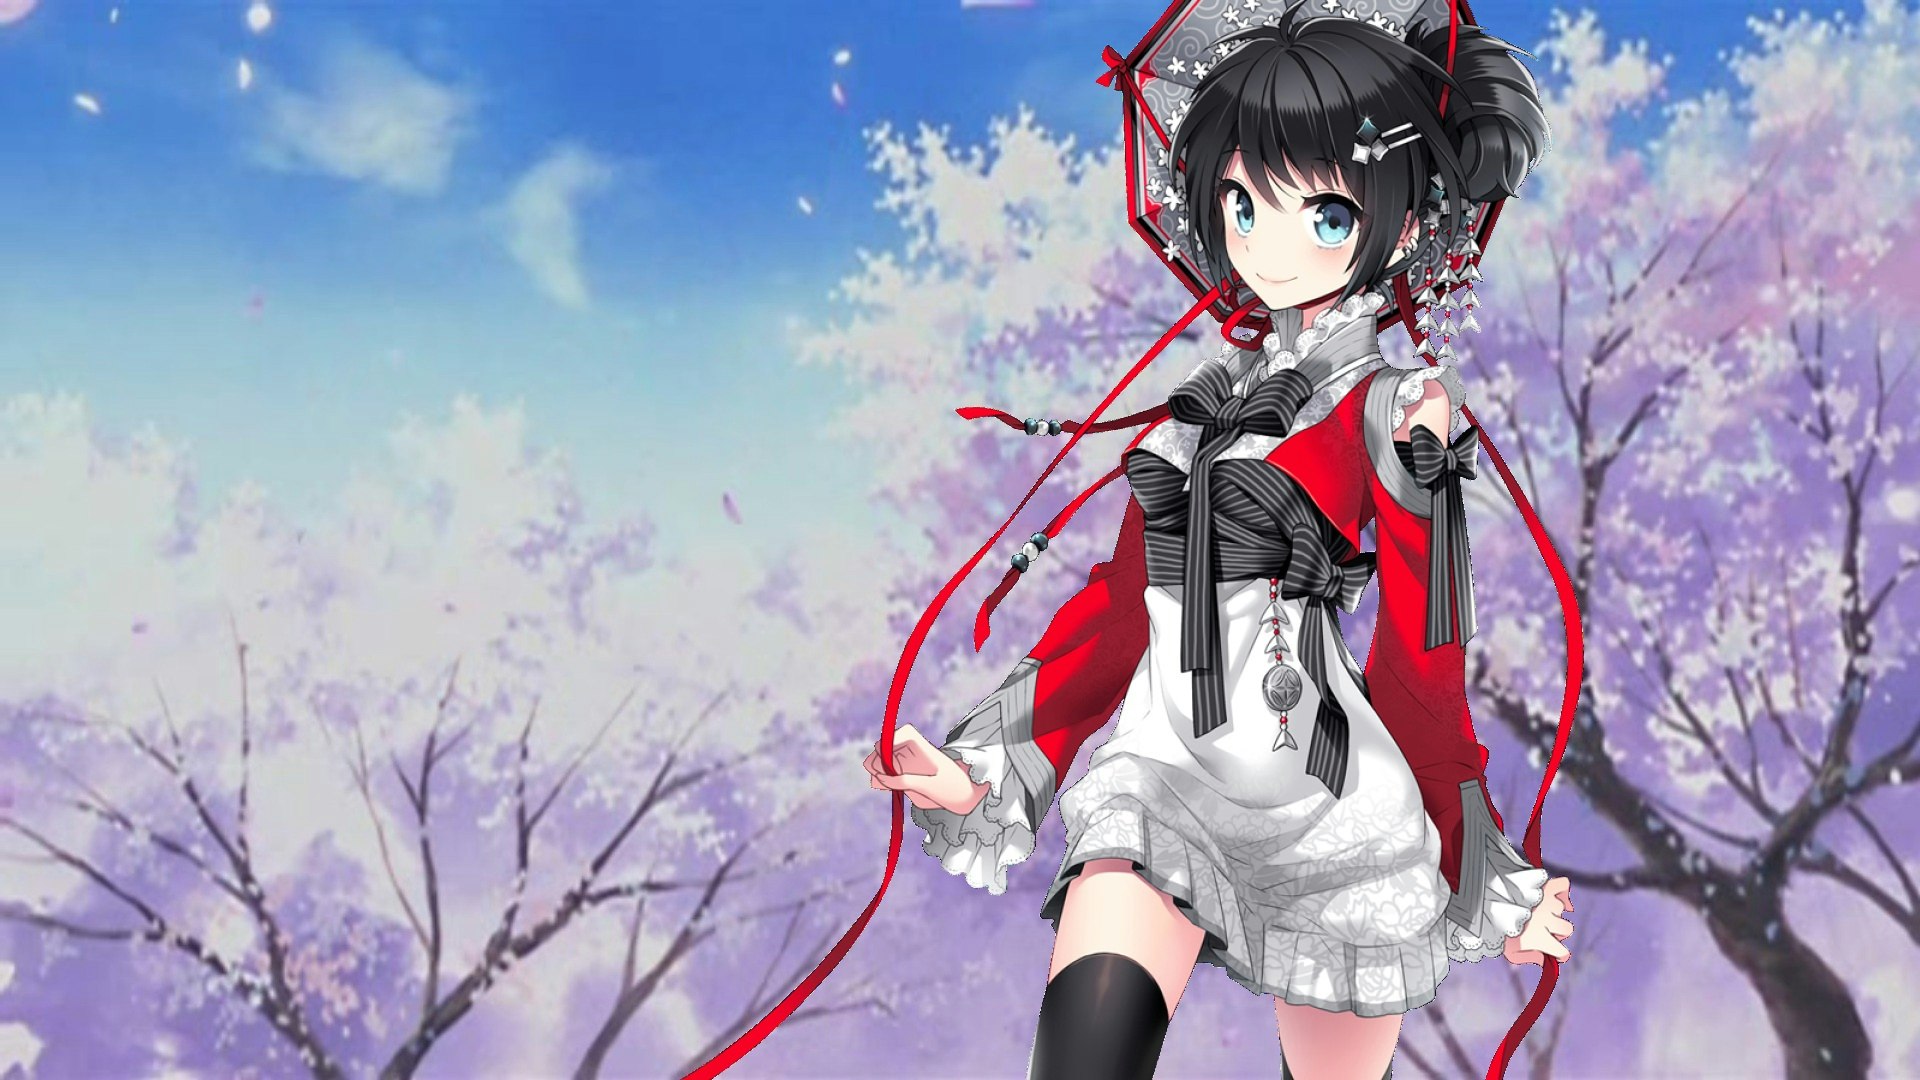
最終結果
同じ機能を持つ画像処理ソフトウェア、例えばSAI、photoshopがありますが、でも、コードで画像処理のメリットは大量の画像が処理必要場合に便利ですね。