laravelでお問い合わせフォームを作成し、入力された内容をメールに通知する必要があったので、そこで学習したことを残しておきます。(WebAPI経由)
SendGrid APIKeyの取得
まずはSendGridのアカウントを作成する。
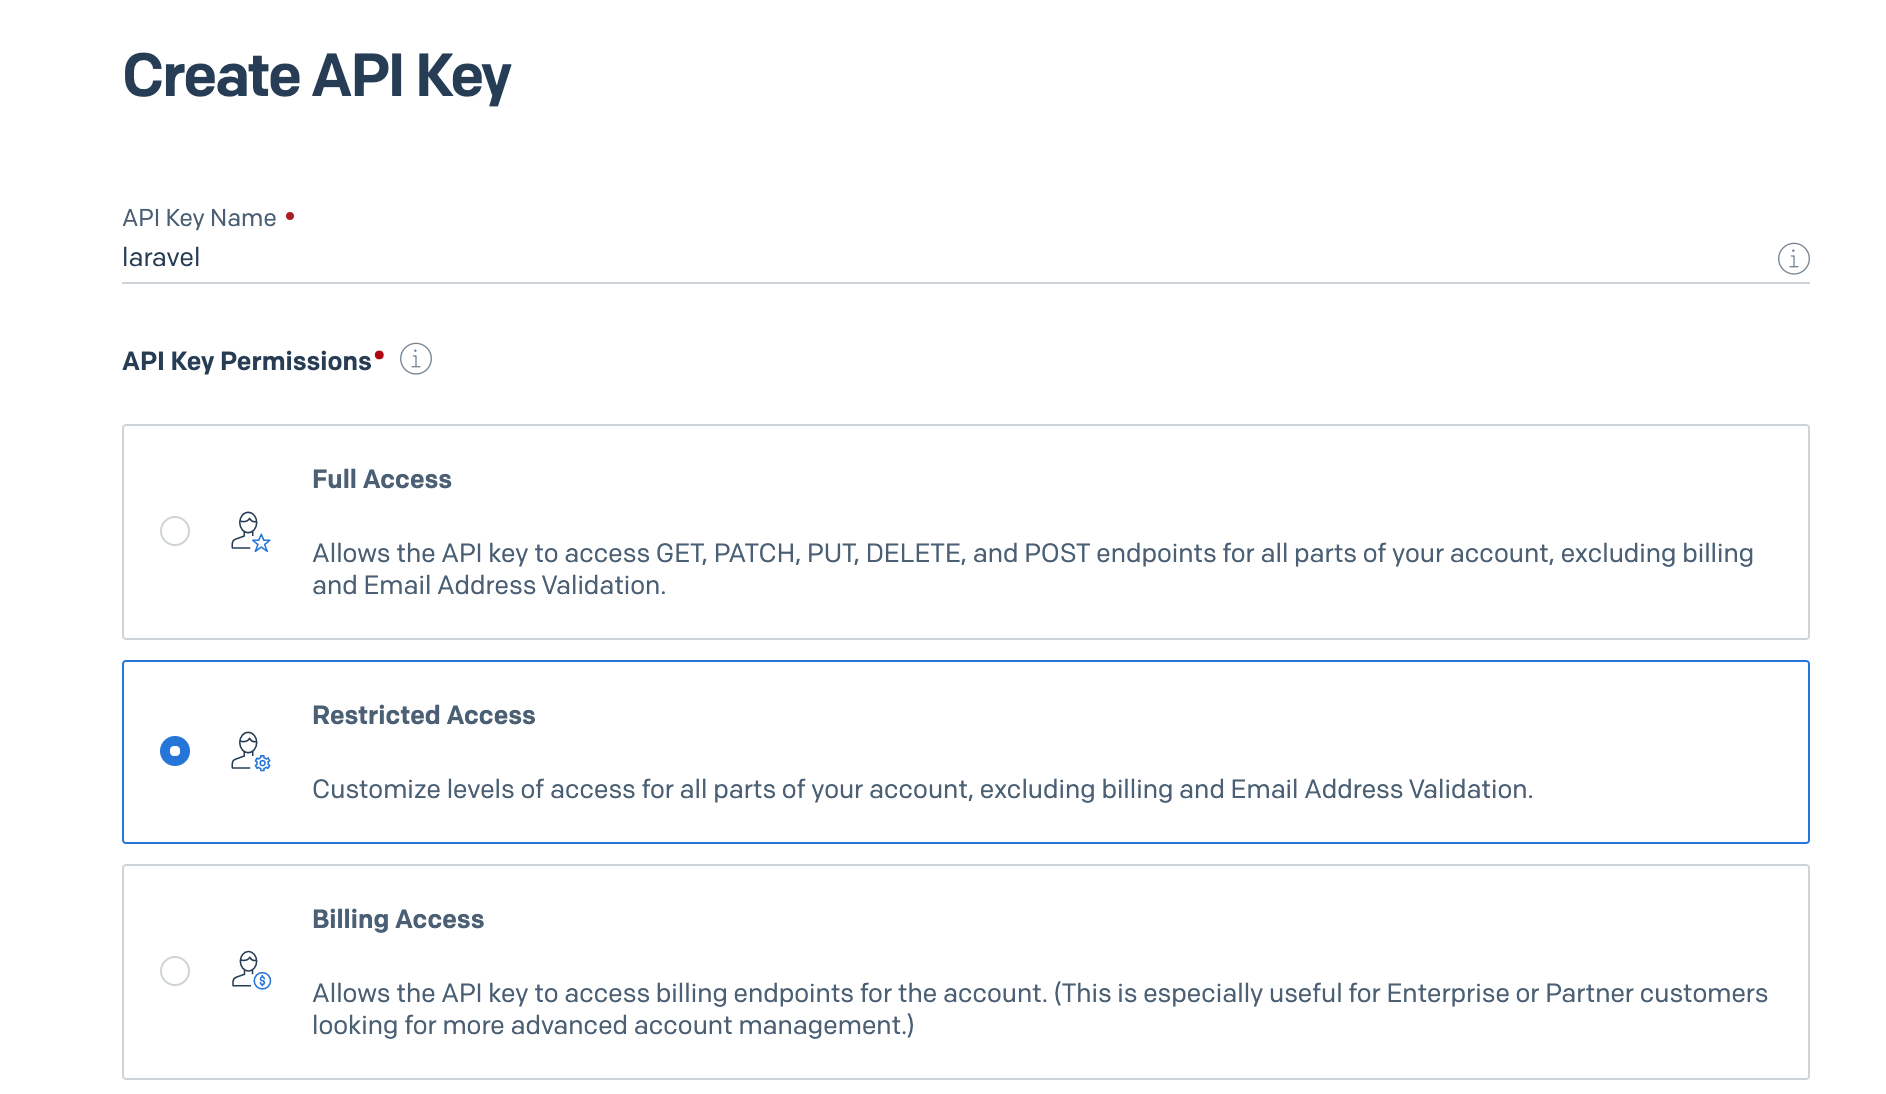
APIキーを発行する。発行ページがなかなかわかりづらいが、マイページの左側のメニューバーのSettings内にある。

「CreateAPIKey」をクリックし、下記の画面に移ったら、APIキーに名前をつける。ここでは"laravel"。メールを送るだけなので、API Key Permissionsは Restrictedにしておく。

ここもメールを送るだけならMail Sendのみで良い。Create&Viewへ。

APIKeyが表示されるはず。クリックするだけでコピー可能。一度しか表示されないのでコピーを忘れずに。

envファイルにAPIキー、メールドライバ(ここではSendGrid)、Fromアドレス、From名を記述する。
デフォルトではSendGridをドライバーに指定できないが、パッケージを作ってくださった方がいるので、composerを使ってインストール。
ありがたいドライバー様(問題あれば消します。)
MAIL_DRIVER=sendgrid
SENDGRID_API_KEY='コピーしたAPIKey'
MAIL_FROM_ADDRESS=送信元メールアドレス
MAIL_FROM_NAME="送信元の名前"
mailable作成
いよいよ実装部分。Mailableクラスを作成する。
php artisan make:mail SendGridSample
App/Mail/SendGridSampleというファイルができる。これを編集する
(忘れずに先ほどのありがたいドライバー様のuseも記述しておく。)
buildメソッドを作り、その中に処理を書いていく。
fromはenvファイルに書いているのでここに書かなくても良い。
<?php

namespace App\Mail;

use Illuminate\Bus\Queueable;
use Illuminate\Contracts\Queue\ShouldQueue;
use Illuminate\Mail\Mailable;
use Illuminate\Queue\SerializesModels;
use Sichikawa\LaravelSendgridDriver\SendGrid;

class SendGridSample extends Mailable
{
    use SendGrid;

    /**
     * Create a new message instance.
     *
     * @return void
     */
     // 引数で受け取ったデータ用の変数
     protected $contact;

    public function __construct($contact)
    {
        // 引数で受け取ったデータを変数にセット
        $this -> contact = $contact;
    }

    /**
     * Build the message.
     *
     * @return $this
     */
    public function build()
    {
        return $this
        ->view('emails.email') //呼び出すテンプレートを指定
        ->subject('お問い合わせ内容確認') //件名
        ->with(['contact' => $this -> contact]) //withオプションでセットしたデータをテンプレートに渡す
        ]);
    }
}
service.phpファイルに、envのSENDGRID_API_KEYの使用を記述する。
[
    'sendgrid' => [
      'api_key' => env('SENDGRID_API_KEY')
   ]
];
メールテンプレート作成
お名前、メールアドレス、受信したお問い合わせ内容を返す簡単なもの。
  <div class="row">
    <h1>お問い合わせ内容を受け付けました。</h1>
  </div>

<br>
・お名前<br>
{{ $contact['name'] }}様<br>
<br>
・メールアドレス<br>
{{ $contact['email'] }}<br>
<br>
・お問い合わせ内容<br>
{!! nl2br(e($contact['post'])) !!}<br>

  <div class="row">
    <p>お問い合わせありがとうございました。</p>
  </div>
ContactControllerを編集
<?php

// 作成したメールクラスをuseする
use Illuminate\Support\Facades\Mail;
use Sichikawa\LaravelSendgridDriver\SendGrid;


    public function send(Request $request)
    {
        \Mail::to($request -> email)
        ->send(new SendGridSample($request));

    }
これでお問い合わせ完了メールを送ることができる。