タイトル通りの環境を作るためにいろんな良記事を参考にしてやってみました。やったこと整理します。
経緯
Visual Studio Codeで競プロ環境構築(導入編) - Qiita
上記記事を見て、VirtualBoxを捨ててホクホクしていたら
[【Visual Studio Code】Stable版バージョン1.35リリース (May 2019) - Qiita]
(https://qiita.com/ayatokura/items/96732ac1ee70f7cd0136)
上記記事のRemote Development(プレビュー機能)の対応というのが気になってきて、
VSCodeのRemote Developmentを使ってみる - Qiita
上記記事などを見て面白そうだと思って、実際試したらよかったのでやったことをまとめていきます。
環境:Windows10
準備
VSCodeのインストール~Windows Subsystem for Linuxを導入する~GCCの導入
下記を参考にして用意します。
Visual Studio Codeで競プロ環境構築(導入編) - Qiita
Remote DevelopmentでWSL環境にリモート接続する
拡張機能インストール~WSLに接続する (Windows)
下記を参考にして接続します。
VSCodeのRemote Developmentを使ってみる - Qiita
Ctrl + Shift + Pでコマンドパレット出して、wslって打ち込むとRemote-WSL:New Windowみたいなのがサクッと見つかるはず。
初回のみ、UbuntuにVSCode Server的なものを入れるので時間がかかります。
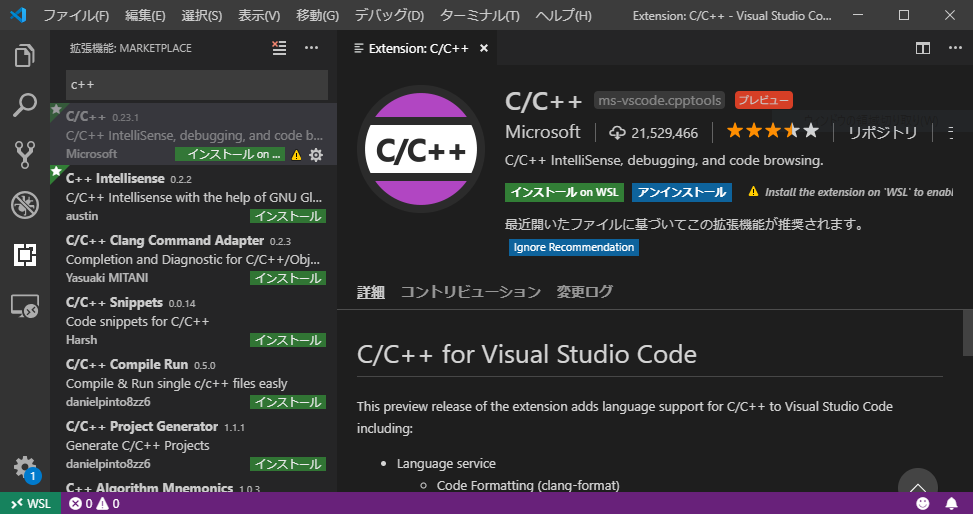
C++拡張機能をWSL側にインストール
インストール on WSL を押してインストールします。
ソースコードをビルドするまで
フォルダー構成
ホームディレクトリ直下にworkディレクトリを作って、その中で閉じることにします。
以下のようにしました。1問ごとに1フォルダーです。
input.txtは./a.out < input.txtのようにして標準入力に使うファイルです。work直下に置くことにします。
work
│  input.txt
└─src
    ├─abc114_a
    │      abc114_a.cpp
    │
    └─abc114_b
            abc114_b.cpp
フォルダーやファイルの作成
Ctrl+@でターミナルを開いてmkdirしてworkとsrcを作ります。
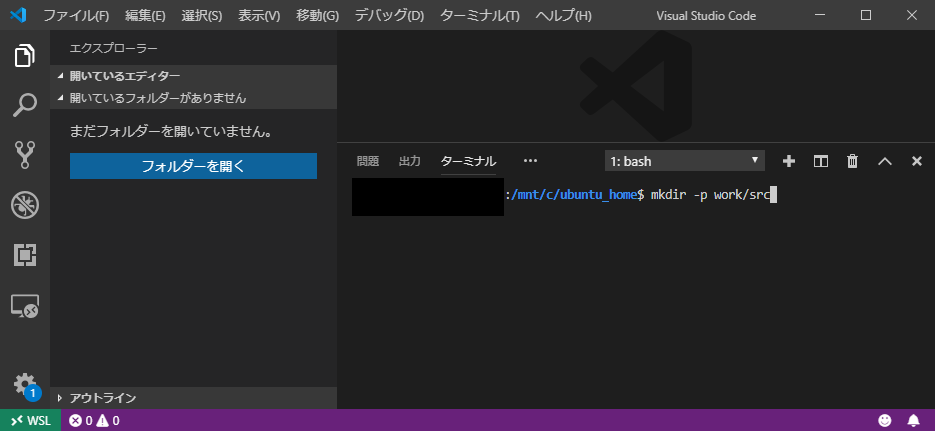
作ったworkを開きます。
私はCUI苦手なのでVSCodeのGUIからinput.txtやabc114_a.cppなどをせっせと作ります。
こんな感じ↓
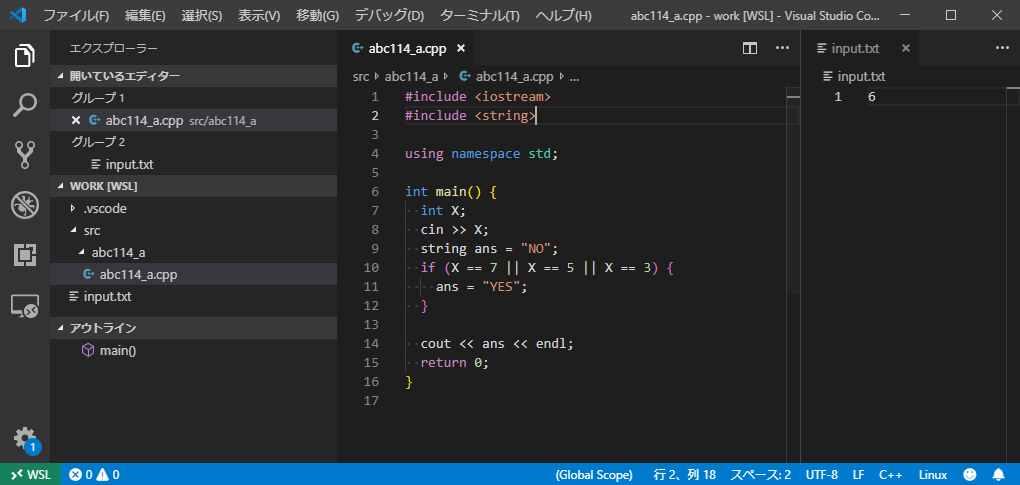
input.txtを画面分割で表示すると捗るような気がします(好みの問題)。
ビルドとデバッグ
設定ファイルを作るため、とりあえず何も考えずにF5を押します。
たぶんどれでも大差ないので、C++ (GDB/LLDB)からのg++-7 build and debug active fileを押してみます。
とりあえず起動したデバッガはうまく動かないのでShift + F5で消します。
.vscode/launch.jsonと.vscode/tasks.jsonができているので、これらを編集します。
{
  // IntelliSense を使用して利用可能な属性を学べます。
  // 既存の属性の説明をホバーして表示します。
  // 詳細情報は次を確認してください: https://go.microsoft.com/fwlink/?linkid=830387
  "version": "0.2.0",
  "configurations": [
    {
      "name": "g++-7 build and debug active file",
      "type": "cppdbg",
      "request": "launch",
      "program": "${workspaceFolder}/a.out",
      "args": [
        "<",
        "input.txt"
      ],
      "stopAtEntry": false,
      "cwd": "${workspaceFolder}",
      "environment": [],
      "externalConsole": false,
      "MIMode": "gdb",
      "setupCommands": [
        {
          "description": "Enable pretty-printing for gdb",
          "text": "-enable-pretty-printing",
          "ignoreFailures": true
        }
      ],
      "preLaunchTask": "g++-7 build active file",
      "miDebuggerPath": "/usr/bin/gdb"
    }
  ]
}
↑programのところと、argsのところを変えました。
{
  "tasks": [
    {
      "type": "shell",
      "label": "g++-7 build active file",
      "group": {
        "kind": "build",
        "isDefault": true
      },
      "command": "/usr/bin/g++-7",
      "args": [
        "-g",
        "-O0",
        "-std=c++14",
        "${file}"
      ],
      "problemMatcher": [
        "$gcc"
      ]
    }
  ],
  "version": "2.0.0"
}
↑わりと変えました。group追加、args変更、options削除、problemMatcher追加です。
もう一度abc114_a.cppを開いてF5を押せば、いい感じにデバッガ動きます。

他にやったこと
拡張機能
下記も気に入ったのでインストールしました:
Bracket Pair Colorizer - Visual Studio Marketplace
ホームディレクトリの変更
下記を参考にして変更しました。
[【WSL】Ubuntuのホームディレクトリを変更する | IT土方の奮闘記]
(https://it-blue-collar-dairy.com/change_home_directory_for_ubuntu/)
テストタスク
下記のもろもろによって、Ctrl + Shift + Tで開いているファイルに対するサンプルケースを検証できるようになってるはずです。
※ファイル名やディレクトリ名に依存しまくりなのが少し引っかかりますが、うまいやり方が分からないので放置しています。
ショートカット作成
C++で競プロをやるためのVSCodeの環境づくり - Qiita
を参考にしてCtrl + Shift + Tでテストタスク実行するショートカットを設定してみました。
サンプル検証するスクリプト
Visual Studio Codeで競プロ環境構築(実践編) - Qiita
を使わせてもらって、ちょっと変更して下記を作りwork直下に置きました。
# !/bin/bash
problemname=$1
script_dir=$(cd $(dirname $0); pwd)
src_dir=${script_dir}/src
cd ${src_dir}/$1

# 本番中に使うためにログインする(usernameとpasswordは適切に読み替えてください)
oj login -u username -p password "https://atcoder.jp/"
oj login --check "https://atcoder.jp/"

# testディレクトリがなければ取得する
if [ ! -e test/ ]; then
  oj dl "https://${problemname:0:6}.contest.atcoder.jp/tasks/${problemname:0:8}"
fi

g++ -Wall -std=c++14 ${src_dir}/$1/$1.cpp
oj test
rm -f a.out

# testディレクトリは消さないことにした
# rm -rf test
スクリプトを実行するタスク
下記のようにtestのタスクを追記しました。
{
  "tasks": [
    {
      "type": "shell",
      "label": "g++-7 build active file",
      "group": {
        "kind": "build",
        "isDefault": true
      },
      "command": "/usr/bin/g++-7",
      "args": [
        "-g",
        "-O0",
        "-std=c++14",
        "${file}"
      ],
      "problemMatcher": [
        "$gcc"
      ]
    },
    {
      "label": "test",
      "group": {
        "kind": "test",
        "isDefault": true
      },
      "type": "shell",
      "command": "${workspaceFolder}/cptest.sh ${fileBasenameNoExtension}"
    }
  ],
  "version": "2.0.0"
}
コードフォーマットの設定
vscodeのC++用コード整形設定(clang-formatの設定) - fastapple's blog
を参考にして、設定してみました。
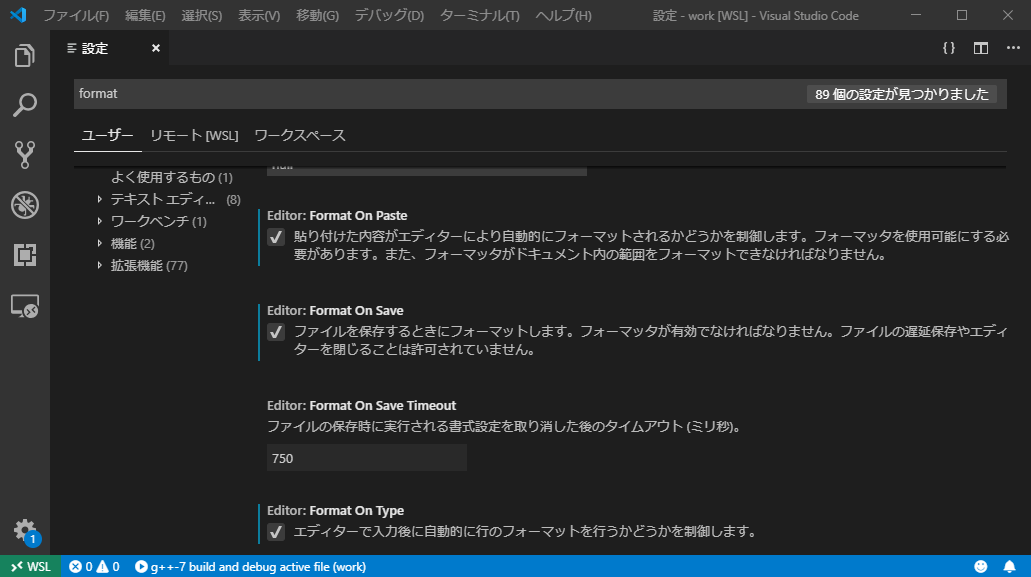
あと、自動でフォーマットがバシバシ走ってくれるように設定を変えました。
Ctrl + ,で設定ファイルを開き、clangやformatで設定項目を検索すると出てきます。
【追記】フォルダー構成の見直し
しばらく使ってみて、ちょっと気になることがあったためフォルダー構成などを見直ししました。@2019/12/31
具体的には、「リビルド遅い問題」です。
PCがそれほど早くないため、何も変更しないときであってもa.outをリビルドする時間がもったいなく思いました。
そこで、makeを使うようにフォルダー構成を見直ししました。
フォルダー構成
.
├── Makefile  # 新規作成
├── bin  # 実行ファイル置き場(最初は中身が空)
│   ├── abc114_a # こんな名前のファイルが作られていく
│   └── abc114_b
├── cptest.sh  # 中身を修正
├── input.txt
├── src  # ソースコード置き場 全部フラットに配置するように変更
│   ├── abc114_a.cpp
│   └── abc114_b.cpp
└── test  # AtCorderから自動取得したテストケース置き場(最初は中身が空)
    ├── abc114_a # こんな名前のフォルダーやファイルが作られていく
    │   ├── sample-1.in
    │   ├── sample-1.out
    │   ├── sample-2.in
    │   └── sample-2.out
    └── abc114_b
        ├── sample-1.in
        ├── sample-1.out
        ├── sample-2.in
        ├── sample-2.out
        ├── sample-3.in
        └── sample-3.out
binとtestに一時ファイルがまとまるようにしました。
各種スクリプトなど
Makefile
# 例:
# make problem=abc111_a
# これでabc111_aという実行ファイルが作れる

# 例2:
# make problem=abc111_a run
# これでabc111_aという実行ファイルが作れて、input.txtを入力として受け取り動く

all: bin/${problem}
.PHONY : all

# abc111_aという実行ファイルを作るためには./src/abc111_a.cppが必要
bin/${problem}: src/${problem}.cpp
	g++ -g -O0 -std=c++14 -o bin/${problem} src/${problem}.cpp

# abc111_aという実行ファイルを動かすためにはabc111_aが必要
run: bin/${problem}
	./bin/${problem} < input.txt
ググって出てきたものをつぎはぎして作成しました。
引数を受け取って、コンパイル対象と実行ファイル名を紐づけしたかった。
cptest.sh
# !/bin/bash
problemname=$1

# 企業コンテストの場合、下記のようにtasksの前はハイフンになるため対策する
# https://atcoder.jp/contests/ddcc2020-qual/tasks/ddcc2020_qual_a

baseurl=${problemname:0:-2}
baseurlreplaced=${baseurl//_/-}

# 本番中に使うためにログインする
oj login -u username -p password "https://atcoder.jp/" # username, passwordは適切な文字列にする
oj login --check "https://atcoder.jp/"

# testディレクトリがなければ取得する
if [ ! -e test/${problemname} ]; then
  oj dl -d test/${problemname}/ "https://atcoder.jp/contests/${baseurlreplaced}/tasks/${problemname}"
fi

make "problem=${problemname}"

oj test -c ./bin/${problemname} -d test/${problemname}/
makeを使うようにちょっと修正しました。
あと、企業コンテストの時にテストケース取得する処理がうまく動かなかったので文字列置換しています。
tasks.json
{
  "version": "2.0.0",
  "tasks": [
    {
      "label": "test_atcorder_sample",
      "type": "shell",
      "command": "${workspaceFolder}/cptest.sh ${fileBasenameNoExtension}",
      "problemMatcher": [
        "$gcc"
      ]
    },
    {
      "label": "test_manual_input",
      "group": {
        "kind": "test",
        "isDefault": true
      },
      "type": "shell",
      "command": "make",
      "args": [
        "problem=${fileBasenameNoExtension}",
        "run"
      ]
    },
    {
      "type": "shell",
      "label": "g++-7 build active file",
      "group": {
        "kind": "build",
        "isDefault": true
      },
      "command": "make",
      "args": [
        "problem=${fileBasenameNoExtension}"
      ],
      "problemMatcher": [
        "$gcc"
      ]
    }
  ]
}
テストケースを自動取得するタスクではなく、手作業で用意した入力を使って動かすタスクをCtrl+Shift+Tに紐づけしなおしました。
こちらのほうがしっくり来たためです。
どのタスクも必要に応じてmakeを使うように修正しています。
launch.json
{
  // IntelliSense を使用して利用可能な属性を学べます。
  // 既存の属性の説明をホバーして表示します。
  // 詳細情報は次を確認してください: https://go.microsoft.com/fwlink/?linkid=830387
  "version": "0.2.0",
  "configurations": [
    {
      "name": "g++-7 build and debug active file",
      "type": "cppdbg",
      "request": "launch",
      "program": "${workspaceFolder}/bin/${fileBasenameNoExtension}",
      "args": [
        "<",
        "input.txt"
      ],
      "stopAtEntry": false,
      "cwd": "${workspaceFolder}",
      "environment": [],
      "externalConsole": false,
      "MIMode": "gdb",
      "setupCommands": [
        {
          "description": "Enable pretty-printing for gdb",
          "text": "-enable-pretty-printing",
          "ignoreFailures": true
        }
      ],
      "preLaunchTask": "g++-7 build active file",
      "miDebuggerPath": "/usr/bin/gdb"
    }
  ]
}
"program"のパス指定箇所を修正したくらいです。