前提知識
- カラー画像のグレースケール化は、各ピクセルの R,G,B を適切に混ぜて 1つの値にする処理です。
- R,G,B をどの割合で混ぜるかは、主に BT.601 と BT.709 規格の係数が使われます。この2つは 微妙に結果が異なります。
- JPEG/PNG 画像の多くは sRGB 規格に従い、その RGB 値はリニア輝度からおよそ 1.0/2.2(=0.4545..)相当のガンマ補正がかかるので、値をそのまま四則演算するとおかしな結果になりがちです。
グレースケール処理の詳細は、こちらをどうぞ。
- グレースケール画像のうんちく
OpenCV
% pip install opencv-python
OpenCV でグレースケール化
cv2.cvtColor でグレースケール化出来ます。
imread で取得したデータは BGR 形式なので、cv2.COLOR_BGR2GRAY を第2引数に指定して下さい。 cv2.COLOR_RGB2GRAY を指定すると R と B の明るさが逆転して駄目です。(尚、imread で入力した画像そのままでなく、cv2.COLOR_BGR2RGB で BGR から RGB 形式に変換してある画像データに対しては、cv2.COLOR_RGB2GRAY を使います。)
import sys
import cv2

_, infile, outfile = sys.argv
img_bgr = cv2.imread(infile)
img_gray = cv2.cvtColor(img_bgr, cv2.COLOR_BGR2GRAY)  # RGB2〜 でなく BGR2〜 を指定
cv2.imwrite(outfile, img_gray)
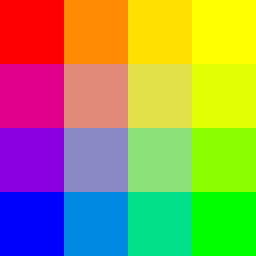
これでグレースケール変換は一応可能ですが、あまり良い結果は得られません。特に R,G,B 3つの極彩色が極端に暗くなります。 これは RGB 値のガンマ補正が原因です。
| 4x4-256x256.png | opencv_gray.png |
|---|---|
 |
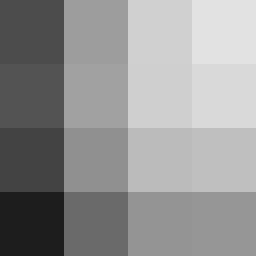 |
この例だと特に左上隅の赤がほぼ黒に変換されて、感覚的に暗すぎる事が分かるでしょう。(尚、人によって色の見え方は違うので絶対ではありません)
OpenCV でグレースケール化 (ガンマ補正)
RGB の輝度値を混ぜる際、sRGB のようにガンマ補正がかかったままでは正確な輝度が出せません。そこで一旦、リニア輝度に変換する必要があります。
cv2.LUT に LUT(ルックアップテーブル)を渡す事で、まとめてトーンカーブ変換出来ます。
まず、ガンマ補正を 2.2 で解除して、物理的なリニア輝度でグレイスケール化を行い、再び 1.0/2.2 で補正し直します。
import sys
import cv2
import numpy

gamma22LUT  = numpy.array([pow(x/255.0 , 2.2) * 255 for x in range(256)], dtype='uint8')
gamma045LUT = numpy.array([pow(x/255.0 , 1.0/2.2) * 255 for x in range(256)], dtype='uint8')

_, infile, outfile = sys.argv

img_bgr = cv2.imread(infile)
img_bgrL = cv2.LUT(img_bgr, gamma22LUT)  # sRGB => linear (approximate value 2.2)
img_grayL = cv2.cvtColor(img_bgrL, cv2.COLOR_BGR2GRAY)
img_gray = cv2.LUT(img_grayL, gamma045LUT)  # linear => sRGB
cv2.imwrite(outfile, img_gray)
| 4x4-256x256.png | opencv_gray_gamma.png |
|---|---|
 |
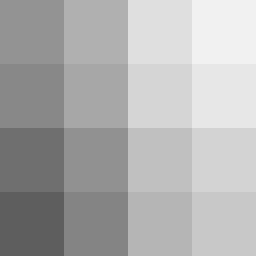 |
一見、これで良さそうですが、実は低輝度が潰れてしまいます。(詳しくは後述する備考の章をご参照下さい)
OpenCV でグレースケール化 (ガンマ補正、低輝度対応)
RGB 値を float32 として保持する事で、低輝度を潰さず処理できます。
尚、float32 として処理するので、リニアから sRGB に戻す時に LUT は使えません。
import sys
import cv2
import numpy

gamma22LUT = numpy.array([pow(x/255.0 , 2.2) for x in range(256)],
                         dtype='float32')
infile, outfile = sys.argv[1], sys.argv[2]
img_bgr = cv2.imread(infile)
img_bgrL = cv2.LUT(img_bgr, gamma22LUT)
img_grayL = cv2.cvtColor(img_bgrL, cv2.COLOR_BGR2GRAY)
img_gray = pow(img_grayL, 1.0/2.2) * 255
cv2.imwrite(outfile, img_gray)
これで、だいたいのケースで満足出来る結果になるでしょう。
OpenCV で退色処理 (decolor)
白黒でなるべくコントラストが潰れないパラメータを探して変換します。この論文にある手法です。
import sys
import cv2

_, infile, outfile = sys.argv

img = cv2.imread(infile)
img_gray, _ = cv2.decolor(img);
cv2.imwrite(outfile, img_gray)
| 4x4-256x256.png | opencv_decolor.png |
|---|---|
 |
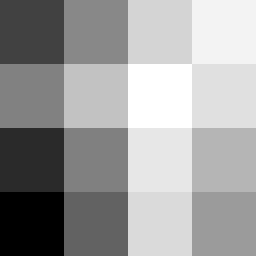 |
カラー画像と明るさの対応はあまり取れてませんが、結果としてグリッドが視認しやすくなっています。
mandrill 画像で比較
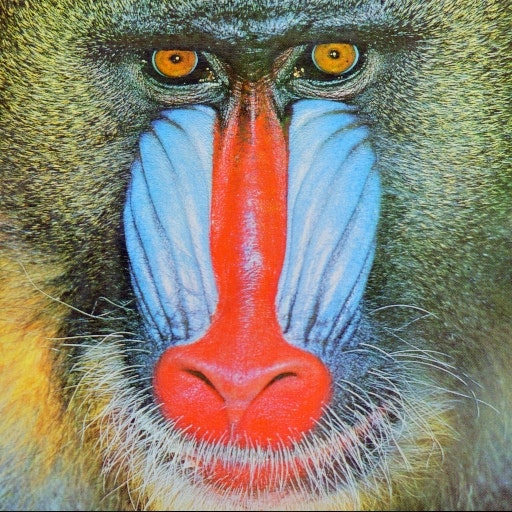
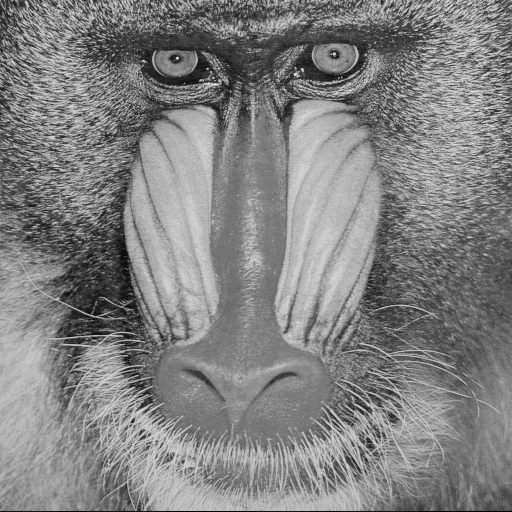
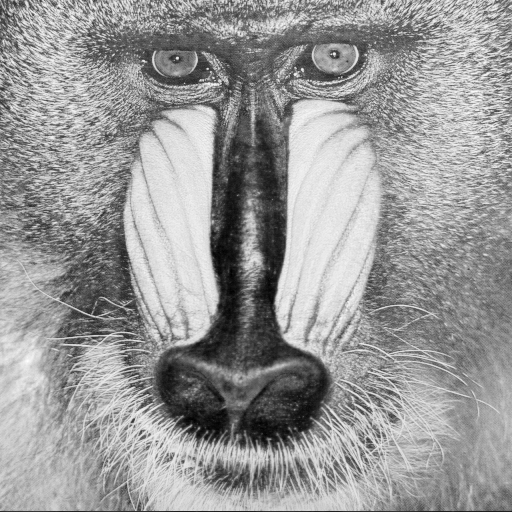
標準画像 SIDBA の有名なマンドリル (mandrill.jpg) で比較します。
| 元画像 | BGR2GRAY だけ | BGR2GRAY+ガンマ処理 |
|---|---|---|
 |
 |
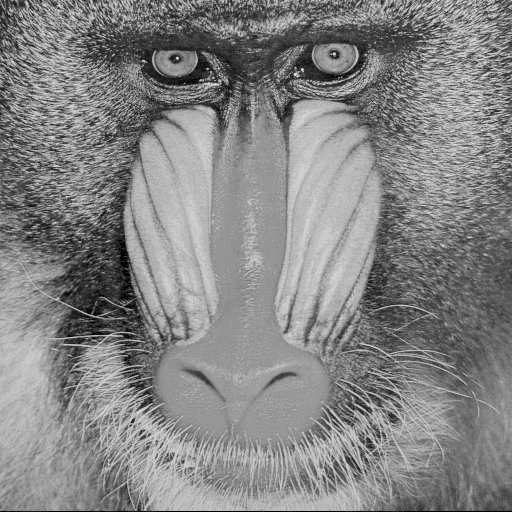 |
BGR2GRAY+ガンマ処理の方が色の明るさ的には正しいはずですが、結果としてコントラスト(明暗の差)による境界がわかりにくく、BGR2GRAY だけの方が画像を見た時の印象が良いかもしれません。
一方、decolor は各色の正確な明るさよりもコントラスト維持を優先するので、都合の良いグレイスケール画像が生成されます。
| 元画像 | decolor |
|---|---|
 |
 |
PIL(Pillow)
% pip install Pillow
PIL(Pillow) でグレースケール化
画像のモード "L" がグレースケール相当です。convert で変換します。
from PIL import Image
import sys

_,infile,outfile = sys.argv

img = Image.open(infile)
img_gray = img.convert("L")  # グレースケール変換
img_gray.save(outfile)
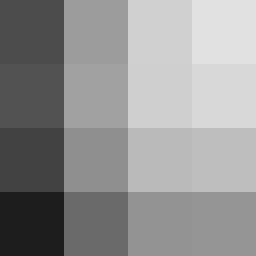
こちらも普通にグレースケール化するとガンマ補正の考慮がされません。
| 4x4-256x256.png | PIL_gray.png |
|---|---|
 |
 |
PIL(Pillow) でグレースケール化 (ガンマ補正)
先ほどの OpenCV と同様にガンマ補正処理を追加します。
im.point に LUT(ルックアップテーブル)を渡す事で、まとめてトーンカーブ変換出来ます。
from PIL import Image
import sys

gamma22LUT  = [pow(x/255.0, 2.2)*255 for x in range(256)] * 3
gamma045LUT = [pow(x/255.0, 1.0/2.2)*255 for x in range(256)]

_,infile,outfile = sys.argv

img = Image.open(infile)
img_rgb = img.convert("RGB") # any format to RGB
img_rgbL = img_rgb.point(gamma22LUT)
img_grayL = img_rgbL.convert("L")  # RGB to L(grayscale)
img_gray = img_grayL.point(gamma045LUT)
img_gray.save(outfile)
| 4x4-256x256.png | PIL_gray_gamma.png |
|---|---|
 |
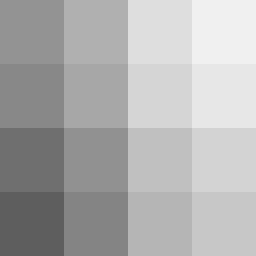 |
なお、8bit depth なので低輝度は潰れます。
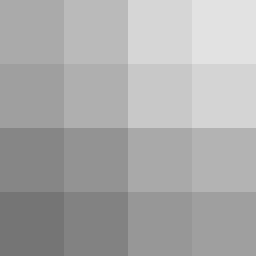
PIL(Pillow) でグレースケール化 (ガンマ補正 + BT.709)
convert の第二引数で色変換行列の係数を変更出来ます。デフォルトで BT.601 なので、今回は BT.709 に変えてみましょう。
from PIL import Image
import sys

rgb2xyz_rec709 = (
    0.412453, 0.357580, 0.180423, 0,
    0.212671, 0.715160, 0.072169, 0, # RGB mixing weight
    0.019334, 0.119193, 0.950227, 0 )

gamma22LUT  = [pow(x/255.0, 2.2)*255 for x in range(256)] * 3
gamma045LUT = [pow(x/255.0, 1.0/2.2)*255 for x in range(256)]

_,infile,outfile = sys.argv

img = Image.open(infile)
img_rgb = img.convert("RGB") # any format to RGB
img_rgbL = img_rgb.point(gamma22LUT)
img_grayL = img_rgbL.convert("L", rgb2xyz_rec709)  # RGB to L(grayscale BT.709)
img_gray = img_grayL.point(gamma045)
img_gray.save(outfile)
| 4x4-256x256.png | |
|---|---|
 |
 |
PIL(Pillow) でグレースケール化 (numpy で低輝度対応)
PIL の RGB は 8bit depth しか扱えないので、低輝度への対応は numpy の力を借りると良いでしょう。
from PIL import Image
import sys
import numpy as np

_,infile,outfile = sys.argv
im = Image.open(infile)
if im.mode != "RGB":
    im = im.convert("RGB") # any format to RGB
rgb = np.array(im, dtype="float32");

rgbL = pow(rgb/255.0, 2.2)
r, g, b = rgbL[:,:,0], rgbL[:,:,1], rgbL[:,:,2]
grayL = 0.299 * r + 0.587 * g + 0.114 * b  # BT.601
gray = pow(grayL, 1.0/2.2)*255

im_gray = Image.fromarray(gray.astype("uint8"))
im_gray.save(outfile)
これで良い結果が出るはずです。
PIL(Pillow) ImageOps でグレースケール化
ImageOps.grayscale の処理は image.convert("L") と同じです。
def grayscale(image):
    """
    Convert the image to grayscale.

    :param image: The image to convert.
    :return: An image.
    """
    return image.convert("L")
scikit-image
% pip install scikit-image six
scikit-image でグレースケール化
rgb2gray は 0〜1 (float64) の範囲で処理するので変換処理が要ります。
ubyte(uint8) のまま rgb2gray に渡しても自動で float に変換されますが、サンプルでは明示的に img_as_float を呼んでおきます。
また、float のままでは画像ファイル保存出来ないので、ubyte に戻します。小数点以下を削る際に出る精度が落ちる警告は、サンプルでは warnings パッケージで局所的に抑えてます。
import sys
from skimage.color import rgb2gray
from skimage import io
from skimage import io,	img_as_float, img_as_ubyte
import warnings

_,infile,outfile = sys.argv

img = io.imread(infile)
img = img_as_float(img)  # np.array(img/255.0, dtype=np.float64)
img_gray = rgb2gray(img)
with warnings.catch_warnings():
    warnings.simplefilter("ignore")
    img_gray = img_as_ubyte(img_gray)  # np.array(np.round(img_gray*255), dtype=np.uint8)
io.imsave(outfile, img_gray)
(2022/03/03 追記:scikit-image-0.19.2 で追試したところ warning ignore なしでも警告は出ませんでした。warning.catch_warnings は不要かもしれません)
| 4x4-256x256.png | skimage_gray.png |
|---|---|
 |
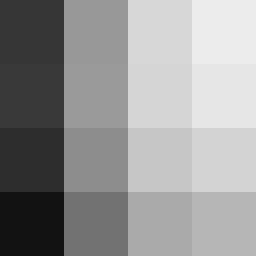 |
例によってガンマ補正のケアが足りません。
scikit-image でグレースケール化 (ガンマ補正)
skimage は exposure.adjust_gamma 関数があるので、それを使うだけです。
import sys
from skimage.color import rgb2gray
from skimage import io,	exposure, img_as_float, img_as_ubyte
import warnings

_,infile,outfile = sys.argv

img = io.imread(infile)
img = img_as_float(img)  # np.array(img/255.0, dtype=np.float64)
imgL = exposure.adjust_gamma(img, 2.2)  # pow(img, 2.2)
img_grayL = rgb2gray(imgL)
img_gray = exposure.adjust_gamma(img_grayL, 1.0/2.2)  # pow(img_grayL, 1.0/2.2)
with warnings.catch_warnings():
    warnings.simplefilter("ignore")
    img_gray = img_as_ubyte(img_gray)  # np.array(img_gray*255, dtype=np.uint8)
io.imsave(outfile, img_gray)
| 4x4-256x256.png | skimage_gray_gamma.png |
|---|---|
 |
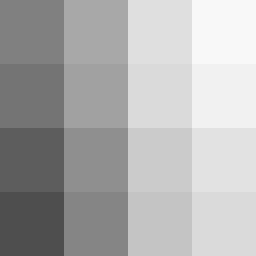 |
scikit-image は rgb2gray が float64 で動作するので、このままで低輝度に対応してます。
いい感じです。
備考
ガンマ補正の注意点
sRGB の値を 0〜255 整数のまま linear輝度に変換すると低輝度の階調が潰れてしまいます。
具体的には sRGB の 6 以下の輝度は linear と相互変換すると全部 0 になります。更に sRGB ガンマを 2.2 で近似する場合は 14 以下の輝度が潰れます。
- R,G,B を混ぜる処理をビット深度12以上か浮動小数点で行う。(scikit-image だと rgb2gray が浮動小数点対応のはず)
- linear => sRGB の方向ではガンマ補正を LUT でなく毎度計算する。(もしくは LUT を巨大にするか)
といった対処が必要です。
参考の為、0〜255 のままリニアにすると、低輝度がどう潰れるのかを調べる実験コードです。
gamma22LUT  = [round(pow(x/255.0, 2.2)*255)     for x in range(256)]
gamma045LUT = [round(pow(x/255.0, 1.0/2.2)*255) for x in range(256)]
for i,g in enumerate(gamma22LUT):
    print(i, g, gamma045LUT[g])
% python gamma22_round.py
0 0 0
1 0 0
2 0 0
3 0 0
4 0 0
5 0 0
6 0 0
7 0 0
8 0 0
9 0 0
10 0 0
11 0 0
12 0 0
13 0 0
14 0 0
15 1 21
16 1 21
17 1 21
なお、 LUT 作成時に round を取らない場合は更に悪化して 20 以下の値が潰れます。
gamma22LUT  = [int(pow(x/255.0, 2.2)*255)     for x in range(256)]
gamma045LUT = [int(pow(x/255.0, 1.0/2.2)*255) for x in range(256)]
for i,g in enumerate(gamma22LUT):
    print(i, g, gamma045LUT[g])
% python gamma22_round.py
0 0 0
1 0 0
2 0 0
(略)
18 0 0
19 0 0
20 0 0
21 1 20
22 1 20
23 1 20
sRGB のガンマ補正
sRGB の"ガンマ補正"は 2.2 ズバリでなく。0付近の低輝度では線形、それ以上では 2.4 ガンマ補正を組み合わせた変換です。
# sRGB to linear RGB
lv = v / 12.92;                      # v <= 0.04045
lv = pow((v + 0.055) / 1.055, 2.4);  # v >= 0.04045

# linear RGB to sRGB
v = 12.92 * lv;                      # v <= 0.0031308
v = 1.055 * pow(lv, 1/2.4) - 0.055;  # v >= 0.0031308
2.2 のガンマ補正をそのまま使うと低輝度での計算誤差が出やすいので、それを抑える都合です。
全体として 2.2 のガンマ補正に近いので、これまでのサンプルは 2.2 で処理しました。
低輝度でより正確に処理したい場合は切り替えて処理しましょう。
サンプルの LUT を書き換えるとこうなります。
# gamma22LUT  = [round(pow(x/255.0, 2.2)*255)     for x in range(256)]
# gamma045LUT = [round(pow(x/255.0, 1.0/2.2)*255) for x in range(256)]
gammaFrom_sRGB = [round( x/12.92 if x<(0.04045*255)   else  pow((x/255+0.055)/1.055,2.4) *255 ) for x in range(256)]
gammaTo_sRGB   = [round( x*12.92 if x<(0.0031308*255) else (pow(x/255,1/2.4)*1.055-0.055)*255 ) for x in range(256)]
ガンマ補正の注意点に書いたのと同じ問題があります。sRGB の 6 以下がリニア輝度では 0 になります。尚、対処方法も同じです。
こっちも実験コードをつけます。
for i, g in enumerate(gammaFrom_sRGB):
    print(i, g, gammaTo_sRGB[g])
% python gamma_srgb.py
0 0 0
1 0 0
2 0 0
3 0 0
4 0 0
5 0 0
6 0 0
7 1 13
8 1 13
9 1 13
最後に
ITK, SIP, Wand(ImageMagick) は気が向いたら書きます。
