先日、以下の記事を書いた際に使った「Web Serial API」。
●Web Serial API を最短の手順で試したくてやったこと(micro:bit を利用) - Qiita
https://qiita.com/youtoy/items/a0071a6d2ef7f6930d33
この時は、シリアル通信で値の読み書きをするところは、以下の Googleさんが提供しているサンプルを使いました。
⇒ https://googlechromelabs.github.io/serial-terminal/
今回は、Web Serial API を使った値の書き込みの処理を自分で書いてみます。
micro:bit 側のプログラムを準備する
シリアル通信で Webサイト側から値を受け取るためのプログラムを作ります。
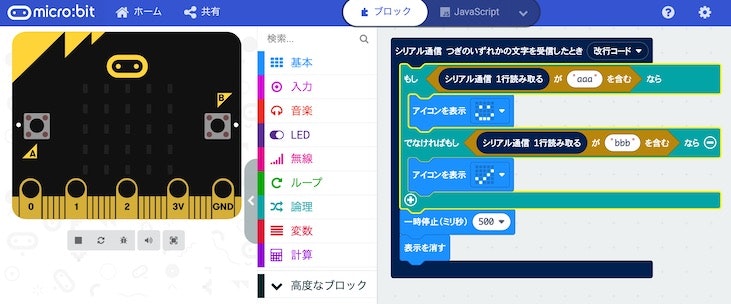
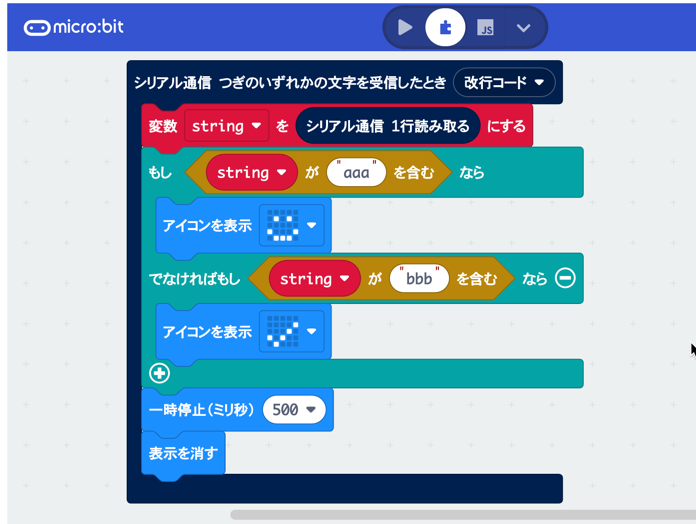
Microsoft MakeCode for micro:bit を使い、以下のプログラムを micro:bit に書き込みます。
※ 以下のプログラムは修正をしたほうが良いです(詳細は、【追記3】として書いた部分を参照ください)
実装した処理は、シリアル通信で 1行分のデータを読み取り、その中に「aaa、または bbb という文字列」が含まれている場合に、LED を特定のパターンで光らせる、というものです。
追記3: プログラムの修正箇所について
記事のコメント欄にて、プログラムを以下のようにした方が良いのではないか、というコメントをいただきましたので追加で記載しました(改善版のプログラムを添えてのコメント、ありがとうございました)。
確かに、条件分岐内で読み取り処理を実行する形は避けた方が、データ読み取りで意図しない挙動になるのを防げて良さそうです。
Web Serial API の仕様を見てみる
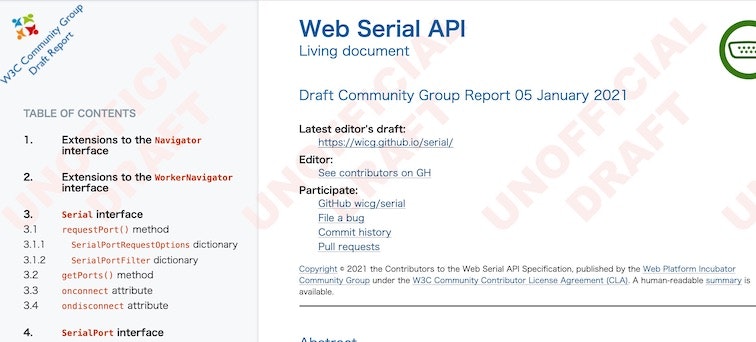
Web Serial API を使う側のプログラムを自分で書いていくにあたり、以下のサイトで仕様などを見ていきました。
●Web Serial API
https://wicg.github.io/serial/
接続処理
仕様を見ると、例えば特定のデバイスだけを接続対象の候補にだすようなフィルタの処理についてなど、いろいろな仕様が書かれてますが、今回はシンプルな接続処理を実装しようと思います。
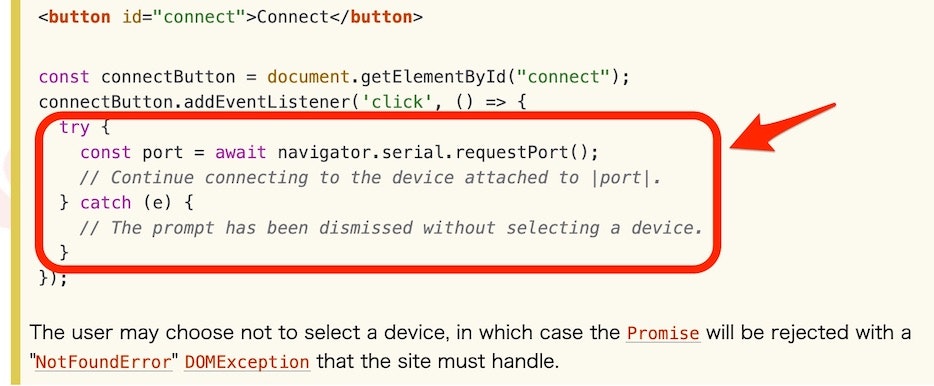
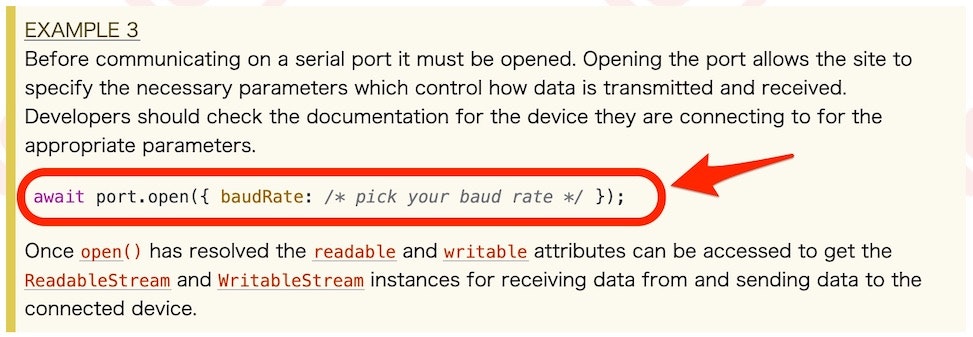
最低限、必要そうに見えるのは「3.1 requestPort() method」の「EXAMPLE 1」のあたりの以下の部分と、「4.4 open() method」の「EXAMPLE 3」あたりの以下の部分っぽいです。
書き込み処理
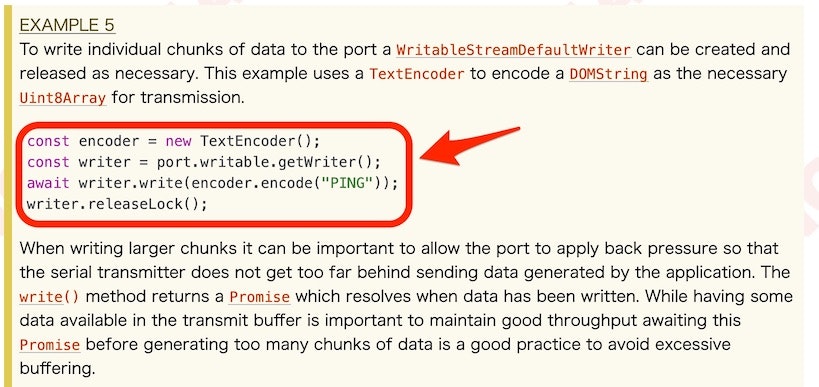
書き込み処理の部分は「4.6 writable attribute」の「EXAMPLE 5」の部分を使うと良さそうです。
Web Serial API の書き込み処理を実装する
それでは、上記の内容をふまえて、HTML+JavaScript で Web Serial API の接続・書き込み処理を実装していきます。
コピペして簡単に使えるように、ファイルは分けずにワンソースでプログラムを書きました。
<!DOCTYPE html>
<html>
  <head>
    <meta charset="utf-8" />
    <meta name="viewport" content="width=device-width, initial-scale=1" />
    <title>Web Serial(Write)</title>
  </head>

  <body>
    <h1>Web Serial</h1>
    <button onclick="onStartButtonClick()">接続</button>
    <button id="write01">書き込み1</button>
    <button id="write02">書き込み2</button>

    <script>
      const button01 = document.getElementById("write01");
      const button02 = document.getElementById("write02");
      button01.addEventListener("click", function () {writeText('aaa\n');}, false);
      button02.addEventListener("click", function () {writeText('bbb\n');}, false);

      let port;

      async function onStartButtonClick() {
        try {
          port = await navigator.serial.requestPort();
          await port.open({ baudRate: 115200 });
          console.log("接続");
        } catch (e) {
          console.log("Error");
        }
      }

      async function writeText(text) {
        const encoder = new TextEncoder();
        const writer = port.writable.getWriter();
        await writer.write(encoder.encode(text));
        console.log("テキスト書き込み: " + text);
        writer.releaseLock();
      }
    </script>
  </body>
</html>
Webサイト上にボタンを 3つ用意し、それぞれ「接続処理」・「書き込み処理1」・「書き込み処理2」に割り当てています。
また、baudRate は micro:bit に合わせて「115200」に設定しています。
実際に動かしてみる
冒頭で紹介した記事の中で書いていたのですが、Web Serial API がデフォルトで使えるのはベータ版で提供されている Chrome の release 89 です(2021年2月9日時点)。
Chrome の安定版である release 88(2021年2月9日時点)で使えるようにする方法もありますが、自分は Chrome のベータ版で動かしました。
そして、実際に動いている様子の動画は、このような感じです。
来週の #IoTLT の登壇ネタに使う「Web Serial API」。
— you (@youtoy) February 9, 2021
以下のページの仕様を読み解きながら、Web Serial API による書き込みを行う処理を、できるだけ少ないコードで実装して、micro:bit と組み合わせて動作させてみた!
https://t.co/WnrHaE4Fy4 pic.twitter.com/SNvQCbfRAm
とりあえず、Webサイト上でのボタン押下に合わせて micro:bit の LED が光り、その光り方は押したボタンによって変わる(今回は 2通り)、という動作が実現できました。
【注意!】
今回のものは、LED を光らせるボタンの 2つ目を押した際、そのボタンを2回押してから光るという動作をしています。おそらく、何かシリアル通信の部分で意図しないデータがバッファに残ってるとか、対応したほうがよさそうな内容が残っていそうです。
↓これを見てみると良さそうかも。
●serial-terminal/index.ts at master · GoogleChromeLabs/serial-terminal
https://github.com/GoogleChromeLabs/serial-terminal/blob/master/src/index.ts
追記
読み取りの処理も試して、最終的にはうまくいきました。
●Web Serial API を使って micro:bit からセンサーの値を読み取る(途中段階まで) - Qiita
https://qiita.com/youtoy/items/9606c58369796a65f8f5
●Web Serial API を使って micro:bit からセンサーの値(XYZ)を読み取る&リアルタイムなグラフ化 - Qiita
https://qiita.com/youtoy/items/6394a5570ddd54a2ce87
追記2
ソースコードなどを GitHub にも置きました。
https://github.com/yo-to/WebSeriaAPI/tree/main/examples/01_write_microbit
