これまで、以下の 2つの記事を書いた際に使った「Web Serial API」。
- Web Serial API を最短の手順で試したくてやったこと(micro:bit を利用) - Qiita
- Web Serial API を使った micro:bit への値の書き込み - Qiita
まだ、シリアル通信での値の読み取りを実装できてなかったので、それを試します。
micro:bit 側のプログラムを準備する
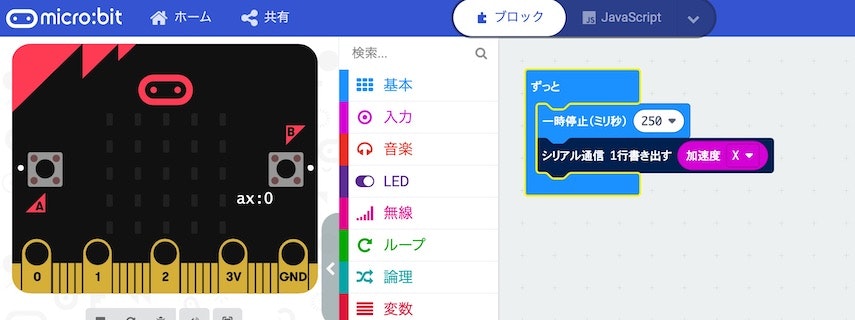
シリアル通信で Webサイト側へ値を書き出すためのプログラムを作ります。
Microsoft MakeCode for micro:bit を使い、以下のプログラムを micro:bit に書き込みます。
実装した処理は非常に単純で、micro:bit の加速度センサーの X の値を、一定に時間間隔でひたすらシリアル通信で書き出すというものです。
Web Serial API の仕様を見てみる
Web Serial API を使った micro:bit への値の書き込みを試した記事と同様に、以下の仕様を見つつ必要そうな部分を取り出していきます。
●Web Serial API
https://wicg.github.io/serial/
接続処理
この部分は、Web Serial API を使った micro:bit への値の書き込みを試した記事と同じになるため、そちらの記載をご覧ください。
読み取り処理
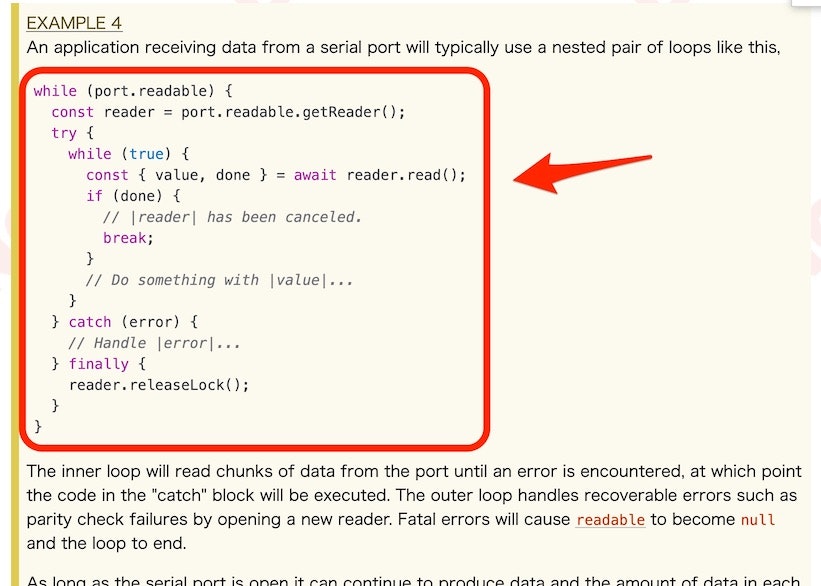
読み取り処理の部分は「4.5 readable attribute」の「EXAMPLE 4」の部分を使うと良さそうです。
上記を元にしたプログラムを動かして value の中身をコンソールに書き出すと、データがバイナリになっているため、以下のようにデコードの処理を入れました。
const inputValue = new TextDecoder().decode(value);
Web Serial API による読み取り処理を実装する
それでは、上記の内容をふまえて、HTML+JavaScript で Web Serial API の接続・読み取り処理を実装していきます。
コピペして簡単に使えるように、ファイルは分けずにワンソースでプログラムを書きました。
<!DOCTYPE html>
<html>
  <head>
    <meta charset="utf-8" />
    <meta name="viewport" content="width=device-width, initial-scale=1" />
    <title>Web Serial(Read)</title>
  </head>

  <body>
    <h1>Web Serial(Read)</h1>
    <button onclick="onStartButtonClick()">接続</button>

    <script>
      async function onStartButtonClick() {
        try {
          const port = await navigator.serial.requestPort();
          await port.open({ baudRate: 115200 });

          while (port.readable) {
            const reader = port.readable.getReader();

            try {
              while (true) {
                const { value, done } = await reader.read();
                if (done) {
                  console.log("Canceled");
                  break;
                }
                const inputValue = new TextDecoder().decode(value);
                console.log(inputValue);
              }
            } catch (error) {
              console.log("Error: Read");
              console.log(error);
            } finally {
              reader.releaseLock();
            }
          }
        } catch (error) {
          console.log("Error: Open");
          console.log(error);
        }
      }
    </script>
  </body>
</html>
実際に動かしてみる
これまで書いた記事と同様に、Web Serial API がデフォルトで使える Chrome のベータ版 release 89(2021年2月9日時点)で試します。
そして、以下のようにセンサーの値を読み取って、コンソールに出力することができました。
ただし、これまでの内容では未完成です(この後に補足します)。
Web Serial API を使って、micro:bit の加速度センサーの値を、ブラウザのコンソールに出力してみた。 pic.twitter.com/FQwKmhEURd
— you (@youtoy) February 9, 2021
対応できてないこと ← その後、解決しました
今回、対応がまだできてない事項があります。
それは、以下の部分です。
↑ その後、解決しました(詳細は以下の記事で)
●Web Serial API を使って micro:bit からセンサーの値(XYZ)を読み取る&リアルタイムなグラフ化 - Qiita
https://qiita.com/youtoy/items/6394a5570ddd54a2ce87
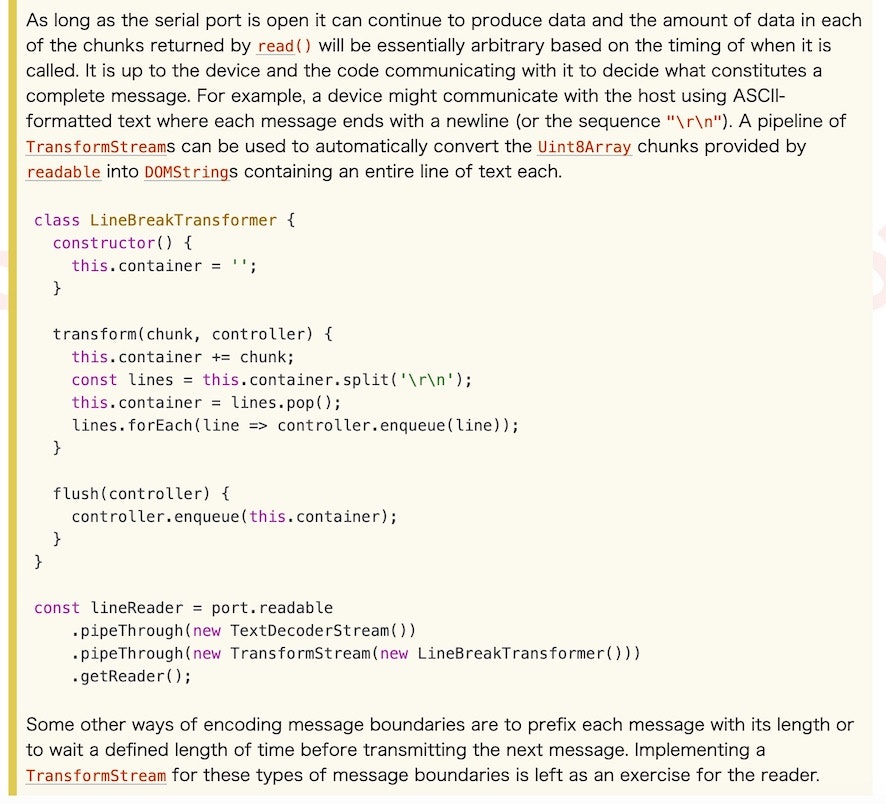
どういう内容かというと、1行分ずつ書き出されたデータを読み込む時、理想的には書き出された単位で(1行ずつ)読み出せると扱いやすいですが、今の実装だとそのようにはならない、というものです。そのため、読み取ったデータをまとめて、改行部分で区切って扱う処理(上記の画像内で書かれている内容)が必要なのですが、それがまだ実装できてません。
具体的に生じる問題として、今の実装だと以下のような事が起こります。
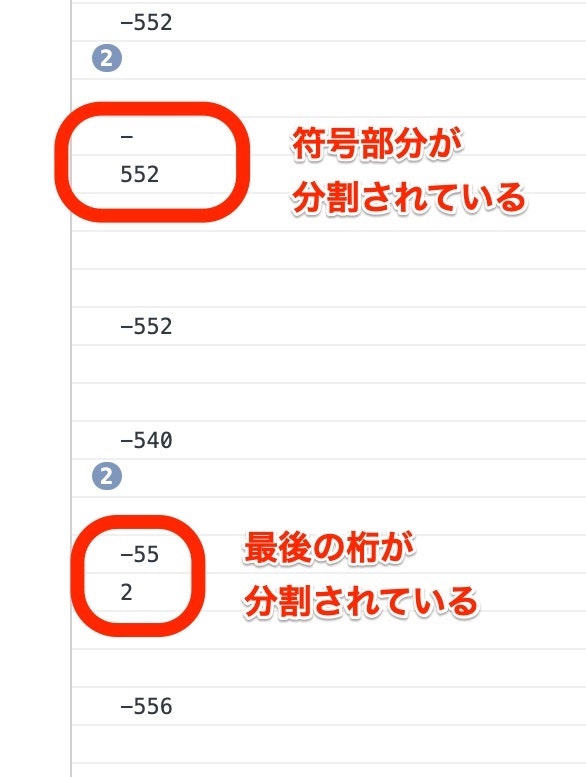
以下の画像は、micro:bit をほぼ静止させた状態で値を出力させている状態のものです。
このように、出力された 3桁の負の値が、途中の部分で分割された状態で読み込まれることがあります。
この件については、別途、対応できればと思っています。
↓このあたりを見ると良いかな。
●GoogleChromeLabs/serial-terminal: Demo application for the Serial API.
https://github.com/GoogleChromeLabs/serial-terminal
余談
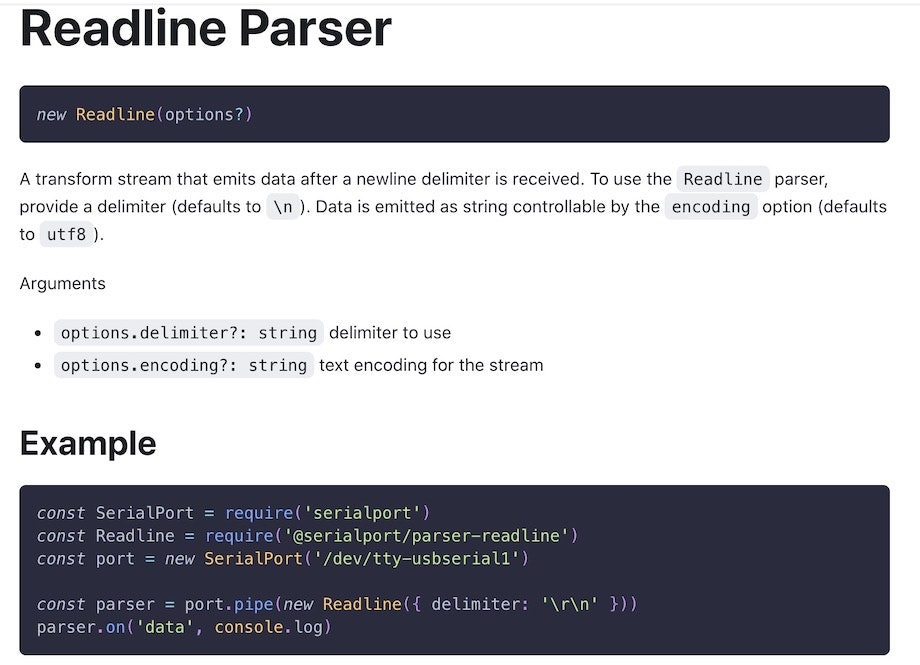
Node.js で Node Serialport を使う場合だと、こんな感じでサクッと処理できたりするんだけど...
const parser = port.pipe(new Readline({ delimiter: '\r\n' }))
parser.on('data', console.log)
●Readline Parser | Node Serialport
https://serialport.io/docs/api-parser-readline/
