ここ最近書いた、以下の記事でも扱っている Leap Motion + JavaScript の話題です。
- Leap Motion の JavaScriptライブラリ(leap.js)のプラグイン「leap-plugins.js」を試す: Hand Entry のお試し(p5.js Web Editor上で) - Qiita
- バニラな JavaScript や p5.js で Leap Motion の情報を取得する(leap.js ではなく WebSocket を利用) - Qiita
今回は、手や指の向きを取得するための処理や、それに必要な仕様の情報について書いていきます。
今回の話に関わる動画
今回の「Leap Motion で取得した手や指の向きの情報を、p5.js Web Editor上の描画に連動させる」という話について、それを動作させた時の動画を掲載します。
このように、p5.js Web Editor上で線を描画し、その角度や長さを変化させる、ということをやりました。
Leap Motion で手や指の向きを取得(JavaScriptライブラリを利用)
JavaScriptライブラリを利用するための準備
冒頭で掲載していた記事と同様に、今回の情報取得などには JavaScriptライブラリ「leap.js」を使います。
CDN からライブラリを読み込む話や、それを p5.js Web Editor上で行う話については、冒頭に書いていた記事よりもさらに前に書いた記事の中で書いていますので、そちらをご参照ください。
Leap Motion での情報取得
「Leap.loop」と「Frame」
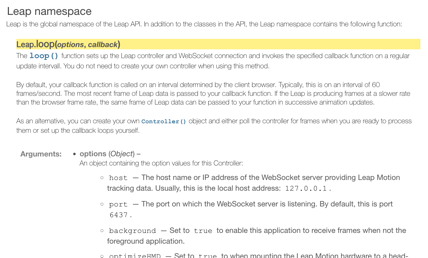
ここで Leap Motion から情報を取得する時に用いている処理について、少し補足します。まず、手や指の向きの情報を含むデータを取得する際に用いる「Leap.loop」について書きます。
●API Reference — Leap Motion JavaScript SDK v3.2 Beta documentation
https://developer-archive.leapmotion.com/documentation/javascript/api/Leap_Classes.html#Leap.loop

この処理を使うと、一定の時間間隔で「Frame」を取得でき、その中に以下の手や指の情報が含まれています。
「Frame.hands[]」と「Frame.fingers[] / Hand.fingers[]」
以下の「Frame.hands[]」と「Frame.fingers[] / Hand.fingers[]」は、「片手や両手」・「5本の指のうちの全部、もしくは一部の指」の情報を扱えるよう、個々の手・指の情報を配列で保持しています。
●【Frame.hands[]】
https://developer-archive.leapmotion.com/documentation/javascript/api/Leap.Frame.html#Frame.hands[]
![Frame.hands[]](https://qiita-user-contents.imgix.net/https%3A%2F%2Fqiita-image-store.s3.ap-northeast-1.amazonaws.com%2F0%2F50868%2Fff1437aa-d282-762e-b8cb-98f072f3c308.png?ixlib=rb-4.0.0&auto=format&gif-q=60&q=75&s=dee7652afbed394fcae96322235a2f81)
●【Frame.fingers[]】
https://developer-archive.leapmotion.com/documentation/javascript/api/Leap.Frame.html#Frame.fingers[]
![Frame.fingers[]](https://qiita-user-contents.imgix.net/https%3A%2F%2Fqiita-image-store.s3.ap-northeast-1.amazonaws.com%2F0%2F50868%2F543b1b32-ac51-a366-d191-5f6d8a7cec8e.png?ixlib=rb-4.0.0&auto=format&gif-q=60&q=75&s=78cb9cfbdf574cb24a5fa20c045d5db9)
●【Hand.fingers[]】
https://developer-archive.leapmotion.com/documentation/javascript/api/Leap.Hand.html#Hand.fingers[]
「direction」
そして、さらにその個別に保持されている情報の中で、「direction」という向きに関する情報を持っています。以下は、一方の手の向きの情報に関する部分(Hand.direction)です。
●【Hand.direction】
https://developer-archive.leapmotion.com/documentation/javascript/api/Leap.Hand.html#Hand.direction

この方向の情報は、3方向の向きの情報を配列で持っているため、「hand.direction[0]」や「hand.direction[1]」、「hand.direction[2]」という書き方で、それぞれを取得する形です。
各指についても、同じ「direction」で方向の情報を取得できます。
左右の手の区別に関する補足
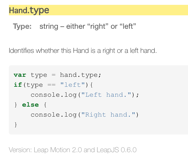
「Frame.hands[]」で取得できる手の情報について、左右の手を区別するための情報が含まれています。それが「Hand.type」で、これが「left」か「right」のどちらであるかで、左右の手を区別できます。
●【Hand.type】
https://developer-archive.leapmotion.com/documentation/javascript/api/Leap.Hand.html#Hand.type

各指の指定に関する補足
上で左右の手を区別する情報について書きましたが、各指の情報を取得する方法についても、ここで書いておきます。
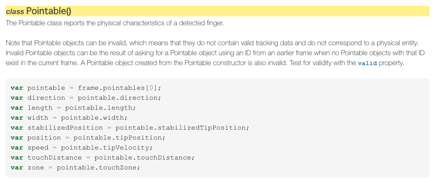
Frame.fingers[] や Hand.fingers[] の中で各指の情報を持っている部分は「Finger class(Pointable class)」になるようです。この中に、先ほどと同様に「direction」があります。
●Finger — Leap Motion JavaScript SDK v3.2 Beta documentation
https://developer-archive.leapmotion.com/documentation/javascript/api/Leap.Finger.html#Finger
●Pointable — Leap Motion JavaScript SDK v3.2 Beta documentation
https://developer-archive.leapmotion.com/documentation/javascript/api/Leap.Pointable.html#Pointable

これは「fingers[0]」や「fingers[4]」という書き方で情報を取得します。
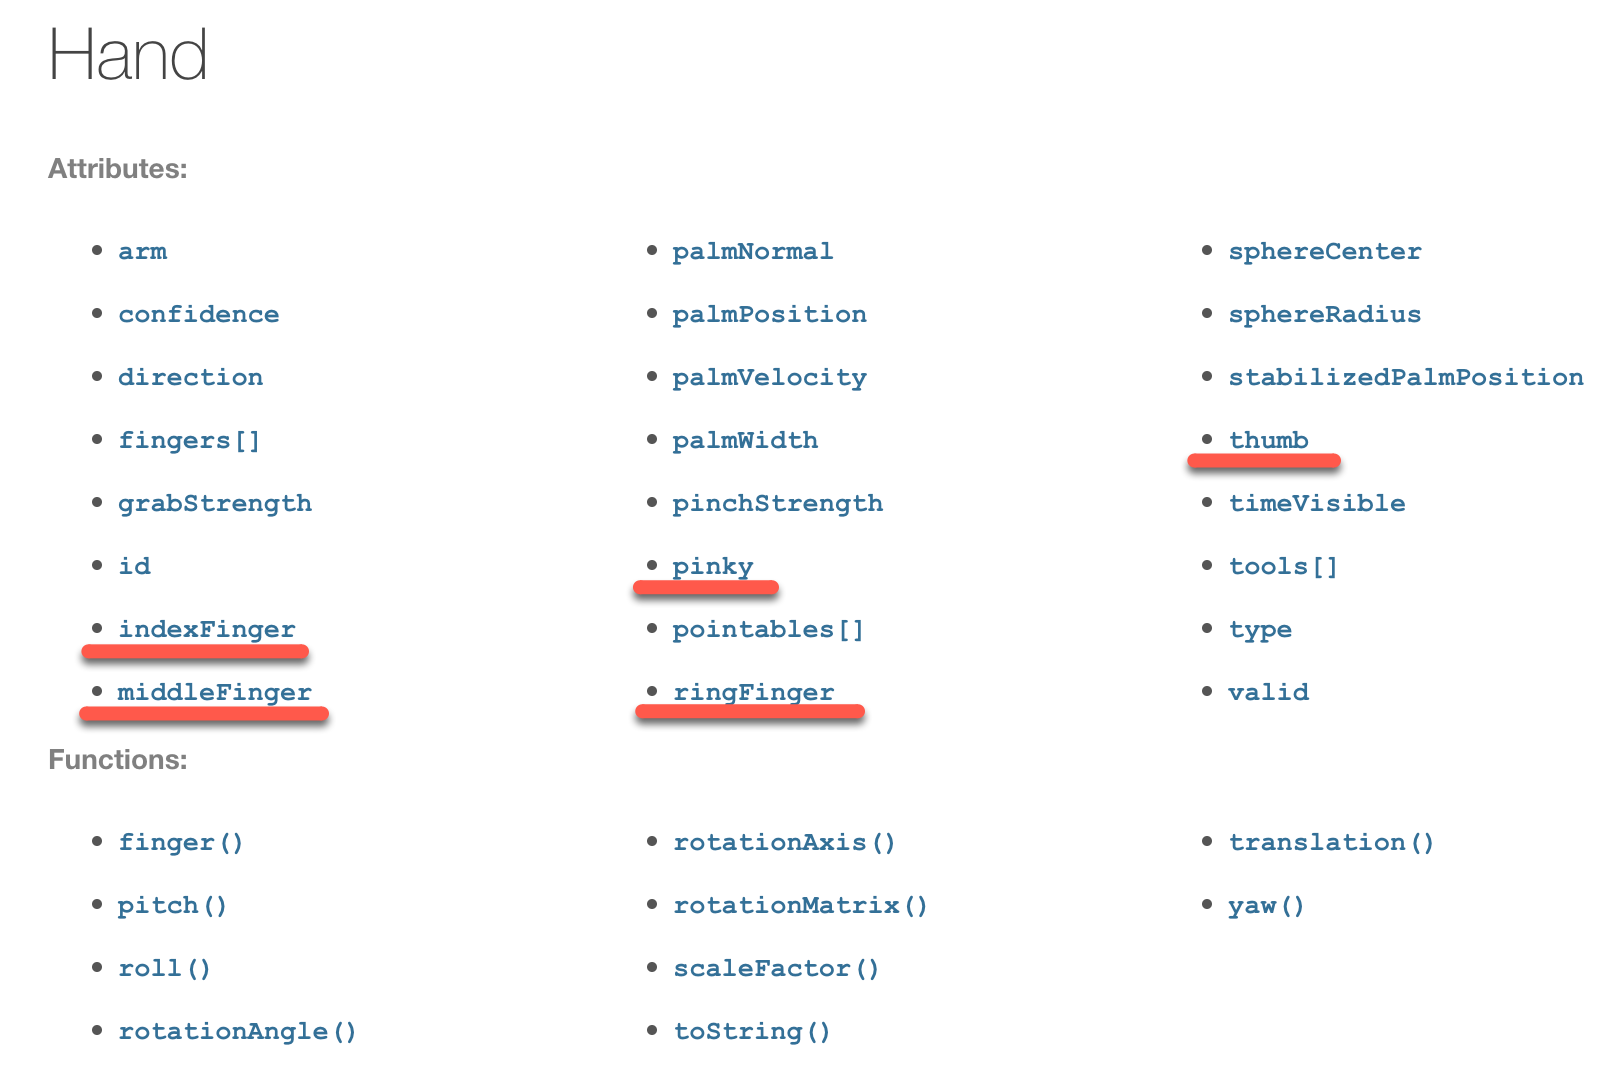
またそれとは別に、以下のように「Hand.【指の名称】」というやり方でアクセスする方法もあるようでした。

手や指の方向を取得し描画する処理
手の方向を取得し描画する処理
まずは、手の方向を取得する処理について、ポイントになる部分を抜粋して書きます。
「Frame.hands[]」に該当するのが、以下の「hands」です。それが 1つか 2つの時(少なくともどちらか一方の手が検出されている時)に、次のような処理を行っています。
・hands の中身を forEach で順に見ていく
・hand.type を確認して、左手の情報だった場合に線を描画する処理をする(3つの方向の情報がある中で direction[0] と direction[1] を線の描画に使う)
    if (hands.length > 0) {
      hands.forEach(function (hand) {
        switch (hand.type) {
          case "left":
            console.log("左手");
            drawLine(hand.direction[0], 0.3, [200, 150, 100]);
            drawLine(hand.direction[1], 0.7, [100, 150, 200]);
            break;
          case "right":
            console.log("右手");
            // 【何かの処理】
            break;
        }
      });
    }
今回、右手については処理を何も書いていない状態です。
また、p5.js で線をひく処理は以下のようにしています。
function drawLine(handDirection, position, color) {
  const da = 100;
  const dx0 = width * position,
    dy0 = height * 0.5,
    dx1 = dx0 + da * sin(handDirection),
    dy1 = dy0 - da * cos(handDirection);
  stroke(...color);
  line(dx0, dy0, dx1, dy1);
}
線は (x0, y0) と (x1, y1) の 2点間を結ぶものにします。それについて (x1, y1) は、 (x0, y0) から一定の距離と角度となるようにしています(da や sin()・cos() で極座標から直交座標への変換を実施)。
ちなみに、ここで「方向を示す handDirection」は、「-1 から 1」の値をとるものです。そのような範囲で変化する値であるため、sin()・cos() の角度(ラジアン)を指定する部分にそのまま入力として使っています。
指の方向を取得し描画する処理
次は、指の方向を利用する話です。
右手・左手を区別する部分は、先ほどの内容と似たような処理です。そして、線を描画する部分の中身が違っていますので、そちらの補足に進みます。
    const hands = leapFrame.hands;
    if (hands.length > 0) {
      hands.forEach(function (hand) {
        switch (hand.type) {
          case "left":
            drawLine("L", hand, 0.3, [200, 150, 100]);
            break;
          case "right":
            drawLine("R", hand, 0.7, [100, 150, 200]);
            break;
        }
      });
    }
手の向きを描画した時は、3つある向きの情報のうち 2つをそれぞれ異なる線の角度に対応させました。
一方、以下では線を描画する角度は左右の手(の5本の指)でそれぞれ固定の値にしています。そして、その線の長さを変化させるようにしています。
function drawLine(LR, hand, position, color) {
  const dx0 = width * position,
    dy0 = height * 0.7;
  let da, dx1, dy1;

  const radList = [-75, -25, -5, 15, 35];
  const radList2 = radList.map(function (e) {
    if (LR === "L") { // 左手(手のひらが上向きの前提)
      return e;
    } else if (LR === "R") { // 右手(手のひらが上向きの前提)
      return e * -1;
    }
  });

  // 手のひらが上向きの前提
  da = 130;
  for (let i = 0; i < 5; i++) {
    const da2 = da * map(hand.fingers[i].direction[1], 0, 1, 1.0, 0.1);
    dx1 = dx0 + da2 * sin(radians(radList2[i]));
    dy1 = dy0 - da2 * cos(radians(radList2[i]));
    stroke(...color);
    line(dx0, dy0, dx1, dy1);
  }
}
また、今回は両手の手のひらの向きが上という前提で、描画する線の方向や direction がとる値の範囲の扱い(プログラムの中で p5.js の map を使って値の範囲の変換をしている部分)を決めています。
もし、両手の手のひらが下向きの場合も対応する場合は、「手か指の向きから、手のひらの向きを判定する処理」や、「手のひらの向きによって、線を秒する角度指定の部分や、p5.js の map で処理している部分を変える対応」が必要になりそうです。
このような実装をして、冒頭に掲載した動画の処理の内容を実現しました。