(この記事は KDDI エンジニア&デザイナー の Advent Calendar 2025 の記事【2つ目】です)
はじめに
この記事で扱う内容は、以下の記事にも書いていた「OpenAI の Agent builder」関連です。
●OpenAI の Agent builder を今になって試してみる(テンプレートの内容を少し変更して実行)【AIエージェント構築&運用】 - Qiita
https://qiita.com/youtoy/items/c285b367b57278e893e0
上記の内容を試していたところ、作った内容をコードで出力できるようでした。それを OpenAI Agents SDK で動かしてみた話です。
実際に試してみる
実際に試してみます。
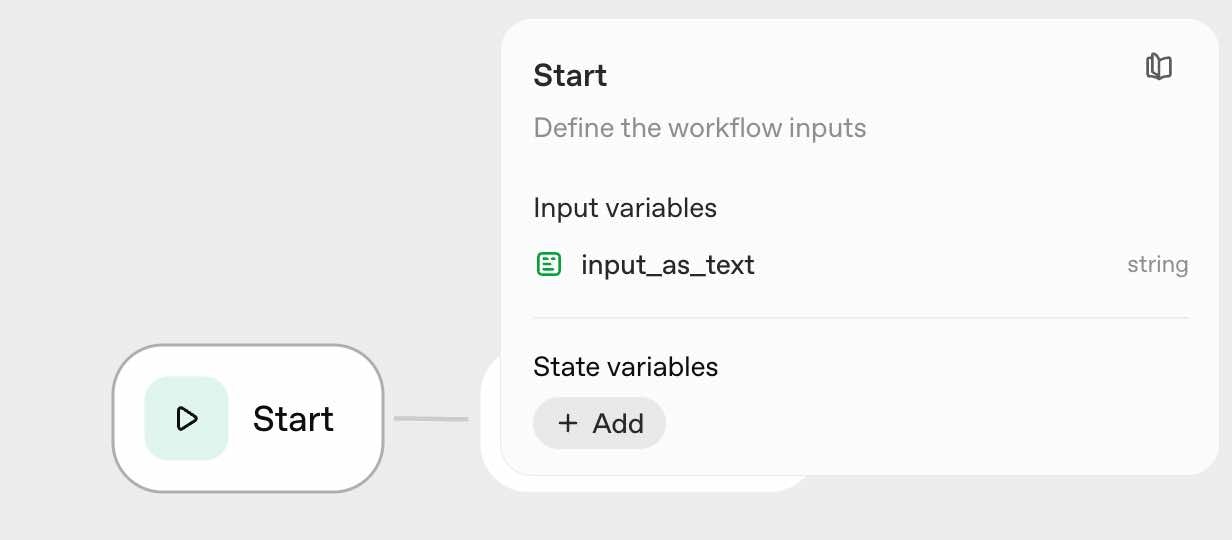
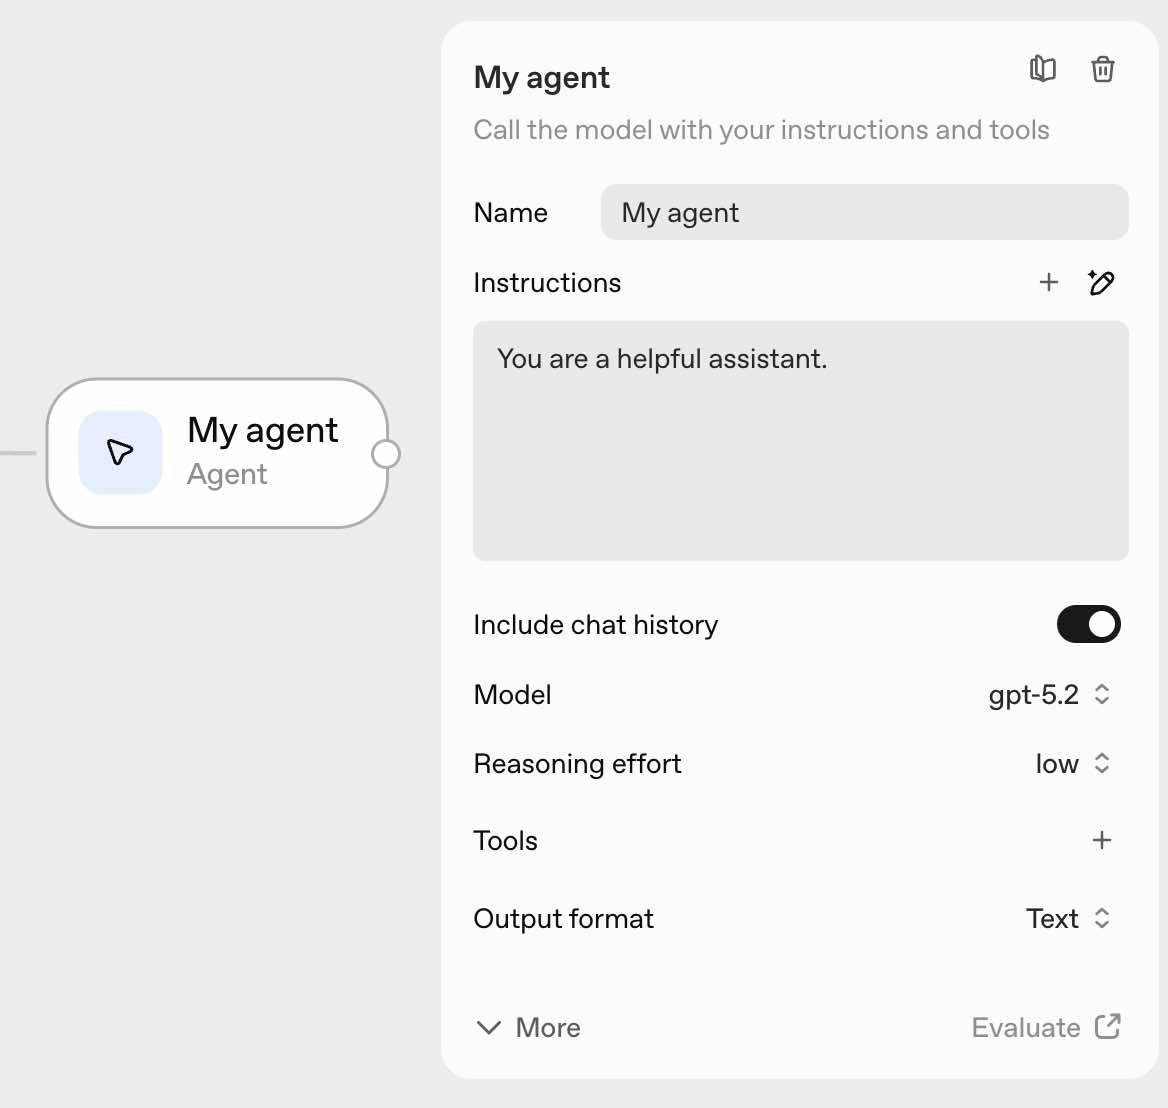
Agent builder でコードを出力
とりあえずシンプルな内容で試せればと思い、Agent builder側はデフォルトで作られる内容そのままとしました。
出力されたコード
デフォルトで用意された内容をコードとして出力すると、以下の内容が得られました。
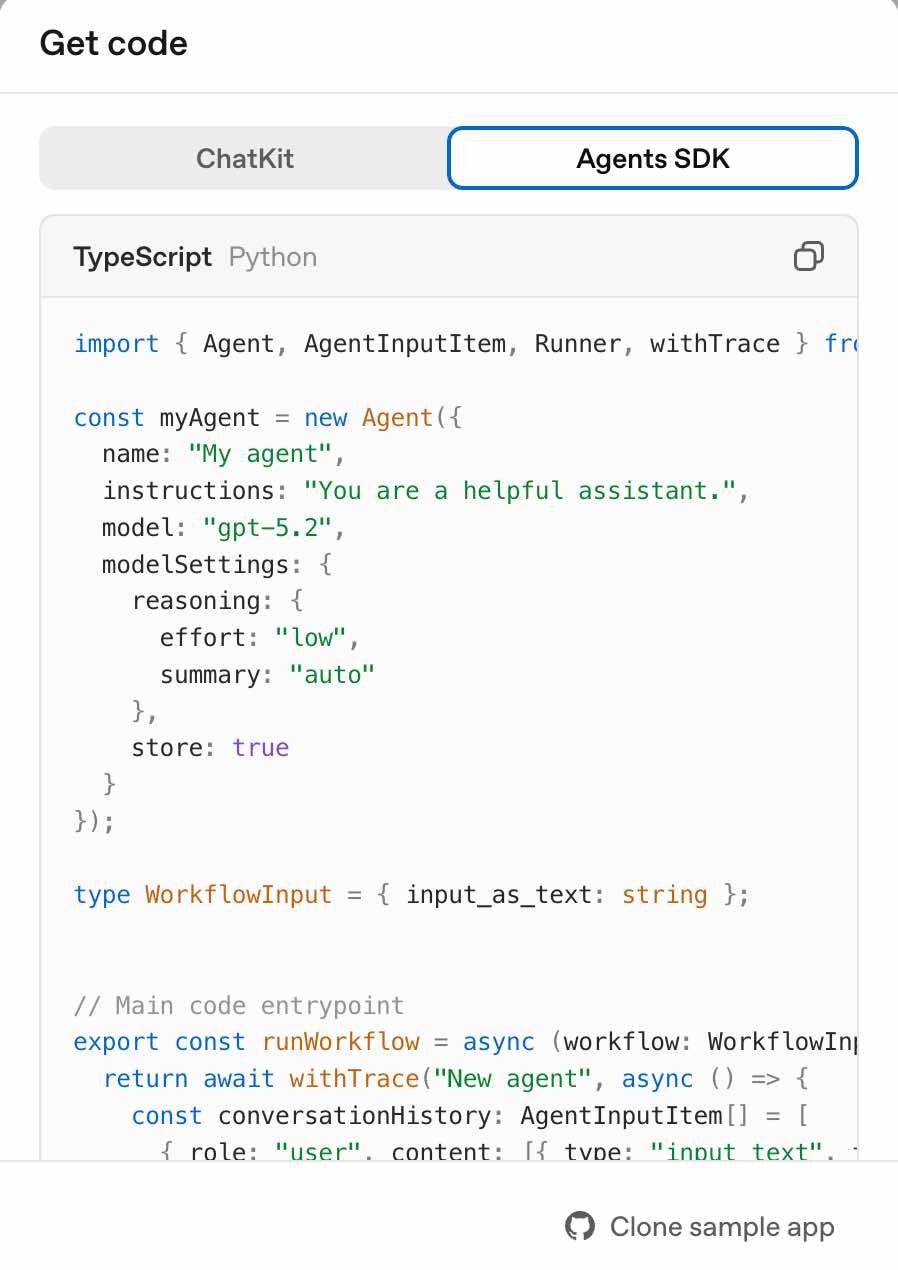
import { Agent, AgentInputItem, Runner, withTrace } from "@openai/agents";

const myAgent = new Agent({
  name: "My agent",
  instructions: "You are a helpful assistant.",
  model: "gpt-5.2",
  modelSettings: {
    reasoning: {
      effort: "low",
      summary: "auto",
    },
    store: true,
  },
});

type WorkflowInput = { input_as_text: string };

// Main code entrypoint
export const runWorkflow = async (workflow: WorkflowInput) => {
  return await withTrace("New agent", async () => {
    const conversationHistory: AgentInputItem[] = [
      {
        role: "user",
        content: [{ type: "input_text", text: workflow.input_as_text }],
      },
    ];
    const runner = new Runner({
      traceMetadata: {
        __trace_source__: "agent-builder",
        workflow_id: "【Workflow ID】",
      },
    });
    const myAgentResultTemp = await runner.run(myAgent, [
      ...conversationHistory,
    ]);
    conversationHistory.push(
      ...myAgentResultTemp.newItems.map((item) => item.rawItem)
    );

    if (!myAgentResultTemp.finalOutput) {
      throw new Error("Agent result is undefined");
    }

    const myAgentResult = {
      output_text: myAgentResultTemp.finalOutput ?? "",
    };
  });
};
これに少し処理を加えたりして実行できないかと、試してみました。
Agent builder で出力されたコードを実行できるようにする
Agent builder で出力されたコードに手を加える
まずは先ほど出力されたコードに、少しだけ処理を加えます。
import { Agent, AgentInputItem, Runner, withTrace } from "@openai/agents";

const myAgent = new Agent({
  name: "My agent",
  instructions: "You are a helpful assistant.",
  model: "gpt-5.2",
  modelSettings: {
    reasoning: {
      effort: "low",
      summary: "auto",
    },
    store: true,
  },
});

type WorkflowInput = { input_as_text: string };

// Main code entrypoint
export const runWorkflow = async (workflow: WorkflowInput) => {
  return await withTrace("New agent", async () => {
    const conversationHistory: AgentInputItem[] = [
      {
        role: "user",
        content: [{ type: "input_text", text: workflow.input_as_text }],
      },
    ];
    const runner = new Runner({
      traceMetadata: {
        __trace_source__: "agent-builder",
        workflow_id: "【Workflow ID】",
      },
    });
    const myAgentResultTemp = await runner.run(myAgent, [
      ...conversationHistory,
    ]);
    conversationHistory.push(
      ...myAgentResultTemp.newItems.map((item) => item.rawItem)
    );

    if (!myAgentResultTemp.finalOutput) {
      throw new Error("Agent result is undefined");
    }

    const myAgentResult = {
      output_text: myAgentResultTemp.finalOutput ?? "",
    };

    // この部分を追加
    return myAgentResult;
  });
};
変更した場所については、最後のところに「 return myAgentResult; 」を追加しただけです。
Agent builder で出力されたコードを呼び出す処理
あとは、上記のコードを呼び出す処理を準備します。具体的には、以下のシンプルな内容としました。
import { runWorkflow } from "./app.ts";

async function main() {
  const prompt = `
あなたは日本語で答えるアシスタントです。
次のテーマを箇条書きで整理し、最後に一言まとめてください:
- Agent Builder から出力されたコードの使いどころ
- Runner / withTrace の役割
`;

  const result = await runWorkflow({ input_as_text: prompt });

  console.log("=== output_text ===");
  console.log(result.output_text);
}

main().catch((err) => {
  console.error(err);
  process.exit(1);
});
コードを実行
あとは、下準備をしてコードを実行するだけです。
下準備は、pnpm を使って進めました。
pnpm でパッケージのインストールなど
pnpm で実行したコマンドは、以下になります。2つ目のコマンドを実行する前には、OpenAI の APIキーを環境変数としてセットしました。
pnpm install @openai/agents
pnpm dlx tsx run.ts
それと 2つ目のほうについて、tsx をローカルインストールして使う場合のコマンドも書いておきます。
pnpm add -D tsx
pnpm exec tsx run.ts
実行結果
上記のコマンドで処理を実行した結果は、以下のとおりです。
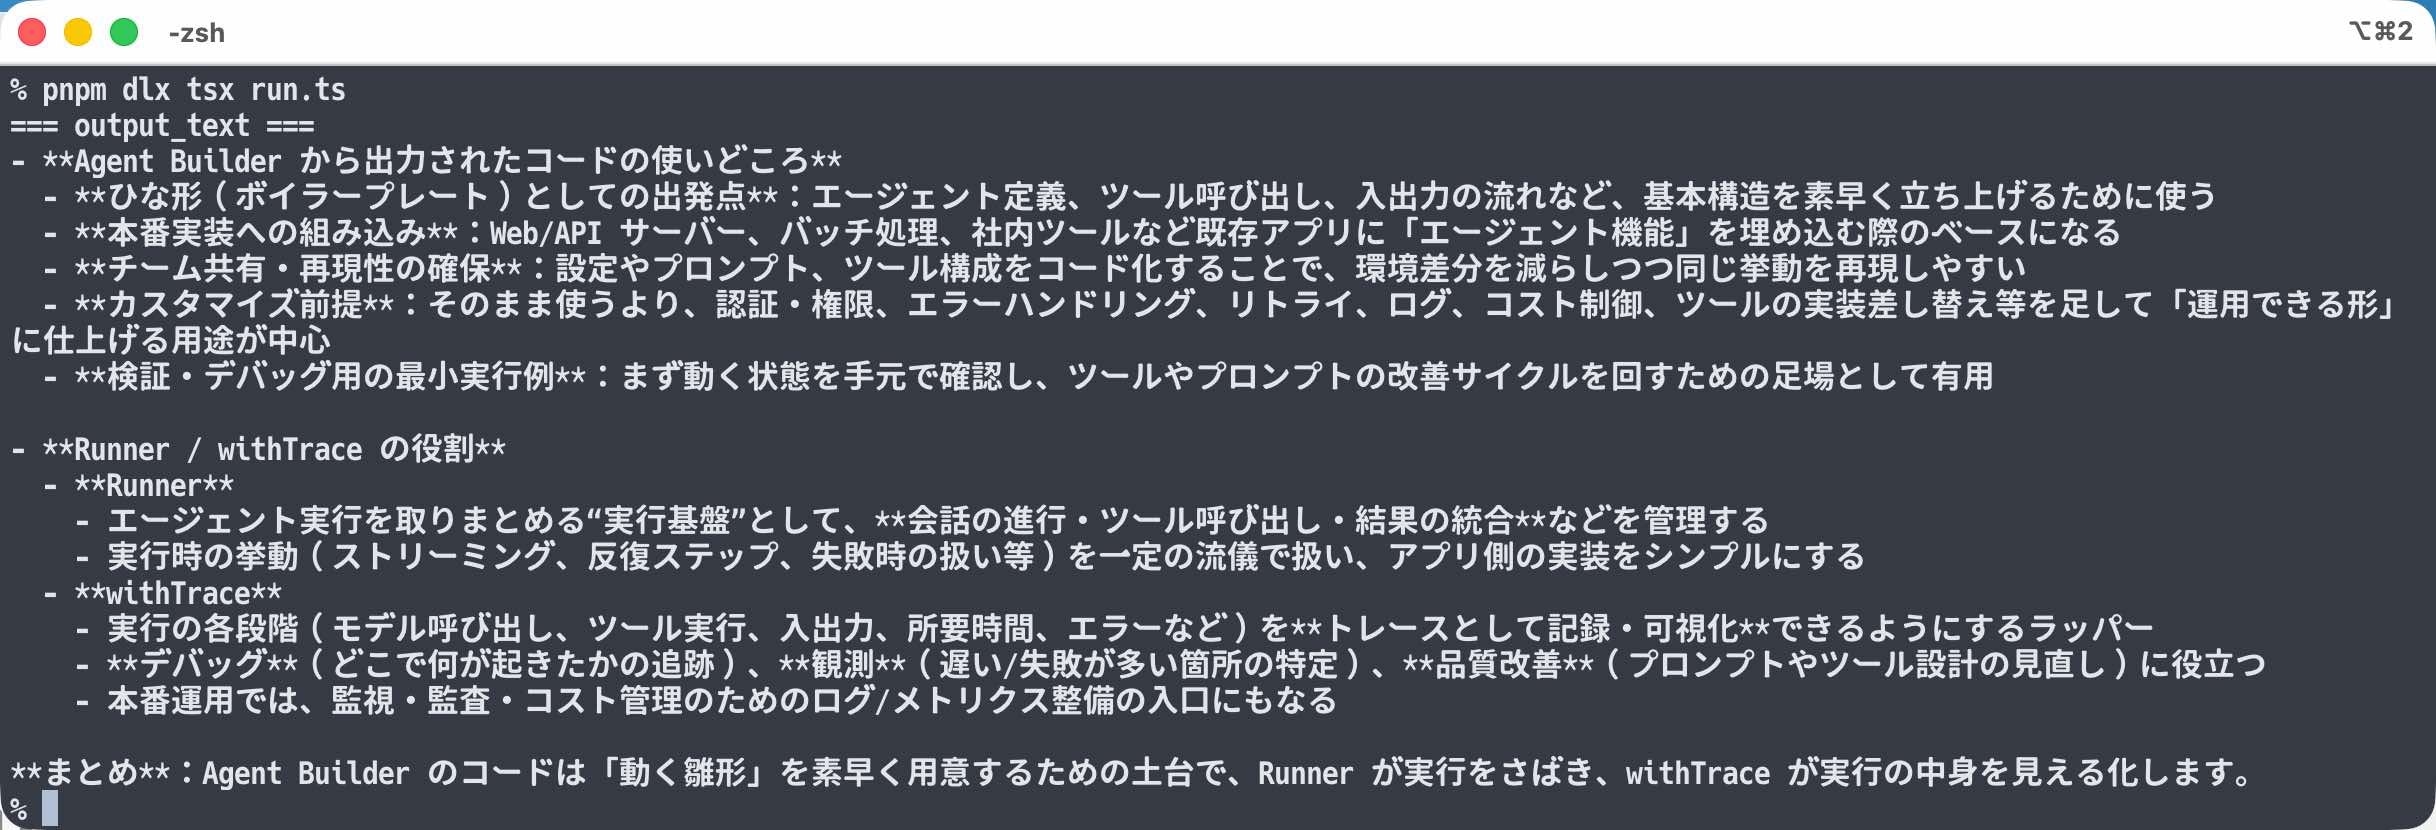
無事、レスポンスを得られたことが確認できました。