はじめに
みなさんPWAやってますか!PWA良いですよ、PWA!
最近ではPWAをPlayStoreやAppStoreに登録できるようにもなってきていて、ネイティブの機能バリバリじゃなければPWAで十分に対応できます。
PWAアプリを3つのアプリストアにリリースして学んだこと - Qiita
【実践】Google Play Store でPWA配信
特に自分たちのウェブ系エンジニアとしては、ウェブ系の開発スキルセットでアプリが作成できる、というのはかなりの強みですね。
そんなPWAなのですが、開発スキルの変化ストア登録以外にも簡単になる事がありました。
デプロイです。
PWAアプリはウェブアプリ(ページ)として振る舞うので面倒なビルドが不要です。
ウェブページとしてHTTPSで接続可能などこかにアップロードするだけで確認できます。
開発フローとして、
ブランチ作成 => コミットプッシュ => Slackにデプロイ済みが通知 => PRに添付 => レビューがめっちゃしやすい!
となりました。
こんな感じでデプロイ済みのURLが送られてきます。

めっちゃ良いです!特に非エンジニアの人にビルド、デプロイをすることなく確認してもらいやすいのはよかったです。
またブランチごとに独立しているので他の人の開発に影響されることなく独立して確認できます。便利❗
ブランチ名の取得
ブランチごとに独立してデプロイを行うため、デプロイ先のディレクトリを決定します。
$ git symbolic-ref --short HEAD
feature/kusaoisii/201902/add-Ga-ticket
ここで取れたブランチ名をアップロード先にします。
またGitのワークフローは Git-flowをベースにしているため、リリースはreleaseブランチで行い、リリースタグを打っています。
このリリースタグも独立したデプロイを行うようにしました。
if [[ "$DEPLOY_PATH" == master ]]; then
  # master(本番)はindex.htmlのリダイレクトが効くルート直下デプロイ
  # ssh  -o StrictHostKeyChecking=no -i `pwd`/attachments/dsn6 username@username.sakura.ne.jp "mkdir -p ${DEPLOY_BASE}/${DEPLOY_PATH}"
  rsync -avr -e "ssh  -o StrictHostKeyChecking=no -i `pwd`/attachments/username" app/ username@username.sakura.ne.jp:${DEPLOY_BASE}/
  # e.g. export DEPLOY_PATH=release/v1.2.3 と指定される
  DEPLOY_PATH='release/'`echo $(git tag | sort | tail -1)`
  ssh  -o StrictHostKeyChecking=no -i `pwd`/attachments/username username@username.sakura.ne.jp "mkdir -p ${DEPLOY_BASE}/${DEPLOY_PATH}"
  rsync -avr -e "ssh  -o StrictHostKeyChecking=no -i `pwd`/attachments/username" app/ username@username.sakura.ne.jp:${DEPLOY_BASE}/${DEPLOY_PATH}
リリースは
https://exmaple.com/release/v1.1.1
といったURLにしています。
バージョン番号のとり方は下記に書いています。
[システムを継続して開発する場合にはバージョン情報を自動で付けると良かったです - Qiita]
https://qiita.com/yousan/items/cffa19f67f225097127d
アップロード
PWAはウェブサイトと一緒なので、該当のディレクトリをアップロードする必要させます。
さくらのレンタルにアップしてみました。
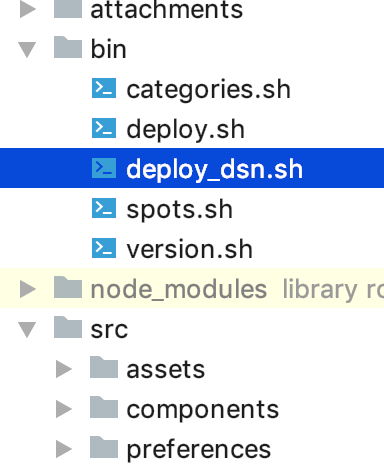
アップロードスクリプトはリポジトリ直下にbin/を作りそこに置いています。
対象となるディレクトリはリポジトリ直下にあるsrc/です。
# !/usr/bin/env bash

set -xe

# スクリプトが呼ばれた場所からリポジトリのルートディレクトリ(ここから一つ上のディレクトリ)に移っておく
cd -- "$(dirname "$BASH_SOURCE")"
cd ../

# 秘密鍵のパーミッションreadを確実に落としておく
chmod 0600 `pwd`/attachments/key

# デプロイ先のパス指定
BASE_URL='https://example.com/'
# @see https://qiita.com/sugyan/items/83e060e895fa8ef2038c#git-symbolic-ref%E3%82%92%E4%BD%BF%E3%81%86
BRANCH_NAME=`git symbolic-ref --short HEAD` # 現在のブランチ名を取得 e.g. feature/yousan/201812/for-deploy
DEPLOY_BASE='/home/username/www/documentroot'
DEPLOY_PATH=$BRANCH_NAME
RSYNC_OPT='-avr -e "ssh -i '`pwd`'/attachments/dsn6"'
if [[ "$DEPLOY_PATH" == master ]]; then
  # master(本番)はindex.htmlのリダイレクトが効くルート直下デプロイ
  # ssh  -o StrictHostKeyChecking=no -i `pwd`/attachments/dsn6 username@username.sakura.ne.jp "mkdir -p ${DEPLOY_BASE}/${DEPLOY_PATH}"
  rsync -avr -e "ssh  -o StrictHostKeyChecking=no -i `pwd`/attachments/username" app/ username@username.sakura.ne.jp:${DEPLOY_BASE}/
  # e.g. export DEPLOY_PATH=release/v1.2.3 と指定される
  DEPLOY_PATH='release/'`echo $(git tag | sort | tail -1)`
  ssh  -o StrictHostKeyChecking=no -i `pwd`/attachments/username username@username.sakura.ne.jp "mkdir -p ${DEPLOY_BASE}/${DEPLOY_PATH}"
  rsync -avr -e "ssh  -o StrictHostKeyChecking=no -i `pwd`/attachments/username" app/ username@username.sakura.ne.jp:${DEPLOY_BASE}/${DEPLOY_PATH}
else
  ssh  -o StrictHostKeyChecking=no -i `pwd`/attachments/username username@username.sakura.ne.jp "mkdir -p ${DEPLOY_BASE}/${DEPLOY_PATH}"
  rsync -avr -e "ssh  -o StrictHostKeyChecking=no -i `pwd`/attachments/uername" app/ username@username.sakura.ne.jp:${DEPLOY_BASE}/${DEPLOY_PATH}
fi

DEPLOYED_URL=${BASE_URL}${DEPLOY_PATH}"/index.html"

set +xe # デバッグ出力をオフにする
echo -e "\n\n"
printf '🎉\e[34m Success! \e[m🎉\n'
printf '\e[34m The deployed URL: \e[m '${DEPLOYED_URL}"\n"

# デプロイ結果をSlackに通知
curl -X POST -H 'Content-type: application/json' \
  --data '{"text": "Thank you for your commit!  Your change makes us strong.\nURL: '${DEPLOYED_URL}'",
           "username": "Deploy bot",
           "channel": "#app-notify",
           "icon_emoji": ":tada:",
           }' \
  https://hooks.slack.com/services/xxxxxx/xxxxxxx/xxxxxxxxxxxxxx
ここまでで手動でdeploy.shを呼ぶとアップロードとSlackへ通知されるようになりました。
CircleCI化
コミットプッシュに連動して自動的にdeploy.shを呼ばれるように自動化しておきます。
Vue.jsで作られたPWAだったためnpmなどでビルドを行うために、イメージはNode.js用のnodeを、アップロードには使い慣れたphpイメージを使いました。
複数のコンテナで受け渡ししてビルドとデプロイ
CircleCIではDockerイメージからコンテナを立ち上げ、その上で作業を行います。
今回の件ではnodeのコンテナでビルドを行い、その結果をphpのイメージでアップを行います。
イメージごとに揃っているライブラリが違うため、最適なものを選ぶことができます。
今回はアップロードにrsyncを使っていたために別イメージになりました。
S3にアップする場合にはaws-cliが入っているイメージを使うと良いです。
Can I build and deploy at different jobs? - Build Environment - CircleCI Discuss
version: 2
jobs:
  build:
    docker:
      # specify the version you desire here
      - image: circleci/node:8.14
      - persist_to_workspace:
          root: . # workspaceのrootパス(絶対パスかworking_directoryからの相対パス)
          paths:
            - . # 共有するパス(絶対パスかrootからの相対パス)
  deploy: # @see https://circleci.com/docs/2.0/deployment-integrations/#aws
    docker:
      - image: circleci/php:7.2
    working_directory: ~/repo
    steps:
      # buildされたファイルをここで復元
      - attach_workspace:
          at: .
fingerprintの登録
(ほとんどの)rsyncはSSH上で動かしているため、SSHのサーバのfingerprintを登録しておきます。
初回接続時に(yes/no)されるアレです。
      - add_ssh_keys:
          fingerprints:
            - "xx:xx:xx:xx:xx:xx:xx:xx:xx:xx:xx:xx:xx:xx:xx:xx:"
            - "xxxxxxxxxxccxcxcxcxcxcxcxcxcxcxcxcxcxcxcxcxc"
            - "xxxxxx/xxxxxxxxxxxxxxxxxx"
There are no configured ssh keys to install. – CircleCI Support Center
sshに-o StrictHostKeyChecking=noなどをつけたのですがそれだけでは足りなかったようで、ちゃんと登録を行いました。
デプロイ設定
出来上がったconfig.ymlです。
# Javascript Node CircleCI 2.0 configuration file
#
# Check https://circleci.com/docs/2.0/language-javascript/ for more details
#
version: 2
jobs:
  build:
    docker:
      # specify the version you desire here
      - image: circleci/node:8.14

      # Specify service dependencies here if necessary
      # CircleCI maintains a library of pre-built images
      # documented at https://circleci.com/docs/2.0/circleci-images/
      # - image: circleci/mongo:3.4.4

    working_directory: ~/repo

    steps:
      - checkout

      # Download and cache dependencies
      - restore_cache:
          keys:
          - v1-dependencies-{{ checksum "package.json" }}
          # fallback to using the latest cache if no exact match is found
          - v1-dependencies-

      - run: yarn install
      - run: npm run build

      - save_cache:
          paths:
            - node_modules
          key: v1-dependencies-{{ checksum "package.json" }}
      # ビルド結果を保存
      # @see https://qiita.com/sawadashota/items/ba89382d563bc90bb5cd#persist_to_workspace
      - persist_to_workspace:
          root: . # workspaceのrootパス(絶対パスかworking_directoryからの相対パス)
          paths:
            - . # 共有するパス(絶対パスかrootからの相対パス)
            -
      # run tests! テストまだないです!
#      - run: yarn test

  deploy: # @see https://circleci.com/docs/2.0/deployment-integrations/#aws
    docker:
      - image: circleci/php:7.2
    working_directory: ~/repo
    steps:
      # buildされたファイルをここで復元
      - attach_workspace:
          at: .
      - add_ssh_keys:
          fingerprints:
            - "xx:xx:xx:xx:xx:xx:xx:xx:xx:xx:xx:xx:xx:xx:xx:xx:"
            - "xxxxxxxxxxccxcxcxcxcxcxcxcxcxcxcxcxcxcxcxcxc"
            - "xxxxxx/xxxxxxxxxxxxxxxxxx"
      - run:
          name: Deploy to sakura
          command: bash bin/deploy_dsn.sh

workflows:
  version: 2
  deploy-master:
    jobs:
      - build
      #      - deploy
      - deploy:
          requires: # テスト失敗したら辞める
            - build
アジャイルとデプロイ
アジャイル開発には 動くソフトウェア を重視すると書かれています。
自動デプロイのおかげで常にリリース可能な動くソフトウェアを確認できるので便利でした。
GitのPullRequest
Gitで開発作業を行う際にブランチを作成してもらっています。
完了やレビューを行う際にはPRを出してもらうようにしています。
このPRにデプロイ済みURLを付与するようにしました。

こうすることでレビュアーが常に動作できるものを確認できます。めっちゃ便利!
感想
さぁ、自動デプロイの環境は整いました!
あとはメンバーでPWAの開発をゴリゴリと行うだけです!開発は楽しいですね、じゃんじゃん開発していきましょう!
雑感
今回の件、当初はS3にアップを行っていましたが、相性がよくなかったです。
PWAの制約上、HTTPS化が必須です。S3バケットに独自ドメインを割り当ててHTTPSするには少し大変で手こずりました。そのためいわゆる普通のホスティングサービスを使いました。
最近だとNowとかお手軽でイケてるのでそういうのを使ってみると良いかもしれませんね。
Now でクラウドの複雑さから解放されよう、今すぐに - Qiita
今回のPWAアプリはフロントのみで構成されていました。
DB連携やサーバサイド系の処理は一切ありません。
サーバサイドの処理が入ってきた場合にはそちらのデプロイも必要になるため少し大変かもしれないですね。

