AppSyncをチーム開発に向けて自動デプロイを行いました。
ブランチごとに独立したデプロイになるとPRの際に動作確認を行いやすいです。特にServerlessフレームワークでのAppSyncはDynamoDBなどもすべてセットでデプロイされるため、データ構造、データを含めて独立して完結したデプロイとなります。便利!
ワークフローサイクルとして
- サーバサイドのコードに変更を入れる
- ブランチにコミットプッシュする
- PR作成
- 他のメンバーがPRでのデプロイに対して動作レビューとコードレビュー
ということを行えるようになります。
Serverlessの準備
Serverlessの準備を行います。serverlessパッケージとserverless-appsync-pluginをインストールしておきます。
$ npm init -y
$ npm install --only=dev serverless serverless-appsync-plugin
serverless.ymlを作成します。(コードのほとんどを @reimenさんからもらいました ![]() )
)
service: my-first-app # NOTE: update this with your service name

plugins:
  - serverless-appsync-plugin

provider:
  name: aws
  runtime: nodejs8.10
  stage: ${opt:stage, self:custom.defaultStage}
  region: ap-northeast-1
  timeout: 30
  stackTags:
    Project: ${self:service}
  deploymentBucket:
    name: serverless-deployment
  environment:
    TZ: Asia/Tokyo
    SERVICE: ${self:service}
    STAGE: ${self:provider.stage}

custom:
  defaultStage: develop
  accountId: xxxxxxxxxxxxxx
  appSync:
    name: ${self:service}-${self:provider.stage}
    authenticationType: API_KEY
    mappingTemplatesLocation: mapping-templates
    mappingTemplates:
      - dataSource: Lambda
        type: Query
        field: users
        request: "users-request-mapping-template.vtl"
        response: "users-response-mapping-template.vtl"
    schema: schema.graphql
    dataSources:
      - type: AMAZON_DYNAMODB
        name: Main
        description: 'Main Table'
        config:
          tableName: '${self:service}-${self:provider.stage}-main'
          serviceRoleArn: { Fn::GetAtt: [AppSyncDynamoDBServiceRole, Arn] }
      - type: AWS_LAMBDA
        name: Lambda
        description: 'Lambda Function'
        config:
          functionName: graphql
          lambdaFunctionArn: { Fn::GetAtt: [GraphqlLambdaFunction, Arn] }
          serviceRoleArn: { Fn::GetAtt: [AppSyncLambdaServiceRole, Arn] }

functions:
  graphql:
    handler: handler.graphqlHandler

resources:
  Resources:
    MainTable:
      Type: 'AWS::DynamoDB::Table'
      Properties:
        TableName: '${self:service}-${self:provider.stage}-main'
        AttributeDefinitions:
          - AttributeName: pk
            AttributeType: S
          - AttributeName: sk
            AttributeType: S
        KeySchema:
          - AttributeName: pk
            KeyType: HASH
          - AttributeName: sk
            KeyType: RANGE
        BillingMode: PAY_PER_REQUEST
    AppSyncDynamoDBServiceRole:
      Type: "AWS::IAM::Role"
      Properties:
        RoleName: "Dynamo-${self:service}-${self:provider.stage}"
        AssumeRolePolicyDocument:
          Version: "2012-10-17"
          Statement:
            -
              Effect: "Allow"
              Principal:
                Service:
                  - "appsync.amazonaws.com"
              Action:
                - "sts:AssumeRole"
        Policies:
          -
            PolicyName: "Dynamo-${self:service}-${self:provider.stage}-Policy"
            PolicyDocument:
              Version: "2012-10-17"
              Statement:
                -
                  Effect: "Allow"
                  Action:
                    - "dynamodb:Query"
                    - "dynamodb:BatchWriteItem"
                    - "dynamodb:GetItem"
                    - "dynamodb:DeleteItem"
                    - "dynamodb:PutItem"
                    - "dynamodb:Scan"
                    - "dynamodb:UpdateItem"
                  Resource:
                    - "arn:aws:dynamodb:ap-northeast-1:${self:custom.accountId}:table/${self:service}-${self:provider.stage}-*"
    AppSyncLambdaServiceRole:
      Type: "AWS::IAM::Role"
      Properties:
        RoleName: "Lambda-${self:service}-${self:provider.stage}"
        AssumeRolePolicyDocument:
          Version: "2012-10-17"
          Statement:
            -
              Effect: "Allow"
              Principal:
                Service:
                  - "appsync.amazonaws.com"
              Action:
                - "sts:AssumeRole"
        Policies:
          -
            PolicyName: "Lambda-${self:service}-${self:provider.stage}-Policy"
            PolicyDocument:
              Version: "2012-10-17"
              Statement:
                -
                  Effect: "Allow"
                  Action:
                    - "lambda:invokeFunction"
                  Resource:
                    - "arn:aws:lambda:ap-northeast-1:${self:custom.accountId}:function:${self:service}-${self:provider.stage}-*"
S3バケットの作成
サーバレスを置くためのバケットを作成しておきます。
$ aws s3api create-bucket --bucket serverless-deployment-yousan --create-bucket-configuration LocationConstraint=ap-northeast-1
{
    "Location": "http://serverless-deployment-yousan.s3.amazonaws.com/"
}
参考: https://docs.aws.amazon.com/cli/latest/reference/s3api/create-bucket.html
ローカルでのデプロイ
ローカルでデプロイのテストを行います。
$ $(npm bin)/sls deploy

Serverless: Packaging service...
Serverless: Excluding development dependencies...
Serverless: Uploading CloudFormation file to S3...
Serverless: Uploading artifacts...
Serverless: Uploading service appsync-service.zip file to S3 (44.2 KB)...
Serverless: Validating template...
Serverless: Creating Stack...
...
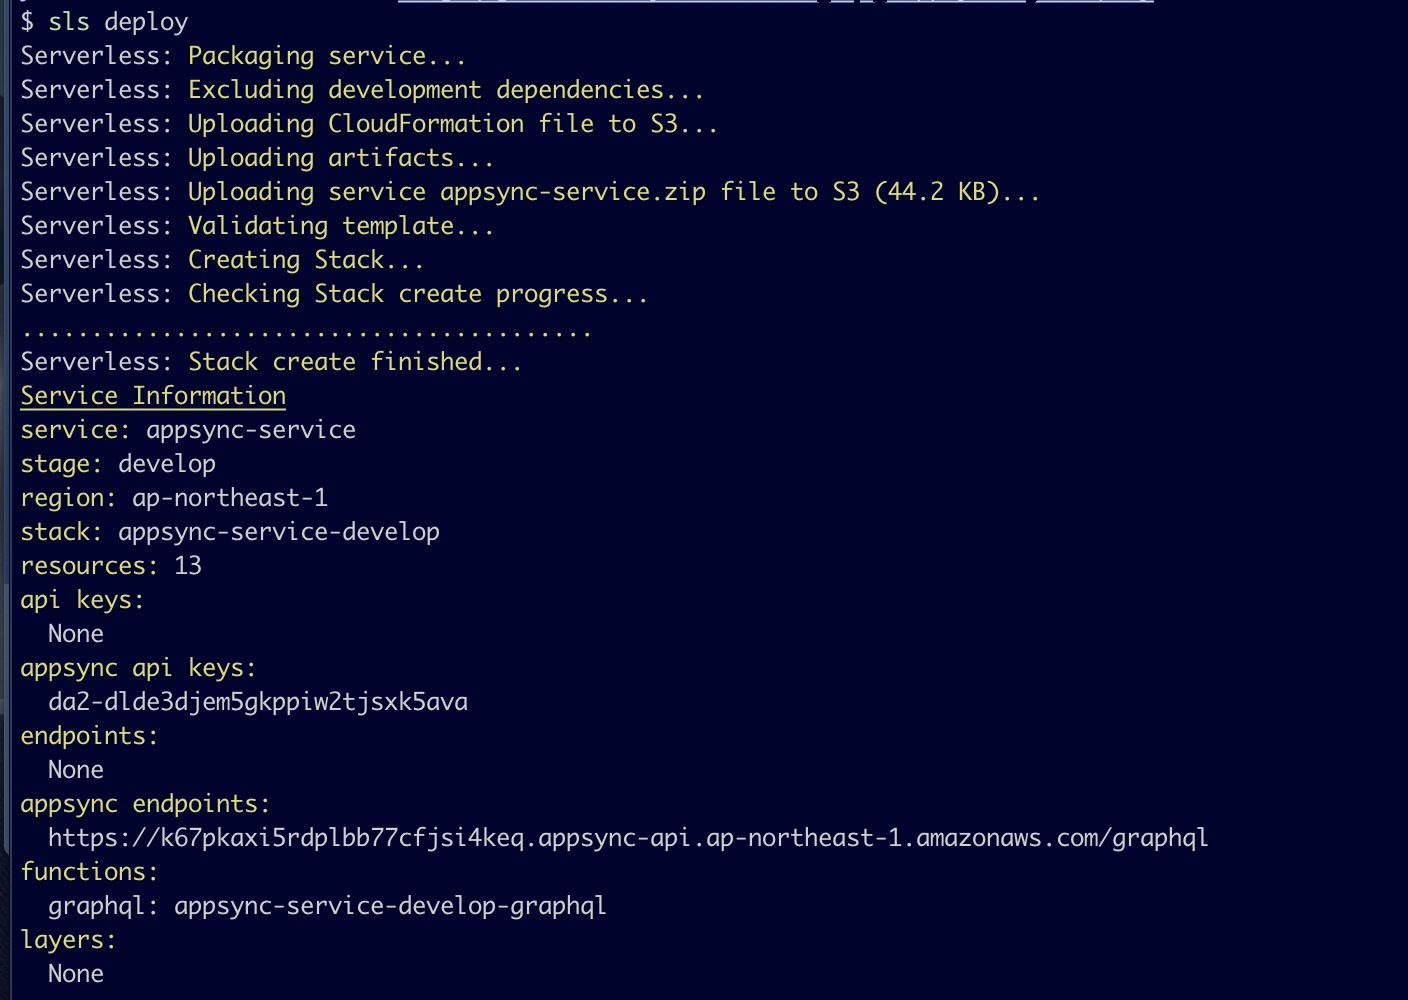
デプロイ完了しました。(上記に出ているスタックは削除済みです)
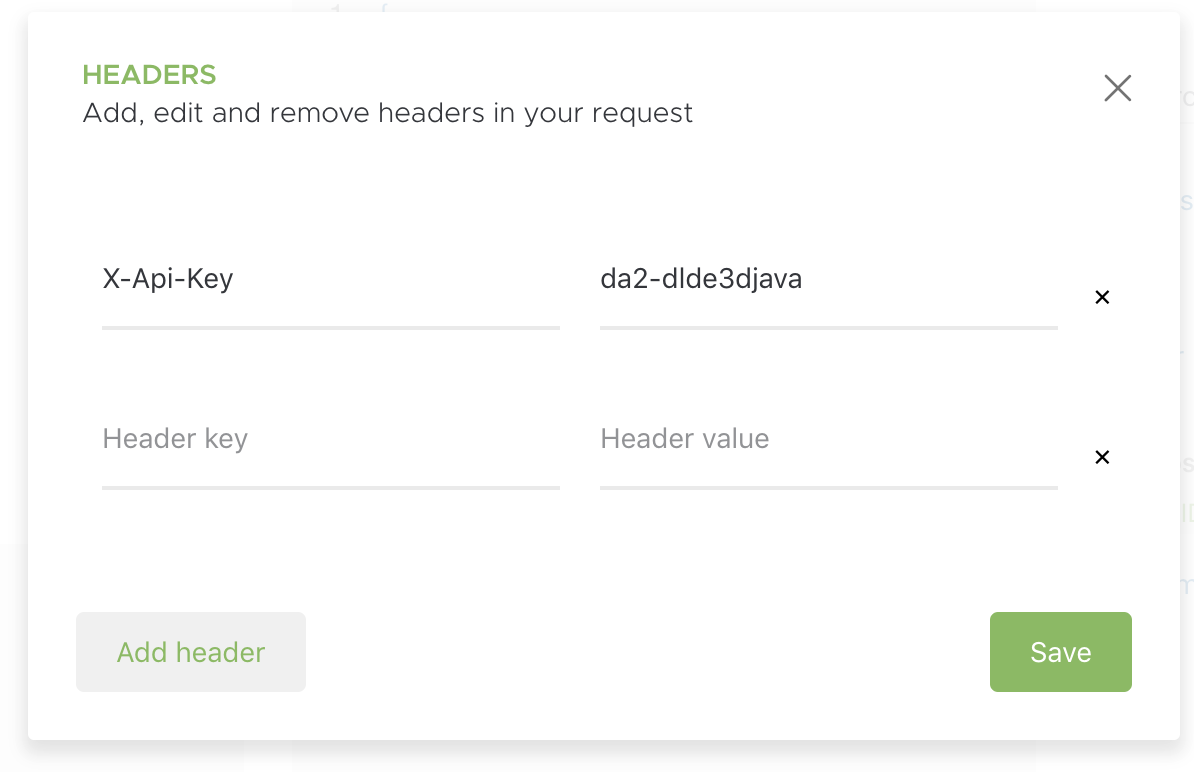
GraphQLに接続して確認できるか試しておきます。
接続に必要なapi keysとappsync endpointsは控えておきます。
api keyはX-Api-Keyとして設定しておきます。
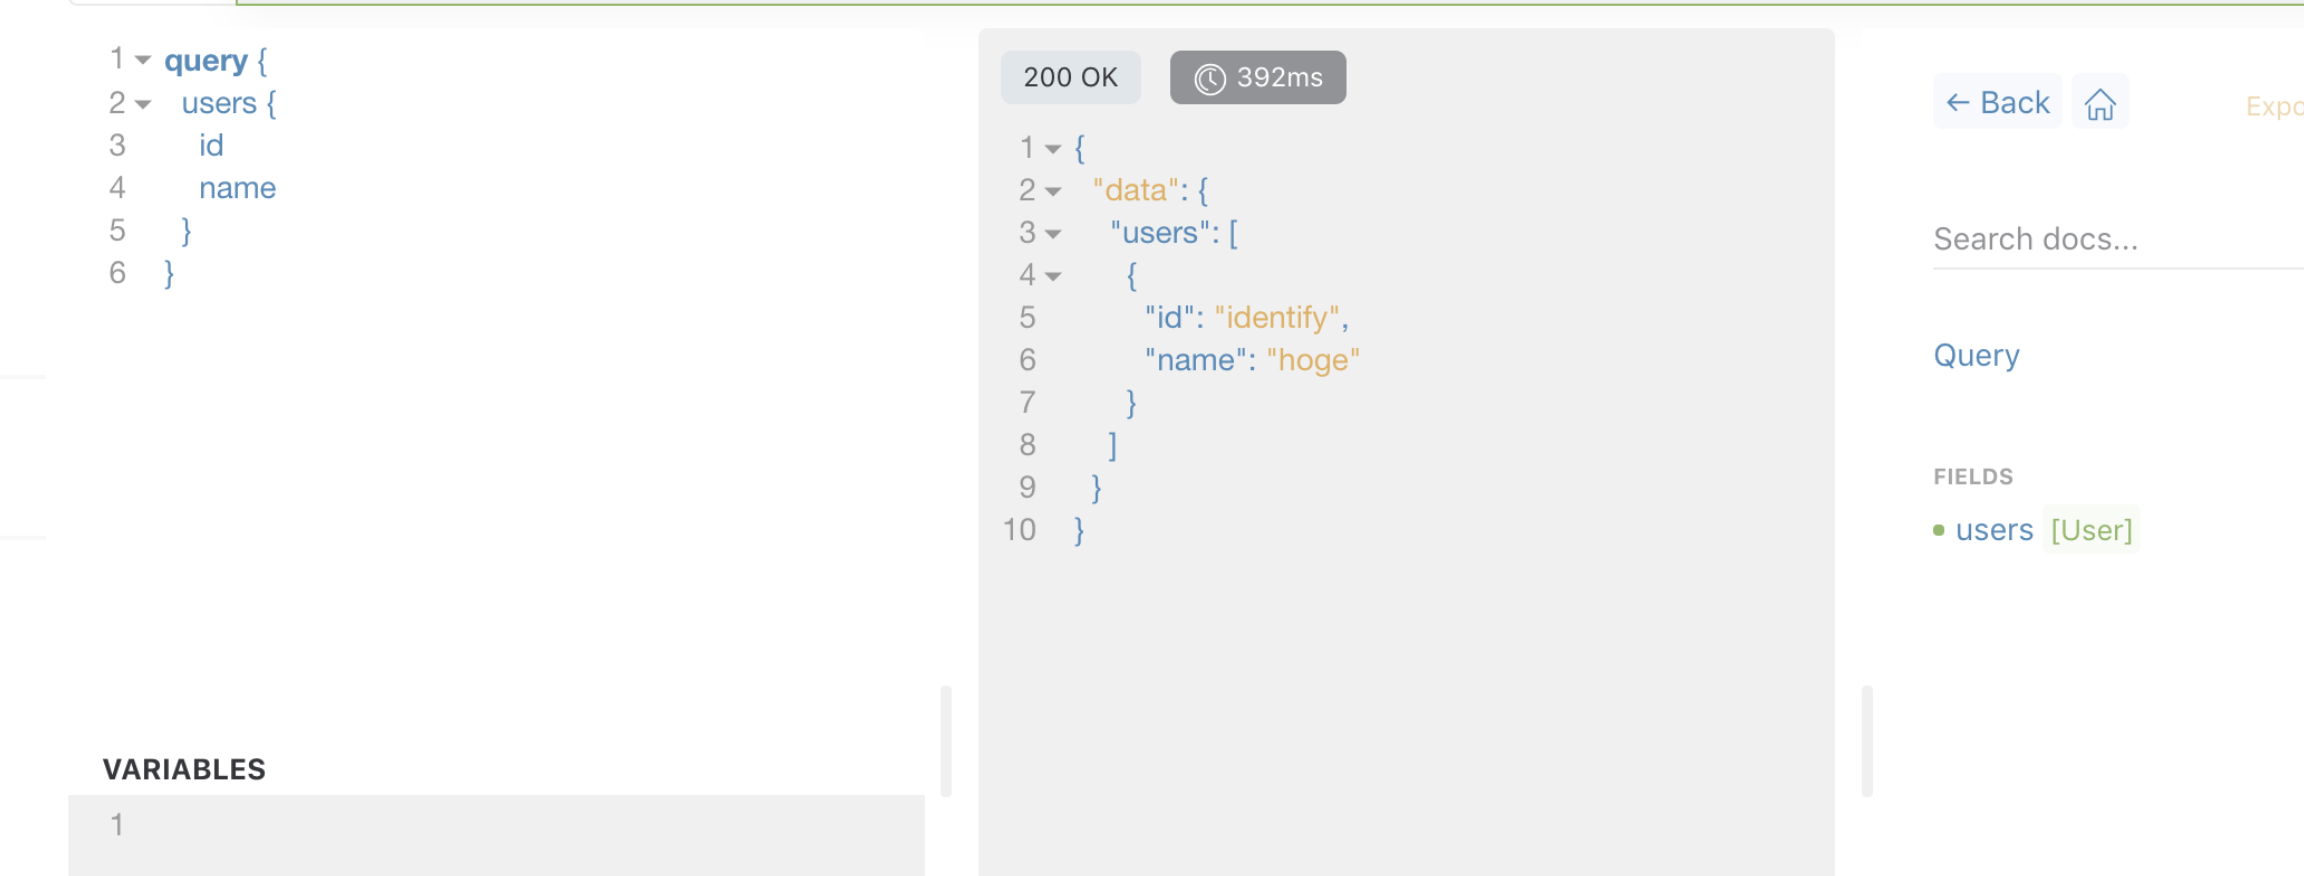
上記はAltair GraphQL Clinentです。
ブランチごとに独立したデプロイにする
ブランチごとに独立したServerlessのデプロイとなるようにします。
Serverlessの場合にはステージという概念があるので、ブランチごとに個別のステージを割り当てるようにします。
GitのワークフローはGitFlow+プルリクエストでマージ方式を採用しています。そのためよく使うブランチは下記の三種類です。
- master (とreleaseブランチ) => 本番環境用
- develop => 開発用
- feature/xxx => 機能開発用。それぞれのPRが送られる単位。
このうちfeatureブランチを独立してデプロイさせます。
AWSのServerlessフレームワークで使われるCloudFormationでは、名前に64文字までという制限があります。またブランチ名にスラッシュがあるとそのままではステージ名に使えません。
そこで現在のブランチ名からハッシュ値に変換するようにしました。
# 現在のブランチ名を取得する
BRANCH=`git rev-parse --abbrev-ref HEAD`

if type "md5" > /dev/null 2>&1; then
  BRANCH_HASH=$(echo ${BRANCH} | md5 | cut -c 1-6) # ブランチ名からのハッシュ値を取得。スタック名に使用する。
else
  # CircleCIのubuntuはmd5sumコマンドを使う(本当はelseifしたい)
  BRANCH_HASH=$(echo ${BRANCH} | md5sum | cut -c 1-6) # ブランチ名からのハッシュ値を取得。スタック名に使用する。
fi
上記のコードで ${BRANCH_HASH} を使うと、現在位置のブランチから一意なハッシュが作成されます。このハッシュを元にステージを決定してデプロイを行います。
また後ほどCircleCI(のnode用コンテナ、Ubuntu)で自動化を行う場合、md5コマンドが見つからないと言われるためにMac環境とUbuntuで動くようにmd5sumを切り替えしています。
$ $(npm bin)/sls deploy --region ap-northeast-1 --stage ${BRANCH_HASH}
# !/usr/bin/env bash
# ブランチにコミットがあった場合にCFnでデプロイを行います。

set -xe

# ファイルがある場所に移動
cd -- "$(dirname "$BASH_SOURCE")"


# 現在のブランチ名を取得する
BRANCH=`git rev-parse --abbrev-ref HEAD`
# DEPLOY_BASE='/home/'
# DEPLOY_PATH=${DEPLOY_BASE}${BRANCH} # ファイルを設置する場所 e.g. feature/201904/yousan/deploy-scripts

if type "md5" > /dev/null 2>&1; then
  BRANCH_HASH=$(echo ${BRANCH} | md5 | cut -c 1-6) # ブランチ名からのハッシュ値を取得。スタック名に使用する。
else
  # CircleCIのubuntuはmd5sumコマンドを使う(本当はelseifしたい)
  BRANCH_HASH=$(echo ${BRANCH} | md5sum | cut -c 1-6) # ブランチ名からのハッシュ値を取得。スタック名に使用する。
fi


cd ../
# デプロイしつつ、Slackに通知するためにファイルにも出力する
./node_modules/.bin/sls deploy --region ap-northeast-1 --stage ${BRANCH_HASH} | tee bin/output.txt
これで手元からデプロイを行います。
$ ./bin/deploy_branch.sh
CircleCIで自動デプロイセットアップ
GitHubに連携してCircleCIでデプロイされるようにします。
注意点としてCircleCIのNodeのデフォルトのイメージでは動きませんでした。
デフォルトのnode 6.10ではバージョンが低いため、新しいイメージを指定する必要があります。
今回は9.11.2を使っています。
公式イメージのバージョンを確認することができます。
# Javascript Node CircleCI 2.0 configuration file
#
# Check https://circleci.com/docs/2.0/language-javascript/ for more details
#
version: 2
jobs:
  build:
    docker:
      # specify the version you desire here
      - image: circleci/node:9.11.2

      # Specify service dependencies here if necessary
      # CircleCI maintains a library of pre-built images
      # documented at https://circleci.com/docs/2.0/circleci-images/
      # - image: circleci/mongo:3.4.4

    working_directory: ~/repo

    steps:
      - checkout

      # Download and cache dependencies
      - restore_cache:
          keys:
            - v1-dependencies-{{ checksum "package.json" }}
            # fallback to using the latest cache if no exact match is found
            - v1-dependencies-

      - run: yarn install

      - save_cache:
          paths:
            - node_modules
          key: v1-dependencies-{{ checksum "package.json" }}

      # run tests!
      - run: yarn test

      - run: ./bin/deploy_branch.sh
重要なのは最後の方にある./bin/deploy_branch.shです。これでデプロイされるようになります。
CircleCIで動かすための手順
上記でCircleCIでセットアップを行いましたがうまく動きませんでした。
aws-cliの認証が通らないためです。
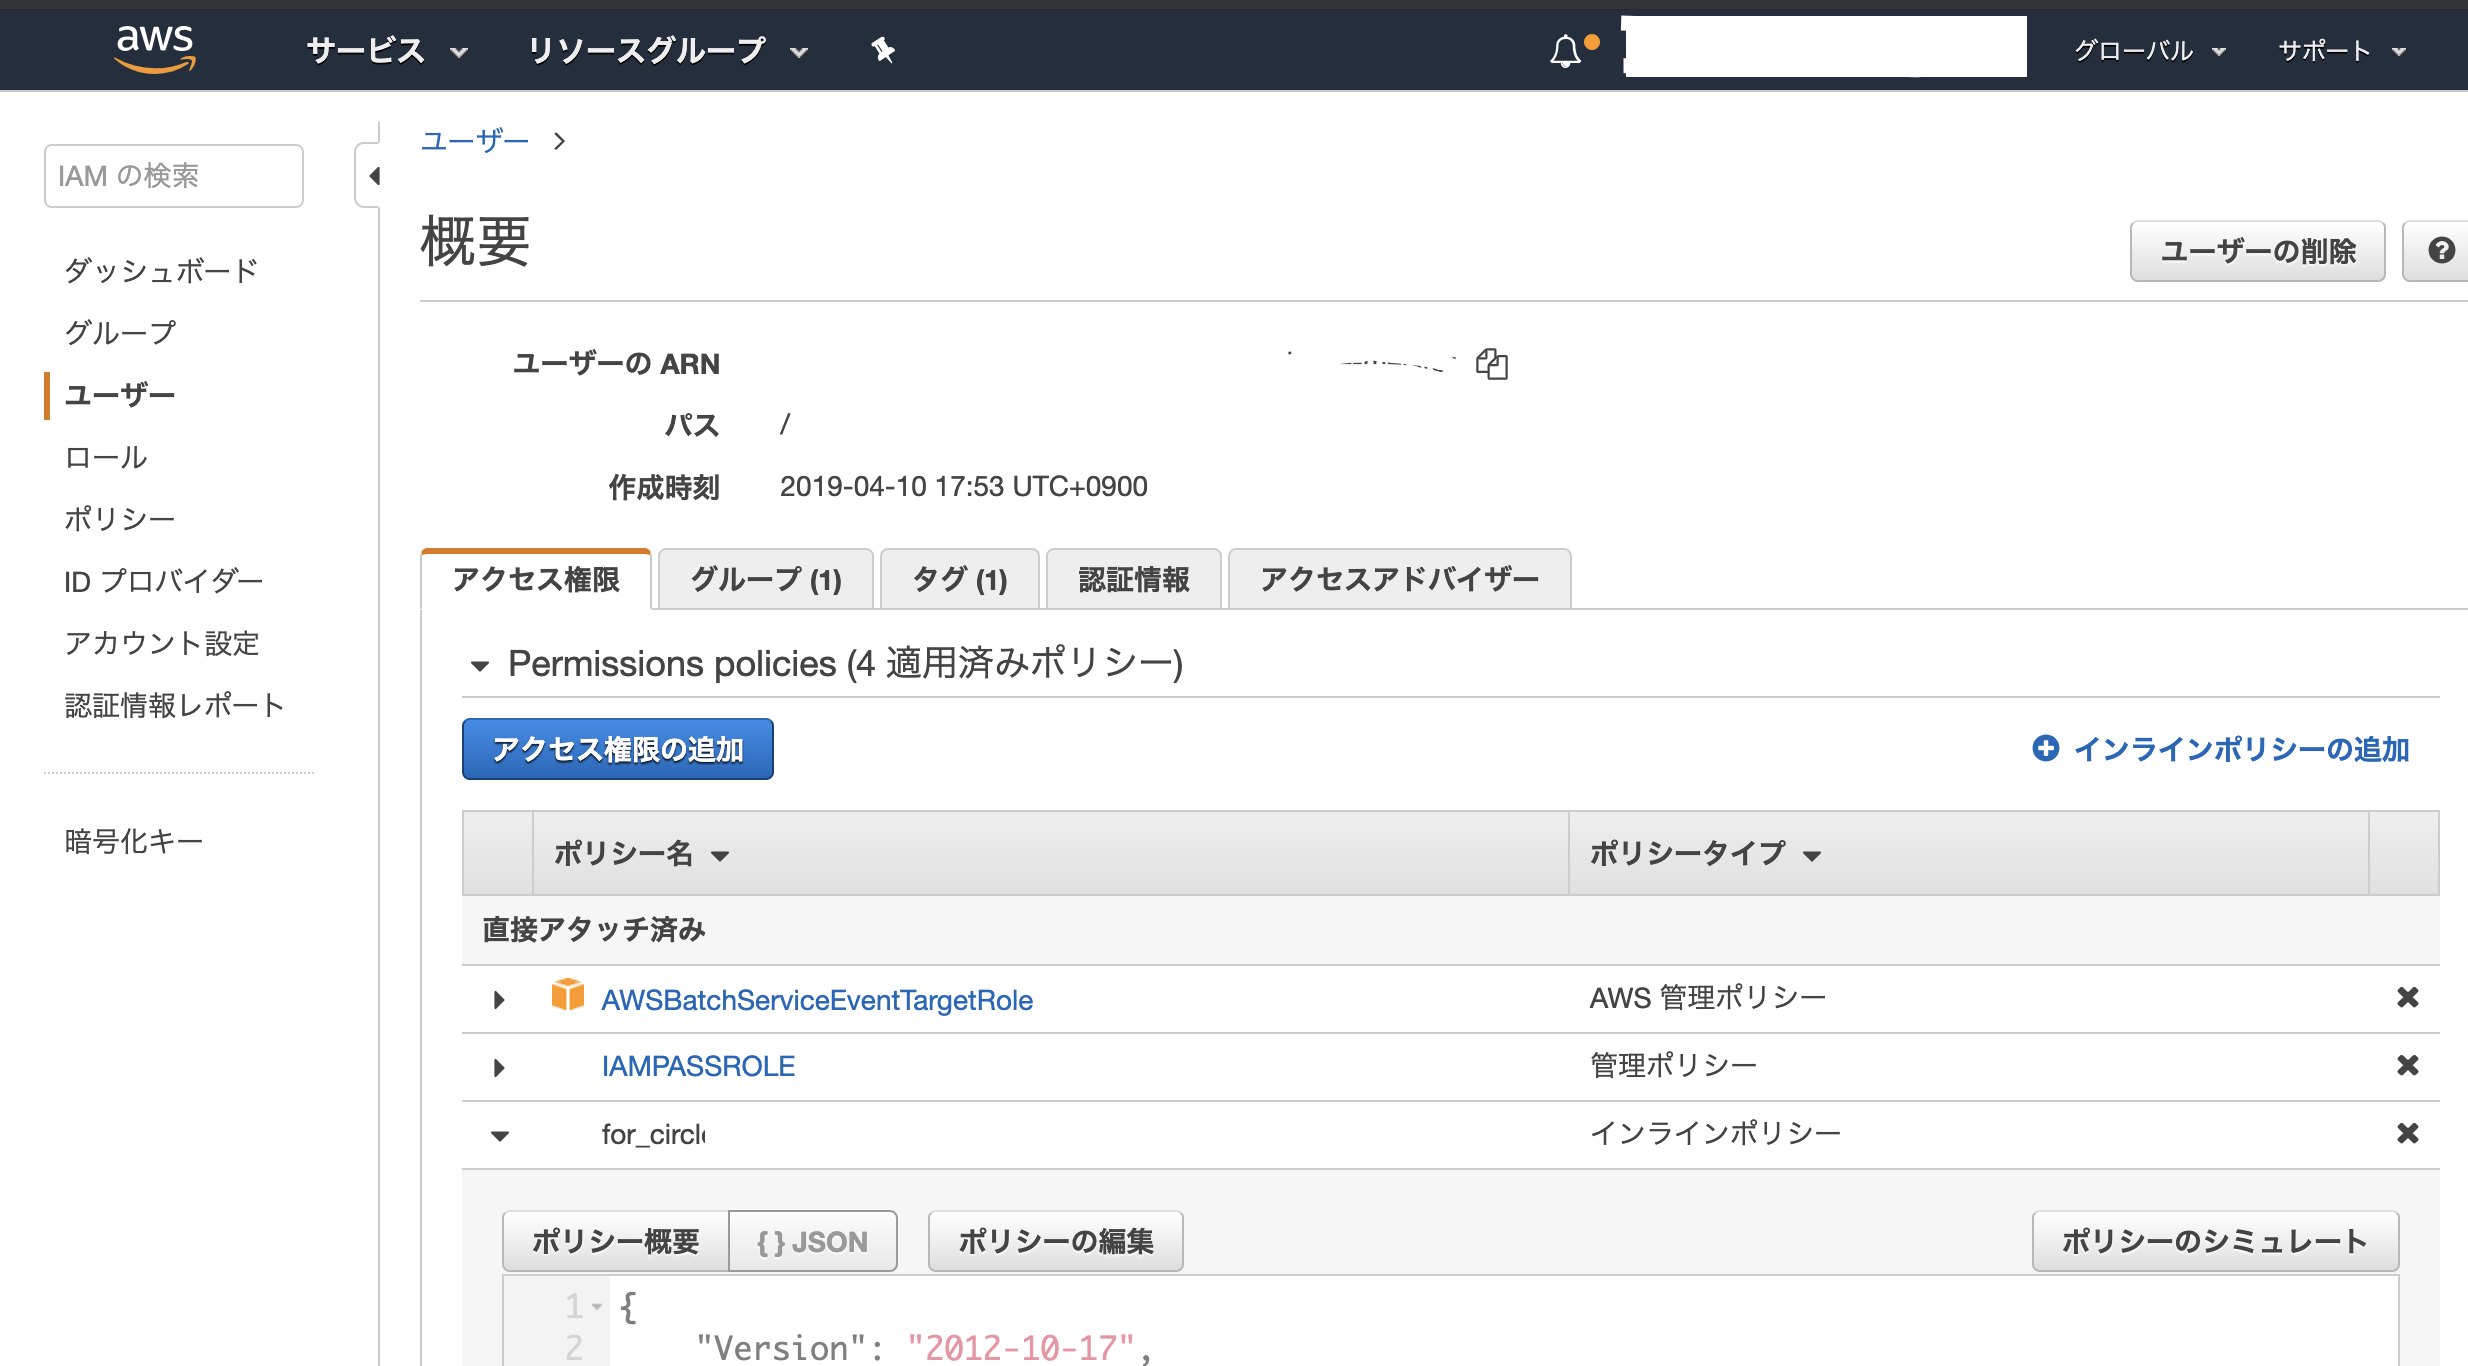
IAMユーザーを作成しておきます。
CloudFormationからもIAMユーザーを作成する必要があるため、ポリシーの設定で作成の許可を行います。
{
    "Version": "2012-10-17",
    "Statement": [
        {
            "Sid": "EditSpecificServiceRole",
            "Effect": "Allow",
            "Action": [
                "iam:*"
            ],
            "Resource": "*"
        }
    ]
}
ユーザー作成時にアクセスキーができたらCircleCIに保存しておきます。
CicleCIの設定からEnvironmentとして設定します。
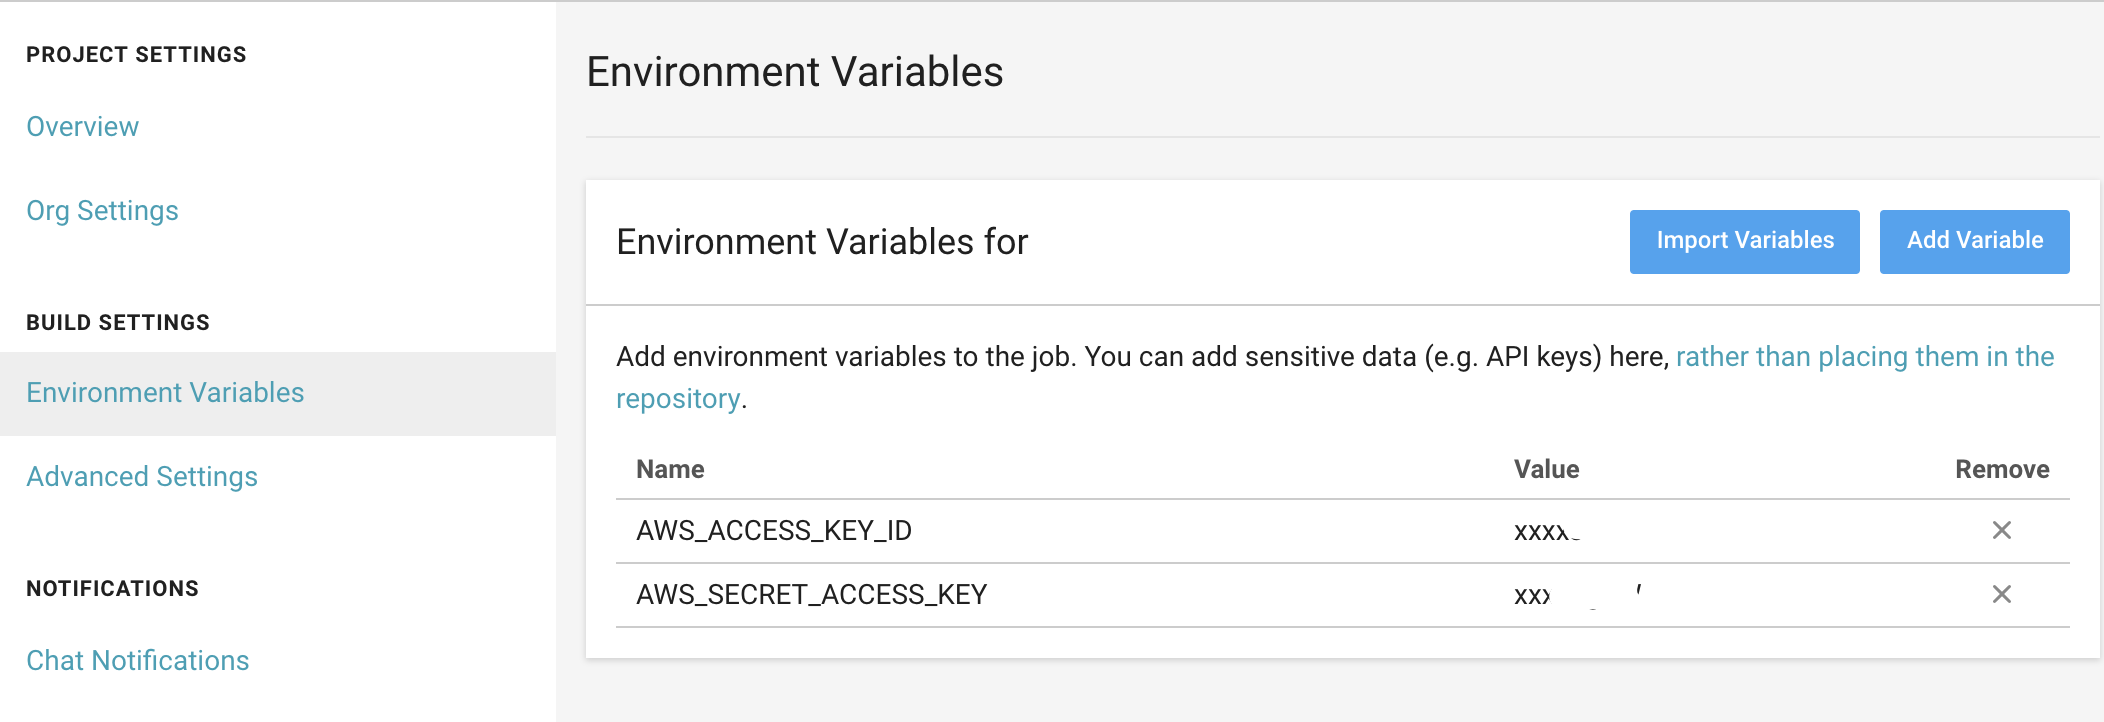
以前はAWS専用の環境変数が用意されていたのですが、2019年4月現在は共通の環境変数として登録すれば良くなったようです。
CircleCI 1.0 の AWS Permissions で設定した AWS Credentials をローテーションする
https://blog.manabusakai.com/2019/04/change-aws-credentials-on-circleci/
Slackへの通知
CircleCIで自動デプロイされるので、エンドポイントやキーを割り当てる必要があります。
CircleCIのデプロイ結果を確認すればよいのですがそれだと面倒なので、必要な情報をSlackで通知するようにします。
deploy_branch.shの結果が扱いにくいため(値を見やすくするため、改行で区切られている。)、teeでファイル(output.txt)に書き出し、別のスクリプトで読み込ませます。
...(前略)...

./node_modules/.bin/sls deploy --region ap-northeast-1 --stage ${BRANCH_HASH} | tee bin/output.txt

./slack.sh
その結果を読み込んでSlackで通知させます。
# !/usr/bin/env bash
# デプロイされたURLをSlackに通知するスクリプト
# 使い方は
# $ ./slack_deployed.sh https://example.com
# のように、通知したいURLを後ろにつけて呼び出す

set -xe
# ファイルがある場所に移動
cd -- "$(dirname "$BASH_SOURCE")"

# 引数を変数に格納
# API_KEYS=${1:-not_set}
# ENDPOINT_URL=${2:-endpoint}
# OUTPUT=${1:-notset}
SLACK_URL=https://hooks.slack.com/services/T0HQ9xxJQKU/xxxx/K32b1xxxxxxxxxxxxxxxxxxxx

# Slackに出力したいServerlessのレスポンスを加工
# Slackで出力するときに複数行だとcurlで送れないので、すべてセミコロンでくっつける
OUTPUT=`cat output.txt | grep -A2 appsync | grep -v "\-\-" | tr '\n' ' : '`


set +xe # デバッグ出力をオフにする
echo -e "\n\n"
printf '🎉\e[34m Success! \e[m🎉\n'
# printf '\e[34m The deployed URL: \e[m '${ENDPOINT_URL}"\n"

# デプロイ結果をSlackに通知
curl -X POST -H 'Content-type: application/json' \
  --data '{"text": "Thank you for your commit!  Your change makes us strong.\n'"${OUTPUT}"'",
           "username": "Deploy bot",
           "channel": "#graphql-notify",
           "icon_emoji": ":tada:",
           }' \
    ${SLACK_URL}
以上でGitでコミットプッシュすれば自動でデプロイされます。
その他まだやりたいこと
- masterブランチとdevelopブランチ、releaseブランチもそれぞれ作るようにしたい
- ハッシュじゃなくて記号をハイフンとかでサニタイズと文字数制限いれたものでも良さそう
- Slack通知をslsコマンドの出力フォーマットを変えて整形したい
- GraphQLのエンドポイント名をハッシュじゃなくてわかりやすすいものにできないかな
- ブランチのマージ時に古いデプロイを消したい(CFnは200個までの制限あり)