bounding boxで範囲を指定して取得する方法
const filepath = "{somegeotiff.tif}"
const tiff = await GeoTIFF.fromUrl(filepath);
const image = await tiff.readRasters({
bbox: [139.5, 35.5, 140, 36],
resX: 0.001,
resY: 0.001
})
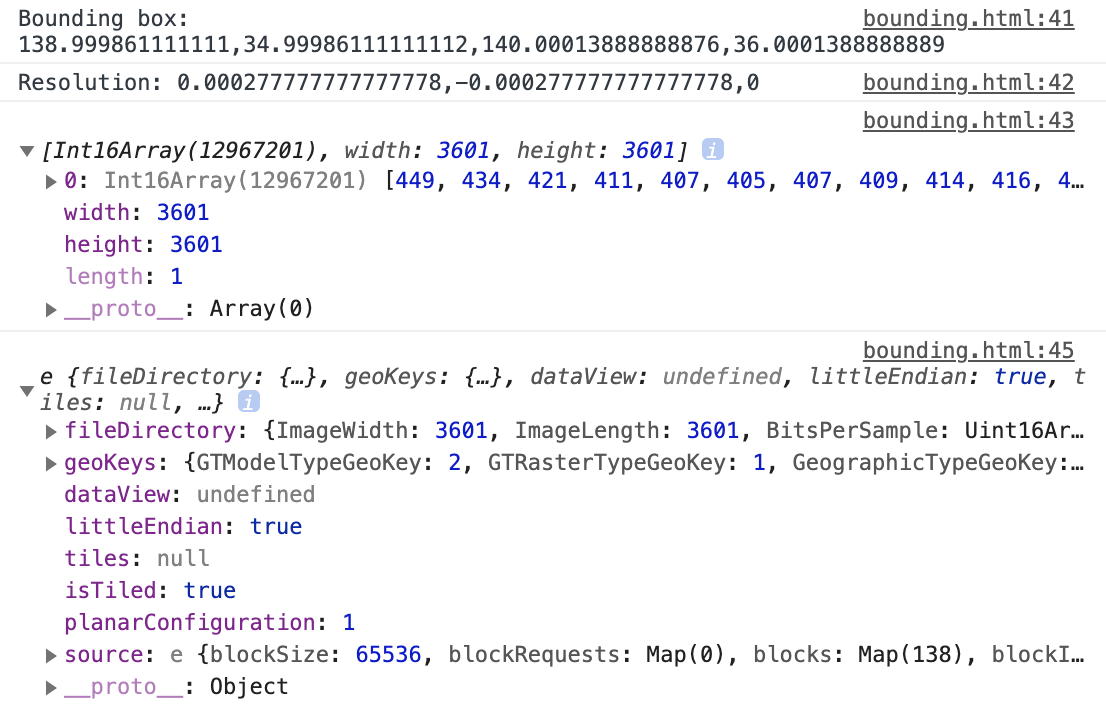
console.log(image);

基本的なGeoTIFFとgeotiff.jsの使い方はこちらを読んでください。
Cloud Optimized GeoTIFFの触り方
ダメな例
const filepath = "{somegeotiff.tif}"
const tiff = await GeoTIFF.fromUrl(filepath); //GeoTIFFBase
const image = await tiff.getImage(0); //GeoTIFFImage
console.log(`Bounding box: ${image.getBoundingBox()}`);
console.log(`Resolution: ${image.getResolution()}`);
console.log(image);
console.log(await image.readRasters({
    bbox: [139.5, 35.5, 140, 36],
    resX: 0.001,
    resY: 0.001
}));
README を読めばわかることですが、bboxを引数で指定できるのはGeoTIFFBaseのインスタンスのreadRastersのみです。
GeoTIFFImageのインスタンスのreadRastersで指定しても無視されます(画像全体が取得されます)。
ここに気づかずハマりました。
GeoTIFFBase.readRasters({bbox,resX,resY})は指定した分解能に合わせて内部でいい感じにCOGの画像ピラミッドの階層を選択してくれます。windowはどっちも対応してるのにbboxはGeoTIFFImageでのみ対応なのはこれが理由)
取得例
緯度経度
<!DOCTYPE html>
<html>

<head>
    <meta charset="UTF-8">
    <meta name="viewport" content="width=device-width, initial-scale=1.0" />
    <title>GeoTiff sample</title>
    <style>
        body {
            margin: 0;
            padding: 20px;
            width: 100%;
        }

        #info {
            font-size: 14px;
            margin-bottom: 10px;
        }

        #images>* {
            font-size: 14px;
            margin-bottom: 10px;
        }
    </style>
</head>

<body>
    <div id="info"></div>
    <div id="images"></div>

    <script src="https://cdn.jsdelivr.net/npm/geotiff"></script>
    </script>
    <script>
        (async function () {
            const filepath = "{ASTGTMV003_N35E139_dem.tif}"
            const tiff = await GeoTIFF.fromUrl(filepath);

            const showImage = (tiff, bbox, resX, resY) => {
                tiff.readRasters({
                    bbox,
                    resX,
                    resY
                }).then((image) => {
                    const {
                        width,
                        height
                    } = image;

                    let arr = [];
                    if (image[0].length === width * height) {
                        for (let i = 0; i < image[0].length; i++) {
                            arr[i * 4] = image[0][i];
                            arr[i * 4 + 1] = image[0][i];
                            arr[i * 4 + 2] = image[0][i];
                            arr[i * 4 + 3] = 255;
                        }
                    } else {
                        arr = image[0];
                    }

                    const data = new ImageData(new Uint8ClampedArray(arr), width, height)
                    const canvas = document.createElement("canvas");
                    const ctx = canvas.getContext("2d");
                    canvas.width = width;
                    canvas.height = height;
                    ctx.putImageData(data, 0, 0);

                    const div = document.createElement("div");
                    div.innerHTML =
                        `Bounding box: ${bbox}<br>resX: ${resX}, resY: ${resY}<br>width: ${width}px, height: ${height}px<br>`
                    div.appendChild(canvas);
                    document.getElementById("images").appendChild(div);
                });
            }
            const image = await tiff.getImage(0);
            document.getElementById("info").innerHTML =
                `all<br>Bounding box: ${image.getBoundingBox()}<br>Resolution: ${image.getResolution()}`
            showImage(tiff, [139.5, 35.5, 140, 36], 0.01, 0.01)
            showImage(tiff, [139.5, 35.5, 140, 36], 0.001, 0.001)

        })()
    </script>
</body>

</html>
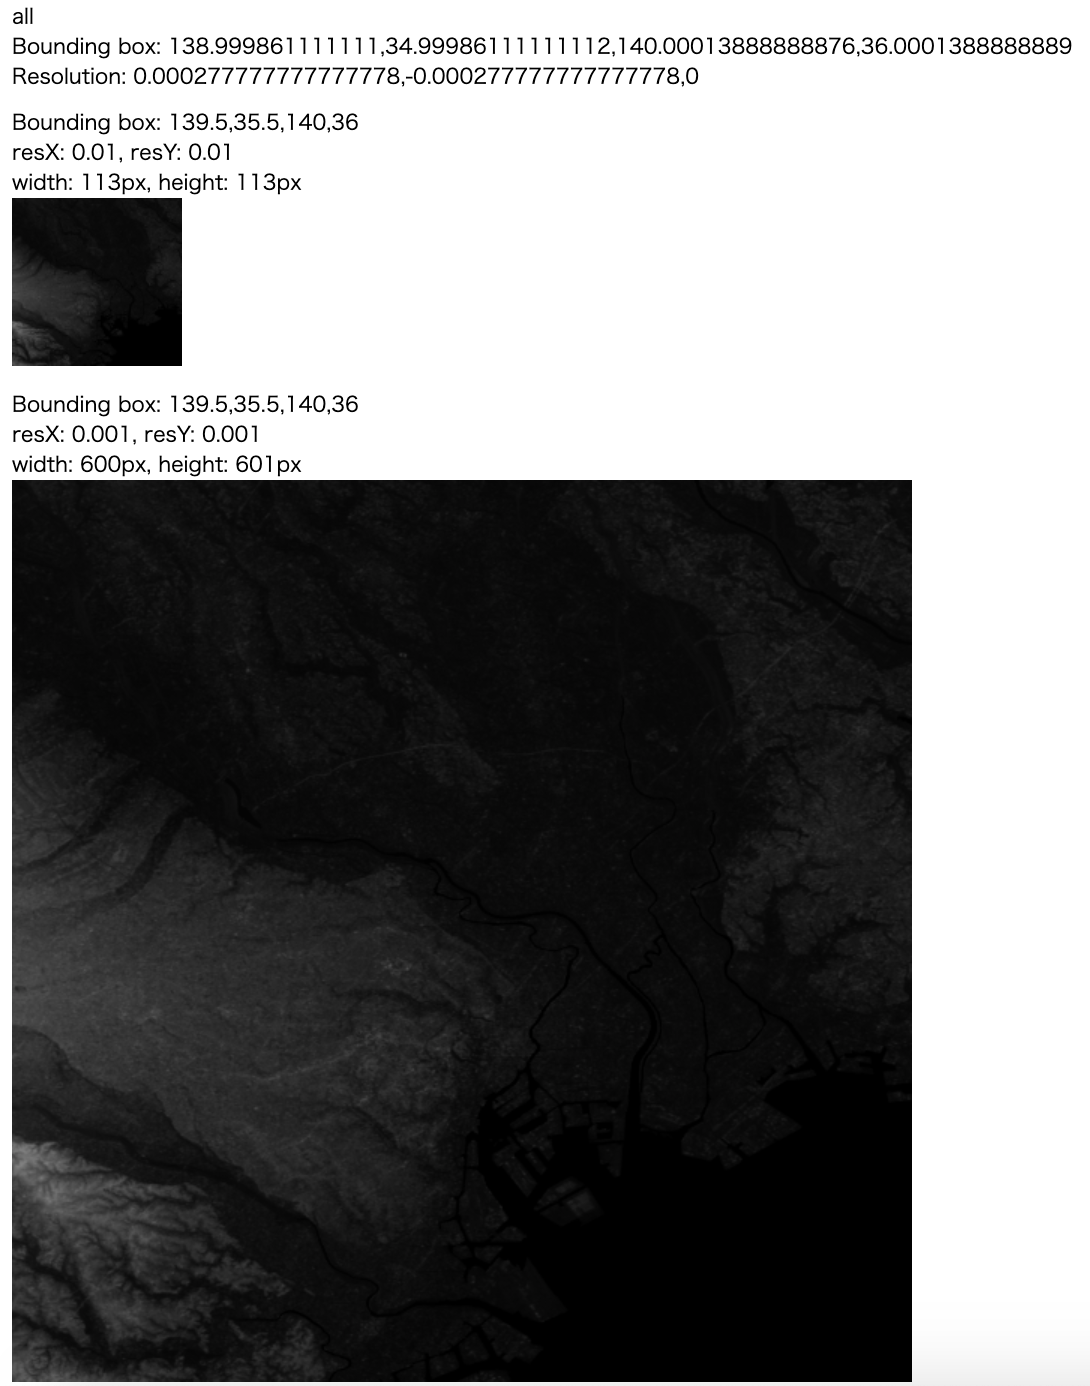
ASTER GDEM という標高のGeoTIFFの取得例です。
緯度経度座標系で投影されています。COGの状態で配布されています。
サンプルで利用しているファイルは、範囲が[139, 35, 140, 36]、1ピクセルの分解能は0.000277777777777778 (=1/3600) です。
Bounding box: 138.999861111111,34.99986111111112,140.00013888888876,36.0001388888889
Resolution: 0.000277777777777778,-0.000277777777777778,0
画像として2枚表示していますが、どちらもbboxで[139.5, 35.5, 140, 36]の範囲を指定して取得しました。
左が分解能0.01, 右が分解能0.001です。
分解能は取得する画像ピラミッドの階層を決めているだけで、widthが (bbox[2] - bbox[0])/resX となるわけではないので注意してください。
ユニバーサル横メルカトル(UTM)直交座標系
filepath = "https://s3-us-west-2.amazonaws.com/planet-disaster-data/hurricane-harvey/SkySat_Freeport_s03_20170831T162740Z3.tif"
// 中略
showImage(tiff, [265000, 3210000, 270000, 3215000], 100, 100)
showImage(tiff, [265000, 3210000, 270000, 3215000], 20, 20)
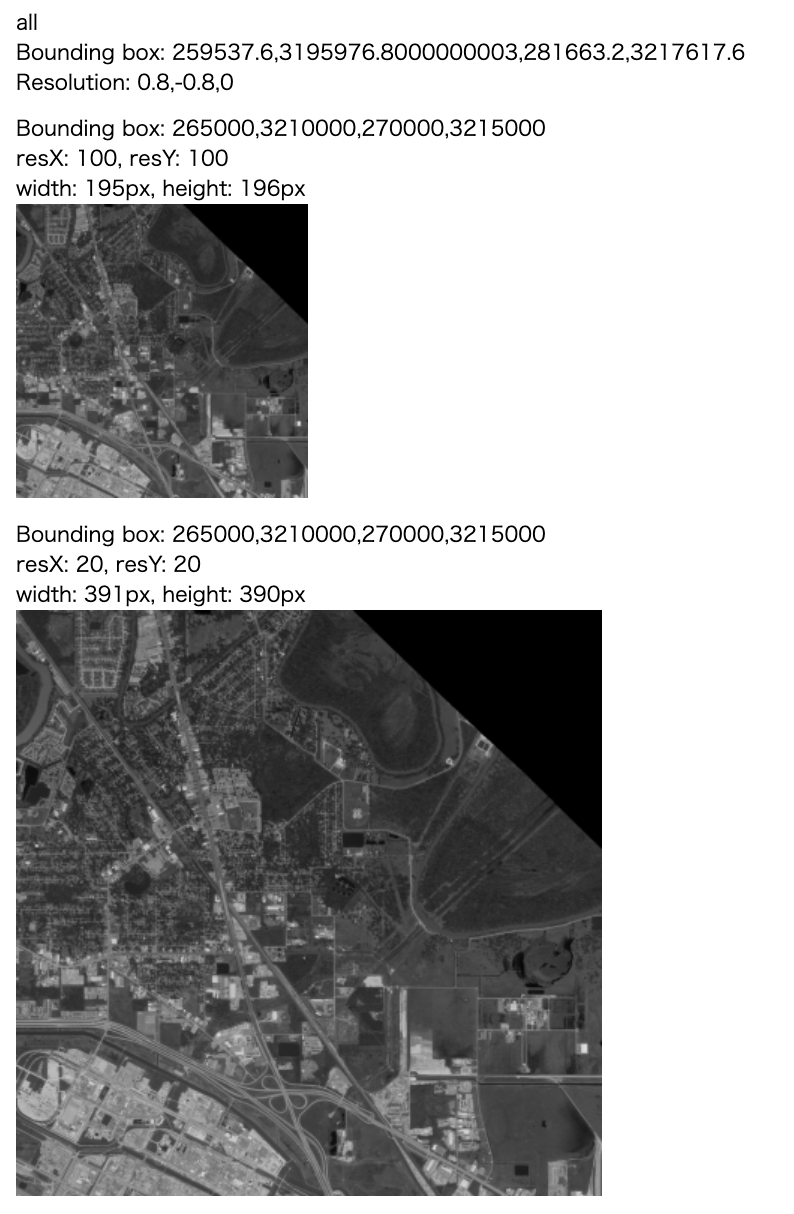
だいたいの衛星画像はUTMで座標が与えられているのでこちらの指定の方法にお世話になることが多いかも。