いろいろやってみる。mermaidですね。
import bpy
import math
import random
# 【完全リセット】全オブジェクト・メッシュ・マテリアルを削除
def reset_scene():
# 全オブジェクトを選択して削除
bpy.ops.object.select_all(action='SELECT')
bpy.ops.object.delete(use_global=False)
# 使用されていないメッシュデータやマテリアルを削除
for block in bpy.data.meshes:
bpy.data.meshes.remove(block)
for block in bpy.data.materials:
bpy.data.materials.remove(block)
# 【マテリアル作成】Principled BSDFで赤い光沢のあるマテリアルを作成
def create_red_shiny_material(name="RedShiny"):
mat = bpy.data.materials.new(name=name)
mat.use_nodes = True
bsdf = mat.node_tree.nodes["Principled BSDF"]
# 赤色に設定 (R=1,G=0,B=0)
bsdf.inputs['Base Color'].default_value = (1.0, 0.0, 0.0, 1.0)
# 光沢を強めるためにメタリックを0.5、粗さを低めに(滑らかに)
bsdf.inputs['Metallic'].default_value = 0.5
bsdf.inputs['Roughness'].default_value = 0.2
return mat
# 【マテリアル作成】青いザラザラした床マテリアル
def create_blue_rough_material(name="BlueRough"):
mat = bpy.data.materials.new(name=name)
mat.use_nodes = True
bsdf = mat.node_tree.nodes["Principled BSDF"]
# 青色に設定 (R=0,G=0,B=1)
bsdf.inputs['Base Color'].default_value = (0.0, 0.0, 1.0, 1.0)
# メタリックは0、粗さを高めに(ザラザラ感)
bsdf.inputs['Metallic'].default_value = 0.0
bsdf.inputs['Roughness'].default_value = 0.8
return mat
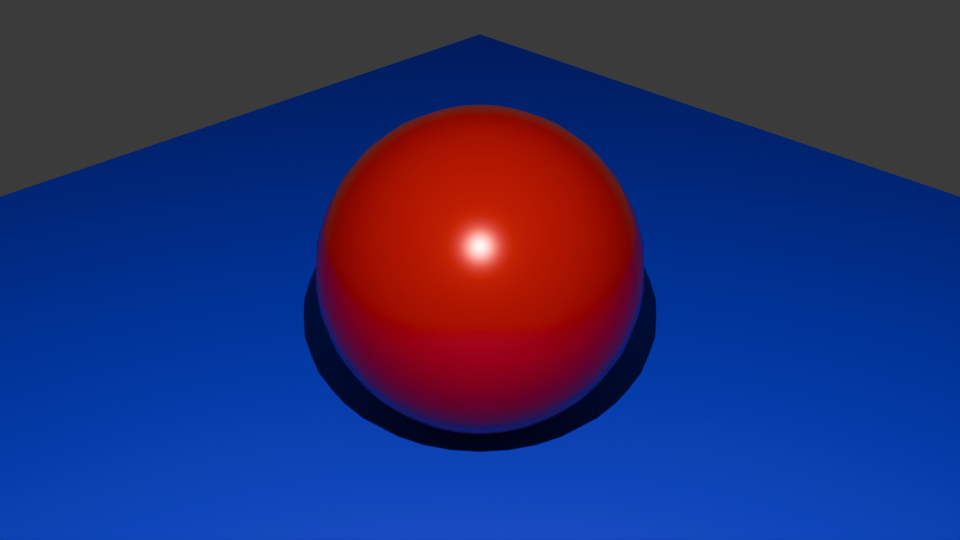
# 【シーン構築】球体と床の配置、カメラとライトの設置
def build_scene():
# パラメータ
sphere_radius = 1.0
floor_size = 10.0
# --- 球体の作成 ---
bpy.ops.mesh.primitive_uv_sphere_add(radius=sphere_radius, location=(0, 0, sphere_radius))
sphere = bpy.context.active_object
sphere.name = "MySphere"
# 球体に赤い光沢マテリアルを割り当て
sphere.data.materials.append(create_red_shiny_material())
# スムーズシェーディング
bpy.ops.object.shade_smooth()
# --- 床の作成 ---
bpy.ops.mesh.primitive_plane_add(size=floor_size, location=(0, 0, 0))
floor = bpy.context.active_object
floor.name = "MyFloor"
# 青いザラザラマテリアルを割り当て
floor.data.materials.append(create_blue_rough_material())
# 床は平面なのでスムーズは不要だが念のため
bpy.ops.object.shade_smooth()
# --- カメラの作成 ---
cam_data = bpy.data.cameras.new(name="MyCamera")
cam = bpy.data.objects.new("MyCamera", cam_data)
bpy.context.collection.objects.link(cam)
# カメラ位置: 球体を見下ろすためにX=5, Y=-5, Z=5の位置に設置
cam.location = (5.0, -5.0, 5.0)
# 球体の位置(0,0,sphere_radius)をカメラが向くように回転を設定
# 方向ベクトルを計算し、カメラの回転に変換
direction = (0 - cam.location[0], 0 - cam.location[1], sphere_radius - cam.location[2])
# 正規化
length = math.sqrt(direction[0]**2 + direction[1]**2 + direction[2]**2)
direction_norm = (direction[0]/length, direction[1]/length, direction[2]/length)
# カメラの回転を計算(簡易的にZ軸を上に固定して向ける)
import mathutils
rot_quat = mathutils.Vector(direction_norm).to_track_quat('-Z', 'Y')
cam.rotation_euler = rot_quat.to_euler()
# --- ライトの作成 ---
light_data = bpy.data.lights.new(name="MyLight", type='POINT')
light = bpy.data.objects.new(name="MyLight", object_data=light_data)
bpy.context.collection.objects.link(light)
# ライトを球体の上方に設置して全体を照らす
light.location = (3.0, -3.0, 5.0)
light.data.energy = 1000 # 明るさを調整
# 【レンダリング設定】
def setup_render(resolution_x=1920, resolution_y=1080, scale_percent=50, samples=32):
scene = bpy.context.scene
scene.render.engine = 'CYCLES' # レンダリングエンジンをCyclesに設定
scene.cycles.samples = samples # サンプル数を設定
scene.render.resolution_x = resolution_x
scene.render.resolution_y = resolution_y
scene.render.resolution_percentage = scale_percent # 50%サイズに設定
# --- 実行ブロック ---
if __name__ == "__main__":
reset_scene()
build_scene()
setup_render()
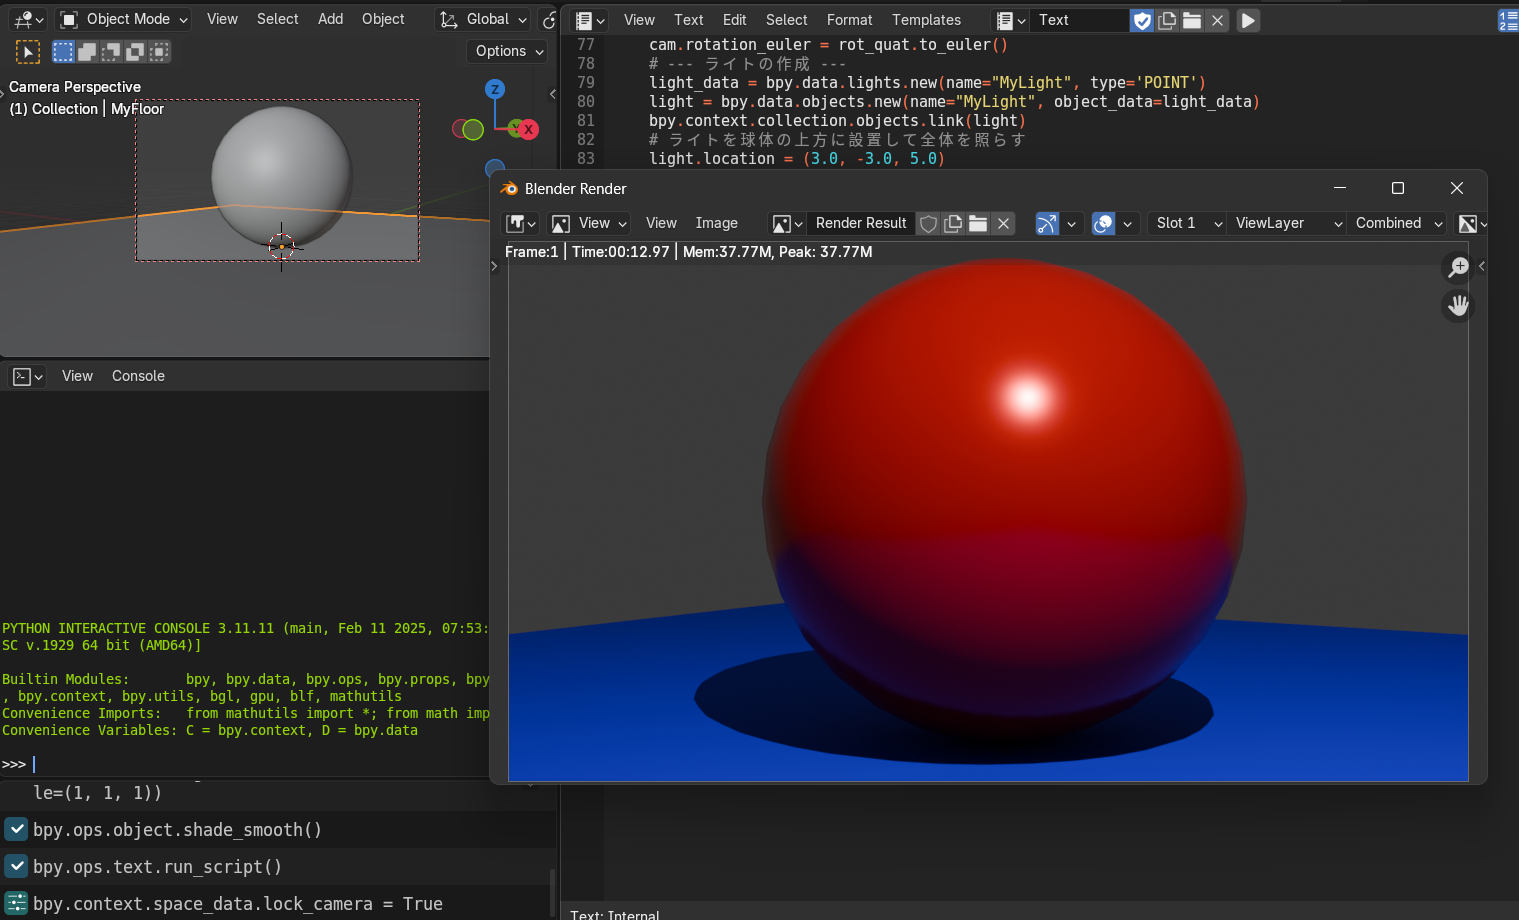
# レンダリングウィンドウをポップアップで表示
bpy.ops.render.render('INVOKE_DEFAULT')
シーンレイアウト画面で、カメラviewを調整し、F12でレンダリング。
手動でカメラを動かし、調整後の値を「コピペ用」に出力する技
Nパネル(サイドバー)の数値を見ると「度数(Degrees)」になっていますが、スクリプト(Python)は「ラジアン」を必要とするため、計算し直すのが面倒です。
そこで、以下のコードをコンソールに貼り付けて実行してください。スクリプトにそのまま貼り付けられる形式で出力されます。
# 現在のアクティブカメラを取得
cam = bpy.context.scene.camera

# location=(x, y, z) の形式で出力
print(f"location=({cam.location.x:.3f}, {cam.location.y:.3f}, {cam.location.z:.3f})")

# rotation=(x, y, z) の形式で出力(ラジアン)
print(f"rotation=({cam.rotation_euler.x:.3f}, {cam.rotation_euler.y:.3f}, {cam.rotation_euler.z:.3f})")
一歩一歩です。ありがとうございます。