記事概要
Elasticsearchとkibanaをサーバが起動された時に自動的に起動する形で設定をする方法を下記に紹介する。
なお、下記の内容はElasticsearchのドキュメントページ(下記URLを参考にした)
https://www.elastic.co/guide/en/elasticsearch/reference/current/setup-repositories.html
各種プロキシ設定
プロキシサーバがある場合、こちらからRPMやYumのプロキシを設定する。
(プロキシがない場合、飛ばして良い)
http://oscasierra.net/2011/05/redhat-proxy/
Elasticsearchインストール
GPG-KEYの取得
下記のコマンドを実行してGPG-Keyの取得をする。
129.168.0.1は自分の環境のプロキシサーバのアドレス,7777にはプロキシのポート番号を設定する。
(プロキシサーバがない環境の場合は省略する)
sudo rpm --httpproxy 129.168.0.1 --httpport 7777 --import https://packages.elastic.co/GPG-KEY-elasticsearch
sudo rpm --import https://packages.elastic.co/GPG-KEY-elasticsearch
レポジトリ登録
elasticsearch.repoを下記の場所に作成し、下記の内容を記述する
sudo vi /etc/yum.repos.d/elasticsearch.repo
[elasticsearch-5.x]
name=Elasticsearch repository for 5.x packages
baseurl=https://artifacts.elastic.co/packages/5.x/yum
gpgcheck=1
gpgkey=https://artifacts.elastic.co/GPG-KEY-elasticsearch
enabled=1
autorefresh=1
type=rpm-md
Yumでインストール
下記のコマンドを実行し、elasticsearchをインストールする
sudo yum install elasticsearch
起動設定
/etc/elasticsearch/elasticsearch.ymlを開き、network.hostをElasticsearchをインストールしたサーバのIPアドレスに変更し、コメントを外す。
vi /etc/elasticsearch/elasticsearch.yml
network.host: xxx.xxx.xxx.xxx(ElasticSearchをインストールしたサーバのIP)
elasticsearchを再起動する
下記のコマンドを実行し、elasticsearchを再起動する。
sudo service elasticsearch restart
自動起動設定
下記のコマンドを実行し、自動起動設定をする。
sudo chkconfig elasticsearch on
Kibana
GPG-KEYの登録
GPG-KEYをダウンロード&インストールする。
rpm --import https://packages.elastic.co/GPG-KEY-elasticsearch
Repositoryの登録
/etc/yum.repos.d/の下にあるkibana.repoを作成し、下記の内容を記述する。
sudo vi /etc/yum.repos.d/kibna.repo
[kibana-5.x]
name=Kibana repository for 5.x packages
baseurl=https://artifacts.elastic.co/packages/5.x/yum
gpgcheck=1
gpgkey=https://artifacts.elastic.co/GPG-KEY-elasticsearch
enabled=1
autorefresh=1
type=rpm-md
YumでKibanaインストール
下記のコマンドを実行し、kibanaをインストールする
sudo yum install kibana
Elasticsearchとの接続設定
/opt/kibana/config配下にあるkibana.ymlを編集し、elasticsearch.urlの値を下記の通り変更する(xxx.xxx.xxx.xxxはelasticsearchのIPを設定する)
sudo vi /opt/kibana/config/kibana.yml
elasticsearch.url: "http://xxx.xxx.xxx.xxx:9200"
自動起動設定
sudo /bin/systemctl daemon-reload
sudo /bin/systemctl enable kibana.service
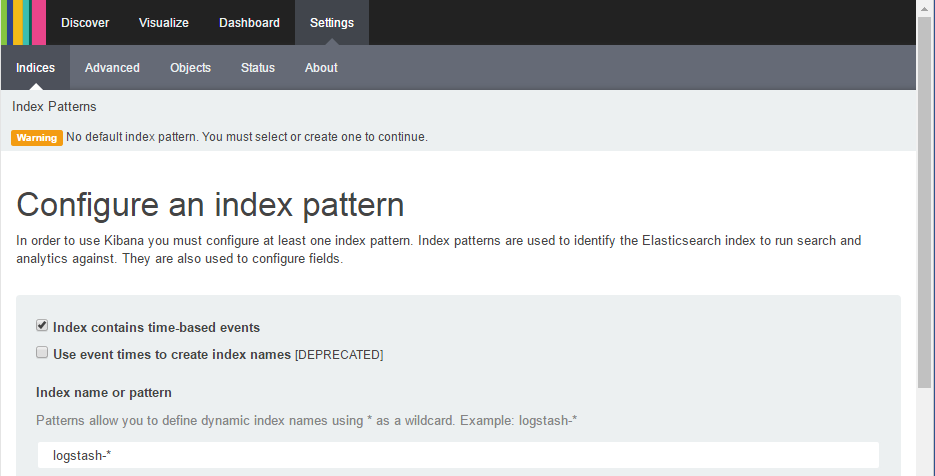
下記にアクセスして確認。下記の画面が表示されればOK。
http://xxx.xxx.xxx.xxx:5601/
なお、この方法でインストールした場合、elasticsearchのインストール先は下記の通りとなる
詳細は下記を参照
https://www.elastic.co/guide/en/elasticsearch/reference/current/setup-dir-layout.html
/usr/share/elasticsearch
以上の手順が完了したら、次の手順に進む
Elasticsearchプラグインの紹介とインストール手順
