
この記事について
本記事は、2020年3月6日 (米国時間) にて、Azure Cosmos DB に新しく Free Tier (無償利用枠) が登場したことに伴い、改めて Azure Cosmos DB を色々と触っていく試みの 2 回目です。
今回は、Microsoft Docs のチュートリアルを参考に、Express.js を使って、Azure Cosmos DB に CRUD を行う 簡易な Web アプリケーションの作成および実行を行います。
※ Express.js について知りたい方は、以下の記事を参照してください。
対象読者
- Azure Cosmos DB について学習したい方
- Azure Cosmos DB を使ってみたい方
- Node.js で Azure Cosmos DB への CRUD 操作を行いたい方
- 鬼滅の刃が好きな方 (笑)
開発環境準備
環境
OS は好きなものを使ってください。今回、筆者は以下の macOS 環境を使用しています。
- OS: macOS Catalina Version 10.15.3
- Node.js: v12.16.1
Azure Cosmos DB
前回の記事を参考にして、新しく Azure Cosmos DB を作成します。
Visual Studio Code
インストールがまだの方は、リンクより、インストーラーをダウンロードしてください。
※コードエディタはお好きなものを利用頂いて問題ありませんが、本記事では、一部 Visual Studio Code の拡張機能を利用します。
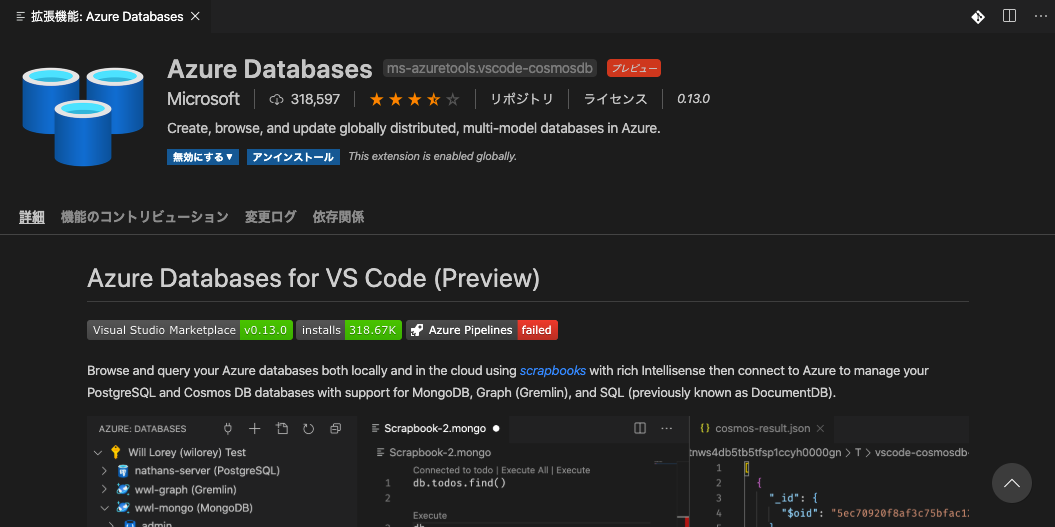
Visual Studio Code を起動後、拡張機能の画面より Azure Cosmos DB の拡張機能をインストールします。

2020/6/7 追記
拡張機能については、Azure Databases に名前が変更になりました。(リポジトリについては変更ありません)
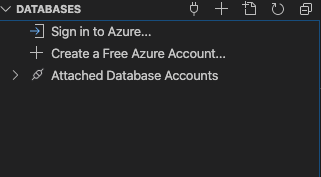
インストールが完了すると、メニューに Azure のアイコンが追加されます。
Azure アイコンを選択すると、[COSMOS DB] タブが表示されるので、[Sign in Azure...] を選択し、Azure にサインインします。
Azure アイコンを選択すると、[DATABASES] タブが表示されるので、[Sign in Azure...] を選択し、Azure にサインインします。
サインインに成功すると、前回作成した Azure Cosmos DB アカウント、およびデータベースやコンテナが確認できます。
Node.js
公式サイトより、LTS 版のインストーラーをダウンロードし、インストールを行ってください。
開発
データベースの作成
今回の Web アプリケーション用に、新しくデータベースを作成します。
前回記事 と同様に、Azure にログインし、Azure Cosmos DB アカウントの [データ エクスプローラー] 画面を表示します。
[New Container] 右横からメニューを展開し、[New Database] を選択します。

[New Database] 画面が表示されますので、以下の内容を入力し、[OK] を選択してデータベースを作成します。

- Database id: DamonSlayer
- Provision throughput: On
- Throughput: Manual, 400
データベースが正常に作成され、一覧に [DamonSlayer] データベースが表示されたことを確認します。
[DamonSlayer] データベースの右横にある [・・・] を選択し、メニューより [New Container] を選択します。

[Add Container] 画面が表示されますので、以下の内容を入力し、[OK] を選択してコンテナーを作成します。
- Database id: Use existing, DamonSlayer
- Container id: Characters
- Indexing: Automatic
- Partition Key: /category
- My partition key is larger than 100 bytes: Off
- Provision dedicated throughput for this container: Off

コンテナーが正常に作成され、一覧に [Characters] コンテナーが表示されたことを確認します。

※Visual Studio Code の拡張機能を利用して、新しくデータベースおよびコンテナーを作成することも可能ですが、Throughput が 1000 からしか選択できず、無償枠の範囲を超過してしまうため、ご注意ください。
CRUD アプリの仕様
今回は簡易的なもののため、指定の URL に GET でアクセスした際に、CRUD 処理を行うこととします。
CRUD 処理にて必要となる情報については、クエリパラメータで送信します。
※本来のアプリケーション開発では、非現実的な仕様のため、そのまま流用することは避けてください。ただし、Express.js を使用したアプリケーション開発の経験がある方であれば、POST 送信や JWT を使った認証など、一部コードを書き換えることで本番に近い利用も可能にできるとは思っています。
プロジェクト作成
プロジェクトのルートディレクトリを作成します。
本記事では、 azure-cosmosdb-samples というディレクトリを作成して使用します。
mkdir -p azure-cosmosdb-samples
ルートディレクトリを作成したら、npm initで package.json を作成します。
cd azure-cosmosdb-samples
npm init -y
実行すると、ルートディレクトリ直下に package.json が作成されます。
package.json 内にある main 要素について、index.js から app.js に書き換えます。
{
  "name": "azure-cosmosdb-samples",
  "version": "1.0.0",
  "description": "",
  "main": "app.js",
  "scripts": {
    "test": "echo \"Error: no test specified\" && exit 1"
  },
  "keywords": [],
  "author": "",
  "license": "ISC"
}
TypeScript および Express.js のインストール
今回は、Node.js + Express.js + TypeScript で開発を行うため、Express.js と TypeScript をインストールします。
npm install body-parser cookie-parser cors express morgan
npm install --save-dev @types/body-parser @types/cookie-parser @types/cors @types/express @types/node @types/morgan npm-run-all ts-node ts-node-dev typescript
インストールが完了したら、TypeScript のバージョンを確認します。
筆者の環境では、「Version 3.8.3」となっています。
npx tsc -v
Version 3.8.3
バージョンが正常に確認できたら、tsconfig.json を作成します。
npx tsc --init
コマンドを実行すると、ルートディレクトリ配下にtsconfig.jsonが作成されます。
tsconfig.json の中には様々な要素が記載されていますが、今回は開発に必要となる以下の要素のみ、設定をします。
{
  "compilerOptions": {
    "target": "ES2019",
    "module": "commonjs",
    "lib": [
      "ES2019",
      "DOM"
    ],
    "sourceMap": true,
    "outDir": "./dist",
    "strict": true,
    "typeRoots": [
      "./node_modules/@types"
    ],
    "esModuleInterop": true,
    "forceConsistentCasingInFileNames": true
  },
  "include": [
    "src/**/*.ts"
  ],
  "exclude": [
    "node_modules"
  ]
}
tsconfig.json を更新したら、package.json に戻り、scripts 要素を更新します。
{
  "scripts": {
    "dev": "ts-node-dev --respawn src/app.ts",
    "clean": "rimraf dist/*",
    "tsc": "tsc",
    "build": "npm-run-all clean tsc",
    "start": "npm run build && node ./dist/app.js"
  },
}
scripts 内にある dev にて、ts-node-devの指定をしているため、ルートディレクトリ以下に .node-dev.json を作成します。
{
  "notify": false
}
@azure/cosmos のインストール
Azure Cosmos DB SQL API 用の JavaScript および Node.js SDK ライブラリをインストールします。
このライブラリを利用する事で、簡単に Azure Cosmos DB へ接続および操作を行うことが可能になります。
npm install @azure/cosmos
コーディング
準備ができたので、実際のコーディングを行っていきます。
ルートディレクトリ以下に、新しくsrcディレクトリを作成します。
TypeScript のコードは、この src ディレクトリ以下に記述していきます。
mkdir -p src
src/class
送信されたリクエストに対するレスポンスのデータ型を定義します。
export interface ResJson {
  success: boolean;
  message: string;
  data: any;
}
src/common
(あんまり好きではないですが、よくある共通なんとか〜以外に良いディレクトリを思いつきませんでした。。)
実際にレスポンスを送信するクラスを定義します。
import { Response, Request, NextFunction } from 'express';
import { ResJson } from '../class/resJson';

export class AppRes {
  public static sendJson (res: Response, isSuccess: boolean = false, message: string = '' , jsonData: any = null) {
    const obj: ResJson = {
      data: jsonData,
      message: message,
      success: isSuccess
    };
    res.set('Cache-Control', 'no-cache').json(obj);
    return;
  }

  public static sendError (next: NextFunction, message: string, err?: any): void {
    let errors: any = [];
    if (err instanceof Array) {
      err.forEach((e) => {
        errors.push(e);
      })
    } else {
      errors.push(err);
    }
    next({ message: message, data: errors });
    return;
  }
}
src/config
アプリの設定値を定義します。
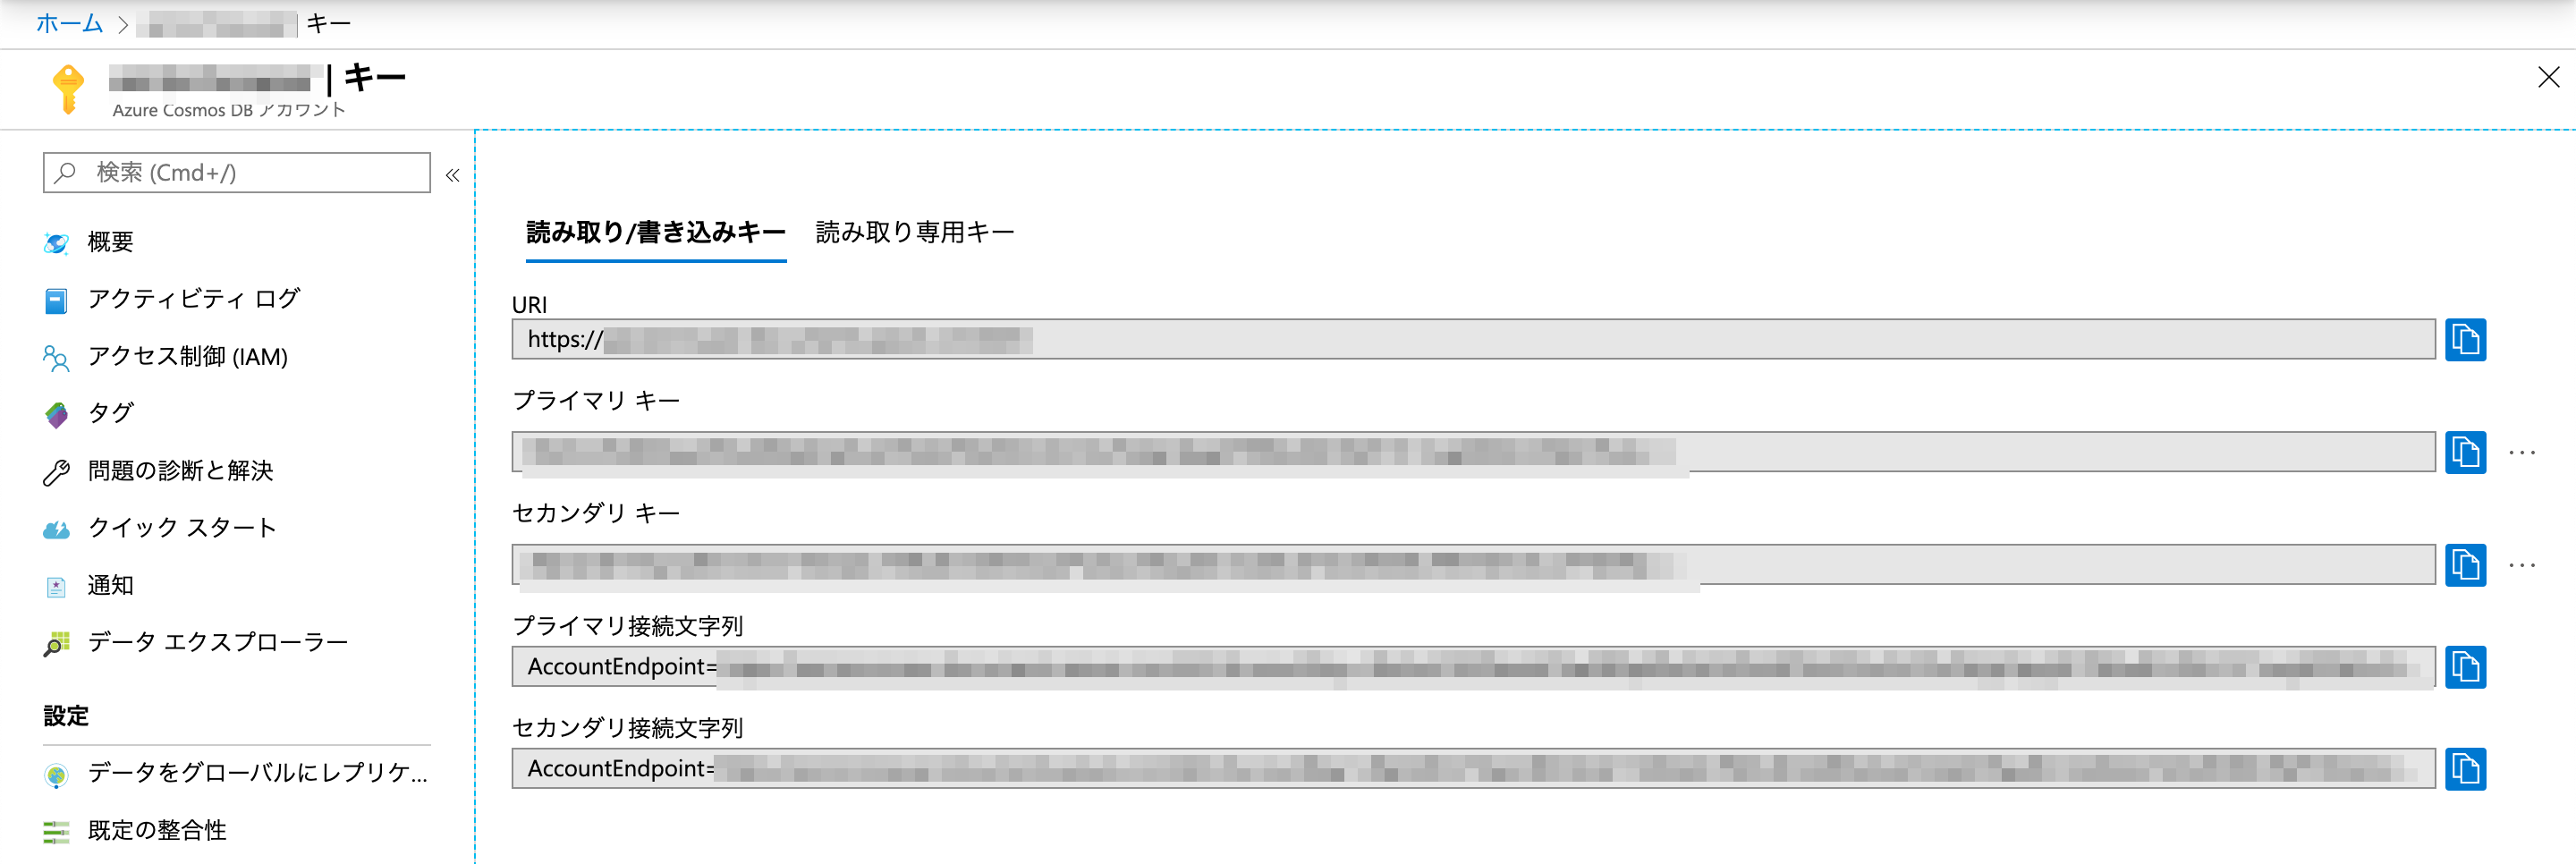
COSMOSDB_CONFIGの中にて、Azure Cosmos DB への接続に使用する値を定義します。
endpointおよびkeyの部分は、Azure ポータル上で確認できる URI および プライマリ キー の値に置き換えてください。
export class AppConfig {
  public static PORT_NUMBER = 3000
  public static MAX_REQUEST_SIZE = 20000000
  public static COSMOSDB_CONFIG = {
    endpoint: "<Your Azure Cosmos account URI>",
    key: "<Your Azure Cosmos account key>",
    databaseId: "DamonSlayer",
    containerId: "Characters",
    partitionKey: { kind: "Hash", paths: ["/category"] }
  }
}
src/controllers
コントローラー部分を定義します。コントローラーの中で @azure/cosmos を利用した CRUD 処理を実装しています。CRUD の各詳細については、次回の記事で説明しようと思います。
import { CosmosClient, Database, Container } from '@azure/cosmos';
import { NextFunction, Request, Response } from 'express';
import { AppRes } from '../common/appRes';
import { AppConfig } from '../config/appConfig';

export class CosmosDbController {
  private _errors: any;

  public async fetchList(req: Request, res: Response, next: NextFunction) {
    try {
      const { endpoint, key, databaseId, containerId } = AppConfig.COSMOSDB_CONFIG;
      const client: CosmosClient = new CosmosClient({ endpoint, key });
      const database: Database = client.database(databaseId);
      const container: Container = database.container(containerId);

      const querySpec = {
        query: "SELECT * FROM Items"
      };
      const { resources: items } = await container.items
        .query(querySpec)
        .fetchAll();
      console.info("fetch success!");
      AppRes.sendJson(res, true, "fetch success!", items);
    } catch (e) {
      console.error(e.message);
      this._errors.push(e.message);
      AppRes.sendError(next, "fetch error.", this._errors);
    }
  }

  public async fetch(req: Request, res: Response, next: NextFunction) {
    try {
      const { endpoint, key, databaseId, containerId } = AppConfig.COSMOSDB_CONFIG;
      const client: CosmosClient = new CosmosClient({ endpoint, key });
      const database: Database = client.database(databaseId);
      const container: Container = database.container(containerId);

      const querySpec = {
        query: `SELECT * FROM Items WHERE Items.id = "${req.query.id}"`
      };
      const { resources: items } = await container.items
        .query(querySpec)
        .fetchAll();
      console.info("fetch success!")
      if (items.length == 0) {
        AppRes.sendJson(res, true, "No data.", items);
      } else {
        AppRes.sendJson(res, true, "fetch success!", items);
      }
    } catch (e) {
      console.error(e.message);
      this._errors.push(e.message);
      AppRes.sendError(next, "fetch error.", this._errors);
    }
  }

  public async create(req: Request, res: Response, next: NextFunction) {
    try {
      const { endpoint, key, databaseId, containerId } = AppConfig.COSMOSDB_CONFIG;
      const client: CosmosClient = new CosmosClient({ endpoint, key });
      const database: Database = client.database(databaseId);
      const container: Container = database.container(containerId);

      const newItem = {
        id: req.query.id,
        category: req.query.category,
        name: req.query.name,
        description: "",
        isAlive: true
      };
      await container.items.create(newItem);
      AppRes.sendJson(res, true, "create success!", newItem);
    } catch (e) {
      console.error(e.message);
      this._errors.push(e.message);
      AppRes.sendError(next, "create error.", this._errors);
    }
  }

  public async update(req: Request, res: Response, next: NextFunction) {
    try {
      const { endpoint, key, databaseId, containerId } = AppConfig.COSMOSDB_CONFIG;
      const client: CosmosClient = new CosmosClient({ endpoint, key });
      const database: Database = client.database(databaseId);
      const container: Container = database.container(containerId);

      const updateItem = {
        id: req.query.id,
        category: req.query.category,
        name: req.query.name
      };
      await container.item(req.query.id, req.query.category)
        .replace(updateItem);
        AppRes.sendJson(res, true, "update success!", updateItem);
    } catch (e) {
      console.error(e.message);
      this._errors.push(e.message);
      AppRes.sendError(next, "update error.", this._errors);
    }
  }

  public async delete(req: Request, res: Response, next: NextFunction) {
    try {
      const { endpoint, key, databaseId, containerId } = AppConfig.COSMOSDB_CONFIG;
      const client: CosmosClient = new CosmosClient({ endpoint, key });
      const database: Database = client.database(databaseId);
      const container: Container = database.container(containerId);
      await container.item(req.query.id, req.query.category).delete();
      AppRes.sendJson(res, true, `delete item id=${req.query.id} category=${req.query.category}`);
    } catch (e) {
      console.error(e.message);
      this._errors.push(e.message);
      AppRes.sendError(next, "delete error.", this._errors);
    }
  }
}
src/routes
先ほど作成した CosmosDbController クラスに紐づく、ルーティングを行うクラスを定義します。
import { NextFunction, Request, Router, Response } from 'express';
import { CosmosDbController } from '../controllers/cosmosdb.controller';

export class CosmonDbRouter {

  router: Router;
  controller: CosmosDbController;

  constructor () {
    this.router = Router();
    this.controller = new CosmosDbController();
    this.init();
  }

  init () {
    this.router.get('/list', this.controller.fetchList);
    this.router.get('/detail', this.controller.fetch);
    this.router.get('/create', this.controller.create);
    this.router.get('/update', this.controller.update);
    this.router.get('/delete', this.controller.delete);
  }
}

const cosmosdbRouter = new CosmonDbRouter();
cosmosdbRouter.init();

export default cosmosdbRouter.router;
src
アプリの起動時に最初に実行される処理を定義します。
この中で、Express の Web サーバの起動なども行います。
import bodyParser from 'body-parser';
import cookieParser from 'cookie-parser';
import express from 'express';
import { NextFunction, Request, Response } from 'express';
import logger from 'morgan';
import cors from 'cors';
import { AppRes } from './common/appRes';
import { AppConfig } from './config/appConfig';
import CosmonDbRouter from './routes/cosmosdbRouter';

class App {
  public express: express.Express;

  constructor() {
    this.express = express();
    this.middleware();
    this.routes();
  }

  private middleware(): void {
    this.express.use(cors({
      credentials: true,
      methods: 'GET',
      origin: ['']
    }));
    this.express.use((req: Request, res: Response, next: NextFunction) => {
      console.debug((new Date().toLocaleDateString()) +
        '@@@Request Url' + req.url);
      next();
    })
    this.express.use(bodyParser.json({
      limit: AppConfig.MAX_REQUEST_SIZE
    }));
    this.express.use(cookieParser());
    this.express.use(logger('dev'));
  }

  private routes(): void {
    this.express.use('/api/cosmosdb', CosmonDbRouter);
    this.express.use((req: Request, res: Response, next: NextFunction) => {
      next({ message: `Requested Path is undefined. url=${req.url}` });
    })
    this.express.use((err: any, req: Request, res: Response, next: NextFunction) => {
      if (!res.headersSent) {
        AppRes.sendJson(res, false, err.message, err.data);
      }
    });
  }
}

const port = AppConfig.PORT_NUMBER;
const app = new App();
app.express.listen(port, () => {
  console.info(`Waiting at port ${port}. DateTime=${escape(new Date().toLocaleDateString())}`);
}).on('error', (error) => {
  console.error(`Port ${port} does not open. \r\n${error.message}`);
  process.exit(1);
});
サンプルデータ登録
CRUD アプリを作成しましたが、今のままでは Azure Cosmos DB には 1 つもデータがありません。
そこで、Azure Cosmos DB にテスト用のサンプルデータを登録していきます。
ルートディレクトリ以下に、sample.json ファイルを作成します。
[
  {
    "id": "1",
    "category": "main-character",
    "name": "竈門 炭治郎",
    "age": 15,
    "height": 165,
    "description": "妹を救い、家族の仇討ちを目指す、心優しい少年。鬼や相手の急所などの“匂い”を嗅ぎ分けることができる。",
    "isAlive": true
  },
  {
    "id": "2",
    "category": "main-character",
    "name": "竈門 禰󠄀豆子",
    "age": 14,
    "description": "炭治郎の妹。鬼に襲われ、鬼になってしまうが、他の鬼とは違い、人である炭治郎を守るよう動く。",
    "isAlive": true
  },
  {
    "id": "3",
    "category": "enemy",
    "name": "鬼舞辻 無惨",
    "description": "禰󠄀豆子を鬼に変えた者で炭治郎の宿敵。普段は人間のふりをして暮らしている。",
    "isAlive": true
  },
  {
    "id": "4",
    "category": "friend",
    "name": "煉獄 杏寿郎",
    "age": 20,
    "description": "鬼殺隊の“柱”の一人。“炎の呼吸”で鬼を殲滅する。",
    "isAlive": false
  }
]
冒頭にインストールした Visual Studio Code の拡張機能 [Azure Cosmos DB]では、json ファイルを使ってデータをインポートさせることができます。

[DamonSlayer] -> [Characters] を右クリック -> [Import Document into a Collection...] を選択し、sample.json 選択してデータをインポートします。
実行
ルートディレクトリに移動し、npm startで作成した CRUD アプリを起動します。
cd azure-cosmosdb-sample
npm start
コマンドを実行することで、distディレクトリが新しく作成され、TypeScript から JavaScript にコンパイルされたソースコードが出力されます。CRUD アプリはこの出力された JavaScript を使って動いています。
以下のような実行結果が出力されれば、正常に起動ができています。
Waiting at port 3000. DateTime=2020-3-14
一覧データ取得
Webブラウザを起動し、以下の URL にアクセスします。
http://localhost:3000/api/cosmosdb/list
先ほど登録したデータの一覧が取得され、画面に表示されます。

ID に紐づくデータの取得
指定した id に一致するデータのみ取得する場合は、以下の URL にアクセスします。
URL のクエリパラメータ(? マーク以降の文字列)内で、任意のid値を入力して下さい。
(今回は、id が "3" である 鬼舞辻 無惨 のデータを取得します。)
http://localhost:3000/api/cosmosdb/detail?id=3

データの登録
新しくデータを登録する場合は、以下の URL にアクセスします。
クエリパラメータ内にて指定した id、category、name の値を使ってデータを登録することができます。
(今回は、id を "5" として 鱗滝 左近次 のデータを登録します。)
http://localhost:3000/api/cosmosdb/create?id=5&category=friend&name=鱗滝%20左近次

※URL エンコード版
http://localhost:3000/api/cosmosdb/create?id=5&category=friend&name=%E9%B1%97%E6%BB%9D%20%E5%B7%A6%E8%BF%91%E6%AC%A1
データの更新
既存のデータを更新する場合は、以下の URL にアクセスします。
クエリパラメータ内にて指定した id と category に紐づくデータの name 値を、同じくクエリパラメータ内にて指定した name の値に書き換えます。
(今回は、id を "5" として name 値を 鱗滝 左近次 から 冨岡 義勇 に更新します。)
http://localhost:3000/api/cosmosdb/update?id=5&category=friend&name=冨岡%20義勇

※URL エンコード版
http://localhost:3000/api/cosmosdb/update?id=5&category=friend&name=%E5%86%A8%E5%B2%A1%20%E7%BE%A9%E5%8B%87
データの削除
既存のデータを削除する場合は、以下の URL にアクセスします。
クエリパラメータ内にて指定した id と category に紐づくデータを削除します。
(今回は、id を "5" 、 category が "friend" のデータ 冨岡 義勇 を削除します。)
http://localhost:3000/api/cosmosdb/delete?id=5&category=friend
さいごに
今回は、Node.js + Express.js + TypeScript を使って、Azure Cosmos DB への簡易的な CRUD アプリを作成しました。
しかしながら、このアプリは全てのリクエストが GETで行われており、実際の本番環境には使えるものではありません。
ただし、この CRUD アプリに多少手を加えることで、簡単に POST で同じ通信を行ったり、認証された状態でしか CRUD を実行できないように、動作を変更させることは可能になります。
実際に、これを読んだあなたの手で、その処理を実装してみてください。
また今回のソースコードの中には、一部無駄なコードの書き方をしている部分があります。もっと簡略化できるポイントがないか、探してみてください。そして、見つけたら直してみてください。
今回のソースコードは GitHub にて公開しています。是非 Pull Request してみてください。